Category: Plant Care & Gardening

  • The Ultimate No-Nonsense Guide on How to Plant Succulents and Keep Them Alive

    The Ultimate No-Nonsense Guide on How to Plant Succulents and Keep Them Alive

    Succulents are everywhere right now. They sit on Target desks, kitchen windowsills, and patio tables all across the country, but let’s be honest for a second: a lot of people struggle with how to plant succulents so they actually stay alive.

    I’ve spent over fifteen years working in greenhouses and homes across various USDA hardiness zones. In my years of handling these fleshy little plants, I’ve noticed that most folks accidentally kill them with kindness. Planting them isn’t hard, but you have to unlearn a few traditional gardening habits to get it right.

    Here is exactly how to plant succulents so they survive the transition into your home or garden.

    Quick Care Guide for Succulents

    Care FactorRequirements
    Light6+ hours of bright, direct sunlight daily
    Watering“Soak and dry” method (only when soil is bone dry)
    Best SoilGritty, fast-draining cactus and succulent mix
    ContainerTerracotta or ceramic with drainage holes
    TemperatureIdeal: 60°F – 80°F (Protect from frosty winters)

    Choosing Your Dirt and Container for Succulent Planting

    Choosing Your Dirt and Container for Succulent Planting
    Choosing Your Dirt and Container for Succulent Planting

    If you plant a succulent in regular garden soil or standard moisture-retaining potting soil, it will probably die. I can’t stress this enough. Succulents hate having wet feet.

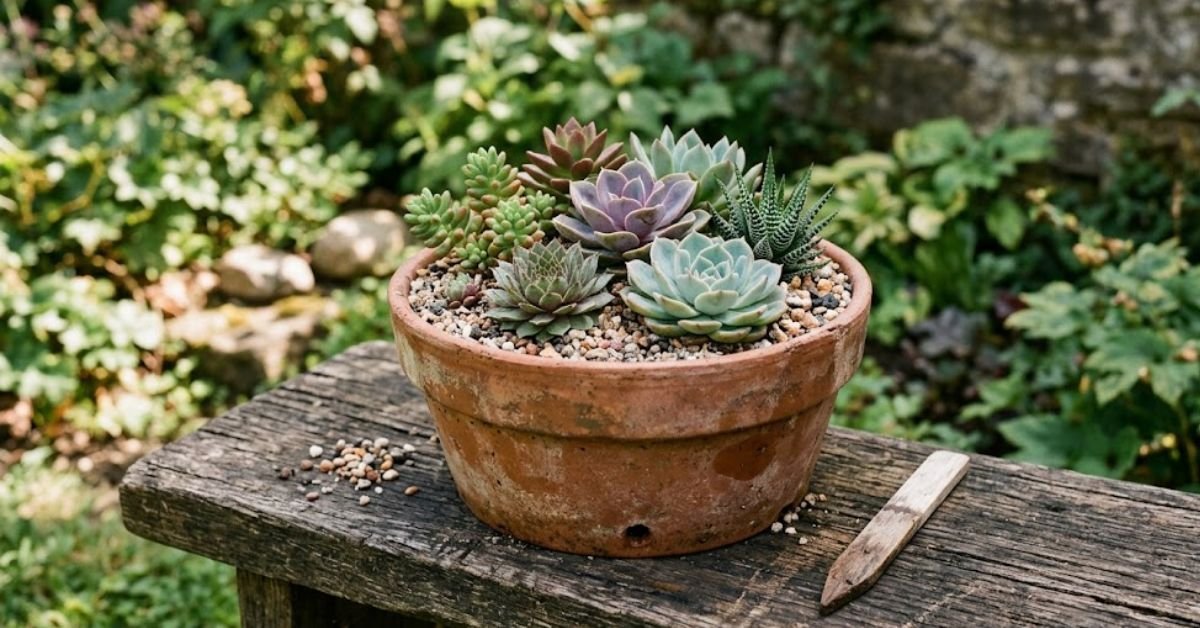
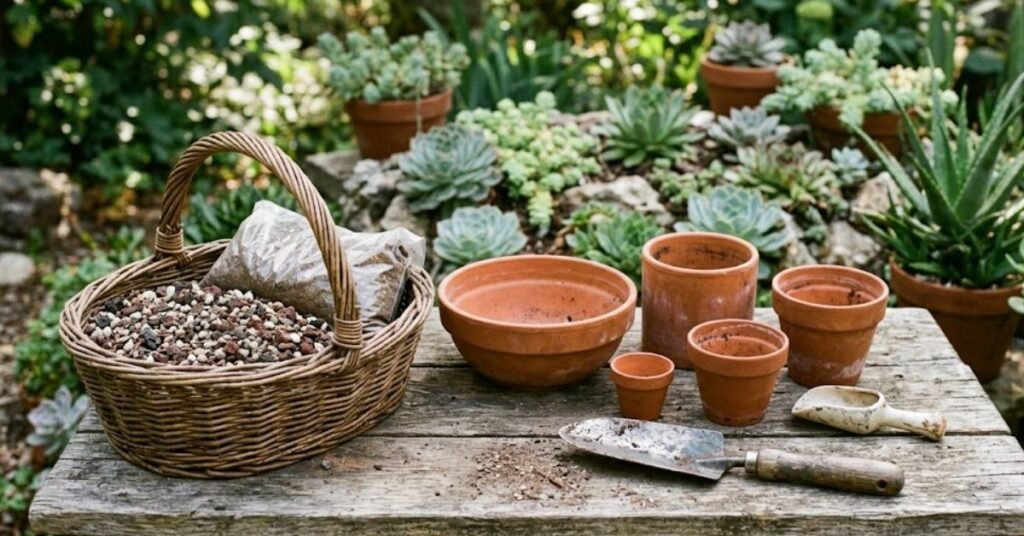
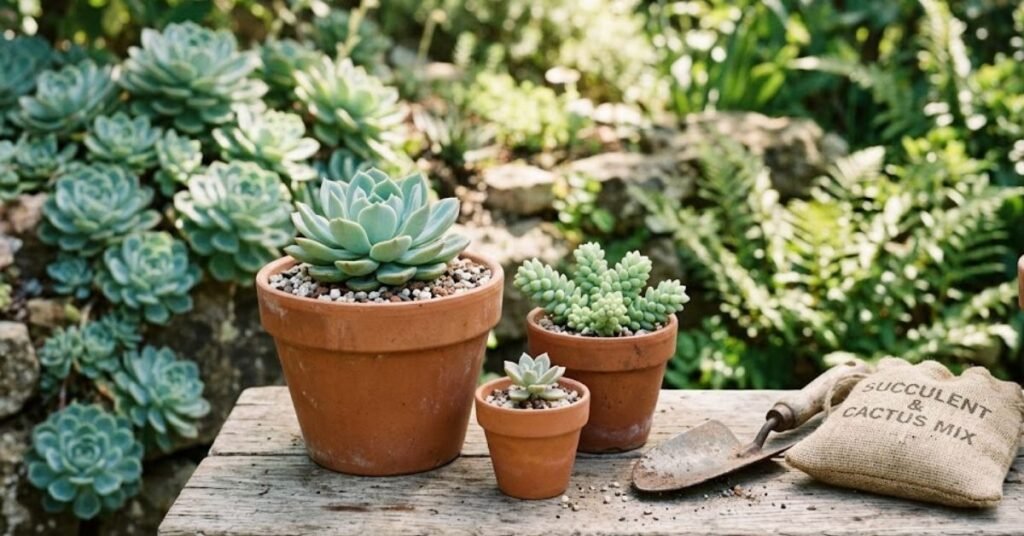
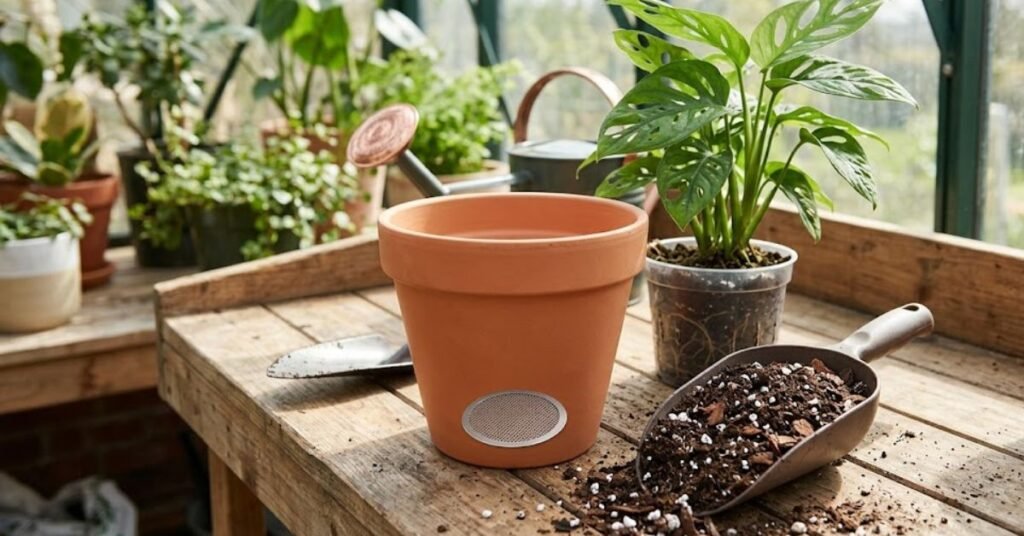
    When you are figuring out how to plant succulents, your absolute best friend is drainage. I always opt for unglazed terracotta pots. Terracotta is porous, meaning it breathes and helps pull excess moisture out of the dirt. Whatever pot you pick, look underneath it. If there isn’t a drainage hole at the bottom, put it back or grab a drill.

    For the soil, head to your local garden center and buy a dedicated cactus and succulent potting soil.

    Personal Pro-Tip: Standard store-bought succulent mix is still a bit too heavy out of the bag for my liking. I always mix it 50/50 with perlite or coarse sand. This creates giant air pockets that let water flush straight through, mimicking their native rocky desert environments.

    Step-by-Step: How to Plant Succulents the Right Way

    Now for the actual process. Spring or early summer is the prime time for this because the plants are actively growing and adapt quickly to their new homes.

    [Bare Root Succulent] ➔ [Place in Empty Terracotta Pot] ➔ [Fill Around with Gritty Mix] ➔ [Wait 1 Week] ➔ [Water Deeply]

    First, gently remove the plant from its original plastic nursery pot. Squeeze the sides of the container to loosen the root ball. Don’t just yank it by the stem.

    Once it’s out, brush away the old, compacted nursery soil from the roots. We want those roots free and clear to touch our new, gritty soil mix. Inspect the roots while you are at it. Healthy roots look white or light brown; mushy black ones are a bad sign.

    Fill your new pot about halfway with your gritty potting soil. Center the plant, then gently fill in the gaps around the edges. Don’t bury the leaves—only the roots and the very base of the stem should be underground. Press the soil down gently with your fingers just to anchor the plant, but don’t pack it tight like brick mortar.

    Personal Pro-Tip: Do not water the plant immediately after potting it. This runs counter to everything we do with normal house plants, I know. Moving a plant causes micro-tears in the roots. If you pour water from the faucet onto torn roots right away, bacteria can enter and cause rot. Give it five to seven days to heal before its first deep drink.

    What Most Americans Get Wrong When Growing Succulents

    Choosing Your Dirt and Container for Succulent Planting (1)
    Choosing Your Dirt and Container for Succulent Planting

    We love our climate control, but our houses can actually be quite hostile to desert plants.

    The biggest silent killer in American homes is the air conditioning vent. I’ve visited countless clients who couldn’t figure out why their indoor plants were dropping leaves, only to find the container sitting directly in the path of a freezing AC draft. It shocks the plant. Keep them clear of vents.

    Another classic issue is the “ice cube watering” myth that circulates online. Giving your plant a tiny sip of water or a single ice cube every week ensures the roots at the bottom of the pot never actually get a drink, while keeping the top layer perpetually damp. It’s the worst of both worlds.

    Instead, soak the soil thoroughly under the kitchen faucet until water pours out of the bottom drainage hole, then leave it completely alone until the dirt is dry all the way through.

    Personal Pro-Tip: If your home stays cool and humid because of heavy AC use in the summer, your soil will take longer to dry out. Always poke your finger deep into the pot, or use a cheap wooden chopstick, to verify the soil is dry to the very bottom before watering again.

    Troubleshooting Common Succulent Planting Mistakes

    Plants talk to us through their leaves. You just need to know how to read them.

    Yellow, Mushy, or Translucent Leaves

    This is a classic sign of overwatering. The plant has taken in so much water that its cell walls are literally bursting. Stop watering immediately. If the stem is still firm, pull off the ruined leaves and let the whole setup dry out completely for a few weeks.

    Wrinkled, Puckered, or Crispy Leaves

    Your plant is thirsty. Succulents store water in their fleshy leaves for a rainy day. When they run dry, they start consuming their own reserves, causing the leaves to shrivel. Give it a deep, thorough soak. They usually plump right back up within 24 to 48 hours.

    Tall, Stretched, and Leggy Stems

    If your compact rosette starts looking like a weirdly tall vine with wide spaces between the leaves, it’s begging for sunlight. This is called etiolation. Move it closer to a south- or west-facing window where it can get real sun.

    Personal Pro-Tip: If your plant gets incredibly leggy, you can “behead” it. Cut the top rosette off with clean shears, let the cut end dry out and callous over for three days, then stick it right back into fresh soil. It will grow brand new roots!

    Safety First: A Note on Pet Toxicity

    Safety First A Note on Pet Toxicity
    Safety First A Note on Pet Toxicity

    Before you fill your home with greenery, you need to consider your furry housemates.

    Many common varieties like Echeveria, Sempervivum (Hens and Chicks), and Haworthia are entirely non-toxic to cats and dogs. They might get a mild stomach ache if they chew on them, but they aren’t poisonous.

    However, some very popular choices are highly toxic. The Jade plant (Crassula ovata), Aloe Vera, and Kalanchoe varieties can cause vomiting, lethargy, and heart rate issues if ingested by pets. Always verify the specific botanical name before putting a new plant within reach of a curious dog or cat.

    Personal Pro-Tip: If you absolutely love Jade plants but have a cat that likes to chew greenery, use hanging wall planters or high floating shelves to keep the toxic varieties completely out of the jump zone.

    Frequently Asked Questions

    Q1: How do I know if my succulent needs to be repotted?

    If you see roots growing wildly out of the bottom drainage hole, or if the plant has grown so wide that it completely blocks the top of the container making it impossible to water, it is time for a larger home.

    Q2: Can succulents survive outside during a northern winter?

    It depends entirely on the variety and your USDA Hardiness Zone. Most tropical options will die if the temperature drops below 40°F. However, cold-hardy varieties like Sempervivum can easily survive freezing winter snows outside in Zone 4 if planted in ground that drains beautifully.

    Q3: How much sunlight do indoor succulents actually need?

    They need a lot. Ideally, aim for six hours of bright light. A window facing south or west is usually your best bet in the United States. If your apartment only has dim, north-facing windows, you will likely need to buy a small LED grow light to keep them happy.

    Q4: Should I mist my succulents with a spray bottle?

    No, please don’t do this. Misting creates a humid environment right around the leaves, which can invite fungal diseases and rot. They want dry air and dry leaves, paired with occasional deep root watering.

    Q5: Can I plant multiple different succulents together in one pot?

    Yes, but make sure they share the same care requirements. Mix plants that all want full sun and minimal water together. Do not mix a shade-loving Haworthia in the same bowl as a sun-worshipping desert cactus, or one of them will suffer.

    Q6: Why are the lower leaves on my succulent drying up and falling off?

    If it’s just the very bottom leaves turning brown and crispy while the top of the plant looks vibrant and new, this is totally normal. It’s just the natural aging process as the plant grows upward. Simply gently pluck the dead leaves off and discard them.

    Q7: What is the best way to propagate a succulent?

    You can easily grow new ones from single leaves. Gently twist a healthy leaf off the stem, ensuring a clean break. Lay it flat on top of some dry soil out of direct sunlight. In a few weeks, tiny pink roots and a miniature baby plant will sprout from the base of the leaf.

    Final Thoughts

    Learning how to plant succulents successfully comes down to patience and restraint. Give them the right gritty dirt, a pot that drains, plenty of sunshine, and don’t fuss over them with constant watering. Once you get the hang of letting the soil dry out completely, you’ll find these resilient little desert plants are some of the easiest, most rewarding green companions you can keep in your home.

  • The Ultimate No-Nonsense ZZ Plant Care Guide: How to Keep This Indestructible Houseplant Alive

    The Ultimate No-Nonsense ZZ Plant Care Guide: How to Keep This Indestructible Houseplant Alive

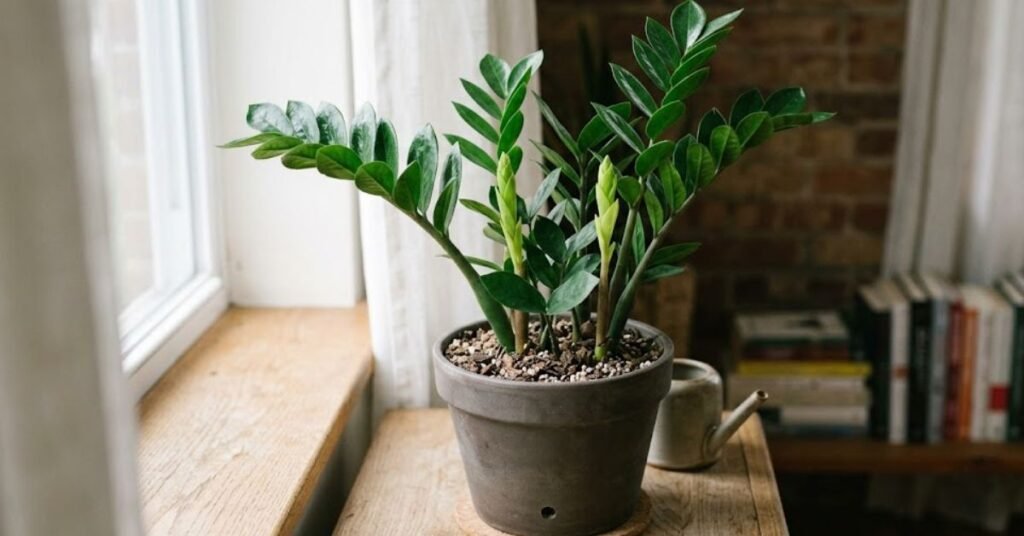
    Let’s be brutally honest for a second: most houseplants behave like total divas, which is exactly why you need a realistic ZZ plant care guide that won’t overwhelm you with impossible rules. While other green companions demand perfectly balanced humidity and filtered water gathered from distant mountain springs, the ZZ plant (Zamioculcas zamiifolia) just handles life. It doesn’t throw a tantrum if you forget about it for a few weeks.

    In my fifteen years of working in American greenhouses and troubleshooting leggy foliage for folks across the country, I’ve found that this species acts more like a loyal roommate than a needy pet. Whether you live in a dark basement apartment in Chicago or a sun-drenched home in Phoenix with the central air conditioning blasting 24/7, this plant genuinely wants to survive. But “indestructible” isn’t a dare. You can still mess it up if you make a few classic mistakes, so let’s lay down the foundational ground rules.

    Care ElementWhat the ZZ Plant Needs
    LightLow to bright indirect light (Avoid direct blazing sun)
    WateringEvery 3 to 4 weeks (Let the soil dry out completely)
    Soil MixWell-draining potting soil mixed with plenty of perlite
    Temperature60°F to 85°F (Keep away from cold AC vents)
    FertilizerBalanced houseplant food once in Spring and once in Summer
    ToxicityToxic to cats, dogs, and humans (Contains calcium oxalate)

    Getting to Know Your Plant: A Realist’s ZZ Plant Care Guide

    Getting to Know Your Plant A Realist's ZZ Plant Care Guide
    Getting to Know Your Plant A Realist’s ZZ Plant Care Guide

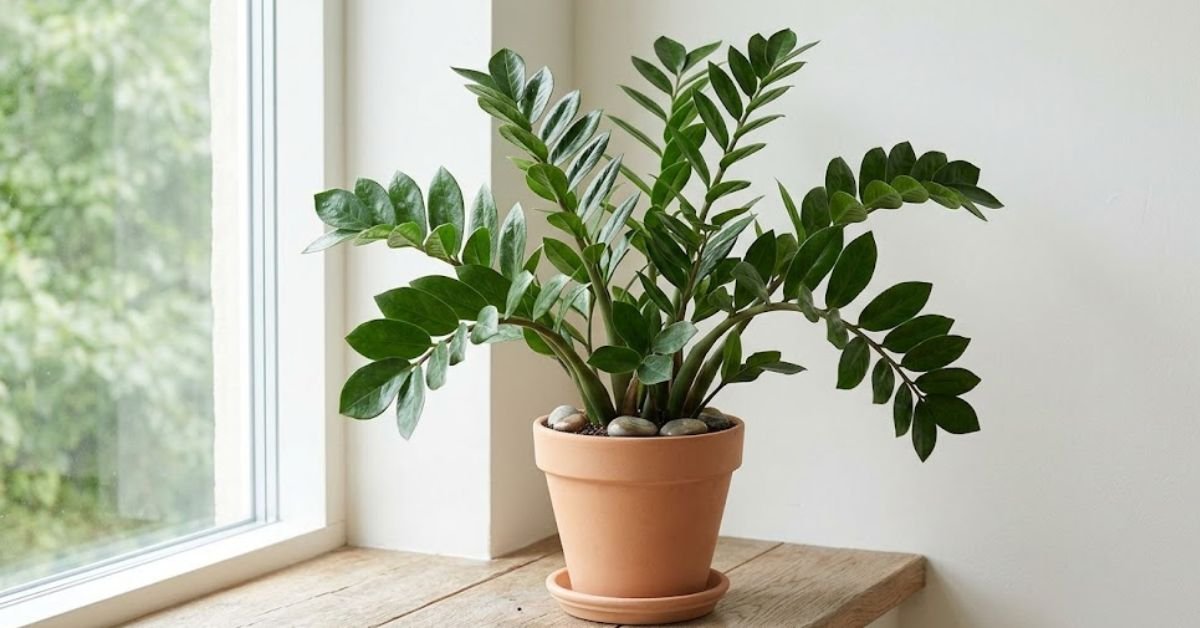
    The ZZ plant is native to dry regions of East Africa. Why does this matter to you sitting in your living room? Because it evolved to survive long periods of absolute drought followed by sudden, heavy downpours.

    Underneath the soil, the plant grows these thick, potato-like lumps called rhizomes.

    These rhizomes are essentially internal water tanks. When you water the plant, the rhizomes suck up the moisture and store it for weeks. So when you forget to water it because life got busy, the plant just sips from its storage tanks.

    Personal Pro-Tip: Think of your ZZ plant like a cactus in disguise. If you treat it like a tropical fern, you will kill it with kindness. Neglect is actually a form of love here.

    How Much Light Does a ZZ Plant Actually Need?

    One of the biggest reasons people look up a ZZ plant care guide is because they have a dark corner they want to brighten up.

    Yes, this plant can survive in low-light environments, like an office with fluorescent bulbs or a north-facing window. But there is a difference between surviving and growing. In low light, your ZZ plant will grow incredibly slowly. If you notice it stretching out and getting floppy, it’s begging for more light.

    Ideally, place it in a spot with bright, indirect sunlight. A few feet away from an east- or west-facing window is perfect.

    Just keep it out of direct, harsh afternoon sun. Blazing sunlight will literally scorch those beautiful, glossy green leaves, leaving ugly brown burn marks.

    Personal Pro-Tip: Every time you dust your furniture, take a damp cloth and wipe down the leaves of your ZZ plant. Dust blocks sunlight, which slows down photosynthesis. Keeping the leaves shiny keeps the plant healthy.

    Master the Watering Routine for Your ZZ Plant

    If you want to kill this plant, overwatering is your best weapon. It is the number one cause of death for indoor plants across America.

    Because those underground rhizomes store water so well, the roots hate sitting in soggy potting soil. If the soil stays wet for too long, the rhizomes will rot, turn to mush, and the plant will collapse.

    So, how often should you water?

    Do not use a calendar. Instead, push your finger deep into the potting soil. If you feel any moisture at all, walk away. Wait until the soil is completely dry from top to bottom. In a typical US home with standard air conditioning running during the summer, this usually means watering every 3 to 4 weeks. During the winter, when the plant goes dormant, you might only water it once every two months.

    When you do water, take it to the kitchen sink or faucet. Pour water thoroughly until it runs out of the drainage holes at the bottom of the pot. Let it drain completely, then put it back in its saucer. Never let the pot sit in a pool of standing water.

    [Rhizomes store water] ➔ [Soil stays wet] ➔ [Rhizomes rot] ➔ [Plant dies]

    Personal Pro-Tip: When in doubt, leave it dry. A thirsty ZZ plant will wrinkle slightly, which is easily fixed with a good soak. An overwatered ZZ plant will turn yellow and rot, which is much harder to save.

    Choosing the Best Mix and Pot for Long-Term Success

    Choosing the Best Mix and Pot for Long Term Success
    Choosing the Best Mix and Pot for Long Term Success

    You cannot use heavy, dense garden soil for indoor containers. You need a mix that lets water flush through quickly and allows the roots to breathe.

    Go to the garden center and grab a standard bag of high-quality indoor potting soil. Then, buy a small bag of perlite or coarse sand. Mix them together at a ratio of roughly three parts potting soil to one part perlite. This creates the perfect, chunky, fast-draining home for your plant.

    As for the pot, drainage holes are non-negotiable. If your favorite decorative ceramic pot doesn’t have a hole in the bottom, keep the plant in its plastic nursery pot and slip that inside the pretty ceramic one.

    Personal Pro-Tip: Terracotta pots are a lifesaver for chronic overwaterers. The porous clay breathes and helps draw excess moisture out of the soil much faster than plastic or glazed ceramic pots.

    The Ultimate ZZ Plant Care Guide to Troubleshooting Problems

    Even the toughest plants have bad days. If your plant is looking a little sad, use this quick diagnostic checklist to fix it.

    Yellowing Leaves

    If entire stems or multiple leaves are turning bright yellow, you are watering too much. Stop watering immediately. Pull the plant out of its pot and check the rhizomes. If they are firm, the plant will recover once the soil dries out. If they are mushy and smell bad, you have root rot. You’ll need to cut away the rotten parts and repot the healthy sections in fresh, dry soil.

    Brown, Crispy Tips

    This usually happens when the air in your home is incredibly dry, which is common in northern US states during the winter when the indoor heating kicks on. Move the plant away from direct heating vents.

    Lean or Floppy Stems

    If the stems are growing long, spindly, and falling over, the plant is searching for light. Move it closer to a window. Alternatively, if the plant has grown massive, the heavy stems might just need some support from a simple moss pole or plant stake.

    Personal Pro-Tip: If a single leaf turns yellow and drops off near the very bottom of a stem, don’t panic. Old leaves die off naturally as the plant produces fresh new growth.

    Crucial Toxicity Warning for US Pet Owners

    We need to talk about safety because American homes are full of furry friends.

    The ZZ plant contains calcium oxalate crystals. If a cat, dog, or curious toddler chews on the leaves, these microscopic crystals act like tiny shards of glass. It causes immediate irritation, swelling of the mouth and tongue, and potential vomiting.

    It is not typically fatal, but it will absolutely cause a miserable trip to the vet or emergency room. Keep this plant up on a high shelf or on a heavy plant stand well out of reach of your pets. Wash your hands after handling or trimming the plant, as the sap can cause minor skin irritation for some people.

    Personal Pro-Tip: If you have an aggressive plant-chewing pet, pass on the ZZ plant entirely and grab a Calathea or a Spider Plant instead. They are completely pet-safe.

    Common Mistakes Americans Make with Indoor Greenery

    Common Mistakes Americans Make with Indoor Greenery
    Common Mistakes Americans Make with Indoor Greenery

    Why do folks still struggle despite reading a standard ZZ plant care guide? Here are the three most common environmental traps I see in modern homes:

    • Blast Zones from Air Conditioning: Placing your plant directly in the path of a cold AC vent during July. The constant chilly draft shocks the tropical native.
    • The “Sip” Watering Method: Giving the plant a tiny splash of water every week. This keeps the top layer of soil constantly damp (causing fungus gnats) while the deep roots and rhizomes stay bone dry. Always water deeply but infrequently.
    • Assuming Outdoor Success Indoors: Attempting to grow this outdoors in northern states. The ZZ plant is only hardy outdoors in USDA Zones 10 and 11 (like Southern Florida or Hawaii). For the rest of the country, it must stay indoors as a houseplant once temperatures drop below 50°F.

    Frequently Asked Questions

    Q1: Can a ZZ plant live in a windowless room?

    Yes, but only if the room has bright overhead fluorescent or LED lights turned on for at least 8 to 10 hours a day, like a typical corporate office. If it is a pitch-black closet or bathroom with the lights off, it will eventually waste away and die.

    Q2: How fast do ZZ plants grow?

    They are notoriously slow growers, especially during the darker winter months. You might only see a few new shoots pop up during the Spring and Summer growing season. Don’t worry, you aren’t doing anything wrong; they just like to take their time.

    Q3: Why are the new stems on my plant pale green?

    That is completely normal. Fresh new growth emerges as a bright, vibrant, almost neon green color. Over a few weeks, those leaves will naturally darken to match the deep, glossy green of the older stems.

    Q4: Do I need to mist my ZZ plant to increase humidity?

    No. Misting is unnecessary and can actually invite fungal diseases to form on the leaves. The ZZ plant adapts beautifully to the average dry air found inside most climate-controlled American homes.

    Q5: When should I report my ZZ plant?

    These plants actually enjoy being a bit root-bound. You only need to repot them every two to three years. A clear sign it’s time to upgrade is when the thick underground rhizomes start warping or cracking the sides of the plastic nursery pot.

    Q6: Can I grow a new plant from just a single leaf?

    You absolutely can. If a leaf accidentally falls off, push the stem end into a small pot of moist soil or drop it in a small jar of water. It takes patience—sometimes several months for a new rhizome to form—but it works.

    Q7: What is a Raven ZZ plant?

    The Raven is a highly sought-after cultivar of the standard ZZ plant. Its new growth starts out bright green, but turns a striking, dramatic dark purple-black color as the leaves mature. The care requirements are identical to the standard green version.

    Final Thoughts

    The beauty of this plant lies in its sheer resilience. It forgives our busy schedules, our dark apartments, and our dry winter air. Get the soil mix right, put it in a spot with some decent light, and severely limit your watering impulses. Do those three things, and your ZZ plant will happily occupy its corner of your home for a decade or more.

  • My Foolproof Guide on How to Propagate Pothos in Water

    My Foolproof Guide on How to Propagate Pothos in Water

    I remember the very first time I snipped a vine off my overgrown houseplant. I honestly had no clue what I was doing. But dropping that little green stem into a leftover jelly jar and watching the roots slowly push out over the next few weeks felt like absolute magic. If you are tired of spending twenty bucks a pop at the local garden center and want to multiply your indoor jungle for free, you are in the exact right place. Let’s talk about how to propagate pothos in water.

    FeatureDetails
    MethodWater Propagation
    Water TypeRegular Faucet Water
    Time to Root3 to 4 weeks
    USDA ZonesZones 10-12 (Outdoors), otherwise keep strictly inside!
    Best TimeSpring and Fall

    Why Learning How to Propagate Pothos in Water is a Game Changer

    How to Propagate Pothos
    How to Propagate Pothos

    I used to think multiplying plants required a degree in botany or a fancy greenhouse setup. Turns out, it’s incredibly easy. You just snip a piece and drop it in a cup. That’s really it. Plus, you don’t need to drag heavy bags of potting soil into your house right away.

    It’s literally free plants.

    The standard way to do this is taking a tiny stem cutting—around 1 to 1.5 inches—with a single node and leaf attached. Usually, you’ll see roots forming in just under a month. It rarely ever fails.

    Personal Pro-Tip: Please don’t stress about buying expensive rooting hormones. A clean pair of kitchen scissors and a leftover glass jar will do the trick perfectly.

    Exactly How to Propagate Pothos in Water Without Failing

    If you genuinely want to know how to propagate pothos in water, the secret is finding the “node.” Without a node, you get zero roots.

    1. Find the Node: Look closely at the vine. See those little brown bumps right near where the leaf attaches to the main stem? That is the node.
    2. Make the Cut: Snip roughly half an inch below that bump.
    3. Fill a Glass from the Faucet: Drop your fresh cutting right in. Make sure the node is completely submerged, but keep the actual leaf dry. You do not need pricey bottled water for this. Basic faucet water works beautifully.
    4. Place in Bright, Indirect Light: A windowsill is fantastic. Just keep it out of the blazing afternoon sun so you don’t accidentally cook the leaves.

    Personal Pro-Tip: I like to use clear glass. Seeing the water level drop saves me from forgetting to top it off, and I highly recommend changing the water entirely once a week so the roots get fresh oxygen.

    Common Mistakes Americans Make With Pothos Water Propagation

    Common Mistakes
    Common Mistakes

    We love freezing cold houses in the summer. Our plants? Not so much.

    The absolute biggest mistake I constantly see is folks putting their glass jars right under an air conditioning vent. Pothos hate cold drafts. That icy blast from your AC unit will totally shock the cutting and halt root growth. Keep your jars across the room from any vents.

    Another massive issue is shocking them later on. Roots grown in liquid get very used to being wet. Because of this, they can completely crash when shoved directly into dry potting soil later on. Keep your dirt pretty damp for the first few weeks to ease the transition once you finally pot them up.

    Personal Pro-Tip: If your home is blasting AC all summer long, move your propagation jars into the bathroom. The extra humidity and heat from warm showers is exactly what they want.

    Troubleshooting Your Water-Propagated Pothos

    Sometimes things go sideways. Here is exactly how to fix it when your plant looks sad.

    Why is My Leaf Turning Yellow?

    Rot. It is almost always rot. If the leaf on your cutting is yellowing and feeling mushy, you probably dunked the leaf itself in the water instead of just the bare node. Pull it out immediately, cut off the mushy garbage, and start over.

    Why Do I Have Brown Tips on the Leaves?

    This usually points to extreme lack of humidity or heavy chemical buildup. If your faucet water is heavily treated or super hard, you might see browning edges.

    Personal Pro-Tip: If the stem turns black and squishy at the very bottom under the water, chop that part off fast. Rot spreads up the stem quickly.

    Toxicity Warning: Are Pothos Safe for Dogs and Cats?

    Toxicity Warning Are Pothos Safe for Dogs and Cats
    Toxicity Warning Are Pothos Safe for Dogs and Cats

    No. Not at all.

    This is serious business for pet owners. Pothos contain insoluble calcium oxalates. If your dog or cat chews on a leaf, it causes severe mouth pain, swelling, drooling, and vomiting. Keep your jars high up on bookshelves where your furry friends cannot go.

    Personal Pro-Tip: I keep all my toxic houseplants safely perched on top of my highest kitchen cabinets where my very curious orange cat can’t even attempt a jump.

    FAQs About How to Propagate Pothos in Water

    Q1: How long does it take to see roots?

    You will usually spot little white nubs in about 10 to 14 days. Proper roots take about 3 to 4 weeks.

    Q2: Can I leave my pothos in water forever?

    You actually can. But it won’t grow nearly as fast. Water doesn’t have the heavy nutrients that potting soil does. If you want a huge, bushy vine, eventually move it to dirt.

    Q3: Does the time of year matter?

    Spring and Fall are the absolute best times for propagation because the mother plant is actively growing. Winter is tough because plant growth slows down dramatically in the shorter days.

    Q4: Do I need rooting hormone to propagate pothos in water?

    Nope. Pothos are basically weeds when it comes to rooting. They naturally produce enough of their own rooting hormone to handle it entirely themselves.

    Q5: Why is my cutting doing absolutely nothing?

    It might be sitting in a spot that is too dark or too cold. Move it to a slightly brighter, warmer area in your house.

    Q6: Should I take cuttings from a long vine or a short one?

    I prefer using a longer, somewhat leggy vine. You can chop a long vine into five or six individual node cuttings and start a whole new, massive pot.

    Q7: How big should the roots be before planting in potting soil?

    Wait until the roots are at least two inches long. Better yet, wait until those main roots start sprouting tiny secondary branching roots of their own.

    Personal Pro-Tip: When potting up your rooted cuttings, group 5 or 6 of them together in a single 4-inch pot. A single cutting planted alone will just look like one sad, lonely string.

    Final Thoughts

    Growing new plants from cuttings is genuinely one of my favorite parts of indoor gardening. Now that you know exactly how to propagate pothos in water, you can turn one overgrown plant into a dozen gifts for your friends. Or just hoard them all and fill every empty corner of your own living room. Grab some scissors, find a node, and get to chopping. You’ve got this.

  • Why Is My Snake Plant Turning Yellow? A Horticulturist’s Rescue Guide

    Why Is My Snake Plant Turning Yellow? A Horticulturist’s Rescue Guide

    If you’ve found yourself staring at your plant shelf asking, “Why is my snake plant turning yellow?” you aren’t alone. It is one of the most common issues I see across American households.

    Snake plants (Dracaena trifasciata) are legendary for being nearly indestructible. They handle low light, skipped waterings, and general forgetfulness like absolute champs. But when those stiff, architectural leaves start losing their deep green color and taking on a sickly pale yellow hue, it’s a clear cry for help.

    Don’t panic. We can fix this together. Pinpointing exactly why is my snake plant turning yellow requires a little bit of detective work, but most of the time, the issue stems from a handful of easily correctable environmental factors right inside your home

    Quick Care Guide for Dracaena trifasciata (Snake Plant)

    For the skimmers out there, here is a fast breakdown of what your plant actually wants. If your current setup looks vastly different from this table, you’ve likely found your culprit.

    Care ElementIdeal Condition for US HomesDanger Zone
    LightBright, indirect window light; tolerates low indoor light well.Harsh, direct afternoon sun or pitch-black corners.
    WateringOnly when the potting soil is 100% dry. Every 2–4 weeks depending on the season.Watering on a strict weekly schedule without checking the soil.
    Soil MixLoose, fast-draining cactus and succulent mix with extra perlite.Heavy garden soil or dense, moisture-retaining indoor potting mix.
    Temperature65°F to 85°F. Standard indoor room temperatures.Under 55°F or placed directly in front of central heating vents.
    USDA ZonesHardy outdoors only in Zones 10–12 (South Florida, Hawaii, parts of SoCal).Grown outdoors in cold climates during Fall and Winter.

    Personal Pro-Tip

    In my years of growing this plant, I’ve found that using a terracotta pot instead of plastic makes a night-and-day difference. Terracotta breathes. It helps moisture escape much faster from the potting soil, which protects your plant from accidental drowning.

    The Top Mistakes Explaining Why Your Snake Plant Is Turning Yellow

    The Top Mistakes Explaining
    The Top Mistakes Explaining

    Most Americans fail with snake plants not because they don’t care, but because they treat them like traditional tropical houseplants. They aren’t. They are structural succulents native to arid regions.

    Central AC Units and Winter Heating Drafts

    Our homes are heavily climate-controlled. In the peak of summer, your central air conditioning blasts cold, dry air. In the winter, forced-air heating pumps out dry, roasting currents.

    If you place your pot directly under an AC vent or right next to a drafty window during a northern winter, the rapid temperature fluctuations shock the plant tissue. This thermal stress causes the leaves to lose their rich green pigments and fade into a pale, uniform yellow.

    How Heavy Potting Soil Suffocates the Roots

    Using generic, dense indoor potting soil straight out of the bag is a recipe for disaster. These soils are engineered to hold onto water so that moisture-loving plants don’t dry out.

    But snake plant roots need huge pockets of air. When packed into dense, heavy soil, the roots choke. They cannot absorb oxygen, which triggers a stress response that shows up right on the tips of the leaves.

    Personal Pro-Tip

    Keep your plant at least three to four feet away from any major appliance, drafty window, or HVAC register. If the air in that specific spot makes your own skin feel chilly or dry, your snake plant is likely miserable there too.

    Step-by-Step Diagnostic: Why Is My Snake Plant Turning Yellow?

    Step by Step Diagnostic
    Step by Step Diagnostic

    When clients call me up asking, “Why is my snake plant turning yellow?” the very first thing I ask them about is their watering routine. Let’s break down the exact visual cues so you can diagnose your plant today.

    How Overwatering Leads to a Yellow Snake Plant

    This is the number one killer. Hands down.

    If the yellowing leaves feel mushy, soft, or look somewhat wrinkled and wept over, you are overwatering. When the soil stays constantly wet, fungal pathogens take over, causing the roots to rot away into black slime. Because the ruined roots can no longer transport nutrients up to the plant, the leaves begin to turn yellow and collapse at the base.

    The Fix: Stop watering immediately. Pull the plant out of its pot and inspect the roots. If they are black and smelly, clip them away with sterile shears. Repot the remaining healthy green sections into fresh, dry potting soil mixed heavily with coarse sand or perlite.

    Severe Underwatering vs. Why a Snake Plant Turns Yellow from Drought

    Yes, you can actually underwater these guys, even though they tolerate drought beautifully.

    If you haven’t given your plant a sip of water since last season, the leaves will eventually turn yellow. The key difference here? The leaves will feel completely dry, crispy, and light. They might even start to split vertically down the middle.

    The Fix: Take the pot to your bathroom sink or kitchen faucet. Give it a thorough, deep soaking until water runs freely out of the bottom drainage holes. Let the excess drain completely before putting it back on its saucer.

    Lighting Extremes That Cause Yellowing Leaves

    Snake plants love bright, indirect light. If you stick them in a room with zero windows, they will slowly lose their color due to a lack of photosynthesis, turning a sickly, pale yellow-green.

    Conversely, if you place them in a south-facing window under harsh, unshaded US summer sun, the intense rays will literally scorch the foliage. This looks like bleached, washed-out yellow patches, often accompanied by dry, brown scars.

    The Fix: Move your plant to a spot that gets plenty of ambient light but sits a few feet back from the glass of highly sunny windows.

    Quick Visual Check:

    • Mushy + Yellow = Overwatered (Root Rot)
    • Crispy + Yellow = Underwatered (Dehydration)
    • Bleached Patches = Sunburn (Too much direct light)

    Personal Pro-Tip

    If you’re not sure whether the soil is dry deep down, don’t guess. Insert a plain wooden chopstick deep into the pot. If it comes out clean and dry like a perfectly baked cake, it’s safe to water. If potting soil sticks to it, walk away.

    Pet Safety Rules For a Yellowing Snake Plant

    Pet Safety Rules For a Yellowing Snake Plant
    Pet Safety Rules For a Yellowing Snake Plant

    As a pet parent, you need to know what is coming into your home. Snake plants contain naturally occurring chemical compounds called saponins. These compounds serve as the plant’s natural defense mechanism against insects and fungi.

    If your cat or dog decides to chew on a yellowing leaf, those saponins will cause mild to moderate toxicity.

    • Symptoms: Drooling, nausea, vomiting, and diarrhea.
    • Action Plan: While it is rarely fatal, it causes significant discomfort. If you notice teeth marks on your plant and a lethargic pet, move the plant out of reach and get in touch with your local veterinarian or the ASPCA Animal Poison Control center right away.

    Personal Pro-Tip

    If you have mischievous pets, place your pots on high plant stands or heavy floating shelves. It keeps the plant safe from curious teeth, and keeps your furry family members out of the vet’s office.

    My Final Take on Restoring Your Plant’s Health

    Caring for a sick plant takes patience. If your snake plant has a leaf that has completely turned bright yellow or mushy, accept that this specific leaf is not going to turn green again. The cellular structure is permanently damaged.

    Grab a sharp knife or a pair of bypass pruners, wipe the blades down with rubbing alcohol, and slice that ugly yellow leaf off cleanly right at the soil line. This opens up air circulation and forces the plant to redirect its valuable energy into growing brand-new, beautifully variegated green spears from the root system. Give it time, adjust your watering habits, and watch it bounce back.

    Personal Pro-Tip

    Don’t rush to feed a sick plant. Fertilizing a stressed snake plant with yellowing leaves will burn the remaining healthy roots. Wait until you see brand-new, vibrant green growth emerging from the soil before adding any liquid plant food.

    Frequently Asked Questions

    Q1: Can a yellow snake plant leaf turn green again?

    No. Once a leaf turns completely yellow, the chlorophyll has broken down permanently. The best move is to cut it away at the base so the plant stops wasting resources trying to save it.

    Q2: How do I know if my snake plant is overwatered or underwatered?

    Check the texture. Overwatered leaves look soggy, feel soft or mushy, and might bend over easily. Underwatered leaves look wrinkled, feel dry and crispy, and the soil will be completely shrunk away from the edges of the pot.

    Q3: Should I cut off the yellow leaves on my snake plant?

    Yes, you should. Use a clean, sharp blade to cut the yellow leaf off close to the soil surface. This prevents any potential fungal rot from spreading to the healthy parts of the plant.

    Q4: Why is my snake plant turning yellow and mushy at the base?

    This is a classic symptom of root rot, caused by water sitting around the root system for too long. You need to unpot the plant immediately, trim away any rotted black roots, and repot it into a fresh, dry potting soil mix with excellent drainage.

    Q5: Can too much light cause yellowing?

    Yes. While they like bright rooms, intense, direct afternoon sunlight can bleach the leaves, turning them a pale yellow or stark white. This is essentially a plant sunburn.

    Q6: How long can a snake plant go without water in the summer?

    Indoors, a healthy snake plant can easily go 3 to 4 weeks without water during the summer, especially if your home uses central air conditioning which cools the ambient temperature.

    Q7: Does standard municipal faucet water cause yellowing?

    Usually, the fluoride and heavy mineral salts found in city faucet water cause dry, brown leaf tips rather than widespread yellowing. Because modern US water grids treat water with stable chloramine instead of regular chlorine gas, letting your tap water sit out overnight won’t do a thing. If you want to keep your plant completely stress-free, switch to distilled water or captured rainwater. Alternatively, just thoroughly flush the potting soil with a heavy watering once every Spring to wash away any built-up mineral salts.

  • The Ultimate Guide on How to Grow Broccoli in Pots Like a Pro

    The Ultimate Guide on How to Grow Broccoli in Pots Like a Pro

    If you want homegrown, crunchy veggies but lack a huge backyard, learning how to grow broccoli in pots is your ticket to success. Honestly, knowing how to grow broccoli in pots completely changes the game because brassicas can be incredibly finicky in traditional garden beds. Pests find them instantly, and soil-borne issues linger in the dirt for years.

    Once you master how to grow broccoli in pots on your patio or deck, you suddenly have total control over the soil, water, and placement. It makes a massive difference.

    Quick Care Cheat Sheet

    Care FactorIdeal Target
    Container SizeMinimum 5-gallon pot (12 inches deep & wide)
    Sunlight6+ hours of direct sun daily
    Soil MixtureLightweight potting soil + 30% organic compost
    Watering1 to 1.5 inches weekly (Keep soil evenly damp)
    Best Temperature40°F to 75°F
    USDA ZonesZones 3–10 (Adjust planting season by zone)

    Personal Pro-Tip: If an unexpected late-spring heatwave hits your town, you can simply pick up your pots and move them into a shaded spot. You absolutely cannot do that with an in-ground garden bed!

    Master the Basics: How to Grow Broccoli in Pots Successfully

    Master the Basics How to Grow Broccoli in Pots Successfully
    Master the Basics How to Grow Broccoli in Pots Successfully

    Let’s get real about what this plant needs. Broccoli has a reputation for being a heavy feeder. It drinks quite a bit of water and demands high-quality nutrients to grow big, dense crowns.

    Timing and climate are everything here. Broccoli is a classic cool-season crop. It grows beautifully during the crisp days of Spring and Fall. If you live in Northern states within USDA Hardiness Zones 3 through 7, get your starter plants out right after the last spring frost. If you are down South in Zones 8 through 10, completely skip spring planting. Put your broccoli outside in late summer so it grows during the cool autumn and winter days.

    Personal Pro-Tip: I always check my local University Cooperative Extension office calendar online before planting. They provide the exact week to put cool-season crops outside for your specific zip code.

    Choosing the Right Container: How to Grow Broccoli in Pots for Maximum Yield

    Pot size is where most home gardeners mess up. Do not try to grow broccoli in a shallow window box or a cheap little flower pot. The root system needs serious room to spread out.

    One single plant requires a container that is at least 12 inches deep and 12 inches wide. A standard 5-gallon bucket from the hardware store works perfectly if you drill drainage holes in it. Fabric smart pots are even better. They let the roots breathe and prevent the soil from turning into a swamp.

    Personal Pro-Tip: If you use plastic buckets, drill your drainage holes on the sides about an inch up from the bottom, rather than flat on the base. This creates a tiny water reservoir that stops the pot from drying out completely on breezy afternoons.

    Selecting the Best Potting Soil for Growing Broccoli in Containers

    Do not scoop up dirt from your backyard. It will pack down like concrete inside a container, suffocating the roots and stunting your harvest. Instead, buy a premium, lightweight potting soil.

    Mix in a few heavy handfuls of aged compost before you plant. Because watering washes nutrients out of containers quickly, I always mix a slow-release organic fertilizer right into the potting soil during setup.

    Personal Pro-Tip: Look for a fertilizer with a lower first number (Nitrogen) and higher middle/last numbers (Phosphorus and Potassium), like a 5-10-10 mix. Too much nitrogen gives you massive, beautiful leaves but a tiny, pathetic broccoli head.

    Avoid Early Flowering: How to Grow Broccoli in Pots During Warm Weather

    Sunlight is a double-edged sword for this veggie. Your potted broccoli needs at least 6 hours of direct sunlight daily to build up enough energy to form a head.

    But here is the catch. If the air temperature climbs consistently above 80°F, the plant panics. It thinks summer has arrived, stops growing leaves, and immediately shoots up bright yellow flowers. This is called “bolting,” and it makes your broccoli completely bitter and inedible.

    Consistent watering keeps the root system cool. Run water from your garden hose or faucet until it flows freely out of the bottom of the pot. On hot, windy days, expect to water daily.

    Personal Pro-Tip: Spread a two-inch layer of clean straw or shredded wood mulch over the top of the potting soil. This acts like a cooling blanket, keeping the soil damp and protecting the roots from the baking sun.

    Why Americans Fail: Common Mistakes When Growing Broccoli in Containers

    Common Mistakes Growing Broccoli
    Common Mistakes Growing Broccoli

    I’ve talked to hundreds of patio gardeners across the country, and the same few mistakes pop up every single season:

    • The AC Vent Trap: Many folks try to grow their pots indoors or on an enclosed porch. If your home’s central air conditioning vents blow cold, dry air directly onto the leaves, it will sap the moisture and stunt the plant.
    • The Backyard Exhaust Blaster: Placing your pots right next to your outdoor AC unit compressor will blast the plant with scorching hot air. It will bolt within days.
    • Using Dark Plastic Pots: Black plastic pots absorb solar heat like a sponge, cooking the roots. Stick to terra cotta, fabric, or light-colored options.
    • Overwatering to the point of rot: Damp soil is good. Muddy, waterlogged soil will rot the roots and kill the plant.

    Personal Pro-Tip: Stick your index finger two inches deep into the soil before reaching for the hose. If it feels wet, step away. Only water when the top inch feels dry to the touch.

    Troubleshooting Potted Broccoli Issues

    Plants talk to us through their leaves. Here is how to decode what your broccoli is trying to tell you:

    • Yellowing lower leaves: This usually means your plant is hungry for nutrients or you are overwatering. Cut back on the water and feed it a balanced liquid fertilizer.
    • Tiny holes in the leaves: You have cabbage worms. Look for little green caterpillars hiding on the undersides of the leaves. Pick them off by hand or spray the plant with organic Bt (Bacillus thuringiensis).
    • Purplish leaves: This is a classic sign of a phosphorus deficiency, often caused by cold soil in early spring. Don’t worry too much; it usually fixes itself as the weather warms up.

    Personal Pro-Tip: Check your plants early in the morning. That’s when caterpillars are active and easiest to spot before they hide from the midday sun.

    Is Broccoli Toxic to Dogs and Cats?

    Is Broccoli Toxic to Dogs and Cats
    Is Broccoli Toxic to Dogs and Cats

    Good news for pet owners! Broccoli is completely non-toxic to dogs and cats according to the ASPCA. In fact, my golden retriever loves to crunch on the leftover stems.

    Just keep an eye out if they eat too much of it. Broccoli contains compounds called isothiocyanates, which can cause mild gas or tummy upset in pets if they gorge themselves on the raw leaves.

    Personal Pro-Tip: If you spray your plants with organic pest controls like neem oil, keep your pets away until the leaves are completely dry.

    FAQs About Growing Broccoli in Containers

    Q1: Can you grow a full head of broccoli in a small pot?

    No. If the pot is smaller than 3 to 5 gallons, the root system gets bound. You will end up with a tiny, button-sized head instead of a full meal.

    Q2: How much sun does potted broccoli need?

    It needs a solid 6 to 8 hours of direct sunlight. If you grow it in the heavy shade, the plant gets leggy and stretched out, and it won’t form a tight crown.

    Q3: Why is my broccoli flowering before forming a head?

    This is bolting. It happens when the plant experiences heat stress, usually from temperatures climbing above 80°F, or because the roots ran out of room in a tiny container.

    Q4: What is the best fertilizer for container broccoli?

    Start with a rich potting soil mixed with compost. Once the plant settles in, feed it every two weeks with a water-soluble organic vegetable fertilizer that is slightly higher in phosphorus.

    Q5: How often do you water broccoli in a plastic pot?

    It varies by weather, but usually twice a week in cool weather and daily during hot, sunny spells. Always test the soil with your finger first.

    Q6: Can I grow broccoli indoors under an AC vent?

    Avoid it. Indoor AC vents create dry, artificial drafts that sap moisture from the foliage. If you must grow indoors, use a bright window or grow lights well away from any air vents.

    Q7: How do I know when my container broccoli is ready to harvest?

    Harvest when the main head is firm, tight, and roughly the size of a large fist, but before the tiny green buds start opening into yellow flowers. Use a sharp knife to cut the stem at an angle.

    Final Thoughts

    Growing your own food doesn’t require a massive backyard grid. By picking the right container size and keeping a close eye on the thermometer, you can easily harvest crisp, sweet broccoli right from your porch steps. Give it a shot this season!

  • The No-Nonsense Guide on How to Grow Microgreens Indoors

    The No-Nonsense Guide on How to Grow Microgreens Indoors

    Growing your own food doesn’t require an acre of land or an expensive greenhouse setup. If you want to learn how to grow microgreens indoors, this practical guide cuts through the noise to show you exactly how to get a heavy, nutrient-dense harvest right on your kitchen counter with minimal gear.

    Growth FactorIndoor Target / Requirement
    Best MediumHigh-quality, fine-textured potting soil or seed-starting mix
    Lighting12–16 hours daily (LED grow lights or a bright South-facing window)
    Watering MethodBottom-watering via the faucet; keep damp, never soggy
    Ideal Temperature65°F to 75°F (Keep clear of central heating/AC vents)
    Blackout Phase2 to 4 days under an upside-down tray with a light weight
    Days to Harvest7 to 14 days for most varieties (e.g., Radish, Broccoli, Peas)

    I remember the first time I tried to grow a tray of broccoli greens on my kitchen counter during a brutal winter up in USDA Hardiness Zone 5. My home furnace was running non-stop, blasting dry, hot air across the living room. Within four days, my beautiful little seedlings looked like tiny, withered pieces of straw. I learned the hard way that indoor gardening has its own distinct set of rules.

    If you want to master how to grow microgreens indoors, you don’t need a massive backyard or a green thumb. Honestly, anyone can do it right next to their kitchen sink. Let’s break down exactly how to get a heavy harvest of crisp greens in less than two weeks without overcomplicating things.

    Why You Should Learn How to Grow Microgreens Indoors

    Why You Should Learn How to Grow Microgreens Indoors
    Why You Should Learn How to Grow Microgreens Indoors

    They are essentially super-concentrated versions of adult vegetables. Think about it: a tiny radish shoot can pack more punch and intense flavor than a full-grown radish from the grocery store. Plus, buying those tiny plastic clamshells at Whole Foods or your local supermarket will easily run you five or six bucks for a measly ounce.

    When we handle the process at home, we spend pennies per batch. When we look at the logistics of how to grow microgreens indoors, it really comes down to controlling your immediate countertop environment. It is an easy, satisfying win.

    Personal Pro-Tip

    Don’t start with complicated, expensive setups. Grab some basic radish or broccoli seeds first. They are incredibly forgiving, germinate in a flash, and give you that quick win you need to build up your confidence.

    The Step-by-Step Blueprint on How to Grow Microgreens Indoors

    Let’s get our hands dirty. It doesn’t take much space, but it does require an orderly process.

    Selecting Your Trays and Potting Soil

    Forget about backyard dirt. You need a clean, fine-textured indoor potting soil or a dedicated seed-starting mix. If your potting soil has massive chunks of wood or heavy bark, those tiny seeds will struggle to push their roots down.

    I prefer shallow plastic trays specifically the standard 1020 trays you find at any local garden center or hardware store. You want one tray with drainage holes and one solid tray without holes to nestle it inside.

    Personal Pro-Tip

    If you don’t want to buy professional plastic garden trays, just poke some drainage holes in the bottom of an empty plastic berry clamshell from the grocery store. It works beautifully for small kitchen batches.

    Sowing Seeds While Learning How to Grow Microgreens Indoors

    Here is where most beginners hesitate. When you plant regular garden vegetables, you space seeds inches apart. With microgreens, we throw that rule out the window. We want a dense carpet.

    Fill your tray with about an inch or two of moistened potting soil. Pat it down lightly so it’s flat like a tabletop, but don’t pack it tightly like a brick. Sprinkle your seeds evenly across the surface. They should be close, like sprinkles on a doughnut, but not piled on top of each other in heaps. Mist them thoroughly with a spray bottle using water straight from your kitchen faucet.

    Personal Pro-Tip

    For larger seeds like peas or sunflowers, soak them in a mason jar of water for about 8 to 12 hours before planting. This softens the hard outer shell and shaves days off your total growth time.

    Managing the Crucial Dark Blackout Period

    Once your seeds are sown and misted, they need darkness and a bit of pressure to build strong roots. Don’t put them under the light yet. Instead, cover the seeds with an upside-down tray or a piece of clean cardboard to block out all ambient light.

    I even like to place a light weight like a small brick or a heavy book—right on top of the covering tray. It sounds crazy, but forcing the sprouts to push against a physical weight makes them grow thicker, stronger stems. Check them once a day to ensure the soil isn’t drying out.

    Personal Pro-Tip

    Keep the blackout area warm, ideally around 70°F. If your house is cold during a northern winter, place the tray on top of your refrigerator. The ambient heat from the fridge motor provides a perfect, gentle warmth.

    Setting Up Light for Your Countertop Trays

    After 3 to 4 days, you will lift the cover and see pale, yellowish, somewhat squished sprouts. Don’t panic. This is exactly what they should look like. Now they need light to start producing chlorophyll and turn a vibrant green.

    A bright, South-facing window can work if you get at least 6 hours of direct sun. However, if you live in a place with gray, cloudy winters, a simple LED grow light suspended a few inches above the tray is a game-changer. Leave the lights on for about 12 to 16 hours a day.

    Personal Pro-Tip

    Do not let your grow lights sit too far away. If the light source is two feet above the tray, your microgreens will grow tall, skinny, and floppy as they stretch for it. Keep LEDs just 4 to 6 inches above the canopy.

    Common Mistakes to Avoid When Learning How to Grow Microgreens Indoors

    Common Mistakes Grow Microgreens Indoors
    Common Mistakes Grow Microgreens Indoors

    I have seen countless home gardeners fail because they treat these tiny greens like standard houseplants. They aren’t.

    The biggest killer? Air conditioning and heating vents. If you place your tray directly under or over an active HVAC vent, the moving air will completely parch the soil or chill the plants, leading to sudden stunting.

    Another massive mistake is watering from the top once the greens have sprouted. Dumping water directly onto the fragile leaves matts them down and traps moisture, which is an open invitation for fungal issues. Always water from the bottom by pouring water directly into the outer, solid tray and letting the soil wick it up.

    Personal Pro-Tip

    Get into the habit of picking up your grow tray. If it feels feather-light, it’s time to add water to the bottom tray. If it feels heavy, leave it alone. Your hands are the best moisture meters.

    Troubleshooting When Figuring Out How to Grow Microgreens Indoors

    Let’s look at the issues that pop up most frequently on gardening forums.

    • Fuzzy White Stuff on the Soil: Beginners often mistake root hairs for mold. Look closely under a flashlight. If the fuzz is only tightly hugging the main root stem, those are beneficial root hairs searching for water. If the fuzz is web-like, spreading across multiple plants, and looks like a cobweb, it’s mold.
      • The Fix: Increase your room’s air circulation with a small desk fan. If mold takes over early, spray it lightly with a diluted mix of food-grade hydrogen peroxide and water.
    • Yellowing Leaves: If your greens remain pale yellow after two days under the light, they aren’t getting enough intensity, or the room is too cold.
      • The Fix: Move your light source closer or move the setup away from a drafty winter window.
    • Falling Over / Wilting: This is almost always a sign of severe dehydration.
      • The Fix: Add water to the bottom tray immediately. They usually perk back up within a couple of hours if you catch them early enough.

    Personal Pro-Tip

    If a batch gets completely overrun by thick gray mold, do not try to save it. Toss the soil into your compost pile, wash the tray thoroughly with soap, and start fresh. It happens to everyone at some point.

    Microgreens Pet Toxicity Warning: Are They Safe for Cats and Dogs?

    Microgreens Pet Toxicity Warning Are They Safe for Cats and Dogs
    Microgreens Pet Toxicity Warning Are They Safe for Cats and Dogs

    As a pet owner, I always check plant safety before bringing anything into my living space. Most common microgreens like broccoli, radish, sunflower, and pea shoots are completely non-toxic and safe for cats and dogs. In fact, many cats love nibbling on crunchy pea shoots.

    However, you must avoid growing nightshade family crops as microgreens. Never grow tomatoes, peppers, or eggplants as microgreens. Their sprouts contain solanine, a toxic alkaloid that can make your pets (and you) incredibly sick. Stick to safe brassicas, legumes, and grains.

    Personal Pro-Tip

    If your cat views your microgreen trays as a personal salad bar, place a wire mesh dome or an extra plastic crate upside down over the greens during the light phase to keep curious paws away.

    Frequently Asked Questions About How to Grow Microgreens Indoors

    Q1Can I reuse the potting soil for a second batch?

    I highly advise against it. The old root mats left behind will decay, creating a breeding ground for mold and fungal pathogens that will destroy your next round of seeds. Always use fresh, clean potting soil for every single tray.

    Q2Do I need to add fertilizer to my indoor microgreen trays?

    No. This is the beauty of the process. A seed contains all the energy and nutrients required to grow its first set of leaves. Because we harvest them so early, supplemental fertilizers are completely unnecessary.

    Q3How long do microgreens take to grow from start to finish?

    Most varieties are ready to harvest in 7 to 14 days. Radishes are lightning-fast and can be ready in a week, while slower herbs like cilantro or basil might take up to three weeks.

    Q4Can I grow microgreens using water from my home faucet?

    Yes, standard faucet water is perfectly fine. If your municipal water has a heavy chlorine smell, let it sit out in an open pitcher for 24 hours before watering your plants so the chlorine can naturally dissipate.

    Q5Why are my microgreens growing so tall and leggy?

    They are starving for light. When the light source is too weak or too far away, the seedlings stretch their stems upward as fast as possible to reach it, making them weak and prone to falling over.

    Q6How do I harvest my indoor microgreens cleanly?

    Grab a sharp pair of kitchen scissors or shears. Hold a small bunch of the greens gently by the tips and snip the stems about a quarter-inch above the soil line to avoid getting dirt in your harvest.

    Q7Do microgreens grow back after you cut them?

    Generally, no. Since you are cutting off the growing tip and the first leaves, the plant cannot generate new growth. Pea shoots are the rare exception; if you leave a node at the base, they might throw out a small second flush, but it’s usually best to compost the tray and replant.

    Personal Pro-Tip

    After harvesting, don’t wash your greens until right before you eat them. Storing damp microgreens in the fridge makes them turn into a slimy mess within 48 hours. Keep them dry in a container lined with a clean paper towel.

    Final Thoughts

    Getting a steady supply of fresh greens right inside your home is incredibly rewarding. It cuts down your grocery bill, bypasses whatever is happening with outdoor weather, and keeps your kitchen feeling alive all year round. Start small, watch your watering, and enjoy the crisp crunch of your home-grown harvest.

  • The Ultimate Lazy Yard Hack: Chaos Gardening for Beginners Who Hate Rules

    The Ultimate Lazy Yard Hack: Chaos Gardening for Beginners Who Hate Rules

    Stop obsessing over perfectly straight rows, expensive tools, and meticulous weekend chore lists that leave your back aching. Nature never used a plastic ruler to plant a stunning wild meadow, so why should you? Chaos gardening for beginners is the ultimate liberating backyard shift. With this low-maintenance approach, you literally toss your favorite seeds into a physical bucket, shake them up, hurl them across raw dirt, and let the strongest plants win the race. 

    Quick Reference: The No-Stress Breakdown

    If you are skimming this article while standing in the garden center aisle, here is the fast data you need before buying your seed packets.

    FactorWhat to Expect
    Effort LevelNear zero (just light prep, toss, and step back)
    Best US SeasonsEarly Spring (right post-frost) or late Fall
    Sunlight Needs6+ hours of full sun for most wild bloom/veggie mixes
    Ideal SetupOpen ground plots, neglected borders, or large fabric grow bags
    CostDirt cheap (perfect for clearing out old, forgotten seed packets)

    Why I Swear by Chaos Gardening for Beginners

    Why I Swear by Chaos Gardening for Beginners
    Why I Swear by Chaos Gardening for Beginners

    I spent over a decade obsessing over perfectly spaced rows, pulling every single microscopic weed, and sticking little plastic labels in my yard. It was exhausting. It was incredibly expensive. Honestly, it made me enjoy my yard a lot less.

    When people first look up tips for chaos gardening for beginners, they think it is a complicated permaculture science. It isn’t. You take a giant handful of different seeds, mix them together completely at random, scatter them across a patch of bare ground, and let them fight it out for survival.

    It is the ultimate lazy gardening trend. Think about a wild American meadow. Nobody walks out into an open field with a trowel to plant wild coneflowers exactly six inches apart. Nature throws a beautiful tantrum of growth, and it works.

    Traditional planting guides tell you exactly how deep to dig and how many inches of breathing room to give every single tiny green sprout. We are tossing that script out. In my years running community garden workshops across the country, I have found that plants are far more adaptable than we think. They find the light. They crowd together naturally, creating a dense living canopy that shades the soil and blocks out nasty weeds without you lifting a finger.

    Personal Pro-Tip

    Do not try to organize your seeds by color, height, or type before throwing them. The whole magic relies on complete randomness. Just shake the bucket hard and let them fly.

    Picking the Right Seeds for Chaos Gardening for Beginners

    You cannot just grab any random tropical flower packet from a big-box store shelf and expect it to survive a tough, dry summer in the American Midwest. Success boils down to matching your seed mix with your actual regional climate.

    Your local climate dictates what lives and what dies. If you are throwing down seeds in the baking, humid heat of USDA Hardiness Zone 9 (like Florida or parts of Texas), your mix needs to look completely different than someone planting in the short, volatile growing season of Zone 5 in New York.

    I always tell folks to mix tough annual flowers with fast-growing vegetables. Try combining zinnias, cosmos, and marigolds with radishes and arugula.

    Radishes sprout incredibly fast, often within days. Their broad, early leaves shade the soil, which keeps the slower-growing flower seeds from getting totally baked and ruined by the intense midday sun.

    Personal Pro-Tip

    Always check the back of your seed packets for the recommended USDA zone numbers. If a plant requires delicate greenhouse care or constant misting, leave it out of your chaos mix. Stick to tough, self-seeding varieties that can handle severe neglect.

    My Step-by-Step Blueprint to Start Chaos Gardening for Beginners Today

    My Step by Step Blueprint to Start Chaos Gardening for Beginners Today
    My Step by Step Blueprint to Start Chaos Gardening for Beginners Today

    Setting up your first wild plot does not require a weekend of backbreaking labor. You can get a solid patch rolling in less than an hour if you follow a few basic steps.

    • Find your spot: Pick an area in your yard that gets at least six hours of direct sunlight.
    • Scrape the surface: You do not need a heavy, loud gas tiller. Just take a basic hand rake or hoe and rough up the top two inches of dirt so the seeds have open soil to cling to.
    • Mix the seeds with sand: Dump all your packets into an empty bucket. Throw in a few handfuls of dry play sand or dry potting soil. Because many seeds are tiny and brown, the light-colored sand helps you visually track where you have already thrown them so you do not end up with an accidental, overcrowded clump.
    • Broadcast: Walk around the space and scatter the mix evenly, like you are feeding chickens.
    • Press down: Walk over the scattered seeds or pat the ground down with the flat backside of a shovel. Good seed-to-soil contact is the secret to high germination.
    • Water gently: Hook up your garden hose, turn the faucet on low, and use a misting nozzle.

    Personal Pro-Tip

    Never do this on a windy day. I once made the massive mistake of throwing a premium wild mix during a gusty spring afternoon, and half my budget ended up decorating my neighbor’s concrete driveway instead of my flowerbeds.

    Hidden Traps: Why Most US Homeowners Fail at This Wild Planting Method

    Even though this method is delightfully simple, I see backyard growers make the same major mistakes every single summer.

    First, Americans love our outdoor air conditioning units. If you scatter your chaos garden right next to your home’s central AC condenser unit, the constant blast of hot, dry exhaust air will cook your sprouts before they even grow an inch. Keep your patch away from those mechanical heat zones.

    Second, people overwater. In the US, we have a bad habit of pampering our outdoor spaces to death. If you run your automatic lawn sprinklers every single day until the ground turns into a muddy swamp, your seeds will simply rot in the dirt.

    Finally, local wildlife is incredibly smart. If you just drop seeds on hard, unraked ground and walk away, you are setting up a free morning buffet for every sparrow, blue jay, and squirrel in the county.

    Personal Pro-Tip

    If you have a major bird problem in your neighborhood, throw a very thin, quarter-inch layer of standard potting soil or loose straw over your scattered seeds to hide them from hungry eyes.

    Quick Fixes and Troubleshooting for Chaos Gardening for Beginners

    Since you are letting nature take the wheel, you are going to run into some weird situations. Do not panic when things look a little messy or unpredictable.

    If nothing sprouts after two weeks, check the moisture. When the soil is bone-dry and hard as concrete, the seeds cannot break through their shells. Give the area a gentle misting from the closest outdoor faucet every single morning.

    When plants look incredibly tall, skinny, and floppy, it means your spot is too shady. The plants are stretching their stems trying to find sunlight. You might need to trim back overhanging tree branches before next season.

    Yellowing leaves on young sprouts usually happen when the soil stays soggy for too long, or if you planted right under a roof gutter line where heavy rain flushes out all the natural soil nutrients.

    ProblemLikely CauseQuick Fix
    Seedlings dying off suddenly at the baseDamping-off fungus from stagnant air or muddy soilStop watering entirely and let the hot afternoon sun dry out the topsoil layer.
    One aggressive plant taking over everythingA dominant species or invasive weed mixed into the soilPull that specific variety out by hand to give the slower flowers some breathing room.

    Personal Pro-Tip

    Take photos on your phone every single week. Because different species grow at wildly different speeds, tracking the progress helps you learn which plants are winning the race in your specific yard’s soil.

    Is a Chaos Garden Safe for Your Four Legged Friends?

    Is a Chaos Garden Safe for Your Four Legged Friends
    Is a Chaos Garden Safe for Your Four Legged Friends

    This is a massive point that a lot of big lifestyle blogs completely ignore. When you buy cheap, generic “wildflower mix” bags from big-box stores, they often contain hidden dangers for your pets.

    Common chaos ingredients like foxglove, castor bean, morning glory, and certain types of wild poppies are highly toxic to dogs and cats. If you have a curious puppy or a cat who loves to chew on backyard greenery, you must read the specific ingredient list on your seed packets carefully.

    Stick to entirely pet-safe options like marigolds, sunflowers, zinnias, and basil for your custom mix. It gives you the exact same wild aesthetic without a stressful, late-night emergency trip to the vet clinic.

    Personal Pro-Tip

    If you cannot verify every single seed type in a pre-made commercial mix, fence off your chaos zone with a simple, cheap roll of green chicken wire until the plants mature.

    Real Answers to Reddit’s Hardest Questions About Chaos Gardening for Beginners

    Q1. Can I do this inside an apartment or on a balcony?

    You can, but you need to modify the strategy. Throwing seeds randomly into small indoor pots usually results in a crowded mess where plants choke each other out. Use a large, wide fabric grow bag or a long window box planter on a sunny balcony instead. Just ensure your indoor air conditioning vents aren’t blowing cold, drying air directly onto the soil surface.

    Q2. How do I tell my actual sprouts apart from random weeds?

    This is the toughest part for beginners. My trick is to look for the patterns. If you see fifty identical tiny green leaves popping up uniformly across the area where you scattered your mix, those are your intended plants. If a strange, isolated weed pops up that looks totally different from everything else, pull it out.

    Q3. Do I need to buy expensive fertilizer?

    Usually, no. Part of the beauty of chaos gardening for beginners is that different plants utilize different layers of the dirt. Some have deep taproots that pull up buried minerals, while others have shallow roots that stabilize the top layer. Normal backyard dirt works fine. If your yard has terrible, rocky soil, just spread an inch of organic potting soil over the area before throwing your seeds.

    Q4. Will my Homeowners Association (HOA) get mad at me?

    They might if your front yard looks like an abandoned, overgrown lot. To keep your HOA inspectors happy, contain your chaos garden inside a clear, defined boundary. Use a raised bed, a clean wooden border, or a neat ring of landscape stones. It makes the wild growth look like an intentional design choice rather than pure neglect.

    Q5. Can I use old, expired seed packets?

    Yes! This is actually the best way to use them up. Germination rates drop as seeds age, so buying brand-new fresh packets just to throw them around can get expensive. Dumping all your old, forgotten packets from three years ago into a single chaos mix is a brilliant, zero-cost experiment.

    Q6. When is the absolute best time to plant in the US?

    For most of the country, early Spring right after the danger of the last hard frost has passed—is ideal. This gives the seeds plenty of natural moisture from spring rains to wake up. If you live in a winter mild state like southern California, Arizona, or Florida, late Fall is often better so the plants can establish during the cooler, gentler months.

    Q7. Do I need to clear out all the dead plants when Fall hits?

    Leave them alone until late winter if your neighborhood allows it. The dead flower heads hold tons of natural seeds that will drop straight into the soil for next year’s cycle. Plus, local birds and beneficial insects rely heavily on that dead brush for food and warm shelter during freezing winter weather.

    Final Thoughts on Letting Nature Take the Wheel

    At the end of the day, you have to accept that you are giving up total control over your yard. Some seeds will sprout beautifully, some will get eaten by bugs, and some might not show up at all. That is completely fine. The true joy of this method is the complete surprise of walking out to your yard on a warm morning in July and seeing a massive splash of color you completely forgot you planted. Grab some old packets, find a bare patch of dirt, turn on your garden faucet, and see what happens.

  • Keeping Your Garden Alive: How to Water Plants While Away on Vacation

    Keeping Your Garden Alive: How to Water Plants While Away on Vacation

    Packing your bags for a vacation is always exciting, but figuring out how to water plants while away can quickly trigger a massive amount of pre-trip anxiety. Nobody wants to spend their entire trip wondering if their expensive fiddle leaf fig or favorite monsteras are slowly shriveling up in a quiet, closed-up house. Walking through your front door after a great getaway only to find a living room full of crispy, dropped leaves and dead stems is an absolute nightmare.

    Learning this essential skill is what separates casual plant buyers from long-term indoor jungle curators.

    I have spent decades managing commercial greenhouses, sprawling backyard vegetable plots, and sensitive indoor collections. I have navigated scorching summer heatwaves in the American South and dry winter heating seasons in the Northeast. Over the years, I have tested almost every automated gadget and DIY trick on the market.

    You do not need to spend a fortune on high-tech irrigation setups or guilt-trip your neighbors into visiting your house every single day. This guide breaks down my favorite, field-tested strategies to keep your greenery perfectly hydrated while you are out enjoying the world.

    A Quick Blueprint on How to Water Plants While Away

    If you are currently packing your suitcase and need an immediate game plan, use this breakdown to match your vacation timeline with the right watering method.

    Trip LengthRecommended StrategyIndoor/Outdoor SplitPreparation Time
    1 to 4 DaysDeep watering session right before you step out the doorWorks for both5 minutes
    5 to 10 DaysThe inverted glass bottle trick or a capillary wicking setupBest for indoor pots20 minutes
    10 to 14 DaysGrouped bathtub soaking or a sealed plastic bag micro-greenhouseIndoor only30 minutes
    2+ WeeksAutomated faucet timers coupled with custom drip linesHighly recommended for both1 to 2 hours

    Personal Pro-Tip

    Never test a brand-new DIY watering setup the night before a long flight. I once rigged up an untested wicking system on my kitchen island before a trip to California. I returned to a completely drained water reservoir, a ruined laminate floor, and bone-dry ferns. Set your system up a week early so you can watch how fast the water actually drains.

    Classic Blunders Americans Make When Trying to Water Plants While Away

    Classic Blunders Americans Make When Trying to Water Plants While Away
    Classic Blunders Americans Make When Trying to Water Plants While Away

    The vast majority of plant losses during vacation do not happen because owners forgot to give them water. They happen because people misunderstand how their home environment changes when they leave.

    In the United States, our heavy reliance on central air conditioning creates a major variable. If you leave your AC blasting at 68°F while you are gone, that constant stream of dry, chilled air strips moisture away from your container’s potting soil incredibly fast.

    Conversely, turning your AC completely off during a July vacation can turn a closed-up house into a literal oven. This is especially true if you live down in USDA Hardiness Zones 8 through 11. High indoor temperatures skyrocket the evaporation rate of your soil.

    My sweet spot is setting the thermostat to a stable 76°F or 78°F. This keeps the air warm enough to prevent massive energy bills, but cool enough to slow down transpiration.

    Another massive mistake is overwatering out of pure panic. Drowning your monsteras or snake plants right before you walk out the door leaves them sitting in stagnant water. Without active airflow and normal light cycles, that stagnant pool causes root rot within days.

    [Too Much Water] + [No Air Circulation] = Suffocated Roots = Root Rot

    Outdoor container gardens face an uphill battle too. If you leave porch pots sitting in full afternoon sun while you are away, they will bake. Moving those containers into a shady, north-facing spot before you leave is non-negotiable for survival.

    Personal Pro-Tip

    Walk through your home and look for any pots sitting directly under or next to AC vents. Move them at least six feet away. The direct, artificial breeze from an HVAC system mimics a desert wind, drying out foliage far faster than stagnant air.

    Low-Cost DIY Hacks: How to Water Houseplants While Away

    Low Cost DIY Hacks How to Water Houseplants While Away
    Low Cost DIY Hacks How to Water Houseplants While Away

    You do not need fancy, expensive equipment to maintain proper soil moisture. These simple, budget-friendly strategies work beautifully if you set them up with care.

    The Inverted Wine Bottle Method

    This is my go-to choice for medium-to-large potted plants when I am going to be gone for roughly a week. Take a clean, empty glass wine bottle or a heavy-duty plastic soda bottle and fill it completely with fresh water.

    Quickly flip the bottle upside down and push the neck deep into the pot’s loose potting soil. Make sure you press it down at least three to four inches so it stays secure and sits near the main root ball.

    The soil will slowly draw moisture out of the bottle as it dries out.

    Setting Up a Capillary Wick System

    If you have a whole collection of small-to-medium plants grouped together, a capillary wick setup is incredibly efficient.

    Place a large five-gallon bucket or a giant mixing bowl full of water on top of a small stool or elevated surface. Arrange your potted plants on the floor around the base of that stool.

    Cut lengths of 100% cotton clothesline or thick cotton yarn long enough to reach from the bottom of the water bucket to the soil of each plant. Submerge one end of the cord deep into the water source. Push the other end an inch deep into the potting soil of your plant.

    The natural capillary action of the cotton draws water downward, keeping the soil perfectly damp without oversaturating it.

    [Elevated Water Reservoir] 

           \

            \  <– Cotton Wick (Capillary Action)

             \

          [Potted Plant on Floor]

     Personal Pro-Tip

    Gravity is the secret engine of a wicking system. Your water source must sit physically higher than the top of your plant pots. If the bucket sits on the exact same level as the containers, the water will not travel down the cord properly, and your plants will dry out.

    Post-Vacation Troubleshooting: Fixing Your Greenery After You Get Back

    Sometimes, despite your best efforts, you will return home to a few drama queens looking incredibly sad. Do not panic and throw them in the trash immediately.

    • Symptom: Mushy, yellowing leaves and a swampy smell. Your DIY system delivered way too much water, and the roots are currently drowning. Remove the pot from any decorative outer ceramic sleeve or drainage saucer. Let it sit in a bright room with good airflow until the top two inches of soil are completely dry. Hold off on watering for a couple of weeks.
    • Symptom: Crispy, brown leaf tips and drooping stems. Your plant ran out of moisture early and suffered from the dry indoor air. Take the pot straight to your bathroom or kitchen sink. Run the faucet on a gentle, lukewarm setting and give the soil a massive soak until water runs freely out of the bottom drainage holes. Let it drain completely, then clip away the completely dead leaves with clean shears.

    Personal Pro-Tip

    If a plant looks entirely dead, dry, and bare, do not give up just yet. Take your thumbnail and gently scratch a tiny piece of bark off the main stem near the base of the soil line. If you see a flash of bright green underneath, the plant is alive. Cut the dead top growth back and keep caring for it—it will likely sprout new leaves within a month.

    Pet Safety Warning: Keeping Furry Friends Safe from Travel Watering Setups

    Pet Safety Warning Keeping Furry Friends Safe from Travel Watering Setups
    Pet Safety Warning Keeping Furry Friends Safe from Travel Watering Setups

    Modifying your home environment to handle plant care can introduce unexpected risks for dogs and cats.

    Leaving large, open buckets of water on the floor or on low stools for a wicking system is a massive temptation for a curious pet. If you added liquid plant fertilizer to that water reservoir before leaving, your pets could ingest concentrated chemicals that can cause severe illness. Always use pure, unfertilized water for vacation setups. Better yet, confine your plant systems to a spare bedroom or bathroom that stays closed off from your pets.

    Moving plants around to group them together can also cause problems. You might accidentally place a toxic variety like a peace lily, monstera, or pothos—on a low table or floor space where your cat or dog can easily chew on it out of boredom or separation anxiety. Keep your pet-safe varieties low and leave the toxic plants securely elevated.

    Personal Pro-Tip

    Cats love to play with dangling strings. A collection of cotton wicking lines running from an elevated bucket is an incredibly tempting toy. Secure your wicking lines or place the entire setup inside a room that your pets cannot access while you are away.

    Frequently Asked Questions About How to Water Plants While Away

    Q1. Is it a good idea to leave my plants sitting in a bathtub full of water?

    This strategy works well, but only for specific moisture-loving varieties like ferns, calatheas, syngoniums, and pothos. Line your tub with an old towel to prevent scratching, add an inch or two of water, and set your plastic pots directly on top. Avoid doing this with succulents, cacti, or snake plants. Sitting in standing water for a week will rot their root systems completely.

    Q2. How many days can a typical houseplant survive without water?

    It depends heavily on the season and the species. During the spring and summer active growing periods, most tropical houseplants will start showing severe signs of stress after 7 to 10 days. During the winter, when plant metabolisms slow down dramatically, many varieties can go two to three weeks without any issue at all.

    Q3. Should I buy glass or plastic watering globes for my outdoor containers?

    If you are setting them up for outdoor porch containers or patio pots, always opt for plastic. Glass watering globes can act like a magnifying glass when direct, intense summer sunlight hits them. This creates a legitimate fire hazard if they are focused on dry mulch or dry leaves. Keep glass globes indoors.

    Q4. Will my backyard vegetable garden survive a week-long trip without irrigation?

    In-ground garden beds hold onto moisture significantly better than pots. If you apply a heavy, three-inch layer of clean straw, shredded leaves, or wood mulch across the soil surface, it locks in moisture. Give the garden a massive, deep soaking the morning you leave. An established vegetable garden can usually handle a week of summer weather under those conditions.

    Q5. Does the plastic bag greenhouse trick actually work for long trips?

    It is incredibly effective for smaller tropical plants that crave high humidity. Water the plant thoroughly, then wrap a clear plastic trash bag completely over the top of the plant. Use a few wooden chopsticks or bamboo stakes pushed into the soil to hold the plastic away from the actual leaves. This creates a sealed ecosystem where moisture evaporates, condenses on the plastic, and falls back into the soil. Keep this setup entirely out of direct sunlight so you don’t overheat the plant.

    Q6. Can I use regular nylon or polyester string for a DIY wicking system?

    No. Synthetic fibers like nylon, polyester, or acrylic are hydrophobic, meaning they repel water rather than absorbing it. They will not pull moisture from your reservoir. You must use 100% natural cotton rope, cotton clothesline, or genuine wool yarn for the capillary action to function properly.

    Q7. Should I close all my window blinds before I leave for vacation to save water?

    Do not shut them completely. While cutting down on light lowers the plant’s temperature and slows down water consumption, keeping plants in total darkness for two weeks straight will severely shock them. Tilt your window blinds upward. This reduces the intense, direct burning sun rays while still filling the room with plenty of bright, ambient light.

    Final Thoughts for a Stress-Free Trip

    Plants are remarkably tough, adaptive living things. Missing a routine watering by a few days is rarely a death sentence for a healthy, well-established plant.

    Select a method that aligns with how long you will be away, run a quick test ahead of time to make sure the physics are working, and then go enjoy your vacation. Stop worrying about your fiddle leaf fig and leave the home security camera apps closed!

  • The Ultimate Guide on How to Clean Plant Leaves and Keep Your Greenery Happy

    The Ultimate Guide on How to Clean Plant Leaves and Keep Your Greenery Happy

    Walk into almost any American home where the central heating or air conditioning runs constantly, and you will see it. Dust. In my fifteen years working as a horticulturist traveling from coast to coast, dusty leaves are the number one issue I see in indoor jungles. Most online advice reads like a dry, robotic textbook, but learning how to clean plant leaves correctly is a vital, no-nonsense skill that keeps your greenery breathing easy and growing beautifully. Here is a quick reference table for the skimmers out there who want immediate answers.

    Quick Care Reference for Leaf Cleaning

    Plant Leaf TypeBest Cleaning MethodFrequencyTools Needed
    Large & Broad (Fiddle Leaf, Monstera)Hand wipingOnce a monthMicrofiber cloth + tepid water
    Small & Abundant (Pothos, English Ivy)Faucet or shower rinseEvery 2–3 monthsSink faucet + plastic bag for soil
    Hairy or Fuzzy (African Violets)Dry dustingAs neededSoft paintbrush or cosmetic brush
    Cacti & SucculentsCompressed air / BrushTwice a yearSoft bristle brush or air duster

    Why You Actually Need to Know How to Clean Plant Leaves

    Why You Actually Need to Know How to Clean Plant Leaves
    Why You Actually Need to Know How to Clean Plant Leaves

    Dust layers act like a heavy curtain blocking sunlight. When your home’s air conditioning system kicks on during a scorching July, it circulates dry dust that settles directly on your foliage. This layer physically blocks the microscopic pores called stomata that your plants use to breathe.

    If they can’t breathe or get light, photosynthesis plummets. They won’t grow beautifully. They just sit there, stagnant.

    Dirty leaves are also a five-star resort for pests. Spider mites absolutely love dry, dusty environments. By knowing how to clean plant leaves regularly, you literally wipe out their habitat before an infestation takes over your living room.

    Personal Pro-Tip: In my years of maintaining tropical displays in drafty corporate offices, I noticed that plants near floor-level AC vents collect double the dust. If you can’t move the plant, you’ll need to clean its leaves every two weeks instead of monthly.

    Simple Methods: How to Clean Plant Leaves Safely

    Different plants need completely different treatments. You can’t treat a delicate fern the same way you treat a rugged rubber tree.

    The Faucet Rinse: How to Clean Small Plant Leaves Fast

    For your smaller potted friends like neon pothos or spider plants, the easiest path is a trip to the kitchen sink.

    1. Take the plant to your kitchen sink faucet.
    2. Wrap a plastic grocery bag around the base of the plant to cover the potting soil. This stops the dirt from washing away or getting waterlogged.
    3. Turn on the faucet to a gentle, lukewarm spray. Avoid cold water! Cold water shocks tropical roots.
    4. Gently rinse the foliage, letting the dust wash down the drain.
    5. Leave it in the sink for an hour to drip-dry before returning it to its saucer.

    Personal Pro-Tip: Never use the high-pressure setting on your faucet nozzle. I once saw an enthusiastic collector blast half the foliage off a fragile trailing plant because they used the “jet” setting. Keep it soft.

    The Damp Cloth Routine: How to Clean Plant Leaves of Large Varieties

    Big, statement plants like Bird of Paradise or Rubber Trees require a hands-on approach.

    Get a high-quality microfiber cloth. Dampen it with lukewarm water and wring it out completely. It should be damp, not dripping.

    Support each individual leaf from underneath with your palm. Wipe gently from the base of the leaf outward to the tip. If you don’t support the leaf, the pressure of your hand can easily snap the stems.

    Personal Pro-Tip: Keep a couple of cloths handy. If you use the same dirty rag on every single plant, you risk spreading invisible fungal spores or hidden pest eggs from one pot to your entire collection. Wash your rags between uses.

    Common Mistakes People Make When Trying to Clean Plant Leaves

    Common Mistakes People Make When Trying to Clean Plant Leaves
    Common Mistakes People Make When Trying to Clean Plant Leaves

    The absolute biggest mistake I see across the US is the use of commercial “leaf shine” products.

    People love that artificial, oily gloss. But those products contain waxes and petroleum distillates that completely clog the plant’s pores. It turns the leaf into a sticky dust-magnet. Within two weeks, your plant looks filthier than it did before. Just use plain water or a highly diluted natural mixture.

    Another massive blunder is ignoring your indoor climate. If you clean your plants in the middle of winter when your home heater is blasting, or in summer under heavy air conditioning, don’t leave the wet plants directly in front of the vents. Cold drafts on wet leaves cause unsightly brown spotting and cell collapse.

    Finally, using heavy well water or highly chlorinated city water can leave nasty white crusts on the foliage. Those are calcium and mineral deposits. If your local water is hard, use distilled water or add a tiny splash of lemon juice to dissolve the minerals.

    Personal Pro-Tip: If you see white, chalky rings on your leaves after they dry, stop using raw faucet water. Switch to rainwater or filtered water for your wiping routine. It makes a night-and-day difference in the natural sheen of the foliage.

    Troubleshooting Bad Reactions After Wiping Your Plants

    Did your plant throw a tantrum after its bath? Let’s figure out what went wrong.

    • Yellowing leaves a few days later: You likely accidentally soaked the potting soil during the cleaning process, causing temporary root suffocation. Let the potting soil dry out completely before watering again.
    • Brown, crispy edges: This happens if you use harsh dish soaps or vinegar mixtures that are too strong. The acid or chemicals burn the delicate outer tissue. Stick to plain water or specialty castile soap solutions.
    • Drooping stems: The water was probably too cold or too hot. Tropical plants hate thermal shock. Always match the water temperature to a comfortable room temperature.

    Personal Pro-Tip: If a leaf tears during cleaning, don’t panic. Just trim the jagged edge with clean scissors. The plant will be fine, though your pride might take a hit.

    Is Dusting Safe for Household Pets? A Quick Toxicity Check

    Is Dusting Safe for Household Pets A Quick Toxicity Check
    Is Dusting Safe for Household Pets A Quick Toxicity Check

    When you start wiping down your indoor jungle, you stir up things and change the environment.

    Many common houseplants like Monstera deliciosa, Philodendrons, and Dumb Cane (Dieffenbachia) contain insoluble calcium oxalate crystals. When you wipe these leaves, microscopic amounts of sap can get onto your hands or your cleaning towels.

    If your cat or dog likes to chew on wet things, they might find the damp clothes tempting. Always wash your cleaning tools immediately, and keep pets out of the room while you work to prevent accidental ingestion or skin irritation.

    Personal Pro-Tip: I keep a spray bottle of highly diluted neem oil nearby when cleaning toxic plants. Pests hate it, and the bitter taste naturally discourages curious cats from taking a bite out of the freshly cleaned leaves.

    Frequently Asked Questions About How to Clean Plant Leaves

    Q1Can I use mayonnaise to make plant leaves shiny?

    Please, no. This is an old-school myth that won’t die. Mayonnaise contains oils and fats that spoil, emit a terrible odor over time, clog leaf pores, and attract fruit flies like crazy. Stick to a damp cloth.

    Q2How often should I clean my indoor plants?

    A good rule of thumb for most US homes is once a month. If you live in an arid region like USDA Zone 9 or 10 in the Southwest where dust storms or desert winds are common, you might need to increase this to every two weeks.

    Q3Can I use dish soap to wash the leaves?

    You can, but it must be incredibly diluted. One or two drops of a mild, clear dish soap in a half-gallon of water is plenty. Heavy detergents will strip the protective waxy cuticle off the foliage, leaving it vulnerable to diseases.

    Q4Should I clean the underside of the leaves too?

    Yes! While dust mostly settles on the top, pests like spider mites, thrips, and mealybugs exclusively build their empires on the undersides of leaves. Wiping the bottoms breaks up their breeding cycles.

    Q5Is it safe to put my houseplants outside in the rain to clean them?

    It depends entirely on your USDA Hardiness Zone and the season. If it’s a warm Spring day in Zone 7 or 8 and the rain is gentle, your plants will love the natural rinse. But if it’s chilly, or if the summer sun comes out immediately after the rain, you risk freezing the roots or burning the wet leaves.

    Q6What happens if I don’t clean my plant’s leaves?

    Your plant will slowly starve for light. Growth will stunt, the vibrant green colors will fade to a dull grey-green, and the plant will become highly susceptible to devastating pest outbreaks.

    Q7Can I use vinegar to remove hard water spots from leaves?

    Yes, but use it sparingly. Mix one teaspoon of white vinegar into a quart of distilled water. The mild acidity dissolves the mineral crust without harming the plant, but never apply this solution under direct, hot sunlight.

    Final Thoughts

    Cleaning your plants isn’t just about making your living space look like an interior design magazine. It’s basic healthcare for your green companions. Spending twenty minutes a month wiping down your collection pays huge dividends in new growth, brighter colors, and a pest-free home. Grab a soft cloth, turn on the faucet, and give your plants the breath of fresh air they deserve.

  • The Ultimate American Guide to Growing a Healthy Pittosporum Plant

    The Ultimate American Guide to Growing a Healthy Pittosporum Plant

    If you want a dependable, gorgeous evergreen shrub that can take a beating from coastal salt or survive a hot southern summer, the Pittosporum plant is your absolute best option. I have spent years putting these woody shrubs into both expansive backyard landscapes and tight patio containers. They are incredibly versatile, and below is my raw, honest breakdown of how to make sure your plant flourishes without the usual headaches.

    Quick Care Cheat Sheet for Your Pittosporum Plant

    For those who just want the fast facts before heading out to the local nursery, here is the basic care framework.

    Care FactorRequirements
    USDA Hardiness ZonesBest in Zones 8 through 11
    Light ExposureFull sun to partial shade (Variegated types love afternoon shade)
    Watering ScheduleDeeply weekly during dry spells; very drought-tolerant once established
    Ideal Soil TypeWell-draining soil (Hates wet feet!)
    Container SubstrateHigh-quality, well-aerated potting soil
    Major DislikesSoggy roots, sub-zero winter blasts, and direct air conditioning drafts

    Personal Pro-Tip: Don’t treat container-grown varieties like yard shrubs. If you bring one indoors for the winter, place it far away from your home heating vents or cold entryways.

    What Is a Pittosporum Plant and Where Does It Grow Best?

    What Is a Pittosporum Plant and Where Does It Grow Best
    What Is a Pittosporum Plant and Where Does It Grow Best

    Often referred to as Mock Orange or Japanese Laurel, the pittosporum plant is native to eastern Asia but has found a massive fan base across the United States. I see them everywhere from the coastal Carolinas down to Florida, and all across Texas and California. They feature leathery, glossy leaves that look great 365 days a year. In the Spring, they burst with tiny white or cream flowers that smell exactly like orange blossoms.

    If you live in USDA Hardiness Zones 8 to 11, you can leave this shrub in the ground all year.

    For folks living up North in Zone 7 or lower, you will need to treat this as a container plant. Bring it inside before the first hard freeze hits in the Fall.

    Personal Pro-Tip: When I plant these along windy coastal property lines in the South, I always give them extra space. The sea breeze is great, but they need room to breathe to avoid trapped humidity.

    Common Mistakes Americans Make with the Pittosporum Plant

    Look, I see the same three mistakes over and over again in American yards.

    First, people plant them in heavy clay or low spots where rainwater pools. If the roots sit in water, the plant will rot and die. It’s that simple.

    Second, folks who grow them in pots on patios often use regular garden soil. Never do that. Always use a loose, high-quality potting soil from the garden center to ensure proper drainage.

    Third, is the indoor climate issue. When people bring a potted pittosporum plant inside for the winter, they tend to park it right under an air conditioning or heating vent. The continuous blast of dry air sucks the moisture right out of the leaves, causing a massive leaf drop.

    Personal Pro-Tip: If your home’s central air conditioning blasts a dry draft directly onto your indoor greenery, move your pots to a corner or an enclosed porch. They like humidity, not forced air.

    Troubleshooting Common Pittosporum Plant Issues

    Troubleshooting Common Pittosporum Plant Issues
    Troubleshooting Common Pittosporum Plant Issues

    When something goes wrong, the leaves will tell you immediately. Here is what my decades of dirt-under-the-fingernails experience has taught me to look for:

    Leaf Turning Yellow?

    This is almost always a drainage warning. Pop your head down and look at the ground. Is the soil muddy? If it’s a potted plant, did you forget to empty the saucer under the pot? Stop watering immediately and let the top two inches of potting soil dry out completely. If it’s in the ground, you might need to transplant it to a higher mound.

    Brown Tips on Leaves?

    This usually signals a lack of water during intense summer heatwaves, or it means the water you are using from the outdoor faucet has a high salt content. Give the plant a slow, deep soak right at the base of the stem early in the morning. Avoid overhead watering, which triggers fungal spots.

    Sooty Mold or Sticky Residue?

    If the leaves look shiny and sticky, or if a black soot-like fungus is spreading, you have a pest problem. Aphids, scale insects, or mealybugs are sucking the sap out of your plant. Grab a bottle of neem oil or insecticidal soap and spray the entire plant thoroughly, making sure to hit the undersides of the leaves.

    Personal Pro-Tip: Always check the drainage holes in your container before doing anything drastic. If they are clogged with root debris, clear them out with a stick to let the water escape.

    Toxicity Warning: Is the Pittosporum Plant Safe for Pets?

    Toxicity Warning Is the Pittosporum Plant Safe for Pets
    Toxicity Warning Is the Pittosporum Plant Safe for Pets

    Good news for pet parents. According to the ASPCA, the Japanese pittosporum plant is classified as non-toxic to dogs, cats, and horses.

    You do not have to panic if your puppy decides to chase a lizard into the middle of the bush.

    With that said, I always tell my clients to discourage their animals from chewing on the foliage. Ingesting large quantities of any dense, leathery leaf can cause a mild upset stomach or vomiting simply because it is tough for their digestive tract to break down.

    Also, the seeds can be quite sticky, so keep an eye out if your long-haired cat likes to lounge under the branches.

    Personal Pro-Tip: Even though it’s safe, my golden retriever loves to push his tennis ball deep into our backyard hedge. I always wash the sticky flower sap off his fur with regular pet soap so it doesn’t cause mats or tangles.

    Frequently Asked Questions About the Pittosporum Plant

    Q1. Can you grow a pittosporum plant indoors?

    Yes, you can, but it requires a lot of light. Place it by your brightest south-facing window. You also need to watch out for the dry air caused by winter heating or summer AC units; using a humidifier nearby helps immensely.

    Q2. How often should I water a newly planted shrub?

    For the first growing season, water it deeply twice a week if it doesn’t rain. Once those roots stretch out into the surrounding soil, it becomes highly drought-tolerant and can usually rely on natural rainfall.

    Q3. Why are the leaves on my variegated variety turning completely green?

    This is called reversion. Sometimes the plant decides to produce solid green leaves because they are better at photosynthesizing light. Whenever I see a solid green branch popping out of a variegated bush, I snip it off at the base immediately to keep the pattern uniform.

    Q4. When should I prune my pittosporum plant?

    Always trim it right after it finishes blooming in the late Spring or early Summer. If you prune it too late in the Fall or winter, you will accidentally cut off all of next year’s flower buds, missing out on that incredible fragrance.

    Q5. What is the best fertilizer to use?

    Honestly, they aren’t heavy feeders. I usually throw a balanced, slow-release granular fertilizer around the base of the plant in early Spring. That gives it all the nutrients it needs for the entire growing season.

    Q6. Can it handle frost?

    stablished bushes are pretty tough and can easily handle a light frost down to 20°F. However, if a severe freeze is on the horizon, it’s best to throw a burlap sack or frost cloth over the foliage to protect those delicate tips from harsh winter windburn.

    Q7. Why does my plant have white, cottony blobs on the stems?

    Those are mealybugs. They look like tiny pieces of cotton and love to hide in the joints of the branches. Blast them off with a sharp stream of water from your garden faucet, then treat the area with horticultural oil.

    Personal Pro-Tip: When taking cuttings to propagate new starts in late summer, use clean pruning shears dipped in rubbing alcohol. It prevents the accidental spread of fungal leaf spot from branch to branch.

    Final Thoughts on Growing the Pittosporum Plant

    If you want a low-maintenance, architecturally beautiful evergreen that won’t require constant babysitting, you cannot go wrong with this selection. Just give it plenty of sunshine, ensure the water flows away from the roots, and protect it from harsh indoor vents. It will easily reward you with decades of structure and intoxicating springtime fragrances.
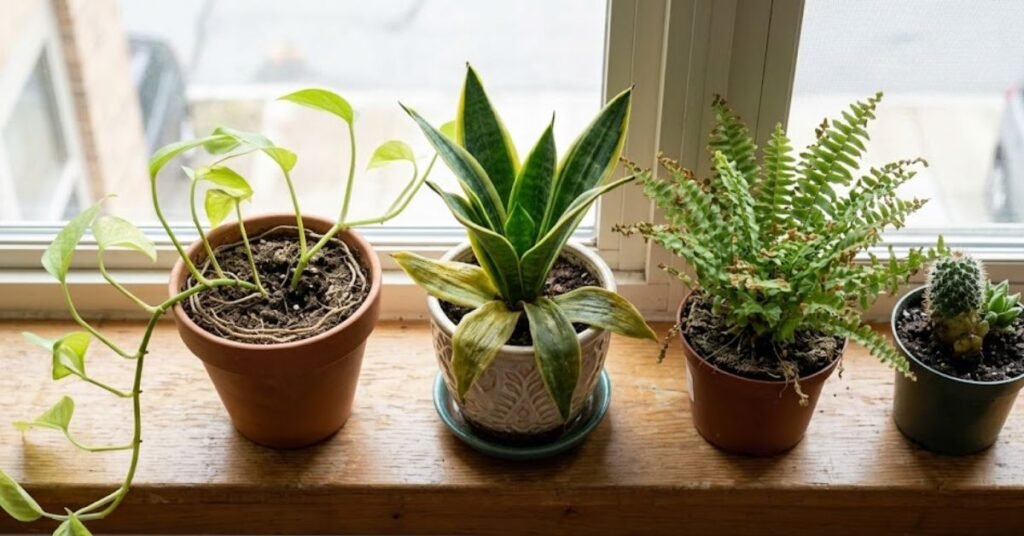
    Personal Pro-Tip: If you’re still on the fence about choosing a specific variety, look for ‘Wheeler’s Dwarf’ if you have a small yard, or grab ‘Variegatum’ if you need a splash of creamy white color to brighten a dark corner of your property.