Category: Plant Care & Gardening

  • How to Style and Pack a Bowl Planter Without Killing Your Plants

    How to Style and Pack a Bowl Planter Without Killing Your Plants

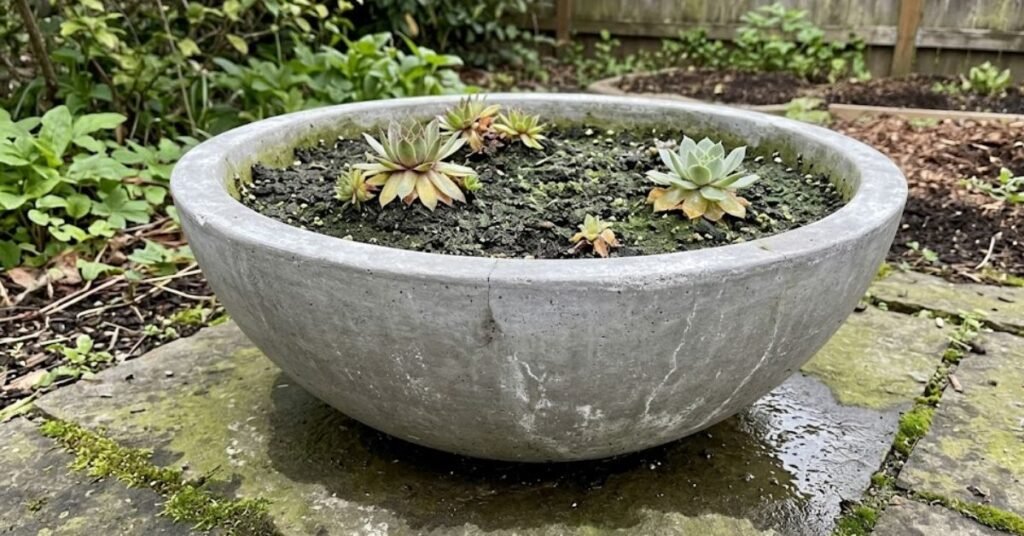
    I love designing in a low profile bowl planter. There is something incredibly satisfying about a wide, shallow arrangement sitting on a farmhouse coffee table or anchoring a backyard patio table. But over the years, I’ve seen so many folks completely tank their green beauties because they treat a wide bowl planter like a regular, deep nursery pot. They require a completely different approach to watering, soil depth, and airflow. If you want your arrangements to survive the season—and look spectacular doing it here is the unvarnished truth on how to manage them.

    Quick Care Guide for Shallow Containers

    Care FactorTarget Setup for Low Profile Dishes
    Drainage NeedsNon negotiable. Drill a hole or use a strict volcanic rock reservoir base.
    Soil MediumLight, airy potting soil mixed heavily with perlite or coarse pumice.
    Watering RoutineSoak thoroughly at the kitchen faucet, then let dry 100% (for succulents).
    Indoor PlacementKeep clear of direct blasts from central AC vents or heating units.
    Outdoor PlacementMove indoors or under cover during heavy Spring downpours if undrained.

    Why the Bowl Planter Shape Changes Everything

    Why the Bowl Planter Shape Changes Everything
    Why the Bowl Planter Shape Changes Everything

    The physics of a wide, shallow container differ wildly from a standard vertical pot. Water behaves differently here. In my fifteen years of working in greenhouses and home gardens, I’ve noticed that most root rot happens not because people water too much, but because the water has nowhere to go in a shallow space.

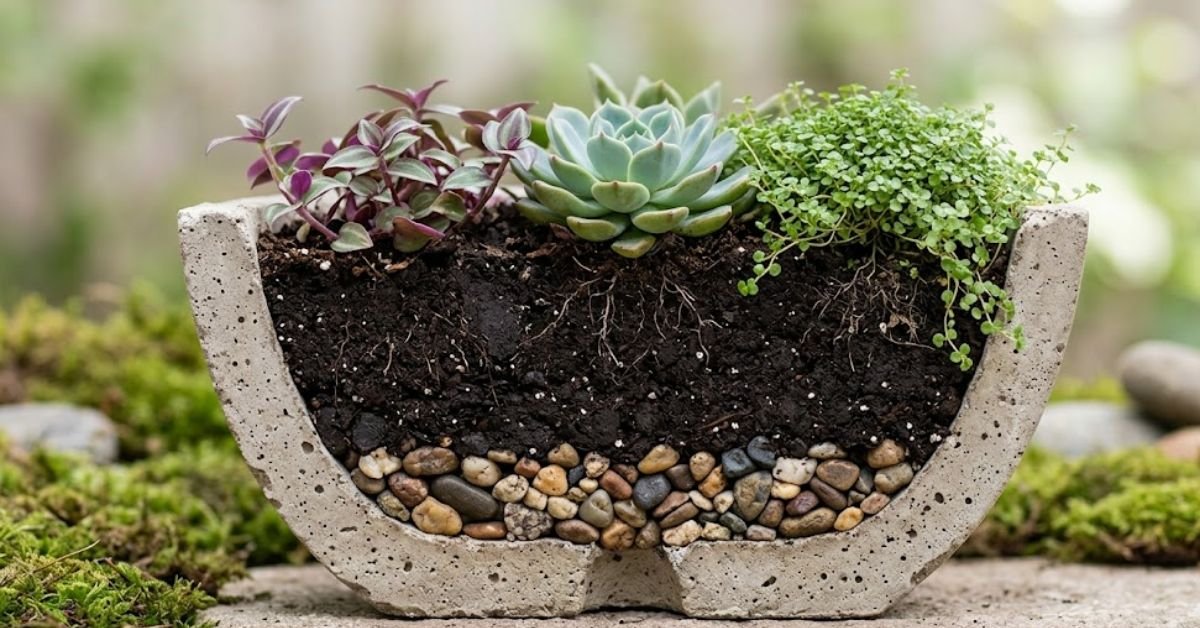
    When you use a bowl planter, the soil layer is thin. This means the root systems of your plants sit much closer to the bottom of the vessel, right where excess moisture tends to pool. If your container lacks proper drainage, those roots end up sitting in a stagnant marsh. They suffocate, turn to mush, and your plant dies before you even realize what went wrong.

    Personal Pro-Tip: If you fall in love with a gorgeous ceramic piece at a local garden center that doesn’t have a drainage hole, don’t panic. Grab a diamond-tipped tile bit from the hardware store, flip the container upside down on an old towel, puddle a little water on the base to keep the bit cool, and drill slowly. This simple trick saves plants.

    Picking the Right Mix for Your Low-Profile Bowl Planter

    Never grab cheap, heavy dirt from the backyard or dense, moisture-retaining bags for these arrangements. You need premium US potting soil as your base, but you have to modify it.

    Because a bowl planter holds a smaller volume of soil spread over a wider surface area, it can dry out incredibly fast on top while remaining muddy at the very bottom. To combat this uneven drying, I always mix my potting soil with roughly 30% coarse perlite or chicken grit. This creates tiny air pockets, ensuring the roots can breathe even after a heavy watering session.

    Personal Pro-Tip: Before putting an ounce of soil into your wide dish, cover the drainage hole with a single layer of mesh drywall tape or a standard coffee filter. This keeps your airy potting soil mix from washing out onto your nice wooden deck or kitchen counter every time you water.

    Designing a Gorgeous Arrangement in a Shallow Bowl Planter

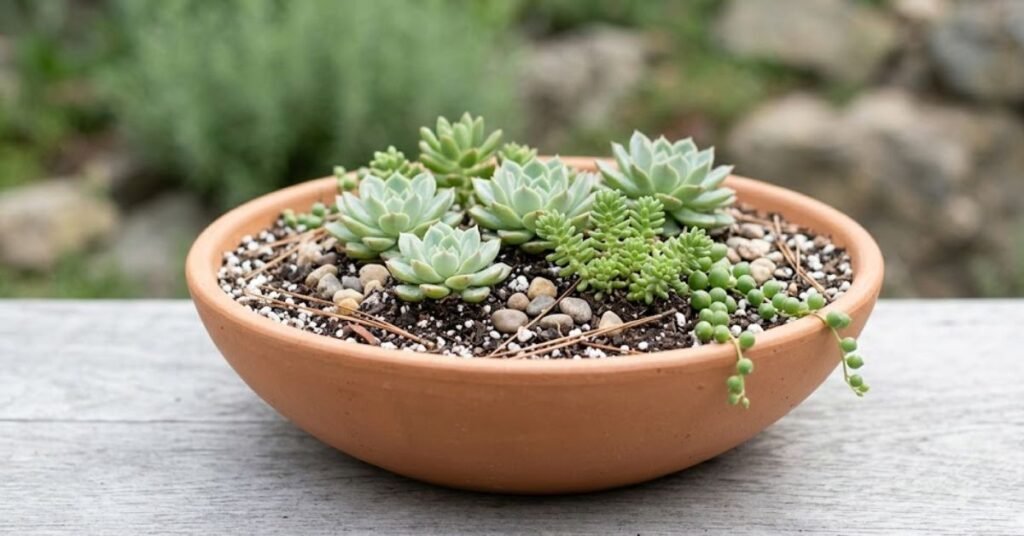
    When designing inside a bowl planter, you want to follow the classic “Thriller, Filler, Spiller” framework, but scaled down for height. Put your tallest, most eye-catching plant dead center, surround it with shorter, textured ground covers to fill the gaps, and place cascading varieties right along the inner lip so they tumble over the edges.

    For an outdoor succulent dish in USDA Hardiness Zone 7 or warmer, I like to use a stunning, chunky Echeveria as my centerpiece. Surround it with low-growing sedums, and let some string of pearls or calico kitten cascade over the rim. If you are building an indoor version for a shady dining room, swap the sun-loving succulents for low-profile tropicals. Dwarf ferns, nerve plants (Fittonia), and creeping fig work beautifully together because they share the same moisture requirements.

    Personal Pro-Tip: Do not crowd your plants tightly just to make the arrangement look full on day one. When I first started creating these, I packed the plants side-by-side for instant gratification. They choked each other out within two months. Leave at least an inch of breathing room between each plant so they can naturally adapt and grow into the space.

    Common Mistakes Americans Make with a Ceramic or Concrete Bowl Planter

    Common Mistakes Americans Make with a Ceramic or Concrete Bowl Planter
    Common Mistakes Americans Make with a Ceramic or Concrete Bowl Planter

    Living in modern American homes means dealing with artificial climates. Our homes are packed with environmental hazards that can destroy a beautiful arrangement in weeks.

    The No-Drainage Trap

    Buying a solid concrete dish with no hole and trying to compensate by adding a layer of gravel at the bottom is a recipe for disaster. That gravel doesn’t create drainage; it just creates a hidden, stagnant pool of toxic water that sours the soil and rots roots.

    Forgetting About the Air Conditioner Airflow

    We blast our central AC systems during hot July days, which creates sharp, freezing drafts of dry air. If you place your tropical bowl planter directly under or near an active AC vent, the soil dries out unevenly, the leaves get crispy, and the plant drops its foliage out of sheer shock.

    Personal Pro-Tip: Stop using a tiny measuring cup to water your containers on a strict schedule. Instead, carry the entire arrangement over to your kitchen faucet or utility sink. Soak the soil thoroughly until water pours freely out of the bottom. Let it sit in the sink for twenty minutes to drip dry completely before returning it to your tabletop.

    Troubleshooting Issues in Your Round Bowl Planter

    Even seasoned gardeners run into issues when dealing with shallow setups. If your arrangement starts looking sad, use these quick visual cues to fix the problem before it’s too late.

    • Leaves Turning Translucent and Mushy: This is a clear indicator of root rot from overwatering. The roots are drowning at the bottom of the container.
    • Crispy, Brown Leaf Tips: This usually happens to indoor tropical dishes when the humidity drops too low or if you are using heavily chlorinated tap water.
    • Plants Stretching Out and Looking Skinny: Your plants are starving for light. They are losing their compact shape because they are desperately reaching toward the nearest window.

    Personal Pro-Tip: If you notice a succulent leaf turning that dreaded mushy yellow color, pluck it off immediately and stop watering. Move the entire container to a brighter spot with better natural airflow and leave it alone for two full weeks. Caught early enough, a strict dry spell can reverse the damage.

    Is Your Bowl Planter Safe for Pets?

    Is Your Bowl Planter Safe for Pets?
    Is Your Bowl Planter Safe for Pets?

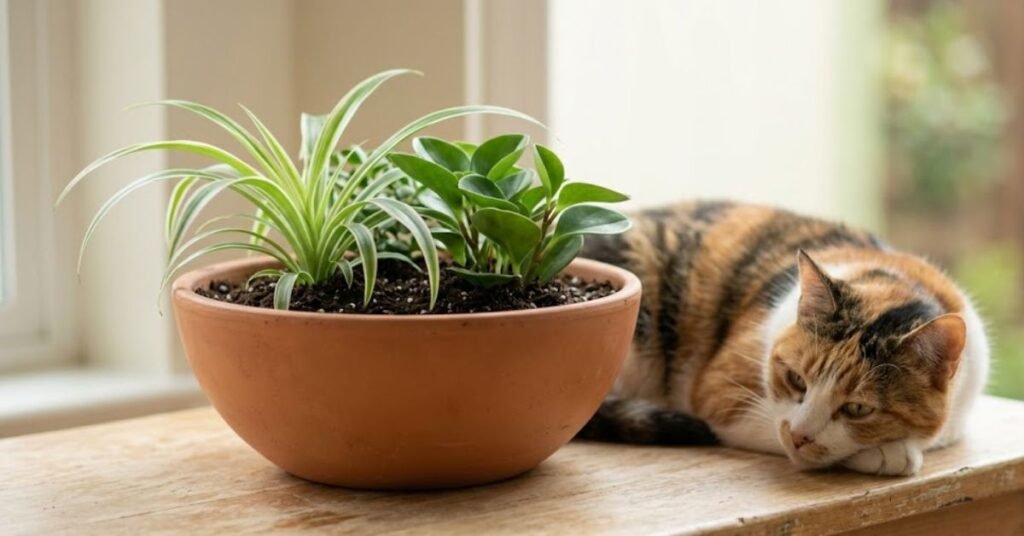
    As pet owners, we have to be incredibly careful about what we bring indoors. Many common plants used in low profile dish arrangements can cause severe stomach upset or worse for cats and dogs.

    If your pets like to chew on greenery, completely avoid using Jade plants (Crassula ovata) or Aloe varieties in your bowl planter. Instead, opt for completely pet-safe choices like Haworthia, Burro’s Tail, or Hens and Chicks (Sempervivum). For indoor tropical setups, use safe options like Boston ferns and nerve plants.

    Personal Pro-Tip: Cats are naturally drawn to wide, shallow containers because the soil looks like a litter box or a comfortable bed. To keep my curious tabby out of my display dishes, I wedge a few large, decorative river rocks or pointy pinecones into the open soil spaces between the plants. It ruins their landing zone, and they leave the display alone.

    Frequently Asked Questions

    Q1Can I grow kitchen herbs in a shallow bowl planter?

    Yes, but pick the right ones. Herbs with shallow root systems like chives, thyme, and oregano do fantastic in a wide, shallow dish. Avoid deep-rooted herbs like rosemary or dill, which will quickly become root-bound and stunted in a low-profile container.

    Q2How do I water a dish that doesn’t have a drainage hole?

    If you absolutely cannot drill a hole, you have to weigh the pot or use a moisture meter. Water incredibly sparingly—using about a quarter of the container’s total volume in water—and wait until the soil is bone dry all the way to the bottom before adding another drop.

    Q3Why did my outdoor concrete bowl crack over the Winter?

    If you live in Zone 6 or colder, water gets trapped inside the porous concrete walls of the container during late Fall. When the first hard freeze hits, that trapped water expands into ice, fracturing the structure of the pot. Always bring concrete pieces into a garage or shed before the first frost.

    Q4Should I put a layer of rocks at the bottom of the pot?

    No. This is an old gardening myth that has been debunked by soil science. Placing rocks at the bottom of a shallow container actually raises the water table closer to the roots, making them more likely to rot. Keep the soil mix consistent from the top of the pot to the bottom.

    Q5How often should I fertilize an arrangement like this?

    Because these containers hold a limited amount of soil, nutrients wash out quickly. During the active Spring and Summer growing seasons, feed your plants once a month with an organic liquid fertilizer diluted to half the strength recommended on the bottle.

    Q6Why are my plants growing toward one side of the dish?

    They are chasing the sun. If your container sits on a windowsill or near a single light source, the plants will naturally lean toward it. Give the pot a quarter-turn every week to keep the growth balanced, even, and upright.

    Q7How do I know when it’s time to repot the arrangement?

    Look at the bottom hole. If you see roots pushing out of the drainage opening, or if water runs straight through the pot without soaking into the soil, the plants have run out of room. It is time to break them apart and refresh the container.

    Final Thoughts

    Mastering the use of a wide, low dish just takes a minor shift in how you view water and soil space. Once you give up the habit of calendar-based watering and ensure your roots aren’t sitting in a hidden puddle, these arrangements become some of the easiest, most striking features in the home. Pick your plants based on your home’s natural light, watch out for those drying AC vents, and enjoy the process of creating a miniature ecosystem right on your tabletop.

  • The Ultimate Guide to the Summer Beauty Allium Plant: A Tough, Gorgeous Perennial for American Gardens

    The Ultimate Guide to the Summer Beauty Allium Plant: A Tough, Gorgeous Perennial for American Gardens

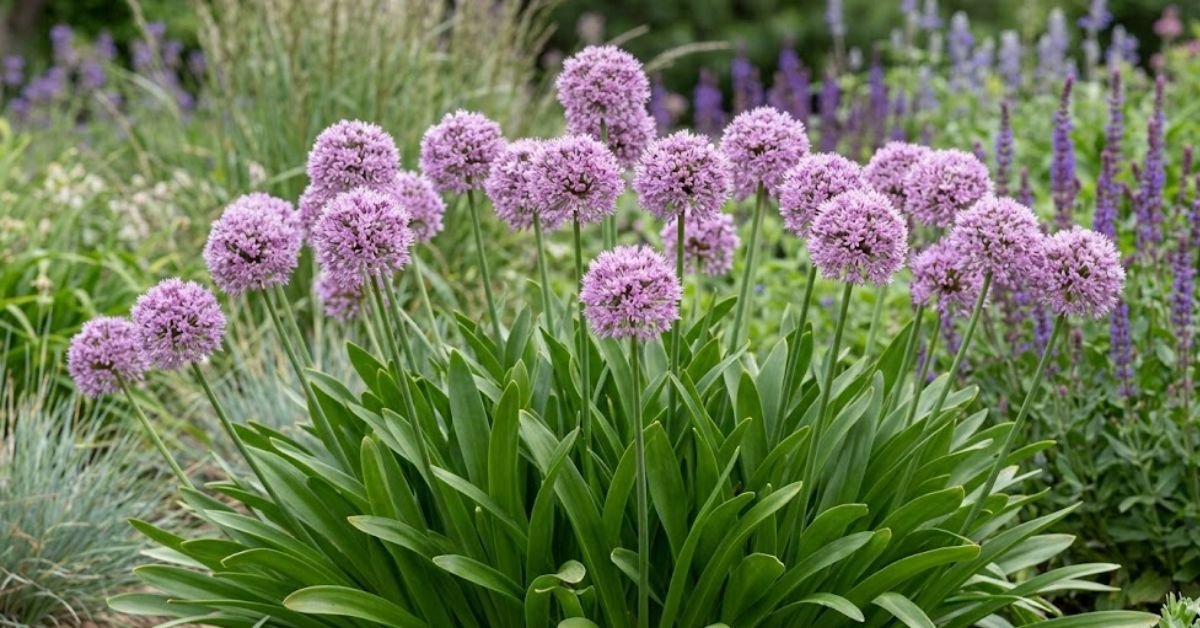
    If you’re tired of high-maintenance perennials that drop dead the moment a summer heatwave hits, you’re going to love this plant. While most spring-blooming bulbs leave behind messy, yellowing foliage by June, the summer beauty allium plant (Allium lusitanicum ‘Summer Beauty’) does the exact opposite. It stays crisp, green, and gorgeous all year, culminating in stunning lavender-pink globes that pollinators go absolutely crazy for.

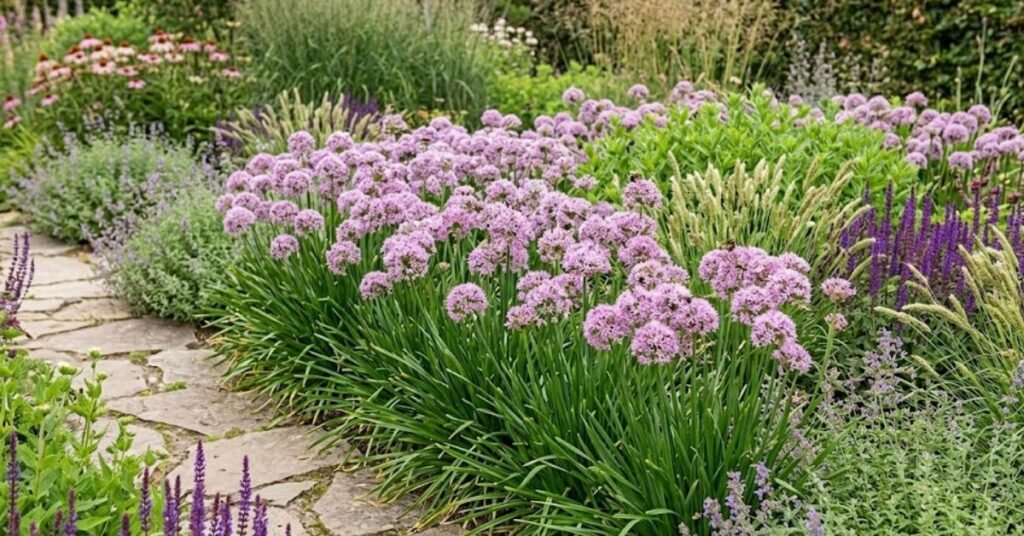
    I first planted a row of these along my walkway about five years ago, and they’ve become the absolute backbone of my mid-summer garden landscape.

    Here’s the quick care breakdown if you just want the fast facts before we jump into the details.

    Quick Care Summary

    Care CategoryRequirements & Details
    Common NameSummer Beauty Allium, Ornamental Onion
    USDA Hardiness ZonesZones 4 to 9 (Handles cold northern winters and hot southern summers)
    Sunlight NeedsFull sun to light afternoon shade (6+ hours of direct sun is best)
    Watering NeedsAverage; highly drought-tolerant once established
    Soil PreferenceLoose, sandy, or loamy soil. Must drain perfectly
    Foliage Height12 to 18 inches tall; flower stalks reach up to 20 inches
    Toxicity WarningHighly toxic to dogs and cats (Keep away from curious pets)

    Why the Summer Beauty Allium Plant is a Game-Changer for Your Yard

    Why the Summer Beauty Allium Plant is a Game Changer for Your Yard
    Why the Summer Beauty Allium Plant is a Game Changer for Your Yard

    Unlike the giant globes that pop up in early spring and quickly turn into brown, crispy eyesores, this specific variety acts much more like a traditional clumping perennial. The foliage emerges in early April as a lush, glossy mound of strap-like green leaves. It holds that clean look all through the dog days of July and August when other plants start looking completely burned out.

    The flowers themselves are beautiful two-inch spheres of soft lavender-pink. They sit on top of perfectly stiff, upright stems that don’t flop over after a heavy summer thunderstorm.

    Personal Pro-Tip: Don’t cut the dried flower heads off when the color fades in late August. I leave mine standing all through the winter. They dry out into beautiful tan spheres that catch the morning frost, adding great structural interest to a boring, snowy winter yard.

    Ideal Growing Conditions and USDA Zones for This Ornamental Onion

    This perennial is incredibly tough. It can reliably survive winters down in USDA Zone 4 (think Minnesota or Maine) and withstands the blistering heat all the way down to Zone 9.

    To get the maximum amount of round purple blossoms, you want to put this plant in full sun. In my own yard, the clumps that get blasted with eight hours of intense midday sun produce twice as many flowers as the ones I mistakenly tucked under the light shade of my oak tree. If you live in an exceptionally scorching southern climate like parts of Texas or Georgia, a little bit of late afternoon shade will keep the leaf tips from looking scorched.

    Personal Pro-Tip: If you are starting these as young container plants from a local nursery in the spring, give them a deep soak right out of the pot. It helps the root system settle into your native soil before the real summer heat hits.

    Watering Rules to Avoid Root Rot in Your Summer Beauty Allium Plant

    When you first put your new plants in the ground, water them thoroughly about once a week to help the roots establish. Once those roots dig deep into the earth, this perennial becomes remarkably drought-tolerant. You can practically forget about it.

    During a typical American summer, normal rainfall is usually more than enough. If you hit a severe dry spell where it doesn’t rain for three weeks, turn on your garden hose or outdoor faucet and give the base of the plants a good, deep soak. But always let the ground dry out completely before you even think about watering them again.

    Personal Pro-Tip: If you have an automatic lawn sprinkler system that fires off every single night, do not plant this allium nearby. Constant shallow watering keeps the bulbous root plates perpetually soggy, which is a fast track to fungal rot.

    Common Mistakes Americans Make with This Perennial

    Common Mistakes Americans Make with This Perennial
    Common Mistakes Americans Make with This Perennial

    I see many well-meaning gardeners make the same few mistakes with this variety, often treating it like a delicate indoor houseplant rather than the rugged outdoor survivor that it is.

    Treating It Like an Indoor Houseplant Near Air Conditioning Vents

    Sometimes folks try to grow these inside a sunny porch or bring them indoors during a heatwave. If you keep them inside an air-conditioned room, the dry, artificial airflow from your AC vents will rapidly sap the humidity out of the air and cause the flower buds to blast and drop before they ever open. Keep them outside where they belong; they love the natural summer heat.

    Planting in Heavy Clay Without Amendments

    Plunking a summer beauty allium plant straight into raw, unamended clay is the number one reason they fail to return the following spring. The roots drown during the winter thaw. Always mix in grit or build a raised bed if your yard is mostly heavy clay.

    Personal Pro-Tip: If you notice your soil holds onto water for hours after a rainstorm, build a small, simple mounded earth bed or rock garden. Elevating the plant just 6 inches above the surrounding ground completely changes the drainage game.

    Troubleshooting Common Issues with the Summer Beauty Allium Plant

    This variety is almost entirely pest- and disease-free because the faint onion scent of the foliage keeps bugs, deer, and rabbits far away. But you might still run into a couple of visual issues.

    Leaf Tips Turning Yellow Prematurely

    If the long, strappy leaves start turning bright yellow in the middle of summer, check the moisture level of your soil. Nine times out of ten, yellowing foliage means the ground is way too wet. Hold off on using the outdoor faucet and let the soil dry out.

    Crispy, Dried Brown Tips on the Leaves

    While some older alliums naturally get ugly, brown foliage right as they bloom, ‘Summer Beauty’ usually stays remarkably green. If your leaf tips look like they’ve been singed by a lighter, it’s a sign of extreme drought combined with scorching winds. Give the soil a deep, thorough watering at dawn.

    Personal Pro-Tip: If you see any mushy, foul-smelling growth at the very base of the stems, it’s a sign of a fungal issue. Snip away the damaged leaves immediately and dust the crown of the plant with a little bit of organic garden sulfur to stop the fungus from spreading.

    Is the Summer Beauty Allium Plant Safe for Cats and Dogs?

    Is the Summer Beauty Allium Plant Safe for Cats and Dogs
    Is the Summer Beauty Allium Plant Safe for Cats and Dogs

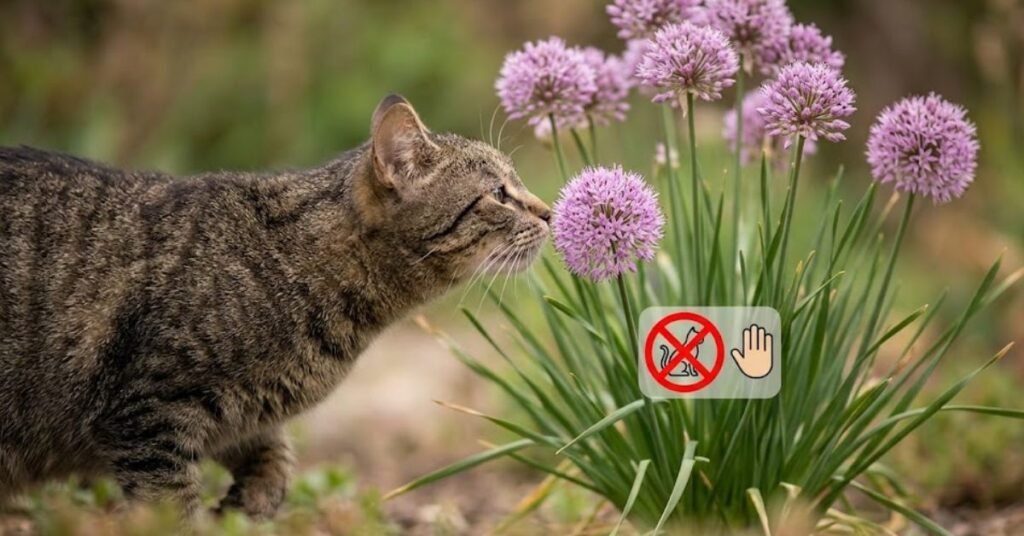
    This is an incredibly critical point for American pet owners: No, it is not safe. Because this plant belongs to the Allium genus, it contains specific compounds called disulfides and thiosulfates. If your dog or cat decides to chew on the onion-scented leaves or flowers, these toxins will damage their red blood cells, potentially causing a dangerous condition called hemolytic anemia.

    Signs of onion poisoning in pets include lethargy, pale gums, vomiting, and a racing heart rate. While the strong scent usually deters most animals from taking a bite, some curious puppies or indoor/outdoor cats might still nibble out of boredom.

    Personal Pro-Tip: If you have a dog that loves to dig or chew everything in sight, plant your alliums in the center of a wide garden bed surrounded by prickly companion plants like coneflowers. This creates a natural physical barrier that keeps your furry friends safe.

    Frequently Asked Questions About the Summer Beauty Allium Plant

    Q1. When is the best time of year to plant or divide the summer beauty allium plant?

    Spring or early fall are the absolute best times. Digging them up and splitting the clumps during the mild, cool days of autumn allows the roots to settle into the soil without having to battle the intense summer heat.

    Q2. Do I need to deadhead the spent globes after they finish blooming?

    You don’t have to. This specific variety is sterile, which means it won’t drop seeds and aggressively take over your entire garden. Deadheading is purely a personal stylistic choice. If you prefer a clean look, snip the stalks at the base; if you like winter texture, leave them alone.

    Q3. Why are the leaves on my summer beauty allium plant turning yellow early?

    Soggy soil is almost always the culprit. This plant needs to dry out between waterings. Double-check your garden beds to ensure water isn’t pooling around the root zone, and cut back on supplemental watering.

    Q4. Can I grow this ornamental onion in containers on my patio?

    Absolutely. They look fantastic in large terra cotta pots. Just ensure you use a lightweight potting soil and a container with substantial drainage holes so excess water can escape easily.

    Q5. How does this variety differ from the popular ‘Millenium’ allium?

    ‘Summer Beauty’ typically begins blooming a couple of weeks earlier than ‘Millenium’. It also grows slightly taller, features a slightly lighter, softer shade of lavender-pink, and has wider, glossier green leaves that hold their color incredibly well.

    Final Thoughts on Adding This Ornamental Onion to Your Landscape

    Adding the summer beauty allium plant to your yard is one of the easiest ways to guarantee dependable color and lush texture without tying yourself to a grueling maintenance routine. It steps up to the plate exactly when the rest of the garden starts to look tired and worn down by the August heat. Give it plenty of bright sunshine, keep its feet out of standing water, and it will reward you with gorgeous, pollinator-friendly blooms year after year.

    Personal Pro-Tip: Take a close look at the blooms on a sunny afternoon in July. You’ll see an absolute festival of native bumblebees and butterflies covering the globes. It’s one of the most rewarding sights for any backyard gardener.

  • The No-Nonsense Guide to Keeping a Purple Waffle Plant Vibrant and Alive

    The No-Nonsense Guide to Keeping a Purple Waffle Plant Vibrant and Alive

    I have spent over fifteen years working as a professional horticulturist, and I can tell you that few houseplants turn heads quite like the purple waffle plant (Strobilanthes alternata). Those deeply puckered, metallic-green leaves with their rich, bright purple undersides look almost otherworldly. They look like textured little waffles, hence the name.

    But here is the honest truth: this plant can be a dramatic little diva if you don’t understand what it wants.

    It is native to the tropical, warm jungles of Indonesia. When you drop it onto a living room side table in an American home with blasting air conditioning or dry winter radiators, it can go downhill fast.

    Don’t panic, though. Once you understand its basic rhythm, it is an incredibly rewarding plant to grow. Let’s look at exactly how to make it flourish in your space.

    The Purple Waffle Plant Fast Care Reference

    For those who just want the quick operating instructions before heading to the garden center, here is the baseline care routine.

    Care ComponentWhat It Actually Wants
    SunlightMedium to bright indirect light. Shield it from harsh afternoon sun.
    WateringConsistently moist potting soil. It hates drying out completely.
    Soil TypeRich, lightweight indoor potting soil blended with extra perlite.
    USDA ZonesHardy outdoors only in Zones 10–11. Grown indoors or as a summer annual elsewhere.
    Humidity NeedsHigh. Prefers 50% or more. Keep it away from dry air currents.
    Pet Toxicity100% Non-toxic to cats and dogs. Completely safe!

    Personal Pro-Tip: If you see this plant completely flatten out and collapse over the side of its pot like it just died, check the soil before you throw it away. It is famous for fainting dramatically when it gets thirsty. Pour some water from the faucet into the pot, and it will usually stand completely upright again within an hour.

    How Much Light Does a Purple Waffle Plant Need to Keep Its Color?

    How Much Light Does a Purple Waffle Plant Need to Keep Its Color
    How Much Light Does a Purple Waffle Plant Need to Keep Its Color

    Light is the secret to keeping those leaves looking intensely purple. In my years of growing the purple waffle plant, I have found that its colors quickly fade to a dull, washed-out green if it sits in a dark hallway or a dim corner. It needs energy to produce that beautiful metallic sheen.

    However, you have to be careful with window placement.

    Direct, hot sunlight through a clear glass pane will scorch those delicate, wrinkled leaves. It bleaches them white.

    The sweet spot is an east-facing window where it catches the gentle morning sun, or a few feet back from a bright south or west window. If you have a sheer curtain to filter the light, that is even better.

    [Sunlight Source] —> [Sheer Curtain] —> [Your Purple Waffle Plant]

    Personal Pro-Tip: Give the pot a quarter-turn every single week. Because it grows relatively fast during the active Spring and summer months, it will quickly lean toward the glass if you leave it in one position. Rotating it keeps the growth beautifully even and bushy.

    Master the Watering Routine for Your Purple Waffle Plant

    Watering is where most indoor gardeners get into trouble. A lot of generic plant advice tells you to let your houseplants dry out completely between waterings. If you do that here, your purple waffle plant will reward you with crispy, dead leaves.

    This plant wants its roots to stay consistently damp. Think of the texture of a kitchen sponge that you have thoroughly wrung out. That is the ideal moisture level.

    I check the pot every couple of days. Stick your finger an inch into the potting soil. If it feels like it is starting to dry out, take it to the kitchen sink and open the faucet. Soak the soil thoroughly until water drains out of the bottom holes.

    The Brutal Impact of Modern Air Conditioning on Tropical Foliage

    Our home HVAC systems are a major hurdle. In the summer, central air conditioning strips moisture from the air. In the winter, forced-air heating makes things bone-dry.

    Because the purple waffle plant loves high humidity, these dry air currents will quickly cause the edges of the leaves to turn brown and brittle. Keep your pot far away from any active vents, registers, or drafty windows.

    Personal Pro-Tip: If your home air is naturally dry, don’t waste your time misting the leaves with a spray bottle. The moisture evaporates in seconds and does nothing long-term. Instead, set the pot on a shallow tray filled with pebbles and water. As the water evaporates around the base, it creates a localized pocket of humid air that the foliage loves.

    Typical Mistakes That Kill This Metallic Beauty

    Typical Mistakes That Kill This Metallic Beauty
    Typical Mistakes That Kill This Metallic Beauty

    We often care for our plants a little too hard, or we treat every species exactly the same. Here is why Americans usually struggle with this specific tropical import:

    • Using containers without drainage: Planting it directly into a cute ceramic pot with no hole at the bottom. Water pools at the base, suffocating the roots and causing root rot.
    • Heavy yard dirt: Using dense outdoor dirt instead of a lightweight indoor potting soil. Outdoor dirt packs down like concrete in a pot, preventing the shallow roots from spreading out.
    • Ignoring the indoor seasons: Flooding the plant with fertilizer during the dark winter months. When growth naturally slows down in late Fall, the plant cannot use those nutrients, and they end up burning the root system.

    Personal Pro-Tip: When you are shopping for supplies, buy a bag of standard indoor potting soil and a small bag of perlite. Mix three parts potting soil with one part perlite. This creates a blend that holds the moisture the plant craves while letting the excess water drain away instantly.

    Troubleshooting Common Purple Waffle Plant Problems

    When this plant is unhappy, it lets you know immediately. You just have to learn how to read the signs and react quickly.

    Leaves Turning Yellow and Stems Soft

    If you notice the leaves losing their green and purple tones, turning a sickly yellow, and feeling mushy, you are overwatering. The roots are drowning. Pull the plant out of its pot and check them. Healthy roots are firm and tan; rotted roots are black, slimy, and smell foul. Cut away the dead roots and repot the plant into fresh, dry potting soil.

    Crispy, Brittle Brown Edges

    This is the opposite problem. It means either the humidity is too low or you are letting the potting soil stay dry for too long. Trim off the ugly brown parts with a sharp pair of scissors following the natural curve of the leaf. Then, increase your watering frequency and move the plant away from any dry drafts.

    Personal Pro-Tip: Don’t be afraid to prune this plant if it starts looking wild or leggy. During the peak Spring growing season, I regularly pinch off the very tips of the long stems using my thumb and forefinger. This forces the plant to branch out from the sides, making it look much thicker and fuller.

    Is the Purple Waffle Plant Safe for Cats and Dogs?

    Is the Purple Waffle Plant Safe for Cats and Dogs
    Is the Purple Waffle Plant Safe for Cats and Dogs

    Here is some fantastic news for pet parents: the purple waffle plant is completely non-toxic to both cats and dogs. The ASPCA officially lists it as safe.

    If your curious cat decides to bite the crinkly leaves or your dog knocks the pot over, you don’t need to make an emergency run to the vet. The plant won’t harm them.

    Of course, a heavy chewing session will ruin the look of your beautiful foliage, so it is still smart to keep it slightly out of reach on a high shelf or a heavy plant stand.

    Personal Pro-Tip: If your cat is obsessed with the texture of the leaves, try placing a few large, smooth river rocks on top of the exposed potting soil. This prevents them from digging in the dirt, which is usually what attracts pets to the container in the first place.

    Real Questions From the Houseplant Community

    1. Can I grow a purple waffle plant outside in the US?

    Yes, but only if you live in the tropical climates of USDA Hardiness Zones 10 or 11, like Southern Florida or Hawaii. For the rest of the country, it makes a great outdoor summer annual for a shaded patio, but you must bring it indoors before the night temperatures drop below 50°F in the Fall.

    2. Why is my plant losing its deep purple color on the underside of the leaves?

    This is almost always due to a lack of light. When the room is too dark, the plant stops producing the pigments that create that purple hue. Move it closer to a bright window with indirect sun to bring the vibrant colors back.

    3. How fast does this plant grow?

    Under the right conditions during Spring and summer, it is a moderate to fast grower. It grows as a low, spreading groundcover, so it will fill out a small 4-inch or 6-inch pot within a single season.

    4. Do I need to fertilize my purple waffle plant?

    Yes, but keep it light. Feed it once a month during the Spring and summer using a balanced liquid houseplant fertilizer diluted to half the strength recommended on the bottle. Stop feeding entirely during late Fall and winter.

    5. Why are the leaves on my plant turning white or looking bleached?

    Your plant is getting sunburned. This happens when it gets hit by intense, direct afternoon sunlight. Move it a few feet back from the window or place it behind a sheer curtain to protect the foliage.

    6. Can you grow a purple waffle plant in a terrarium?

    They are absolutely perfect for closed terrariums. Because they love high humidity, consistent moisture, and small spaces, they flourish in glass enclosures alongside mosses and ferns.

    7. How do I propagate this plant?

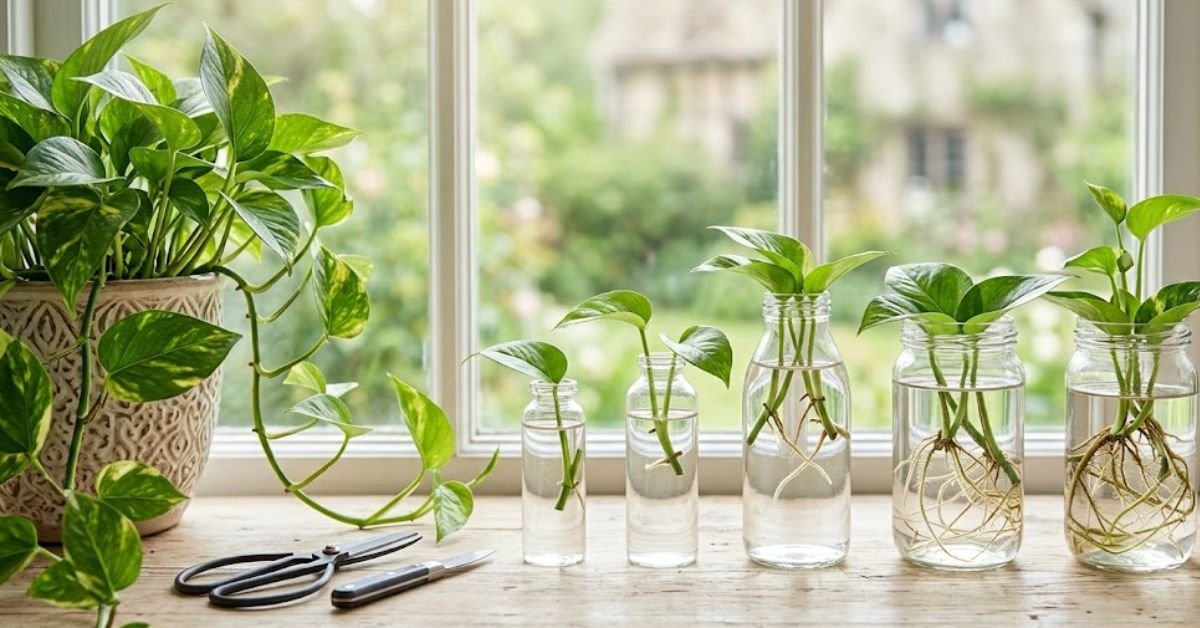
    It is incredibly simple. Cut a 4-inch piece of a healthy stem right below a leaf node, strip off the bottom leaves, and stick it into a small jar of clean water. It will start growing fresh white roots from the stem within two weeks. Once the roots are an inch long, pot it up in fresh potting soil.

    Final Thoughts

    The purple waffle plant might look high-maintenance with its intense colors and dramatic fainting spells, but it is actually one of the most expressive and rewarding houseplants you can own. Keep its potting soil damp, give it a bright room away from your AC vents, and you will enjoy a stunning splash of metallic purple for years to come.

  • The Real Talk Guide to Raising a Healthy Travel Palm Plant

    The Real Talk Guide to Raising a Healthy Travel Palm Plant

    I have grown everything from tiny desert succulents to towering tropical trees over my fifteen years in horticulture, and few things stop visitors in their tracks like a travel palm plant. Its dramatic, architectural layout looks like a massive living piece of mid-century modern art.

    But let’s clarify something right out of the gate: it isn’t an actual palm tree.

    Botanically, it is known as Ravenala madagascariensis, making it a close relative of the banana plant and the bird of paradise family. It earned its common nickname because its cupped stem bases collect rainwater, which weary travelers could theoretically drink in an emergency.

    If you just brought one home from your local greenhouse, you need to understand its distinct quirks before your indoor environment throws it for a loop. Let’s look at exactly how to keep this tropical giant happy in an American home.

    The Travel Palm Plant Quick Care Guide

    For the skimmers who want the core requirements fast, here is the baseline routine to keep your plant alive.

    Care ComponentThe Practical Requirement
    SunlightBlazing bright light. Direct sun is ideal.
    Watering RoutineKeep it evenly moist during warm seasons; let it dry out more in winter.
    Growing MediumLoose, chunkier indoor potting soil with great drainage.
    Outdoor HardinessUSDA Zones 10 and 11 only. Protect from freezes.
    HVAC SensitivityIntolerant of icy AC vents or dry heating registers.
    Pet SafetyMildly toxic to cats and dogs due to gastrointestinal irritants.

    Personal Pro-Tip: Do not buy this plant if your home only has small, dim windows or if you live in a dark basement apartment. I have tried to sustain them with basic grow lights in dim rooms, and they quickly grow weak, pale, and lose their signature symmetry. It requires real, intense daylight.

    Demystifying Light Requirements for Your Travel Palm Plant

    Demystifying Light Requirements for Your Travel Palm Plant
    Demystifying Light Requirements for Your Travel Palm Plant

    If you live down in Miami, Key West, or parts of Southern California (USDA Hardiness Zones 10 and 11), you can drop this beast right into your front yard soil. It wants raw, unadulterated sunshine to build its signature fan.

    But for the rest of us across the country keeping it inside, light is a non-negotiable currency.

    You cannot hide a travel palm plant in a dark corner of your living room. Put it directly in front of your sunniest southern or western window. It needs several hours of bright, direct exposure to produce the energy required to support those massive green sails.

    [Window / Solar Source] —> [Place Your Travel Palm Plant Right Here]

    Personal Pro-Tip: These broad leaves act like giant solar panels. In my time cultivating them, I’ve noticed they collect a layer of household dust incredibly fast. Every few weeks, grab a microfiber cloth, get it damp under the kitchen faucet, and wipe down both sides of the leaves. It instantly improves their ability to process light.

    How Much Water Does a Travel Palm Plant Actually Need?

    People see those lush, jungle-like leaves and instantly start drowning the pot. That is a fast track to disaster.

    Yes, it loves consistent moisture during its active Spring and summer growth spurts, but its roots need oxygen just as much as water. I never water on a strict calendar schedule. Instead, shove your finger a few inches deep into the potting soil. If it feels dry and dusty, take the container to the sink or use a watering can to soak it until water streams out of the bottom drainage holes.

    Why Your Central AC is a Nightmare for Travel Palm Plant Care

    Our standard American climate control setups are brutal on tropical imports. Central air conditioning cools our rooms but sucks out the moisture, creating cold, dry drafts.

    If your travel palm plant sits right in the path of an AC vent, the leaves will react by curling inward or getting incredibly crisp on the edges. Keep the room at a steady temperature above 65°F and away from the direct line of fire of your HVAC system.

    Personal Pro-Tip: When Fall approaches and the days shorten, the plant naturally enters a slower rest period. Cut your watering frequency in half during these cooler months. The potting soil stays wet much longer when the plant isn’t actively pushing out new growth.

    The Most Frequent Mistakes Americans Make with This Dramatic Greenery

    The Most Frequent Mistakes Americans Make with This Dramatic Greenery
    The Most Frequent Mistakes Americans Make with This Dramatic Greenery

    We tend to love our indoor plants to death by fussing over them constantly.

    The biggest mistake I encounter is using containers without drainage holes. If water accumulates at the bottom of the pot with nowhere to go, the roots liquefy. Always use a pot that drains freely.

    Another major blunder is using heavy backyard dirt or dense outdoor compost for an indoor container. It creates a compacted mess that suffocates the root system. Buy a bag of high-quality indoor potting soil and mix in a few handfuls of perlite to keep things loose and fluffy.

    Personal Pro-Tip: These guys get top-heavy as they scale up. Skip the cheap, flimsy plastic pots. Go for a heavy ceramic or terra-cotta container. It provides a sturdy anchor so a passing dog or a stiff breeze from an open window won’t send the whole thing crashing to the floor.

    Troubleshooting Your Travel Palm Plant: Leaf Issues Solved

    When things go wrong, the foliage tells the story. You just have to learn the language.

    Yellowing Fronds

    If you notice the bottom-most leaves turning completely yellow, don’t panic immediately. Old leaves naturally die off as the plant builds new ones at the top. But if multiple leaves turn yellow simultaneously and feel limp or mushy, you are overwatering. Let the potting soil dry out completely before you even think about touching the faucet again.

    Crispy Brown Tips

    This usually stems from low humidity or chemical sensitivities. Many municipal water systems treat tap water with heavy chlorine and minerals. If your leaf tips look toasted, try filling your watering can and letting it sit on your counter overnight before pouring it in. This lets some of the harsh elements dissipate naturally.

    Personal Pro-Tip: Don’t let ugly, dead leaves drain the plant’s energy. Take a clean, sharp pair of garden shears and clip the ruined stem off right at the base of the trunk. It cleans up the aesthetic instantly and lets the plant focus on its fresh, emerging center spears.

    Is the Travel Palm Plant Safe Around Your Dogs and Cats?

    The Real Talk Guide to Raising a Healthy Travel Palm
    The Real Talk Guide to Raising a Healthy Travel Palm

    This is crucial for pet parents. The travel palm plant contains mild toxic properties similar to the bird of paradise family.

    If your cat or dog decides to use the leaves as a chew toy, the sap can cause oral irritation, excessive drooling, vomiting, and an upset stomach. It isn’t typically deadly, but it makes for a miserable pet and an expensive vet bill. Keep it out of reach of curious chewers, perhaps tucked behind a heavy piece of furniture or up on a sturdy plant riser.

    Personal Pro-Tip: If you have an adventurous pet, spray the lower stems with a pet-safe bitter apple spray. One taste of that stuff and they will usually leave your greenery completely alone.

    Frequently Asked Questions About the Travel Palm Plant

    Q1. Can I grow this plant in a room with only north-facing windows?

    It will struggle. A north-facing window rarely provides the intense energy this plant requires. It might survive for a while, but it will grow weak, leggy, and lose its iconic fan layout over time.

    Q2. Why are the new leaves on my plant splitting?

    In nature, these splits are an evolutionary feature. They let high winds pass through the massive leaves without snapping the entire stem. Indoors, minor splitting is completely normal, but excessive tears mean a draft from a ceiling fan or AC vent is hitting it too hard.

    Q3. How do I get my indoor plant to flower?

    Realistically, you probably won’t. While they produce stunning cream-colored flowers outdoors in tropical climates like Zone 11, they rarely flower inside a typical home due to the lack of intense, all-day solar heat.

    Q4. What is the best way to propagate a travel palm plant?

    You can’t do it from a single leaf cutting. You have to wait until the mature parent plant produces small offsets, or “pups,” at the base of its root system during the Spring. You can carefully slice these away during a repotting session.

    Q5. Why is the center spear refusing to open up?

    This usually happens when the indoor air is too dry. The leaf gets stuck to itself. You can help it by wrapping a warm, wet towel around the tight spear for a few minutes to soften the exterior layer, allowing it to unfurl naturally.

    Q6. How often should I apply fertilizer?

    Only feed it during its active growing phase from Spring to late summer. Use a standard liquid houseplant fertilizer diluted to half-strength once a month. Completely skip the food during late Fall and winter.

    Q7. Can I put my indoor pot outside on the patio for the summer?

    Yes, but take it slow. If you move it straight from a dim living room into burning July sun, the leaves will scorch and turn white. Put it in deep shade for a few days first, gradually moving it into brighter spots over a week or two.

    Final Thoughts

    Growing a travel palm plant successfully comes down to patience and restraint. Don’t over-manage it with endless water, give it a massive window with plenty of daylight, keep it away from the AC breeze, and let its spectacular architecture do the talking.

  • Big Pots, Big Statements: Why Ceramic Large Planter Pots Are Worth the Weight 

    Big Pots, Big Statements: Why Ceramic Large Planter Pots Are Worth the Weight 

    Investing in ceramic large planter pots completely transformed my porch garden. Previously, I used to buy cheap, flimsy plastic tub containers every single Spring. Consequently, every single time a rogue thunderstorm kicked up on my front porch, down they went. I found soil everywhere, snapped stems, and total heartbreak.

    Therefore, I finally graduated to heavy stoneware. There is something undeniably stunning about dropping a massive Monstera or a dwarf citrus tree into a gorgeous, glazed piece of pottery. It anchors a room beautifully. For example, it transforms a plain suburban patio into a high-end estate.

    However, dealing with these heavy pots is not always a walk in the park. They carry substantial weight. Specifically, they hold onto water differently than plastic or terracotta. If you place them right next to a blasting AC vent inside a typical American living room, your plants will revolt within a week.

    As a result, I built this real-world, no-nonsense blueprint. Learn how to prep, plant, and manage these heavy-duty beauties without breaking your back or killing your greenery.

    Container SetupWeight & StabilityMoisture RetentionBest Plant Matches
    Indoor SpaceHeavy; absolutely requires a wheeled saucer.High; glazed surfaces keep moisture locked in longer.Monsteras, Fiddle Leaf Figs, Snake Plants.
    Outdoor GardenStays anchored beautifully against high winds.Dries faster in hot sun; needs regular checks.Dwarf Citrus, Hibiscus, Japanese Maples.

    Why Choose Ceramic Large Planter Pots for Your Greenery?

    Why Choose Ceramic Large Planter Pots for Your Greenery crt image
    Why Choose Ceramic Large Planter Pots for Your Greenery

    I’ve spent years getting my hands dirty in both cramped city apartments and sweeping suburban backyard gardens. Through all those years, nothing quite matches the presence of a massive, glazed clay pot. They give an instant, estate-like feel to a front porch or a plain living room corner.

    Aesthetics aside, weight is your best friend here.

    If you live in a windy coastal area or a breezy open plain, cheap plastic containers will tip over the second your plants get top-heavy. These heavy stoneware options stay anchored. They don’t budge.

    Managing Winter Frost and Summer Heat Across USDA Zones

    When you deal with outdoor setups, your local climate dictates your container strategy. If you live up north in USDA Hardiness Zone 5 or 6, winter is a serious hazard for standard earthenware. Water expands when it freezes. If a porous container absorbs water and freezes solid, it will crack right down the middle before Spring arrives.

    I always tell folks in colder zones to empty their outdoor pots before the first hard freeze in late Fall, or move them into a protected garage. Down south in Zone 9 or 10, the blazing summer sun can cook delicate plant roots. Glazed ceramics act like a shield, reflecting intense heat much better than dark plastic ever could.

    Personal Pro-Tip: Before buying a massive pot for your wooden deck, check the weight capacity of your flooring. A 20-inch glazed ceramic pot filled with wet soil and a mature tree can easily top 150 pounds. Buy a heavy-duty rolling plant caddy before you fill it up.

    How to Prep and Plant in Ceramic Large Planter Pots

    Getting a new plant settled into a massive home takes a bit of planning. You cannot just dump dirt inside and call it a day.

    Picking the Right Potting Soil Over Standard Yard Dirt

    Never scoop up regular garden soil from your yard to fill a heavy container. It packs down like concrete, suffocating the root system within weeks. I always buy a high-quality, lightweight potting soil mix that contains plenty of perlite or pumice. This keeps the air pockets open so roots can breathe.

    When it comes time to water, drag your setup over to the garden hose or an outdoor faucet. Give it a deep, slow soak until water runs out the bottom. If the pot lives indoors, you’ll need a deep saucer to save your hardwood floors from absolute ruin.

    Personal Pro-Tip: Do not put gravel or rocks at the bottom of the pot. Old garden myths claim this improves drainage, but soil physics shows it actually raises the water table inside the pot, keeping the roots dangerously wet. Use a small piece of mesh screen or a coffee filter over the drainage hole to keep the dirt from washing out instead.

    Avoid These Blunders with Large Ceramic Pots

    Avoid These Blunders with Large Ceramic Pots
    Avoid These Blunders with Large Ceramic Pots

    Overwatering is the number one plant killer in America. It is shockingly easy to do when you have a massive volume of soil holding onto moisture deep down where your fingers cannot reach.

    The Blast of AC Vents on Indoor Heavy Pottery

    In most American homes, central air conditioning runs constantly throughout the summer. Running your AC creates specific microclimates that wreak havoc on your indoor jungle. If you place a heavy glazed container directly beneath or next to an AC vent, the cold, dry air will dry out the foliage while the soil remains soaking wet.

    This environment causes massive leaf drop. I’ve seen beautiful Fiddle Leaf Figs lose half their leaves in a single week just from a poorly placed vent. Keep your large pots tucked into corners where air circulates naturally without blowing directly on the leaves.

    Personal Pro-Tip: Use a cheap wooden dowel or a long chopstick to check the moisture depth of big containers. Push it all the way to the bottom of the pot. If it comes out with dark, wet soil clinging to it, step away from the watering can.

    Troubleshooting Issues with Your Ceramic Large Planter Pots

    Plants talk to us through their leaves, but the containers themselves can also show signs of distress.

    If your plant’s leaves are turning yellow and dropping off, you are likely dealing with stagnant water at the bottom of the container. Check the drainage hole immediately. Sometimes, aggressive roots grow thick and plug the opening completely, turning your pot into a swamp.

    What to Do About Efflorescence and Salt Buildup

    Have you noticed a white, powdery crust forming on the rim or the outside of your clay pots? Do not panic. That is just efflorescence. It happens when your municipal faucet water contains heavy minerals or when fertilizers build up over time.

    The porous clay wicks the moisture outward, and when the water evaporates into the air, the salt stays behind on the exterior surface. It is not a disease, but it does mean you should flush the soil with pure rainwater or distilled water occasionally to wash away excess salts.

    Personal Pro-Tip: To clean off unsightly white mineral crusts, scrub the exterior of the container with a mixture of one part plain white vinegar and four parts water. It dissolves the calcium deposits instantly without harming your plants.

    Pet Safety Around Ceramic Large Planter Pots

    Pet Safety Around Ceramic Large Planter Pots
    Pet Safety Around Ceramic Large Planter Pots

    As a dog and cat owner, I look at large containers a bit differently than most. A massive, top-heavy tree inside a slick, glazed pot can pose a real safety hazard if you have rambunctious pets running around the living room.

    If your cat loves to use your indoor trees as climbing posts, a heavy ceramic base is actually ideal because it will not tip over easily under their weight. However, the wide surface area of exposed soil looks exactly like a giant litter box to a feline.

    Beyond physical stability, make sure the plants you choose for these statement containers are safe. If you keep toxic plants like Dieffenbachia or Sago Palms in large containers, make sure they are blocked off or elevated so curious pets cannot chew the leaves.

    Personal Pro-Tip: If your dog or cat won’t stop digging in your big indoor pots, cover the exposed potting soil with large, smooth river stones. It completely stops the digging behavior and looks incredibly sharp.

    FAQs About Ceramic Large Planter Pots

    Do large ceramic pots need drainage holes?

    Yes, absolutely. Without a drainage hole, water pools at the bottom, rots the roots, and kills your plant. If you find a gorgeous pot without a hole, use it as a cachepot keep the plant in a plastic nursery liner inside the ceramic one.

    Can I leave my glazed pottery outside during a freeze?

    It depends entirely on your USDA zone. In southern states, it is perfectly fine. In freezing northern states, high-fired glazed ceramics survive better than unglazed terracotta, but standing water inside can still freeze, expand, and shatter the clay.

    How do I move a giant, heavy ceramic pot safely?

    Never lift a heavy pot by the rim; that is how fractures happen. Hug the pot from the base. Better yet, place it on a rolling plant caddy before you fill it up with soil.

    Why is my ceramic container sweating or wet on the outside?

    Unglazed clay is porous and breathes naturally. It draws moisture out of the soil and evaporates it into the air. Glazed pots will not sweat as much, but unglazed ones will naturally show damp spots after a heavy watering.

    Are ceramic pots better than plastic or fiberglass?

    For stability and insulation against temperature spikes, yes. They protect roots from extreme outdoor heat or indoor AC chills. Fiberglass is lighter, but ceramic wins for longevity and classic beauty.

    What plants do best in a deep ceramic container?

    Deep containers hold a lot of moisture. They are perfect for thirsty, large-root plants like Monsteras, indoor palms, ferns, and small ornamental trees like Japanese Maples.

    How do I stop soil from leaking out of the bottom hole?

    Don’t use rocks. Instead, place a coffee filter, a piece of window screen, or a bit of landscape fabric over the hole. Water flows out perfectly, but the dirt stays put.

    Final Thoughts

    Finding the right home for your prized plants takes a little trial and error, but investing in solid pottery pays off for years to come. Just mind your watering habits, watch out for those freezing winter months, and your green space will flourish beautifully.

  • The No-Nonsense Guide to Growing a Chocolate Mint Plant at Home

    The No-Nonsense Guide to Growing a Chocolate Mint Plant at Home

    If you have ever brushed against a chocolate mint plant in mid-Summer, you already know why people fall in love with it. It smells exactly like a York Peppermint Pattie. I have been growing herbs across the US for over fifteen years, and this specific cultivar (Mentha × piperita ‘Chocolate’) remains one of my absolute favorites to share with backyard gardeners and indoor plant parents alike.

    It is incredibly easy to grow. In fact, it is sometimes a little too easy, which we will get into in a minute.

    Here is everything you need to know to keep your plant happy, healthy, and contained.

    Quick Care Cheat Sheet for Your Chocolate Mint Plant

    For those who just want the fast facts, here is the breakdown to get you started today.

    Care ElementModern US Home & Garden Requirements
    USDA Hardiness ZonesZones 5 through 9 (survives winters outdoors easily)
    Sunlight NeedsFull sun to partial afternoon shade
    Soil PreferenceRich, moisture-retentive potting soil (for containers)
    Watering StrategyKeep soil consistently damp; do not let it dry out completely
    Indoor AC ToleranceLow; keep away from dry air conditioning vents
    Pet ToxicityToxic to dogs and cats (contains essential oils)

    Personal Pro-Tip: Never plant this herb directly in your open garden beds unless you want your entire yard to become a mint farm by next Spring. Always use a container.

    What Exactly is a Chocolate Mint Plant?

    What Exactly is a Chocolate Mint Plant
    What Exactly is a Chocolate Mint Plant

    It is a real plant, not a genetically modified gimmick. This is a natural variation of standard peppermint. It features darker green leaves, distinctly purple stems, and a subtle undertone of cocoa in its scent profile.

    I use it constantly in my kitchen. It makes an incredible addition to iced tea, summer cocktails, or chopped up over fresh strawberries.

    Personal Pro-Tip: To get the absolute best flavor and scent out of your leaves, harvest them right before the plant starts producing its tiny purple flowers in late Summer. That is when the essential oils are peaking.

    Sunlight Requirements for the Chocolate Mint Plant

    In my experience growing this plant in both the blistering Texas heat and chilly Midwestern springs, light makes a huge difference in flavor. If you grow it in full sun, the oils get incredibly strong.

    However, if you live down South where the July sun is brutal, give it some afternoon shade.

    Indoor growers often struggle here. If it sits in a dark corner of your kitchen, the stems will stretch out, turn skinny, and lose that signature chocolate aroma. Put it on a south-facing windowsill if you can.

    Personal Pro-Tip: If your indoor plant starts looking “leggy” (long, bare stems with tiny leaves), it is begging for more light. Move it closer to a window or buy a cheap LED grow light to supplement.

    How to Water a Chocolate Mint Plant Without Drowning It

    Mint loves moisture. It is not a cactus; you cannot forget about it for three weeks and expect it to survive.

    When you water, take the pot to your kitchen faucet and soak it until water runs out of the drainage holes at the bottom. Then, let the excess drain completely. Never let the pot sit in a saucer full of standing water, or the roots will rot and turn to mush.

    During hot summer spells, you might need to water outdoor pots every single day. Indoor plants won’t need it quite as often.

    The Seasonal Watering Adjustment Plan

    • Summer Peak (June–August): Check your outdoor pots every morning. If the temperature cracks 90°F, container plants dry out fast. You will likely need to give them a deep soak daily.
    • Winter Dormancy (November–February): Dial it way back. Indoor heating dries the air, but the plant grows much slower during short days. Only water when the top two inches of potting soil feel completely dry.
    • Spring & Fall Transitions: Check the soil every two to three days. Let natural rainfall handle outdoor pots, but double-check them if you hit a dry spell.

    Personal Pro-Tip: Do the finger test. Shove your index finger an inch deep into the potting soil. If it feels dry, head to the faucet. If it feels damp, leave it alone and check again tomorrow..

    Common Mistakes Americans Make with the Chocolate Mint Plant

    Common Mistakes Americans Make with the Chocolate Mint Plant
    Common Mistakes Americans Make with the Chocolate Mint Plant

    Most people kill or regret this plant for two specific reasons.

    First, they treat it like a houseplant that can sit right under an air conditioning vent. Modern American AC units strip moisture from the air. This plant hates dry, blowing air. It causes the leaves to crisp up and drop.

    Second, folks plant it directly in the ground without a barrier. Mint spreads via underground runners called stolons. I once watched a single 4-inch nursery pot take over an entire 10-foot landscaping bed in Ohio within a single season. It is relentless.

    Personal Pro-Tip: If you absolutely want it in the ground for landscaping purposes, plant it inside a heavy-duty plastic bucket with the bottom cut out, then bury the bucket flush with the soil line. This traps the roots and stops the invasion.

    Troubleshooting Issues with Your Chocolate Mint Plant

    Plants talk to us through their leaves. Here is how to decode what your plant is trying to say.

    Why are my leaves turning yellow?

    This is almost always a sign of overwatering or poor drainage. If the potting soil stays waterlogged, the roots suffocate. Dial back your watering schedule and ensure your pot actually has drainage holes.

    What causes dry, brown leaf tips?

    This points to low humidity or underwatering. If it is sitting indoors near an AC vent or heating register, move it immediately. You can also mist the plant occasionally to boost the moisture in the air.

    Why is the plant losing its chocolate smell?

    If you feed it too much heavy fertilizer, it grows incredibly fast but the flavor compounds get diluted. Go easy on the plant food.

    Personal Pro-Tip: If your plant looks old, woody, and tired in late Fall, cut the entire thing back down to about two inches above the soil line. It feels drastic, but it will burst back with fresh, highly fragrant growth in the Spring.

    Is the Chocolate Mint Plant Safe for Pets?

    Is the Chocolate Mint Plant Safe for Pets
    Is the Chocolate Mint Plant Safe for Pets

    This is a huge deal for American pet owners. No, the chocolate mint plant is not safe for cats or dogs. According to the ASPCA, all members of the mint family contain essential oils that can cause significant digestive upset, vomiting, and diarrhea if eaten in large quantities. The name “chocolate” is just a description of the scent, so you don’t have to worry about actual cocoa toxicity, but the mint oils themselves are still a hazard.

    Keep your containers up high on a shelf or hanging basket where curious paws cannot reach them.

    Personal Pro-Tip: If your cat loves chewing on green things, grow a separate pot of organic oat grass (cat grass) right next to your windows to distract them away from your herb collection.

    Frequently Asked Questions About the Chocolate Mint Plant

    Q1. Does it actually taste like real chocolate?

    Not exactly. It tastes like a very clean, crisp peppermint with a distinct cocoa aroma. The scent tricks your brain into tasting chocolate. It won’t replace a Hershey’s bar, but it adds a beautiful dessert-like layer to drinks and pastries.

    Q2. Can I grow it indoors through the winter?

    Yes. Bring your outdoor pots inside before the first hard freeze in late Fall. Place it in your brightest window. It will slow down its growth during winter, but it will stay green as long as your indoor air isn’t completely dried out by central heating.

    Q3. What kind of potting soil should I buy?

    Skip the cheap, heavy dirt from the backyard. Grab a high-quality, well-draining commercial potting soil mix from your local garden center. Look for brands that include perlite (those little white volcanic glass rocks) because it keeps the soil fluffy and aerated.

    Q4. How often should I fertilize it?

    Hardly ever. I usually mix a small handful of organic compost or a weak, diluted liquid fertilizer into the soil once in the Spring. Over-fertilizing makes the plant grow weak stems with very little flavor.

    Q5. Why are my plant’s stems turning deep purple?

    Don’t panic! Purple stems are completely normal for this specific variety. In fact, that dark pigmentation is exactly how you distinguish it from regular spearmint or standard peppermint.

    Q6. Can I use regular water from my kitchen faucet?

    Generally, yes. Most tap water in the US is perfectly fine for herbs. If your local city water is heavily chlorinated and you notice the leaf tips looking sensitive, just fill your watering can and let it sit out on the counter overnight before using it. The chlorine will evaporate.

    Q7. How do I make the plant bushier?

    Pinch off the top growing tips regularly. If you just let it grow straight up, it gets tall and floppy. When you pinch off the top set of leaves, it forces the plant to branch out from the sides, giving you a much fuller, happier container.

    Final Thoughts

    Growing this herb is one of the most rewarding entry points into gardening. It is tough as nails, smells phenomenal, and gives you a constant supply of fresh ingredients for your kitchen. Just remember to keep it in a pot, keep it away from the AC vents, and keep it out of reach of your pets. Do those three things, and you will have a beautiful plant that returns year after year.

  • The Ultimate Guide to Growing Everbearing Strawberry Plants: Fresh Berries All Summer Long

    The Ultimate Guide to Growing Everbearing Strawberry Plants: Fresh Berries All Summer Long

    I have grown just about every berry you can think of over the past twenty years in my backyard. While June-bearers are fantastic for a massive, sudden wave of fruit, they can quickly overwhelm a busy home gardener. That is exactly why I always recommend planting everbearing strawberry plants instead. These resilient beauties do not dump their entire harvest on you in a single week. Instead, they provide a steady, highly manageable yield of sweet berries from late Spring right up until the first autumn frost hits. In my years of trial and error across different USDA zones, I’ve found that success is incredibly easy if you get the fundamentals right. Let’s get your patch started. 

    Care FactorRequirements for Everbearing Strawberry Plants
    SunlightFull sun (6 to 8+ hours of direct sunlight daily)
    USDA Hardiness ZonesZones 4 through 9 (varies slightly by cultivar)
    Soil ConditionsWell-drained potting soil or fertile sandy loam (pH 5.5 to 6.8)
    Watering1 to 1.5 inches per week; keep soil evenly moist but never waterlogged
    FertilizerBalanced 10-10-10 or organic berry food every 4 to 6 weeks
    Pet Safety100% non-toxic to dogs and cats

    Why Grow Everbearing Strawberry Plants in Your Backyard?

    Why Grow Everbearing Strawberry Plants in Your Backyard
    Why Grow Everbearing Strawberry Plants in Your Backyard

    I have grown just about every berry you can think of over the past twenty years. June-bearers are fantastic if you want a massive, sudden wave of fruit to make jams all at once. But if you want to walk out to your backyard patio in late August and pick a handful of sweet berries for your morning cereal, you need everbearing strawberry plants.

    They do not overwhelm you with a giant harvest in one week. Instead, they give you a steady, highly manageable yield from late Spring right up until the first frost hits in the Fall.

    Personal Pro-Tip: When your bare-root bundles arrive in the mail in early Spring, do not let them sit around and dry out. I always soak my bare-root strawberry roots in a bucket of room-temperature water for about an hour right before they go into the ground. It wakes them up instantly and cuts down on transplant shock.

    How to Set Up Your Everbearing Strawberry Plants for Success

    Getting the initial planting depth right will save you months of absolute heartbreak. I see too many home gardeners treat these like standard nursery perennials, burying them way too deep in the mud.

    Sunlight and Climate for Everbearing Strawberry Plants

    These plants absolutely demand full sun. We are talking about a bare minimum of six to eight hours of unfiltered, direct sunlight hitting those leaves every single day. If you live down south in a scorching hot region like Texas or Georgia, give them a spot with light afternoon shade. Extreme summer heat over 85°F can cause them to temporarily pause their fruit production.

    If you are starting your runners or bare-roots early indoors on a sunny windowsill, pay close attention to your home environment. Air conditioning vents blowing dry, freezing air directly onto the young leaves will stunt their growth or completely shrivel up the new flower buds before they can bloom.

    Soil and Watering Secrets

    Strawberries hate wet feet. If you are planting in containers, traditional strawberry jars, or hanging baskets, grab a premium, loose potting soil mixed with a bit of perlite rather than heavy garden soil. The water needs to run right out the bottom drainage holes freely.

    When you turn on the faucet to water your patch, aim the nozzle directly at the base of the plant. Try your best not to soak the leaves. Wet foliage is an open invitation for powdery mildew, leaf spot, and gray mold to ruin your crop.

    Personal Pro-Tip: Plant so that the exact midpoint of the crown—the swollen, woody area where the roots meet the green stems—is completely level with the top of the soil surface. If you bury the crown, it rots and dies within weeks. If you leave it sticking out too high, the top roots dry out and the plant fails.

    Common Mistakes Americans Make with Everbearing Strawberry Plants

    Common Mistakes Americans Make with Everbearing Strawberry Plants (1)
    Common Mistakes Americans Make with Everbearing Strawberry Plants

    Let’s talk about why people fail with these plants. The single biggest mistake I see in American backyards is letting a brand-new plant produce fruit too early in its lifecycle.

    It hurts to do it, I know. But when your new plants throw out their very first beautiful white flowers in April or May, you must pinch them off. Keep pinching off every single blossom for the first six weeks after planting.

    Why? Because you want the young plant to dump every ounce of its energy into building a massive, resilient root system. If you let it produce berries immediately, the plant stays tiny, weak, and exhausted for the rest of the summer.

    Another classic error is overwatering out of panic during a heatwave. People assume that because fruit is juicy, the soil needs to stay muddy. Strawberry roots will rot incredibly fast if they sit in stagnant water.

    Personal Pro-Tip: Always mulch your strawberry beds with clean wheat straw or pine needles. This keeps the heavy, developing fruit off the bare, damp ground, saving your harvest from turning into a mushy, bug-eaten mess. It also does a phenomenal job of keeping the soil cool during dry July heatwaves.

    Troubleshooting Everbearing Strawberry Plants Issues

    Gardening is rarely a perfect science. You will probably encounter a few bumps along the road, but most issues can be fixed with quick, simple adjustments.

    • Leaves turning yellow with bright green veins: This is usually iron chlorosis. It happens when your soil is too alkaline. Strawberries prefer a slightly acidic pH. Test your dirt, or feed them an organic fertilizer designed for acid-loving small fruits.
    • Brown, crispy leaf margins and tips: Check your moisture levels. If the soil is bone dry, they need a deep, thorough drink. However, if this happens to patio container plants positioned right next to an active home air conditioning exhaust or window unit, dry air currents are the culprit. Move the pots away from the draft.
    • Deformed, tiny, or misshapen berries: This almost always points to poor pollination. If it rains for a week straight in Spring and the bees cannot fly, the fruits will not form correctly. Don’t sweat it—the next wave of flowers will produce gorgeous berries once the weather clears.

    Personal Pro-Tip: Keep a sharp eye out for birds. They love bright red berries just as much as you do. The absolute minute I see the first hint of pink blush on my fruit, I throw lightweight bird netting over the entire patch. Otherwise, local robins will strip your plants clean before breakfast.

    Is Growing Everbearing Strawberry Plants Safe for Pets?

    Is Growing Everbearing Strawberry Plants Safe for Pets
    Is Growing Everbearing Strawberry Plants Safe for Pets

    Here is some fantastic news for those of us with furry family members: everbearing strawberry plants are completely non-toxic to dogs and cats. The ASPCA officially lists the entire plant leaves, stems, and fruit as completely safe.

    If your dog sneaks into the garden patch and gobbles down a few ripe berries or munches on a stray leaf, there is absolutely no need to panic.

    Just monitor them to ensure they don’t eat an excessive amount of raw green leaves, as a sudden overload of fiber can cause a minor upset stomach, but the plant itself contains no harmful toxins.

    Personal Pro-Tip: If you apply commercial organic fertilizers to your strawberry beds, keep your pets indoors for at least 24 to 48 hours. Dogs are heavily attracted to the potent smell of organic soil amendments like bone meal, blood meal, or fish emulsion, and they will try to dig up your plants to eat the fertilizer.

    Frequently Asked Questions About Everbearing Strawberry Plants

    Q1Do everbearing strawberry plants produce runners?

    Yes, they do, but far fewer than June-bearing varieties. They put almost all of their daily energy into making flowers and fruit instead of cloning themselves. I highly recommend clipping off the few runners they do make during their first year to keep the mother plant strong and highly productive.

    Q2How many years do these strawberry plants last before replacing?

    A well-maintained patch will give you excellent harvests for about three to four years. After that point, the older plants naturally lose their vigor, and the overall berry size drops off significantly. I usually plan ahead and start a fresh secondary patch with new bare-roots every three years so my backyard never runs out of fruit.

    Q3Can I grow everbearing varieties successfully in USDA Zone 4?

    Absolutely. Popular cold-hardy varieties like Albion, Seascape, and Evie 2 handle the freezing winters of Zone 4 beautifully. You just need to give them a thick 4-inch blanket of straw mulch in late Fall once the ground freezes solid to protect the crowns from severe winter injury and frost heaving.

    Q4Why are my homegrown strawberries sour instead of sweet?

    This almost always comes down to a lack of intense sunlight or bad timing with water. If the weather has been cloudy and overcast for a week, the plant cannot manufacture enough sugars. Overwatering your plants right before you pick the fruit will also dilute the natural sugars, making the berries taste watery and tart.

    Q5When should I fertilize my strawberry patch?

    I feed my plants every four to six weeks starting in early Spring as soon as new green growth pops up. Use a balanced, organic berry food. Stop applying all fertilizer by late August so the plant does not push out tender new leaf growth right before the autumn frost arrives.

    Q6Can I grow these strawberries entirely indoors?

    It is incredibly tough but possible if you use high-intensity LED grow lights. Standard indoor household lighting is simply not strong enough for these plants to set sweet fruit. Also, remember that since there are no bees in your living room, you will have to manually pollinate the flowers using a small, soft paintbrush.

    Q7What is the actual difference between everbearing and day-neutral strawberries?

    Technically speaking, classic everbearing types produce two to three distinct waves of fruit a season, while modern day-neutrals ignore day length completely and produce continuously. Today, most American nurseries use these terms interchangeably on plant tags, and both types will give you consistent fruit all summer long.

    Final Thoughts

    Growing your own food is deeply rewarding, and starting out with a patch of these continuous producers is one of the smartest moves a home gardener can make. It does not take a degree in agriculture to get a beautiful harvest just plenty of bright sunshine, incredibly well-draining soil, and a little bit of discipline to pinch those early blossoms. Give them a try this Spring, and you will be enjoying fresh, homegrown treats all the way until the autumn chill sets in.

  • The Ultimate Guide to the Annabelle Hydrangea Plant: Pro-Tips for American Gardens

    The Ultimate Guide to the Annabelle Hydrangea Plant: Pro-Tips for American Gardens

    If you’ve ever driven through a neighborhood in the Midwest or Northeast during mid-summer and spotted massive, snowball-like white blooms practically glowing in the shade, you’ve met the Annabelle hydrangea plant. In my years working as a horticulturist, this native beauty (Hydrangea arborescens) remains one of my absolute favorite recommendations for homeowners who want maximum visual impact with minimum fuss.

    Here is a quick-glance care guide for the skimmers out there who want the fast facts before digging in.

    Annabelle Hydrangea Plant Quick Care At-A-Glance

    Care ElementRequirement
    USDA Hardiness ZonesZones 3 – 9
    Sun ExposureDappled shade to partial sun (Morning sun is best)
    Soil TypeRich, well-draining, moisture-retentive soil
    WateringConsistent moisture (Deep soaking weekly)
    Bloom TimeEarly summer through Fall
    Mature Size3 to 5 feet tall and wide

    Personal Pro-Tip: Don’t stress about your winter weather. I’ve seen this resilient shrub survive brutal, below-zero wind chills in Minnesota and still push out magnificent blooms the following July without skipping a beat.

    Why the Annabelle Hydrangea Plant is a Backyard Favorite

    Why the Annabelle Hydrangea Plant is a Backyard Favorite
    Why the Annabelle Hydrangea Plant is a Backyard Favorite

    We Americans love a plant that works hard without demanding a lifestyle change, and that’s exactly what this shrub offers. Unlike its picky cousin, the bigleaf hydrangea, which can refuse to bloom if a surprise Spring frost nips its buds, the Annabelle produces flowers on “new wood” (the fresh growth it puts out in the current year). This means no matter how harsh the winter, you are virtually guaranteed a spectacular show of massive, 10-inch flower heads every single summer.

    Watching this plant evolve throughout the season is pure joy. The blooms start as a soft, electric chartreuse green in June, burst into brilliant, clean white puffs by July, and gradually mellow back into a vintage, papery tan as Fall rolls around. They look stunning in the yard, but they make incredible cut flowers for your dining room table, too.

    Personal Pro-Tip: If you love floral design, cut the stems in late August when the petals feel slightly papery. Hang them upside down in a dark, dry pantry for two weeks. They dry beautifully and will last on your mantelpiece all winter.

    Setting Up Your Annabelle Hydrangea Plant for Success

    Getting your new shrub off to a great start isn’t rocket science, but a little strategic planning during planting week pays massive dividends down the road.

    Ideal USDA Zones and Sun Exposure for Your Annabelle Hydrangea Plant

    This plant is highly adaptable across USDA Hardiness Zones 3 through 9. However, its daily sun requirements change dramatically depending on your geography. If you live up north in Michigan or New York, your plant can tolerate almost full sun as long as its roots stay damp.

    But if you are gardening down south in Georgia or Texas, that blistering afternoon sun will scorch the foliage faster than you can flip a burger. In warmer regions, pick a spot that gets bright morning light but offers total relief from the sun after 1 PM.

    Personal Pro-Tip: Walk around your yard at 2 PM during a hot July afternoon. If the spot you’re eyeing is baking in direct, unfiltered sunlight, choose a different location. Your hydrangea will thank you.

    Soil and Water Requirements

    Like most smooth hydrangeas, this variety loves its water, but it absolutely detests muddy, stagnant roots. If you are planting it directly in your garden bed, mix in a generous amount of organic leaf mold or aged wood bark to loosen up heavy clay.

    If you are growing it in a large container on your porch, step away from the native garden dirt and grab a bag of high-quality, well-draining potting soil instead. When it comes to hydration, skip the daily light sprinkles. Instead, turn your garden hose faucet on low and give the base of the plant a deep, slow drenching once or twice a week.

    Personal Pro-Tip: Lay down a three-inch layer of shredded hardwood mulch right around the root zone, keeping it an inch away from the main stems. This acts like a protective blanket, keeping the soil cool and locking in moisture so you don’t have to run to the faucet every single day.

    Common Mistakes with the Annabelle Hydrangea Plant

    Common Mistakes with the Annabelle Hydrangea Plant
    Common Mistakes with the Annabelle Hydrangea Plant

    Even experienced gardeners run into trouble with this shrub, usually because they treat it like other common landscaping plants. Over the years, I’ve noticed three classic blunders that American homeowners make:

    • The Ground-Level Chop: Many folks assume that because it blooms on new growth, they should haircut the entire plant flat to the dirt every winter. Don’t do it. While it will grow back, cutting it completely to the ground results in weak, spindly stems that can’t support the weight of those massive flower heads.
    • The HVAC Death Zone: I’ve lost count of how many times I’ve seen a beautiful new specimen planted right next to an outdoor air conditioning condenser unit. The continuous blast of hot, dry air from your home’s AC system will dehydrate the leaves in a matter of hours, causing severe crisping and leaf drop.
    • Overcompensating with the Hose: When the large leaves droop slightly on a 90°F afternoon, people panic and drown the soil. Often, the plant is just minimizing its surface area to handle the heat and will perk back up by sunset. Constantly watering soggy soil will rot the root system out from under it.

    Personal Pro-Tip: When pruning in late winter, leave a sturdy framework of old stems about 18 to 24 inches off the ground. These older, thicker stems create a rigid skeleton that holds up the new, flexible branches when they get heavy with rainwater.

    Troubleshooting Your Annabelle Hydrangea Plant

    If your plant is looking a little sad, don’t panic. Most issues can be diagnosed and fixed with a few simple adjustments. Here is a quick reference guide to solving the most common visual cries for help:

    What You SeeThe Root CauseThe Exact Solution
    Leaves turning pale yellow with green veinsIron chlorosis (often caused by alkaline or compacted soil).Apply a chelated iron supplement to the soil and top-dress with organic matter.
    Brown, crispy leaf edgesHeat scorch, windburn, or dry air from AC vents.Increase deep watering at the base and check for hot air exposure.
    The entire plant flops flat on the groundTop-heavy blooms weighed down by summer rain.Shake off excess water gently, prune less severely next winter, or install a tomato cage early in Spring.

    Personal Pro-Tip: If your plant suffers from the classic post-rainstorm “flop,” don’t try to tie the individual stems tightly to a single stake—it looks unnatural and chokes the plant. Instead, encircle the entire base with a short, green wire border fence early in the Spring so the stems can naturally lean outward against it.

    Annabelle Hydrangea Plant Toxicity Warning

    Annabelle Hydrangea Plant Toxicity Warning
    Annabelle Hydrangea Plant Toxicity Warning

    Before you head to your local garden center, we need to address a crucial safety note for pet owners. The entire Annabelle hydrangea plant contains a compound called cyanogenic glycosides. If your curious dog or cat decides to use the leaves or stems as a chew toy, it can cause gastrointestinal distress, including vomiting, diarrhea, and lethargy.

    While wild birds and local pollinators absolutely love this shrub, it is definitely not pet-friendly. If you have an adventurous puppy who loves to munch on your landscaping, you’ll want to take precautions.

    Personal Pro-Tip: If you have outdoor pets but still want this stunning look, plant your hydrangeas behind a decorative hardscape barrier or use raised garden beds to keep the foliage well out of reach of sniffing noses.

    Frequently Asked Questions

    Q1Can I change the color of my Annabelle hydrangea plant to blue?

    Unlike French or bigleaf hydrangeas (Hydrangea macrophylla), smooth hydrangeas do not care about your soil chemistry. No amount of aluminum sulfate or coffee grounds will turn this plant blue or pink. It will always open chartreuse, transition to brilliant white, and fade to tan.

    Q2Why is my Annabelle hydrangea plant dropping leaves in late August?

    If the lower leaves are turning yellow and dropping at the end of summer, it’s usually a combination of intense heat and natural preparation for Fall dormancy. As long as the stems look healthy and the top growth isn’t completely dead, it’s just the plant conserving energy.

    Q3Do Annabelle hydrangeas bloom on old or new wood?

    They bloom entirely on new wood. This is a massive relief for northern gardeners because even if a freezing winter kills the plant back to the snowline, the fresh stems that emerge in the Spring will still produce a full crop of gorgeous summer flowers.

    Q4How do I stop my Annabelle hydrangea plant from falling over after a heavy rain?

    The secret lies in your pruning habits. Instead of cutting the stems all the way to the ground in the winter, leave about two feet of old growth intact. These older, thicker stems create a rigid skeleton that holds up the new, flexible branches when they get heavy with rainwater.

    Q5Can I grow an Annabelle hydrangea plant in a container on my deck?

    You absolutely can, provided the container is massive (at least 15 to 20 gallons) and has excellent drainage holes. Make sure to use premium potting soil rather than heavy garden dirt, and position the pot away from the direct exhaust blast of your outdoor air conditioning unit.

    Q6How much should I water my newly planted hydrangea in the Spring?

    For the first growing season, give it a deep soaking twice a week. You want to train the roots to grow deep into the ground rather than staying near the surface. Check the soil an inch down; if it feels dry, it’s time to run the hose.

    Q7Can I dry the blooms for indoor decor?

    Yes, and they look spectacular. The trick is timing: don’t cut them when they are brilliant white and juicy. Wait until late August or September when they turn a soft seafoam green or tan and feel dry to the touch while still on the bush. Cut them, strip the leaves, and put them in a dry vase.

    Personal Pro-Tip: When checking if a dormant winter stem is still alive, do the “scratch test.” Gently scrape a tiny bit of the outer bark with your fingernail. If it’s vibrant green underneath, the stem is alive and well. If it’s brittle and brown, snip it off at the base.

    Final Thoughts

    Bringing the Annabelle hydrangea plant into your landscape is one of the easiest ways to elevate your home’s curb appeal with a classic, elegant look. By giving it the right amount of morning sun, ensuring its roots stay moist but not waterlogged, and avoiding the temptation to chop it entirely to the ground every winter, you will enjoy decades of those legendary snowball blooms. Grab your garden gloves, find that perfect partly shaded spot, and get ready to watch your garden transform.

  • The Ultimate Astilbe Plant Care Guide: How to Grow Vibrant Shade Perennials

    The Ultimate Astilbe Plant Care Guide: How to Grow Vibrant Shade Perennials

    As a horticulturist who has spent countless hours getting my hands dirty in gardens across the country, I’ve recommended the Astilbe plant to more homeowners than I can count. If you have a shady spot in your yard or on your patio that looks a little sad and empty, this feathery, plume-like perennial is your best friend. In my years of growing this plant, I’ve found that its vibrant colors can completely transform a gloomy corner into a focal point.

    Let’s dive into everything you need to know to keep your Astilbe thriving, skipping the complex botany jargon and sticking to what actually works in a typical American home garden.

    Personal Pro-Tip: Don’t toss your plant tags! I always stick the little plastic ID tag that comes with my Astilbe plant deep into the potting soil or garden bed right next to the roots. That way, when Spring rolls around and it hasn’t sprouted yet, I know exactly where it’s sleeping.

    Astilbe Plant Quick Care Reference

    Care NeedRecommendation
    LightDappled shade to partial shade (Keep out of harsh afternoon sun)
    WaterHigh moisture needs; keep soil consistently damp but not soggy
    SoilRich, well-draining, slightly acidic. Use quality potting soil for containers
    USDA Zones3 to 8 (Performs beautifully as a perennial across most of the US)
    ToxicityNon-toxic to cats, dogs, and horses

    Why I Love Growing the Astilbe Plant

    Why I Love Growing the Astilbe Plant
    Why I Love Growing the Astilbe Plant

    There is something incredibly rewarding about watching an Astilbe plant burst into color right when the heat of early summer kicks in. Unlike sun-worshipping flowers like Zinnias or Marigolds, Astilbes do their best work in the shadows. They bring stunning textures—ranging from soft pinks and fiery reds to crisp whites—into spaces under oak trees or along north-facing walls where most other flowers just give up.

    Personal Pro-Tip: I like to plant them in clusters of three or five. A single Astilbe can look a bit lonely, but a group of them creates a stunning, cloud-like drift of color.

    Essential Care Guide for Your Astilbe Plant

    Finding the Right Light

    Astilbes are shade lovers, but “shade” doesn’t mean pitch black. They thrive in dappled sunlight, like the light filtering through tree branches. A few hours of gentle morning sun is fantastic, but keep them away from the harsh afternoon glare.

    Watering Your Astilbe Plant Perfectly

    If there is one thing you must remember, it’s that this plant is incredibly thirsty. Astilbes do not handle drought well. If you are keeping them in patio planters, you might need to water them every single day during July and August. When you water, don’t just sprinkle the leaves—give them a deep soak. If you’re dragging a hose from the outdoor faucet, make sure the water goes straight to the base of the plant.

    Soil and Fertilizer Needs

    They love rich, loamy dirt. If you are planting them in a container, grab a high-quality, moisture-retaining potting soil. In the garden, work some rich organic matter into the ground before planting. I usually toss a handful of slow-release, balanced granular fertilizer around the base right as they start to wake up in early Spring.

    Personal Pro-Tip: If your tap water is heavily softened (which adds salts), try to use water directly from an outside faucet that bypasses the softener, or collect rain in a bucket. Astilbes hate salty soil!

    Common Mistakes When Growing an Astilbe Plant in the US

    Common Mistakes When Growing an Astilbe Plant in the US
    Common Mistakes When Growing an Astilbe Plant in the US

    Why do Americans usually fail with this plant? The number one culprit is our intense summer heat combined with neglect. We get busy, we forget to water for a week, and suddenly the plant looks like a pile of crispy brown hay.

    Another uniquely modern issue I see is the placement of potted Astilbes on covered patios right near outdoor AC unit exhausts or indoor air conditioning vents. The constant blast of dry, artificial air will strip the moisture right out of their delicate fronds, turning them brown overnight.

    Personal Pro-Tip: Mulch is your secret weapon. I always lay down a thick, two-inch layer of wood chips around my outdoor Astilbes. It acts like a cozy blanket that locks the moisture into the soil, protecting them from unexpected heatwaves.

    Astilbe Plant Troubleshooting: Yellow Leaves & Brown Tips

    It breaks my heart to see a struggling plant, but most issues are easily fixable if you catch them early.

    • Crispy Brown Tips and Edges: This is a classic cry for help. Your plant is either drying out or getting scorched by too much direct sun. The Fix: Stick your finger into the soil. If it’s bone dry two inches down, water it immediately. If the soil is wet, the sun is the issue—you may need to dig it up and move it to a shadier spot in the Fall.
    • Yellowing Leaves: If the leaves are turning yellow and feeling mushy, you’ve swung the pendulum too far the other way. You are overwatering, or your soil has poor drainage, causing root rot. The Fix: Back off the watering. If it’s in a pot, ensure the drainage holes aren’t clogged. You might need to repot it with fresh potting soil mixed with a bit of perlite for better airflow.

    Personal Pro-Tip: When I see crispy brown flower plumes at the end of the summer, I just snip them off right down to the foliage. It immediately makes the whole plant look tidier!

    Toxicity Warning: Is the Astilbe Plant Safe for Pets?

    Toxicity Warning Is the Astilbe Plant Safe for Pets
    Toxicity Warning Is the Astilbe Plant Safe for Pets

    As a dog owner myself, I absolutely refuse to bring plants into my yard without checking their toxicity first. This is a massive selling point: the Astilbe plant is completely non-toxic to cats, dogs, and even horses. You don’t have to panic if your Golden Retriever decides to take a bite out of a pink plume or your curious tabby cat brushes up against the leaves.

    Personal Pro-Tip: Even though they are non-toxic, if your pet has a habit of digging up your garden beds, consider placing a few large, decorative river rocks over the root zone to discourage muddy paws.

    Frequently Asked Questions About the Astilbe Plant

    I spend a lot of time on gardening forums and helping neighbors, and these are the questions that pop up constantly:

    Q1. Does the Astilbe plant come back every year?

    Yes! As long as you live in USDA Zones 3 to 8, they are hardy perennials that will reliably return every Spring.

    Q2. Can it grow in complete, deep shade?

    It will survive in deep shade, but it probably won’t flower well. They really need that ambient, indirect light or a little morning sun to produce those big, beautiful plumes.

    Q3. Should I deadhead the faded flowers?

    You don’t have to. Leaving the dried brown plumes actually adds some nice texture to your Fall and Winter garden. But if you prefer a clean look, snip them off!

    Q4. Can I grow an Astilbe plant indoors as a houseplant?

    I really don’t recommend it. They rely on the natural dormancy period brought on by cold Winter weather. Indoors, they tend to slowly decline and suffer from the dry air. Keep them outside.

    Q5. Why didn’t my Astilbe bloom this year?

    Usually, it’s a lack of moisture or a lack of light. If a tree above it grew a thicker canopy this year, the plant might be too shaded. Alternatively, it might need to be divided if it’s an older, crowded plant.

    Q6. How do I divide it, and when?

    Every 3 to 4 years, I dig up the entire root ball in early Spring or early Fall. I take a sharp spade and literally chop the tough root mass into quarters, then replant them. It revitalizes the plant perfectly!

    Q7. Do they attract pollinators?

    Absolutely. While they aren’t as much of a bee-magnet as lavender, you’ll definitely see butterflies and beneficial insects hovering around the blooms in early summer.

    Personal Pro-Tip: If you’re dividing them in the Fall, make sure to do it at least six weeks before your first hard frost. The newly separated roots need time to grip the soil before the ground freezes solid!

    Final Thoughts on Growing the Astilbe Plant

    At the end of the day, gardening is all about finding the right home for the right plant. While some folks get intimidated by the moisture requirements of the Astilbe plant, I look at it as a fair trade-off for the spectacular reward you get in return. There simply aren’t many perennials that can light up a dark, shady corner with such dramatic, cloud-like color.

    If you commit to keeping their soil damp and keeping them shielded from the blazing afternoon sun, these hardy beauties will reward you year after year. Next time you visit your local garden center, pick up a few varieties with different bloom times to stretch that gorgeous color all the way from early to late summer. Happy planting!

  • Growing the Impossible: Your Guide to the Indoor Broccoli Vegetable Plant

    Growing the Impossible: Your Guide to the Indoor Broccoli Vegetable Plant

    You can successfully grow a healthy broccoli vegetable plant inside your home instead of relying on standard houseplants. For example, most indoor gardeners stick to classic, non-edible options like sprawling pothos or moody fiddle leaf figs. However, you can easily shift your strategy to cultivate crisp, fresh florets right in your living room.

    Quick Care Cheat Sheet for Skimmers

    Care RequirementIdeal Conditions
    Light12-16 hours of bright LED grow lights.
    WaterKeep soil consistently moist like a wrung-out sponge.
    SoilRich, well-draining potting soil (never heavy garden dirt).
    Temperature60°F to 68°F (Avoid baseboard heaters!).
    Humidity40% – 50% (Standard US home humidity is usually fine).
    ToxicityNon-toxic to cats, dogs, and kids (ASPCA safe).

    Can You Really Grow a Broccoli Vegetable Plant Indoors?

    Can You Really Grow a Broccoli Vegetable Plant Indoors
    Can You Really Grow a Broccoli Vegetable Plant Indoors

    The short answer is a resounding yes. The long answer is yes, but you have to pick the right variety. You cannot grab standard seeds meant for a massive farm field and expect them to behave in a 10-inch pot sitting in your living room.

    Indoor growers need compact, fast-maturing varieties. Look for seeds labeled ‘Di Cicco’ or ‘Waltham 29’. These stay relatively manageable. The biggest hurdle you will face isn’t just space; it is temperature. Standard American homes are kept around 72°F year-round. A broccoli vegetable plant hates being hot. If it feels too much heat from your forced-air vents, it will panic, bolt, and sprout yellow flowers before giving you a nice green head to eat.

    Personal Pro-Tip: “Always keep your indoor brassicas far away from baseboard heaters or floor vents. I ruined my very first indoor crop because the hot air from the furnace tricked the plants into thinking it was mid-summer. Keep them in a cool spare bedroom or a chilly basement corner!”

    Lighting Your Broccoli Vegetable Plant Without the Sun

    Forget your south-facing window. Seriously. Unless you live in a glass greenhouse, window light passing through standard double-pane glass during a gray Midwest winter is incredibly weak.

    To get a tight, dense crown, your broccoli vegetable plant requires intense, overhead light. Without it, the stem will stretch out looking for the sun, becoming “leggy” and weak. You need a full-spectrum LED grow light positioned exactly 4 to 6 inches above the top leaves. Leave it on for 12 to 16 hours a day. Think of it as manufacturing your own private summer day, right inside your house.

    Personal Pro-Tip: “Don’t guess if your light is close enough. Use the back-of-the-hand test. Hold your hand right above the top leaves. If the light feels uncomfortably hot on your skin after a minute, it’s too close and will scorch your broccoli. If it feels slightly warm, you are in the sweet spot.”

    Watering Your Broccoli Vegetable Plant Like a Pro

    Watering is where most indoor gardeners completely ruin things. The dry air from your furnace acts like a giant sponge, sucking moisture out of the top layer of your potting soil incredibly fast.

    You stick your finger in, feel dry dirt, and panic-water. Meanwhile, the bottom of the pot is a swamp. Your broccoli vegetable plant will develop root rot and collapse. Instead of obsessing over a schedule, water by weight. Lift the pot. Does it feel light and airy? Time to water. Does it feel heavy like a wet brick? Walk away. When you do water, run it under the faucet until it drains out the bottom, ensuring the entire root ball gets a drink. You want the soil to feel exactly like a wrung-out kitchen sponge—damp, but not dripping.

    Personal Pro-Tip: “Never let your plant sit in a saucer full of runoff water. I like to use a turkey baster to suck up the excess water from the drip tray ten minutes after I water. It saves your floors and saves your roots from suffocating.”

    Soil and Fertilizer Secrets for the Broccoli Vegetable Plant

    Soil and Fertilizer Secrets for the Broccoli Vegetable Plant
    Soil and Fertilizer Secrets for the Broccoli Vegetable Plant

    Do not go outside, dig up a bucket of yard dirt, and bring it inside. Outdoor dirt is dense and packed with pests. You need a high-quality, indoor-specific potting soil amended with plenty of perlite for drainage. Imagine the perlite like chocolate chips in cookie dough; you want them scattered everywhere to keep the soil fluffy.

    Because your broccoli vegetable plant is trapped in a container, it relies 100% on you for food. About four weeks after the seeds sprout, start hitting them with a balanced liquid fertilizer every two weeks. Dilute it to half-strength. Too much fertilizer will burn the roots, but too little will result in a pathetic, tiny broccoli head.

    Personal Pro-Tip: “Broccoli is a heavy feeder, especially when it comes to nitrogen. I always mix a handful of worm castings into the top layer of my potting soil right when the plant starts forming its central head. It provides a slow, gentle nutrient boost every time I water.”

    Common Mistakes When Growing a Broccoli Vegetable Plant Inside

    We all mess up. Here is what usually trips people up when they try to grow this crop indoors:

    • Tiny Pots: A 6-inch decorative pot is cute for a succulent. It is a death sentence for a hungry vegetable. You need an 8-inch to 12-inch container minimum.
    • Stagnant Air: Indoor air gets stale. Without wind, the stems stay weak. Point a small oscillating fan at your plants on a low setting. This mimics the outdoor breeze and thickens up the main stalk.
    • Ignoring Drafts: Central AC blasts are freezing. While broccoli likes it cool, a direct icy blast from a vent will shock the plant and stunt its growth entirely.

    Troubleshooting Your Broccoli Vegetable Plant: Quick Fixes

    Troubleshooting Your Broccoli Vegetable Plant Quick Fixes
    Troubleshooting Your Broccoli Vegetable Plant Quick Fixes

    Even with perfect care, things get weird. Let’s fix them before it’s too late.

    • The leaves are turning yellow: You are overwatering, or the plant is starving for nitrogen. Check the pot weight. If it’s heavy, let it dry out. If it’s dry, feed it.
    • The head is splitting and flowering: It is way too hot in your house. The plant is bolting to drop seeds before it dies. Harvest whatever you can immediately, even if it’s small, before it turns entirely into yellow flowers.
    • Crispy brown leaf tips: The humidity is too low. Winter heating systems dry the air down to 20%. Move the plant away from the heat source or group it with other plants to create a microclimate.

    Toxicity: Is the Broccoli Vegetable Plant Safe for Pets?

    Good news for the zoo you call a living room. According to the ASPCA, the entire broccoli vegetable plant is non-toxic to dogs, cats, and humans.

    However, let’s use some common sense. If your golden retriever sneaks into your grow room and eats three pounds of raw broccoli leaves, they are going to have severe gastrointestinal distress. It isn’t poisonous, but it will cause a legendary amount of gas. Keep the plants elevated if you have curious pets who like to chew on green things.

    Frequently Asked Questions About the Broccoli Vegetable Plant

    Q1. How long does it take to get a harvest indoors?

    Patience is required. From seed to a harvestable head, you are looking at roughly 80 to 100 days depending on your indoor temperatures and lighting setup.

    Q2. Can I eat the leaves too?

    Absolutely. The leaves are incredibly nutritious. Treat them exactly like kale or collard greens. You can sauté them with a little garlic and olive oil.

    Q3. Why does my house smell a little weird?

    Brassicas have a distinct smell. As the plant matures, especially if it gets too warm, it might release a faint cabbage-like odor. Keeping a fan on helps disperse this.

    Q4. Do I need to hand pollinate my indoor broccoli?

    No! We eat the un-opened flower buds. You actually want to harvest the head before the yellow flowers open. Pollination is only necessary if you are trying to collect seeds for next year.

    Q5. Should I cut the main head or pull the whole plant?

    Always cut the main head off with a sharp knife, leaving the base of the plant in the pot. Many varieties will shoot out smaller “side shoots” a few weeks later, giving you a second, smaller harvest.

    Q6. Is standard room temperature okay?

    It’s barely acceptable. If your house sits at 75°F, your broccoli will struggle. Try to find the coolest room in the house, ideally hovering between 60°F and 65°F.

    Q7. Can I reuse the potting soil after I harvest?

    You can, but you shouldn’t use it for another brassica right away. Broccoli drains a lot of nutrients from the dirt. Mix that used soil into your outdoor garden beds or use it for lighter-feeding houseplants after adding some fresh compost.

    Final Thoughts on Your Indoor Harvest 

    Growing a broccoli vegetable plant inside your house is the ultimate indoor gardening challenge. It forces you to master your home’s microclimates, outsmart dry heating vents, and control your lighting like a pro. While most people stick to basic houseplants, you are actively pushing the boundaries of what a living room can produce. It takes a bit of extra grit and attention, but snapping off fresh, crisp florets in the middle of winter makes every bit of effort completely worth it. Set up your lights, drop your seeds, and go prove the traditional outdoor growers wrong.