Category: Indoor Plants & Decor

  • The No-Nonsense Guide to Keeping Freshwater Aquarium Plants Alive

    The No-Nonsense Guide to Keeping Freshwater Aquarium Plants Alive

    Most online guides about freshwater aquarium plants read like dusty, 1980s biology textbooks. It’s dry. It makes you feel like you need a PhD in water chemistry just to keep a single green leaf from dissolving into brown goo.

    Look, I spent years managing commercial greenhouses across the US before I finally got hooked on underwater aquascaping. Here is the honest truth: keeping freshwater aquarium plants healthy isn’t rocket science. It is just indoor gardening with a lot more water. You don’t need fancy CO2 injectors or complex, expensive setups to start. You just need to know how these aquatic ecosystems react to your typical home environment, your local tap water, and your lighting schedule. Let’s cut through the internet jargon and talk about how to actually make your tank look incredible without losing your sanity.

    Quick Care Reference for Common Freshwater Aquarium Plants

    Plant NameTank PlacementLight Level RequiredNeeds CO2 Injection?Best For
    Java FernAttached to rocks or woodLowNoAbsolute Beginners
    Anubias NanaForeground / MidgroundLowNoLow-maintenance setups
    Amazon SwordBackground CenterpieceModerateNo (needs root tabs)Filling large open spaces
    HornwortFloating or RootedLow to HighNoCleaning water / Fighting Algae
    VallisneriaBackgroundModerateNoCreating a tall grass wall

    Personal Pro-Tip

    Never bury the horizontal green stem (the rhizome) of your Java Fern or Anubias directly into the sand or gravel. If you bury it, the plant will rot and die within two weeks. Use a tiny drop of gel superglue or some sewing thread to attach it to a piece of driftwood or Texas holey rock instead.

    Why My First Batch of Freshwater Aquarium Plants Melted

    Why My First Batch of Freshwater Aquarium Plants Melted

    Most commercial nurseries grow freshwater aquarium plants immersed meaning their roots are underwater but their leaves are up in the open air. This allows them to grow incredibly fast and stay free of algae before they ship out to your local store. When you drop them completely underwater in your home tank, they panic. They drop their air-breathing leaves to grow completely new, submersed leaves.

    If your new purchases look like they are dying, don’t throw them out yet. Give them a few weeks. The roots are usually perfectly fine, and you’ll quickly see tiny, vibrant green shoots starting to pop out from the center.

    Personal Pro-Tip

    When buying new greenery from a local shop, gently squeeze the base of the stems. If it feels firm, the plant is healthy and will bounce back from the inevitable transition melt. If it feels like soggy paper towels, leave it in the store tank.

    Essential Gear for Keeping Freshwater Aquarium Plants Healthy

    Growing greenery underwater isn’t magic. It just requires you to find a steady balance between light, nutrients, and your water quality.

    Choosing the Right Substrate: Can You Use Organic Potting Soil?

    In traditional backyard gardening, we think of soil as the end-all-be-all. In the aquarium hobby, many folks default to plain aquarium sand or gravel. While sand looks incredibly clean, it has zero nutritional value for heavy root-feeders like Crypts or Swords.

    You have options. You can use expensive specialized aquasoil, or you can go old-school with the “Walstad Method.” This involves using a one-inch base layer of cheap organic potting soil capped with an inch of pool filter sand. I’ve used this exact method in my home tanks during the Spring setup season, and the growth is explosive. Just make sure the potting soil has no chemical fertilizers or vermiculite, which floats to the top and creates a massive headache.

    Personal Pro-Tip

    If you already have an established tank with plain gravel, don’t tear it apart to add soil. Just slide a few aquarium root fertilizer tabs deep into the gravel right next to your heavy feeders every three months. It gives them the exact same boost without the mess of dirt.

    Faucet Water vs. Ideal Water Parameters

    Let’s talk about what comes out of your kitchen faucet. Depending on where you live in the US, your city water might be heavily chlorinated or filled with chloramines. Always use a high-quality water conditioner before letting it touch your tank.

    Another massive hidden factor is your home’s climate control. During the scorching summer months, heavy air conditioning units kick on. This cools down the ambient room temperature, which can cause your tank water to evaporate much faster than usual. When water evaporates, it leaves behind heavy minerals, making your tank water harder. Keep an eye on your water line and top off with distilled water to keep parameters stable.

    Personal Pro-Tip

    I keep a five-gallon bucket of conditioned water sitting in my laundry room for 24 hours before a water change. This lets the water reach ambient room temperature naturally so I don’t shock my tropical plants with an icy blast straight from the faucet.

    Cultivating Popular Freshwater Aquarium Plants in US Homes

    Cultivating Popular Freshwater Aquarium Plants in US Homes
    Cultivating Popular Freshwater Aquarium Plants in US Homes

    Let’s look at a few bulletproof options that will flourish in almost any standard American home aquarium setup.

    • Java Moss: This stuff is practically indestructible. It loves low light and will attach itself to literally anything. If you have baby shrimp or fish fry, this provides the ultimate hiding spot.
    • Amazon Sword: The ultimate background centerpiece. Give it plenty of room because it can easily grow up to twenty inches tall. It needs plenty of iron, so if the leaves look pale, hook it up with an extra root tab.
    • Hornwort: A floating machine. Fun fact: Hornwort is native to North America and is so hardy that it can survive outdoors down to USDA Hardiness Zone 5 in backyard ponds over winter. Indoors, it acts like a sponge for fish waste, keeping your water incredibly clean.

    Personal Pro-Tip

    When trimming your stem freshwater aquarium plants, don’t throw away the tops you cut off. Simply push the cut ends back into the substrate. They will grow brand new root systems, giving you free plants for life.

    Common Mistakes Americans Make with Aquatic Greenery

    Why do so many indoor gardeners fail when trying to grow freshwater aquarium plants? The answers are usually pretty simple.

    First, people treat their aquarium lights like living room lamps. They leave them turned on for 14 hours a day because they want to look at the fish. All that excess light does is trigger a catastrophic explosion of green hair algae. Your plants can’t utilize that much light, but algae absolutely will. Stick to a solid 6 to 8 hours of light per day. Buy a cheap digital outlet timer from the hardware store to automate it.

    Second, folks blast their home air conditioning vents directly onto the top of an open-top aquarium. This creates cold spots in the water and causes wild temperature swings that cause delicate species like Cryptocorynes to melt into mush overnight. Keep your tanks away from HVAC registers.

    Personal Pro-Tip

    If you are battling algae, don’t rush out to buy chemical algaecides. They often harm sensitive freshwater aquarium plants like Vallisneria. Instead, cut your daily lighting period down to 5 hours for a week and do a manual cleanup with an old toothbrush.

    Troubleshooting Sick Freshwater Aquarium Plants

    When your underwater garden starts acting up, it speaks to you through its leaves. You just have to learn the language.

    • Holes in Old Leaves: This is a classic sign of a potassium deficiency. Your plants are literally starving for macronutrients. Grab a bottle of all-in-one liquid aquarium fertilizer and dose the water column weekly.
    • Yellowing New Leaves: This usually means an iron deficiency. It’s incredibly common in areas with soft municipal water.
    • Stems Rotting at the Base: The plant isn’t getting enough light at the bottom, or the substrate is packed too tightly, suffocating the roots. Thin out your plant groupings so light can reach the lower portions of the stems.

    Personal Pro-Tip

    Keep a dedicated pair of long curved aquarium scissors handy. Whenever you see a leaf starting to rot, snip it off immediately at the base. Dead leaves waste the plant’s energy and pollute your water as they decay.

    Are These Freshwater Aquarium Plants Safe for Your Cats and Dogs?

    Are These Freshwater Aquarium Plants Safe for Your Cats and Dogs
    Are These Freshwater Aquarium Plants Safe for Your Cats and Dogs

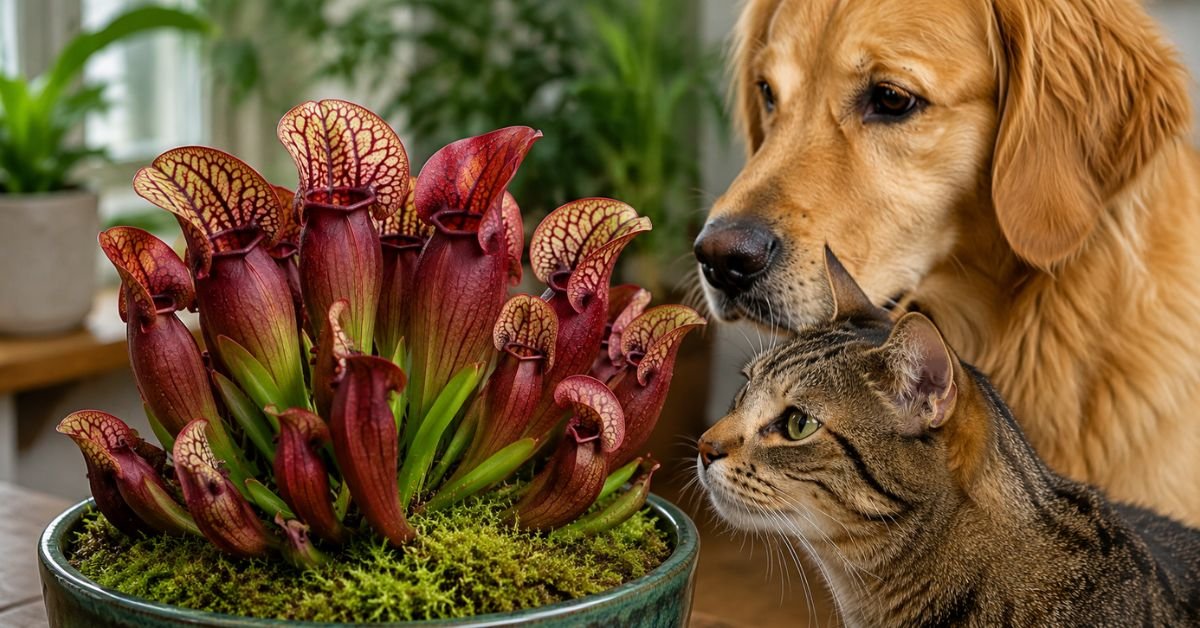
    As pet owners, we worry about what our furry friends chew on. Many popular houseplants like Pothos are toxic to pets. Fortunately, the most popular freshwater aquarium plants including Java Fern, Anubias, Amazon Swords, and Java Moss are completely non-toxic to cats and dogs.

    However, watch out for floating plants like Water Lettuce if your cat likes to dip its paws in the tank water. Water Lettuce contains calcium oxalate crystals, which can cause intense mouth irritation if chewed on by an inquisitive pet.

    Personal Pro-Tip

    If you use a rimless, open-top tank, cats will view it as a giant, delicious water bowl. Use a tight-fitting glass canopy. It keeps your curious pets safe from eating the vegetation and stops your fish from jumping out when the AC kicks on.

    FAQs About Freshwater Aquarium Plants

    Q1Do freshwater aquarium plants need carbon dioxide (CO2) injection systems?

    No, most beginner options do perfectly fine without expensive CO2 setups. They simply absorb the ambient CO2 produced by your fish and surface agitation. High-tech systems are only necessary if you want to grow difficult carpeting plants or intense red variants.

    Q2Can I use regular garden fertilizer for my aquatic plants?

    Absolutely not. Terrestrial fertilizers contain massive amounts of urea and phosphates. If you put that in your fish tank, you will cause a toxic ammonia spike that can wipe out your fish population and trigger a massive algae bloom. Always use fertilizers specifically formulated for aquariums.

    Q3Why are my new plants losing all their leaves?

    They are likely going through the common transition phase called “melting.” Give them two to three weeks to adapt to your specific water chemistry, and you should see healthy new submersed growth emerging.

    Q4How many hours of light do freshwater aquarium plants need each day?

    A sweet spot for a low-tech tank is between 6 and 8 hours of consistent light. Anything more than that usually leads to a major battle with green algae. Use a cheap digital timer to keep the schedule precise.

    Q5Can I plant freshwater aquarium plants in plain aquarium sand?

    Yes, but since sand contains no nutrients, you must supplement heavy root-feeding species with root fertilizer tabs every few months to prevent them from starving.

    Q6Do I need to clean new plants before putting them in my tank?

    Yes. New plants can carry hitchhikers like pest snail eggs, parasites, or unwanted algae. I always give my new purchases a quick dip in a diluted bleach solution (1 part bleach to 20 parts water) for two minutes, followed by a thorough rinse in conditioned water before adding them to my main tank.

    Q7Why are the leaves on my Amazon Sword turning completely see-through?

    Transparent or translucent leaves mean the plant is literally starving to death from a lack of nutrients, usually iron or nitrogen. Shove a root tab directly beneath its root system immediately.

    Final Thoughts

    Building a lush, green underwater world takes a little patience, but it isn’t the rocket science people make it out to be. Focus on easy, low-tech options first, keep your lighting schedule under control, and don’t panic when your new purchases go through a temporary melt. Treat your tank like a living ecosystem, and you’ll be amazed at how quickly it transforms your living room.

  • The Ultimate Human-First Guide to the Best House Plants for American Homes

    The Ultimate Human-First Guide to the Best House Plants for American Homes

    Finding the best house plants for your living space can feel completely overwhelming. As a horticulturist working across various US climates, I see this struggle daily. Specifically, people love bringing nature indoors but often choose the wrong green varieties.

    You need resilient indoor plants, not just pretty Instagram photos. For example, your greenery must survive intense winter radiators and harsh summer air conditioning. Therefore, I designed this hands-on guide to help you find plants that truly thrive.

    Quick Reference: The Ultimate Care Guide for the Best House Plants

    If you are just skimming for quick answers, this table covers our top picks for American living rooms.

    Plant NameLight RequirementWatering FrequencyPet Friendly? (ASPCA)US Home Adaptability
    Snake PlantLow to Bright, IndirectEvery 3–4 weeksNo (Toxic to cats/dogs)Thrives in dry AC air
    Golden PothosLow to Bright, IndirectEvery 1–2 weeksNo (Toxic to cats/dogs)Handles drafty rooms well
    Monstera DeliciosaBright, IndirectEvery 1–2 weeksNo (Toxic to cats/dogs)Needs a bit of extra humidity
    Parlor PalmMedium, IndirectEvery 1–2 weeksYes (Safe for pets)Great for dimmer apartments

    What Makes the Best House Plants for American Homes?

    What Makes the Best House Plants for American Homes
    What Makes the Best House Plants for American Homes

    In my experience running plant consultation services, the biggest hurdle for indoor gardeners isn’t a lack of a green thumb; it’s a mismatch between the plant and the home’s climate.

    In the US, our homes are heavily climate-controlled. Air conditioning units strip humidity from the air all summer, while forced-air heating systems bake our spaces in the winter. The best house plants are those robust enough to withstand these rapid humidity shifts without dropping all their leaves.

    1. The Unkillable Snake Plant (Sansevieria)

    Why it’s One of the Best House Plants for Beginners

    I always tell people that if you think you kill every plant you touch, you haven’t tried a Snake Plant yet. These structural, upright beauties are native to arid regions, meaning they store water in their thick, leathery leaves. They are incredibly forgiving if you travel for work or simply forget they exist for a month.

    Real-World Care Tips

    • Light: They will survive in a dim corner of a basement apartment, but they truly thrive and grow faster in bright, indirect light near an east-facing window.
    • Water: Treat this plant like a cactus. Let the potting soil dry out 100% all the way to the bottom of the pot before you even think about bringing it to the faucet.

    Personal Pro-Tip

    In my years of growing this plant, I’ve found that the number one killer is using heavy garden soil. Always use a well-draining potting soil mixed with a generous handful of perlite or coarse sand. If your home runs cold in the winter (below 65°F), cut your watering down to just once every five to six weeks.

    2. Golden Pothos (Epipremnum aureum)

    Caring for this Versatile Favorite Among the Best House Plants

    If you want that lush, trailing “jungle vibe” on your bookshelves, Golden Pothos is your go-to. It grows incredibly fast during the Spring and Summer months, sending down long vines tipped with heart-shaped, variegated leaves.

    Real-World Care Tips

    • Light: Pothos loves moderate, indirect light. If you notice the beautiful yellow marbling turning solid green, it’s telling you it needs to be closer to a window.
    • Water: Wait until the top two inches of the potting soil feel dry. If the leaves look slightly wilted or limp, that is your cue that it’s thirsty.

    Personal Pro-Tip

    Don’t let long Pothos vines just dangle forever. I like to clip the tips occasionally during the Spring growing season. This encourages the plant to branch out at the base, making the top of the pot look incredibly full and bushy rather than sparse. Plus, you can pop those clippings in a glass of water on your kitchen sill to grow roots for brand-new plants!

    3. Monstera Deliciosa (The Swiss Cheese Plant)

    Bringing Tropical Vibes to the Best House Plants Collection

    Nothing makes a statement quite like a mature Monstera. Known for the dramatic splits and holes (fenestrations) in its massive leaves, this plant instantly anchors a room. While it looks exotic, it’s surprisingly resilient in standard US household conditions.

    Real-World Care Tips

    • Light: Monsteras are sun-worshipers compared to Pothos. Give them a spot right next to a bright window shielded by a sheer curtain, or a few feet away from a blazing southern exposure.
    • Water: Water thoroughly when the top half of the potting soil is dry. Make sure water runs out of the bottom drainage holes, then empty the saucer so it doesn’t sit in stagnant pools.

    Personal Pro-Tip

    Because Monstera leaves have so much surface area, they act like little dust magnets in our homes. Dust blocks sunlight and slows down photosynthesis. Once a month, take a damp, soft microfiber cloth and gently wipe down both sides of every leaf. Your plant will reward you with much faster growth and bigger splits.

    Common Mistakes Americans Make with the Best House Plants

    Common Mistakes Americans Make with the Best House Plants
    Common Mistakes Americans Make with the Best House Plants

    We love our plants, but sometimes we love them to death. Here are the most frequent missteps I see across American households:

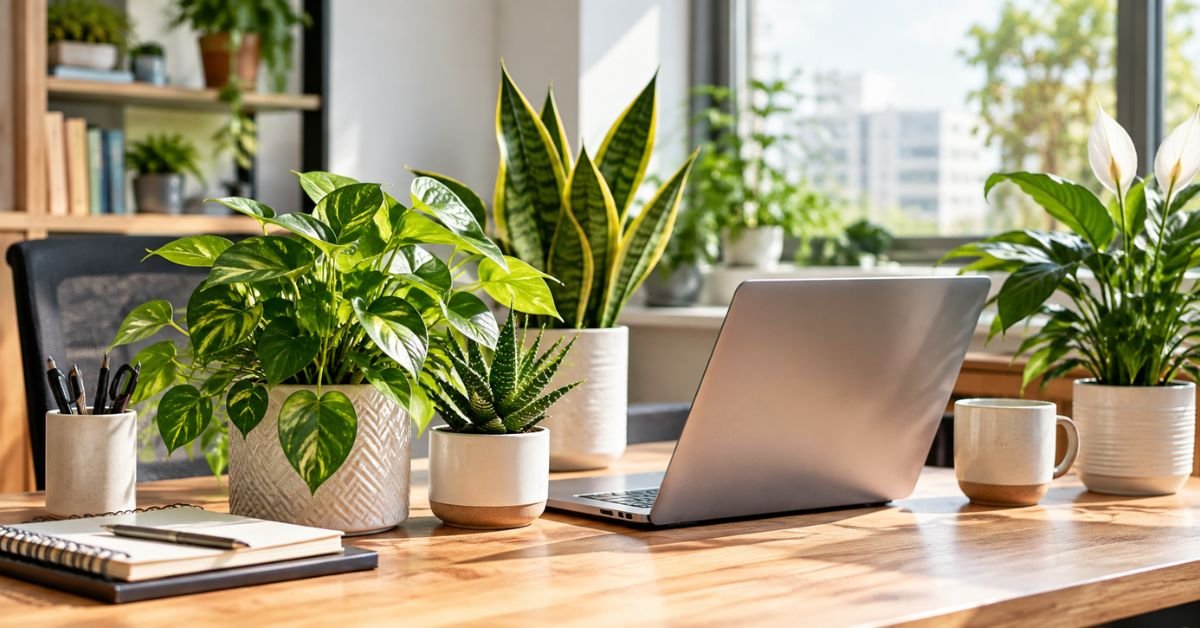
    • Blasting the AC or Heat Vents: Placing a tropical plant directly in the path of an air conditioning draft or a roaring heating vent will dry out the foliage in days, causing crispy, brown edges. Keep plants at least three to four feet away from any forced-air sources.
    • The “Teacup” Watering Habit: Pouring a tiny sip of water over your plants every few days is a recipe for disaster. It causes shallow root systems. Instead, water deeply at the faucet until water runs out the bottom, then wait for the soil to dry out before doing it again.
    • Ignoring USDA Zones for Seasonal Field Trips: Many indoor gardeners like to put their house plants out on the patio during the hot, humid summer months (great for USDA Zones 5–10). However, if you leave them out when night temperatures drop below 55°F in the Fall, you risk shocking the root systems and causing massive leaf drop when you bring them back inside.

    Troubleshooting Guide: Saving Your Best House Plants from Common Issues

    If your green friend is looking a little sad, don’t panic. Plants communicate through their leaves. Here is how to decode what they are saying:

    Yellowing Leaves

    • The Culprit: Usually, this means the root zone is drowning from overwatering.
    • The Fix: Stop watering immediately. Check to make sure your pot has a drainage hole. If the potting soil feels like a soggy sponge, you may need to gently unpot the plant, shake off the wet dirt, and repot it into fresh, dry soil.

    Crispy, Brown Leaf Tips

    • The Culprit: Low humidity or hard tap water minerals building up in the soil.
    • The Fix: If you live in an arid state or have heavy central heating, group your plants together to create a humid microclimate, or run a small humidifier nearby. If your local water is heavily chlorinated, try letting your water sit out in a pitcher overnight before using it, or use filtered water.

    Crucial Toxicity Warning for Pet Owners

    Crucial Toxicity Warning for Pet Owners
    Crucial Toxicity Warning for Pet Owners

    Before you head out to the nursery, please keep your furry family members in mind. Many popular indoor varieties contain insoluble calcium oxalates, which can cause intense oral irritation, drooling, and vomiting if chewed on by cats or dogs.

    If you have curious pets who like to nibble on greenery, skip the Monstera, Pothos, and Snake Plants. Instead, look for completely non-toxic alternatives like Parlor Palms, Spider Plants, or Boston Ferns, which are fully cleared by the ASPCA.

    Frequently Asked Questions About the Best House Plants

    Q1How often should I fertilize my house plants?

    Only fertilize during the active growing seasons of Spring and Summer. I recommend using a balanced, liquid indoor plant fertilizer diluted to half-strength once a month. Hold off completely during late Fall and Winter when the plant’s metabolic rate slows down.

    Q2Do I really need a pot with a drainage hole?

    Yes, absolutely. Growing a plant in a pot without a drainage hole is like driving a car without brakes—eventually, you will crash. Without a hole, excess water pools at the bottom, suffocating the roots and causing root rot, which is incredibly difficult to cure.

    Q3Why is my plant growing long and skinny instead of full?

    This is a phenomenon called “etiolation,” which is a fancy way of saying your plant is stretching out desperately looking for more light. Move it closer to a window or invest in a small LED grow light to help it grow more compactly.

    Q4Can I use dirt from my backyard for indoor plants?

    I strongly advise against this. Outdoor garden soil is full of heavy clay, weed seeds, and microscopic pests or fungus spores. Indoors, it packs down too tightly in a pot, suffocating indoor roots. Always stick to a bagged, sterile indoor potting soil mix.

    Q5How do I get rid of those tiny little black bugs flying around my pots?

    Those are fungus gnats. They lay their eggs in the top layer of consistently damp potting soil. The easiest fix is to let your soil dry out more between waterings, use yellow sticky traps to catch the adults, and water with a mix of water and a bit of mosquito bits (which contain a natural bacteria that kills the larvae).

    Q6Should I mist my tropical house plants?

    Misting only raises the humidity for a few fleeting minutes and can actually invite fungal leaf spot diseases if the air circulation is poor. If you want to raise humidity effectively, use a dedicated humidifier or place your pots on a tray filled with pebbles and water.

    Q7How do I know when it’s time to repot my plant?

    Look at the bottom of the pot. If you see roots curling tightly around the inside or poking aggressively out of the drainage holes, your plant is root-bound. Spring is the absolute best time to move it into a new container that is roughly two inches wider than its current home.

    Final Thoughts

    At the end of the day, creating a thriving indoor garden is all about observation. Plants don’t operate on a strict calendar; they respond to the light, warmth, and humidity of your specific room. Start with resilient varieties like Pothos or Snake Plants, get used to checking the moisture level of your potting soil with your index finger, and enjoy the process of turning your home into a living, breathing sanctuary.

  • A Plant Parent’s Guide: How Often to Water Aloe Vera in Winter

    A Plant Parent’s Guide: How Often to Water Aloe Vera in Winter

    Winter is tough on all of us, but for indoor succulents, it can be downright brutal. I remember the first time I brought a gorgeous, plump aloe inside before the first frost, only to watch it turn into a sad, mushy mess by January. My mistake? I kept watering it like it was still July. As the days shorten across the country and our indoor heating cranks up, understanding exactly how often to water aloe vera in winter is the single most important skill you can master to keep your plant alive. It’s a complete shift from their summer routine, and treating them the same year-round is a guaranteed recipe for root rot. Let’s dive into the exact schedule and care routine I use to keep my succulents thriving through the chilly season.

    Quick Care Table: Aloe Vera Winter Basics

    Care ElementWinter Requirement
    Watering FrequencyEvery 3 to 4 weeks (only when 100% dry).
    LightBright, indirect light (South or West-facing window).
    SoilFast-draining cactus/succulent potting soil.
    Temperature55°F to 75°F indoors. (USDA Zones 10-12 for outdoor growing).
    FertilizerNone. Do not feed during winter dormancy.

    Personal Pro-Tip: I keep a wooden chopstick right next to my aloe pot. Before I even think about taking it to the sink, I push the chopstick all the way down to the bottom. If it comes out with any damp soil clinging to it, I wait another week.

    The Golden Rule: How Often to Water Aloe Vera in Winter

    image
    image

    In my years of growing this plant, I’ve found that the biggest shift you need to make is respecting its dormancy period. During the winter, aloe vera plants aren’t actively pushing out new growth. Because they are resting, they use a fraction of the water they would in the spring or summer.

    So, exactly how often to water aloe vera in winter? Generally, you should only be watering it every 3 to 4 weeks. Your goal isn’t to keep the soil moist; your goal is to let the potting soil dry out completely, bake a little, and then give it a thorough drench. When you do water, take it to the sink, turn on the faucet, and let room-temperature water run through the soil until it freely flows out of the drainage holes.

    Personal Pro-Tip: Never let water sit in the rosette (the center where the leaves meet). I always water the soil directly. Water pooled in the crown during the cool winter months almost always causes stem rot.

    Adjusting How Often to Water Aloe Vera in Winter for US Homes

    Our indoor environments in the US can be incredibly confusing for plants. While the days are short, our central heating systems are kicking on, completely changing the ambient humidity.

    If your aloe is sitting near a heating vent or a radiator, the forced hot air is going to dry that potting soil out much faster than if it were sitting in a chilly, drafty hallway. Conversely, if your plant was dealing with the drying effects of central air conditioning all summer, the winter indoor environment might actually feel a bit less harsh, depending on your setup. You have to read the room. If your home is kept at a toasty 75°F all winter, you might lean closer to the 3-week mark. If you keep things cool, 4 to 5 weeks might be the sweet spot.

    Personal Pro-Tip: I learned the hard way to physically move my aloe pots in late October. The spot that was perfect in June suddenly gets blasted by a heating vent in December. Keep them away from direct drafts, hot or cold.

    Common Mistakes When Watering Aloe in the Colder Months

    image
    image

    Why do so many of us fail with this incredibly tough plant? It almost always comes down to killing them with kindness.

    • Overwatering: This is the number one killer. Giving them a “little sip” every week keeps the roots constantly damp, suffocating them.
    • Wrong Soil: If you used standard indoor potting soil instead of a gritty succulent mix, that soil will hold onto water like a sponge. In winter, this wet blanket effect is fatal.
    • Cold Water Shock: Taking water straight from a freezing winter faucet and dumping it on tropical roots causes shock. Always let your watering can sit out overnight to reach room temperature.

    Personal Pro-Tip: I always use terracotta pots for my aloes. The porous clay actually breathes, allowing moisture to evaporate through the sides of the pot, which provides a great safety net if I accidentally get too heavy-handed with the watering can.

    Troubleshooting Aloe Vera Winter Watering Issues

    Even with the best intentions, things go sideways. Here is how I read my plant’s distress signals.

    Leaves Turning Yellow and Mushy

    This is the classic sign of overwatering. The leaves will feel squishy, like a water balloon, and might start drooping heavily or falling off at the base.

    • The Fix: Stop watering immediately. If the soil is soaking wet, I pull the plant completely out of its pot, knock off the wet potting soil, let the roots air dry for a day or two, and repot it in fresh, dry succulent mix.

    Brown, Crispy Tips or Curling Leaves

    While rare in winter, if the leaves are curling inward like a taco or the tips are turning brown and brittle, the plant is too dry. It is cannibalizing the moisture stored in its own leaves to survive.

    • The Fix: It’s time for a deep, thorough watering. Give it a good soak at the faucet, let it drain completely, and the leaves should plump back up within a few days.

    Personal Pro-Tip: Don’t cut off a mushy leaf right at the base right away. I usually let it dry out a bit first so the wound can callous, preventing bacteria from entering the main stem.

    Toxicity Warning: Keep Pets Safe

    image
    image

    As much as we love this healing plant for human sunburns, we have to be careful with our furry roommates. According to the ASPCA, aloe vera is toxic to both cats and dogs. The sap contains compounds called saponins and aloin, which can cause vomiting, lethargy, and diarrhea if ingested.

    Personal Pro-Tip: My cat loves to chew on spiky things. I keep all my aloes on a high floating shelf, completely out of jumping range, to keep both the plant and the pets safe.

    FAQs on How Often to Water Aloe Vera in Winter

    Q1. Exactly how often to water aloe vera in winter if I live in a cold state?

    If your home is drafty and cool, you might stretch your watering out to once every 4 to 6 weeks. Always let the soil dictate the schedule—100% dry is the rule.

    Q2. Should I mist my aloe vera in the winter?

    No. Aloes thrive in arid environments. Misting them, especially in cooler winter temperatures, just invites fungal diseases on the leaves.

    Q3. Why are my aloe leaves turning pale green in December?

    This is usually a light issue. Winter days are shorter and the sun is lower. Move your plant to the brightest South or West-facing window you have.

    Q4. Does the type of pot change how often to water aloe vera in winter?

    Absolutely. Plastic or glazed ceramic pots trap moisture, meaning you’ll need to water less frequently. Terracotta pots breathe, so the soil dries out faster.

    Q5. Can I use tap water from the faucet?

    Yes, but if your city water has high levels of chlorine or fluoride, let it sit out in an open container for 24 hours before watering so the chemicals can dissipate.

    Q6. Should I fertilize my aloe in the winter?

    Skip the fertilizer entirely from November through March. Feeding a dormant plant causes a buildup of salts in the soil that can burn the roots.

    Q7. How do I know if the soil is actually dry at the bottom?

    Use a wooden skewer or chopstick, or honestly, just lift the pot. After a few weeks of growing, I know exactly what a heavy (wet) pot feels like versus a light (bone-dry) pot.

    Personal Pro-Tip: When in doubt, read the leaves. A healthy aloe leaf should be firm and plump. If it looks full but the soil is dry, the plant doesn’t need water yet.

    Final Thoughts on Your Aloe’s Winter Watering Needs

    Getting through the colder months with your houseplants intact doesn’t have to be stressful. Once you accept that less is more, the whole process becomes incredibly easy. Figuring out how often to water aloe vera in winter basically boils down to ignoring the plant for weeks at a time, making sure it gets as much winter sun as possible, and keeping it away from those harsh heating vents. Trust your instincts, check the soil before you water, and your aloe will be ready to push out a ton of fresh green growth the moment spring arrives!

  • White Spots on Succulent Leaves? Here’s Exactly How to Fix Them

    White Spots on Succulent Leaves? Here’s Exactly How to Fix Them

    As an American horticulturist who has spent years coaxing Echeverias and haworthias to thrive in everything from humid Florida sunrooms to dry, air-conditioned New York apartments, I know the heart-sink feeling of spotting something “off” on a prized plant. One morning you’re admiring your Jade, and the next, you’re staring at mysterious white spots on succulent leaves.

    Before you panic and reach for the trash can, take a breath. Most of the time, these spots are either a minor “oops” in your care routine or a common pest that we can handle with stuff you probably already have under your kitchen sink.

    Quick Care Reference for Healthy Succulents

    Care FactorIdeal Setting (US Standard)Why it Matters
    Light6+ hours of bright, indirect sunPrevents stretching and fungal growth.
    Watering“Soak and Dry” methodPrevents root rot and edema.
    SoilFast-draining potting soil (Cactus mix)Crucial for drainage in indoor pots.
    Temperature60°F – 80°FAvoid placing directly near AC vents or heaters.
    AirflowHigh (use a small fan if needed)Prevents powdery mildew in humid zones.

    Identifying White Spots on Succulent Leaves: Is it Pests or Disease?

    image
    image

    The first thing I do when I see white spots on succulent leaves in my collection is the “rub test.” If the spot wipes away easily like flour, it’s likely a fungal issue. If it’s sticky or moves, we’ve got bugs.

    The Cottony Culprit: Mealybugs and White Spots on Succulent Leaves

    In my experience, the most frequent cause of white spots is the mealybug. These tiny, white, fluff-covered insects love to hide in the nooks and crannies where the leaf meets the stem. They look like little bits of wet cotton or lint. If left unchecked, they suck the sap out of your plant, causing it to wither.

    Personal Pro-Tip: Keep a bottle of 70% isopropyl alcohol and some Q-tips nearby. When I see a “cotton ball” on my succulents, I dab it immediately. The alcohol dissolves their waxy coating and kills them on contact without hurting the plant.

    Powdery Mildew: That Weird Dust-Like White Spotting on Succulent Leaves

    If the white spots on succulent leaves look like someone accidentally spilled powdered sugar on them, you’re likely dealing with powdery mildew. This is a fungal infection that thrives when the air is stagnant and humid—common in Southern states or during “shoulder seasons” (Spring/Fall) when you might not have your AC or heater running to circulate the air.

    Personal Pro-Tip: I’ve found that a simple mix of one tablespoon of baking soda and a half-teaspoon of liquid soap in a gallon of water works wonders as a preventative spray.

    Hard Water Deposits (Efflorescence)

    Sometimes, those white spots on succulent leaves aren’t “alive” at all. If you’re watering your plants straight from the faucet, minerals like calcium and magnesium can build up. As the leaf “perspires” (a process called transpiration), the water evaporates and leaves the salt behind. These spots are usually gritty and circular.

    Common US Mistakes That Cause White Spots on Succulent Leaves

    image
    image

    Why do Americans usually struggle with this? Often, it’s our indoor environments.

    1. The AC Vent Trap: We love our climate control, but placing a succulent directly in the path of an air conditioning vent creates a micro-climate of cold, dry air. This can stress the plant, making it more susceptible to powdery mildew or causing “edema”—where the plant takes up too much water too fast, and the cells literally burst, leaving behind white or corky scars.
    2. Using “Standard” Potting Soil: Many of my clients use regular potting soil meant for petunias. In a pot, this stays wet far too long. I always tell people: “Succulents hate wet feet.” Use a dedicated cactus/succulent mix or amend your soil with perlite.
    3. The “Damp Fall” Syndrome: In USDA zones 7-9, our Falls can be incredibly damp. If you leave your plants outside during these humid stretches without enough breeze, those white spots on succulent leaves (fungus) will show up overnight.

    How to Treat White Spots on Succulent Leaves Naturally

    I prefer to keep things organic, especially if you have kids or pets.

    • Neem Oil: This is the “Gold Standard” for American gardeners. It treats both pests like mealybugs and fungal issues like mildew. Spray your plants in the evening—if you do it during the day, the Texas or California sun will literally “fry” the oil onto the leaves.
    • The “Sink Shower”: Sometimes, a forceful jet of water from your kitchen faucet is enough to knock off a minor mealybug infestation. Just make sure the plant dries out completely afterward.

    Personal Pro-Tip: Always isolate a “spotted” plant. I have a “Plant Hospital” (a separate shelf in a different room) where I keep any plant showing white spots on succulent leaves until I’m 100% sure the issue is gone.

    Troubleshooting Guide: Beyond the White Spots

    image
    image
    • Leaves turning yellow? Usually a sign of overwatering. Check the soil—if it’s soggy, stop watering immediately.
    • Brown, crispy tips? Your plant might be getting “sunburned” or the AC is sucking the moisture out of it. Move it a few feet back from the window or vent.
    • Bottom leaves falling off? If they are drying up and falling off naturally, that’s just growth! If they are mushy and falling off, you’ve got rot.

    Toxicity Warning: Is it Safe for Cats and Dogs?

    This is a huge deal for US pet owners. Many common succulents like Jade (Crassula ovata) and Aloe Vera are actually toxic to cats and dogs if ingested, causing vomiting or lethargy.

    If you have a “nibbler” at home, stick to pet-safe options like Echeveria, Haworthia (Zebra Plant), or Burro’s Tail. Always check the ASPCA website if you aren’t sure.

    FAQs: What People Actually Ask About White Spots

    Q1. Can I use tap water for my succulents?

    You can, but if you have “hard water,” you’ll see those white mineral spots. I like to let my water sit out overnight before using it, or use a filter.

    Q2. Are the white spots on my Jade plant normal?

    Jade plants are famous for “sweating” minerals. If the spots are small, white, and regular, it’s likely just mineral deposits from your faucet.

    Q3. Will white spots kill my plant?

    If it’s mealybugs or fungus, yes, eventually. If it’s mineral deposits or scarring from an AC vent, it’s mostly a cosmetic issue.

    Q4. How often should I check for pests?

    I do a “Leaf Check” every time I water (usually every 10-14 days). Look closely at the center of the rosette.

    Q5. Why are the spots only on the bottom leaves?

    This is often where humidity stays trapped or where pests first crawl up from the soil.

    Q6. Can I use dish soap on my succulents?

    Only use “pure” soaps (like Castile soap). Many modern American dish soaps have degreasers that can strip the protective “wax” (farina) off succulent leaves.

    Q7. Does the USDA zone matter for indoor plants?

    Yes! If you’re in a humid zone (like Zone 9 in Florida), you’ll need more airflow than someone in a dry zone (like Zone 7 in Arizona) to prevent white spots on succulent leaves caused by fungus.

    Final Thoughts

    Finding white spots on succulent leaves doesn’t mean you’re a bad “plant parent.” It’s just the plant’s way of talking to you. Whether it’s telling you the humidity is too high, the water is too “hard,” or it’s picked up a few uninvited mealybug guests, most of these issues are easily fixable with a little patience and some household staples. Keep an eye on your airflow, use the right potting soil, and your greens will be back to their vibrant selves in no time!

  • The Ultimate Guide: How to Get Rid of Spider Mites on Indoor Plants Naturally

    The Ultimate Guide: How to Get Rid of Spider Mites on Indoor Plants Naturally

    If you want to learn how to get rid of spider mites on indoor plants naturally, you are not alone. These tiny pests can quickly damage healthy houseplants by causing yellow leaves, webbing, and weak growth. Fortunately, you can stop spider mites naturally with simple organic methods like Neem oil, humidity control, and proper plant cleaning—without using harsh chemicals.

    Quick Care & Identification Table

    FeatureWhat to Look For
    Primary SymptomTiny yellow or white “stippling” (dots) on leaves.
    Visual ConfirmationFine, silky webbing, usually in the joints of stems.
    Mite ColorTiny red, brown, or pale specks (use a magnifying glass!).
    Favorite ConditionsHot, dry air (near AC vents or heaters).
    Primary Organic FixHigh humidity and Neem oil or Castile soap.

    Why Common Mistakes Make Spider Mites Worse in US Homes

    Why Common Mistakes Make Spider Mites Worse in US Homes
    Why Common Mistakes Make Spider Mites Worse in US Homes

    One of the biggest reasons I see my fellow American plant parents struggle is our love for Air Conditioning. In many USDA Hardiness Zones (especially the hot, humid South or the dry Southwest), we blast the AC or the furnace year-round. This creates a “desert-like” micro-climate inside that spider mites absolutely adore.

    Common US Gardening Blunders:

    • The AC Vent Trap: Placing a plant directly in the path of an AC or heater vent dries out the foliage, making it a buffet for mites.
    • The “Nursery Hitchhiker”: Bringing a plant home from a big-box store without a “quarantine” period in a separate room.
    • Over-fertilizing with Nitrogen: Research suggests that high nitrogen levels in potting soil can actually increase mite density (Zhao et al., 2023).

    Personal Pro-Tip: Whenever I bring a new plant home, it stays in the “guest room” (my makeshift quarantine zone) for at least two weeks. I also keep a cheap hygrometer next to my plants to ensure the humidity stays above 50%.

    Step 1: The First Bath—How to Get Rid of Spider Mites on Indoor Plants Naturally with Water

    Before you reach for any sprays, the most effective first step is a simple trip to the faucet. Physically knocking the mites off the plant is 70% of the battle.

    1. Take your plant to the sink or shower.
    2. Use a lukewarm, steady stream of water to blast the undersides of every leaf.
    3. Pro-Tip: Don’t forget the “elbows” of the plant where the leaf meets the stem; that’s their favorite hiding spot.

    Personal Pro-Tip: For larger plants like a heavy Bird of Paradise, I use a damp microfiber cloth to wipe every single leaf individually after the “shower” to ensure no stragglers remain.

    Step 2: The Neem Strategy for How to Get Rid of Spider Mites on Indoor Plants Naturally

    If the water bath doesn’t finish them, it’s time for Neem oil. Neem is a natural derivative of the Azadirachta indica tree and is incredibly effective because it interferes with the mites’ ability to feed and lay eggs (Souto et al., 2021).

    My Go-To Organic Spray Recipe:

    • 1 quart of warm water
    • 1.5 tsp organic Neem oil
    • 0.5 tsp Dr. Bronner’s Peppermint Castile Soap (this acts as an emulsifier and a natural repellent)

    Note: Always test a single leaf first. Some sensitive plants, like ferns, can be “burned” by oils.

    Personal Pro-Tip: Only apply this spray in the evening. If you spray your plants and then they sit in a sunny window, the oil can “cook” the leaves, leading to ugly brown patches.

    Step 3: Using Rubbing Alcohol to Spot-Treat Spider Mites Naturally

    For smaller infestations, I’ve found that a simple bottle of 70% Isopropyl (rubbing) alcohol is a lifesaver. You can take a cotton swab, dip it in the alcohol, and dab it directly onto the webbing and the mites.

    The alcohol melts the mites’ exterior on contact. It’s strangely satisfying, but be careful—do not use higher concentrations (like 90%) as it evaporates too quickly and can chill and damage the plant tissue (Johnson, 2008).

    Personal Pro-Tip: I keep a pre-mixed spray bottle of 1 part alcohol to 4 parts water for a quick “preventative” misting on my more “mite-prone” plants like Ivies or Calatheas.

    Troubleshooting: Why Are My Leaves Still Turning Yellow?

    Troubleshooting Why Are My Leaves Still Turning Yellow
    Troubleshooting Why Are My Leaves Still Turning Yellow

    If you’ve followed the steps for how to get rid of spider mites on indoor plants naturally and you’re still seeing damage, check these three things:

    1. The Egg Cycle: Most natural treatments don’t kill eggs. You must repeat your treatment every 3-5 days for at least two weeks to catch the new “hatchlings.”
    2. Humidity: If your home is below 30% humidity (common in US winters), the mites will just keep coming back. Buy a humidifier!
    3. Hidden Reservoirs: Check the rim of your potting soil and the bottom of the nursery pot. Mites often hide in the cracks of the plastic.

    Toxicity Warning: Is This Safe for Pets?

    Toxicity Warning Is This Safe for Pets
    Toxicity Warning Is This Safe for Pets

    As a dog owner myself, I’m always cautious.

    • Neem Oil: Generally considered non-toxic to dogs and cats in diluted forms (Wylie & Merrell, 2022). However, if your cat is a “leaf-chewer,” it might cause a mild upset stomach.
    • Castile Soap: Safe, but ensure it doesn’t contain essential oils like tea tree, which can be toxic to cats.
    • Rubbing Alcohol: Highly toxic if ingested. Ensure the plant is completely dry before letting your pets back into the room.

    Final Thoughts on How to Get Rid of Spider Mites on Indoor Plants Naturally

    Getting rid of these pests is a marathon, not a sprint. I’ve had “wars” with spider mites that lasted a month, but with consistency and a bit of humidity, you will win. Remember, a healthy plant is its own best defense—keep that soil rich and that air moist!

    Frequently Asked Questions

    Q1. Can I use dish soap to get rid of spider mites naturally?

    Yes, but avoid “detergents” with degreasers (like Dawn). Stick to true soaps like Castile soap, which are gentler on the plant’s natural wax coating.

    Q2. How do I know if the spider mites are actually gone?

    The “Paper Test” is my favorite method. Shake a leaf over a white piece of printer paper. If you see tiny specks moving, they’re still there.

    Q3. Do predatory mites actually work for indoor plants?

    Absolutely! In the US, you can order Phytoseiulus persimilis online. They are “good bugs” that eat the “bad bugs” and then die off once the food source is gone (Zhao et al., 2023).

    Q4. Why do spider mites love my AC vents so much?

    AC vents create localized areas of low humidity and moving air, which prevents moisture from settling on leaves—creating the perfect dry environment for mites to thrive.

    Q5. Can spider mites live in my potting soil?

    While they primarily live on the leaves, they can certainly hide in the top layer of dry soil or on the rim of the pot. Always wipe down the pot when treating.

    Q6. Does cinnamon help get rid of spider mites?

    It’s a great antifungal, but it’s not a very effective miticide. It might deter them slightly, but it won’t stop an infestation.

    Q7. How often should I spray my plants to get rid of spider mites naturally?

    Every 3 to 5 days. You have to break their life cycle, and since eggs hatch quickly in warm US homes, a weekly spray usually isn’t frequent enough.

  • Mastering Your Indoor Jungle: The Best Well-Draining Potting Soil Mix for Indoor Plants in Homes 

    Mastering Your Indoor Jungle: The Best Well-Draining Potting Soil Mix for Indoor Plants in Homes 

    The best well-draining potting soil mix for indoor plants helps prevent root rot, improves airflow, and keeps houseplants healthy year-round. Many indoor plants struggle in heavy, soggy soil. However, the right soil mix creates the perfect balance between moisture retention and fast drainage for thriving roots and vibrant foliage.

    Whether you grow Monsteras, Snake Plants, Pothos, or Peace Lilies, your soil mix matters more than most people realize. Indoor environments with air conditioning and heating systems can quickly affect soil moisture levels. Therefore, choosing the correct potting mix becomes essential for long-term plant health.

    Quick Reference: The Best Well-Draining Potting Soil Mix for Indoor Plants

    Plant TypeIdeal Mix RatioWhy It Works
    Aroids (Monstera, Pothos)40% Bark, 30% Perlite, 30% PeatHigh aeration for thick roots.
    Succulents/Cacti50% Pumice/Sand, 50% Potting SoilPrevents root rot in desert species.
    General Tropicals60% Peat/Coir, 40% Perlite/BarkHolds moisture but drains quickly.
    Sensitive Ferns70% Peat, 30% PerliteKeeps soil damp but never soggy.

    Why You Need the Best Well-Draining Potting Soil Mix for Indoor Plants in US Homes

    Why You Need the Best Well Draining Potting Soil Mix for Indoor Plants in US Homes
    Why You Need the Best Well Draining Potting Soil Mix for Indoor Plants in US Homes

    In my experience, the biggest killer of houseplants in the USA isn’t neglect—it’s “loving them to death” with a heavy hand at the kitchen faucet. Most standard retail “potting soils” are actually peat-heavy mixes that hold onto water like a sponge. While that’s great for a thirsty petunia in a hanging basket on a hot Georgia porch, it’s a death sentence for a Philodendron sitting in a cool, air-conditioned living room.

    When your AC is running, the air is dry, but the soil stays cool. If that soil isn’t “well-draining,” the water sits around the roots, cutting off oxygen. Roots need to breathe just as much as they need to drink (Agarwal et al., 2021). Without enough air-filled porosity, you’re basically drowning your green friends in slow motion.

    Personal Pro-Tip: I always do the “Squeeze Test.” Take a handful of damp soil and squeeze it. If it stays in a hard, muddy ball, it needs more drainage. If it falls apart easily when you poke it, you’ve got a winner.

    Ingredients for the Best Well-Draining Potting Soil Mix for Indoor Plants

    To build a professional-grade substrate, you need to look past the “dirt.” High-quality horticultural crops grown in containers require specific mineral and organic components to stay healthy (Clark & Zheng, 2020).

    1. The Foundation: Peat Moss or Coconut Coir

    Peat is the gold standard for moisture retention in the US, though many of my “eco-conscious” gardener friends are switching to coconut coir. Both provide the “fluff” your roots need to grow through easily.

    2. The Drainage: Perlite and Pine Bark

    This is where the magic happens. In the Southeastern USA, pine bark is a common byproduct used to enhance drainage and improve aeration in substrates (Agarwal et al., 2021). Perlite (those little white “Styrofoam-looking” bits) creates air pockets.

    3. The Nutrient Boost: Compost (With Caution)

    While compost is rich in nutrients, be careful using it for indoor pots. Some composts can have high salinity or soluble salts, which can lead to “leaf burn” or nutrient lockout in sensitive indoor species (Gondek et al., 2020). If you use it, I recommend keeping it to less than 20% of your total mix.

    Personal Pro-Tip: Stop using “Play Sand” for drainage! It’s too fine and actually clogs up the air holes in your soil, turning your pot into a brick. Stick to coarse horticultural sand or pumice.

    Customizing the Best Well-Draining Potting Soil Mix for Indoor Plants by Zone

    Customizing the Best Well Draining Potting Soil Mix for Indoor Plants by Zone
    Customizing the Best Well Draining Potting Soil Mix for Indoor Plants by Zone

    While your plants are “indoor,” your local climate (USDA Hardiness Zone) still matters.

    • Zones 9-11 (Florida, Texas, SoCal): If you live somewhere with high ambient humidity, your soil will dry out slower. I’ve found I need to add an extra 10-15% perlite to my best well-draining potting soil mix for indoor plants to compensate for the muggy air.
    • Zones 3-5 (The Midwest, Northeast): In the winter, your heater will act like a giant hairdryer for your plants. You might actually want a bit more peat or coir to help the soil hold onto water for an extra day or two so you aren’t watering every 48 hours.

    Common Pitfalls When Using the Best Well-Draining Potting Soil Mix for Indoor Plants

    Even with the perfect soil, I see Americans make these three mistakes constantly:

    1. The “Pot with No Hole” Trap: You bought that beautiful ceramic pot from a boutique, but it has no drainage hole. I don’t care how good your soil is; if the water has nowhere to go, your plant will rot.
    2. AC Vent Placement: I once lost a gorgeous Calathea because I put it directly in the path of a cold AC vent. The moving air dried the leaves, but the soil stayed wet because the plant “shut down” from the cold.
    3. Compacting the Soil: When you’re repotting in the Spring, don’t press the soil down with all your might. You’re crushing those vital air pockets we worked so hard to create!

    Personal Pro-Tip: If you love a pot that has no hole, use it as a “cachepot.” Keep your plant in its plastic nursery liner and just drop it inside the fancy ceramic one. It’s a lifesaver for cleaning and watering.

    Troubleshooting & Toxicity Warning

    Troubleshooting & Toxicity Warning
    Troubleshooting & Toxicity Warning

    Leaf Watch

    • Yellow Leaves + Mushy Stems: Classic overwatering. Your soil isn’t draining fast enough. Add more bark or perlite.
    • Brown, Crispy Edges: Usually a humidity issue (AC/Heater) or your water has too many minerals. Try using filtered water from your fridge or faucet.
    • Interveinal Chlorosis (Yellowing between green veins): This can be a sign of nutrient deficiency, sometimes caused by poor-quality retail mixes (Clark & Zheng, 2020). Time for some fertilizer or a fresh report.

    Toxicity Warning for Pet Owners

    Many popular plants that thrive in the best well-draining potting soil mix for indoor plants (like Monsteras, ZZ plants, and Snake Plants) are toxic to cats and dogs if chewed. Always check the ASPCA list before bringing a new green friend home to your fur babies.

    FAQs About Indoor Plant Soil

    Q1. Can I use outdoor garden soil for my indoor plants?

    Absolutely not. Garden soil is way too heavy and often contains pests (fungus gnats, anyone?) that will thrive in your warm US home.

    Q2. How often should I replace my potting soil?

    I usually refresh my pots every 1-2 years. Over time, the peat breaks down and the “well-draining” properties vanish as the mix becomes compacted.

    Q3. Is perlite better than vermiculite?

    For drainage, yes. Perlite helps water move through. Vermiculite actually holds water, which is better for starting seeds but risky for established houseplants.

    Q4. Why is there white mold on top of my soil?

    It’s usually harmless saprophytic fungus. It means your soil is stayng too wet—increase your drainage or cut back on the watering.

    Q5. Does the best well-draining potting soil mix for indoor plants need fertilizer?

    Most “homemade” mixes are low in nutrients. I recommend a balanced, water-soluble fertilizer applied during the growing seasons (Spring and Summer).

    Q6. Can I reuse old potting soil?

    I don’t recommend it. Old soil can harbor pathogens and has likely lost its structure. Toss it in your outdoor flower beds instead.

    Q7. What is “Aroid Mix”?

    It’s just a fancy name for the best well-draining potting soil mix for indoor plants that is heavy on chunky bark and charcoal, specifically for plants like Monsteras that grow on trees in the wild.

    Final Thoughts

    At the end of the day, your plants are living things that just want a comfortable place to “sit.” By taking the time to mix the best well-draining potting soil mix for indoor plants, you are giving them the foundation they need to survive our modern, climate-controlled homes. It might take a little more effort than just dumping a bag of dirt into a pot, but seeing that first new leaf unfurl in the Spring makes it all worth it.

    Happy planting!

  • The Expert’s Guide: How to Grow Microgreens in Small Apartments

    The Expert’s Guide: How to Grow Microgreens in Small Apartments

    I remember staring at my tiny, cramped kitchen counter a few years ago, missing the massive backyard garden I had before moving to the city. I thought my days of fresh, homegrown produce were over. But in my years of growing plants indoors, I’ve found that you don’t need acres of land to get a massive harvest. If you’re wondering how to grow microgreens in small apartments, you are exactly where I was.

    Whether you live in freezing USDA Zone 3 or sweltering Zone 9, apartment gardening completely flips the script. You control the seasons.

    Quick Care Summary for Skimmers

    RequirementIdeal Condition
    Light4-8 hours of sunlight or a cheap LED grow light.
    WaterBottom-watering daily; keep soil moist but not soggy.
    SoilHigh-quality organic potting soil (avoid outdoor garden dirt).
    Temperature65°F – 75°F (Standard US indoor room temp).
    Harvest Time7 to 14 days after planting!

    Personal Pro-Tip: Don’t buy expensive “microgreen growing kits” right out of the gate. A shallow plastic takeout container with a few holes poked in the bottom works exactly the same as a $30 specialized tray.

    Essential Supplies for Growing Microgreens in Small Apartments

    image
    image

    Figuring out how to grow microgreens in small apartments starts with the right gear. Because we don’t have the luxury of outdoor space, we have to mimic nature on a countertop.

    You will need:

    • Shallow Trays: Two per batch. One with drainage holes, one without (for the bottom).
    • Potting Soil: A light, seed-starting potting soil. Don’t use heavy outdoor dirt; it won’t drain well in trays.
    • Seeds: Radish, broccoli, and sunflower are incredibly easy for beginners.
    • Spray Bottle: For misting the seeds with water straight from the faucet.

    Personal Pro-Tip: I learned the hard way that heavily chlorinated city water from the faucet can sometimes stunt sensitive seeds. I like to fill a pitcher with tap water and leave it on the counter for 24 hours to let the chlorine evaporate before watering my greens.

    Step-by-Step: How to Grow Microgreens in Small Apartments Year-Round

    The secret to mastering how to grow microgreens in small apartments lies in the setup.

    1. Prep the Soil: Fill your top tray (the one with holes) with about an inch of potting soil. Tamp it down gently so it’s flat and even.
    2. Sow the Seeds: Sprinkle your seeds thickly across the soil. It should look like a crowded dance floor—much closer together than you’d ever plant outdoors.
    3. Water and Weight: Mist the seeds heavily. Then, place an empty tray on top of the seeds with a small weight (like a soup can) on it. This simulates being buried under heavy spring soil and makes the stems grow thick and strong. Keep them in the dark like this for 3-4 days.
    4. Let There Be Light: Once the seeds sprout and push the top tray up, remove the weight and put them near a sunny window or under a light.

    Personal Pro-Tip: I love growing radishes in the Fall and Winter because they germinate incredibly fast, even if my apartment is a little drafty. They give that spicy, satisfying crunch when summer salads are long gone.

    Common Mistakes When Cultivating Microgreens in Tight Spaces

    Common Mistakes When Cultivating Microgreens in Tight Spaces
    Common Mistakes When Cultivating Microgreens in Tight Spaces

    When friends ask me why their indoor gardens fail, I usually find they are making one of two uniquely American home mistakes.

    The biggest culprit is the air conditioning vent. In the summer, we blast the AC. If your microgreen tray is sitting right under an air conditioning vent, the constant flow of dry, cold air will suck the moisture right out of your potting soil, leaving your tiny sprouts crispy in a matter of hours.

    The second mistake is overwatering from the top. Pouring water directly over delicate sprouts knocks them over and invites mold. Always bottom-water by pouring water into the solid bottom tray and letting the soil soak it up.

    Personal Pro-Tip: Hold your hand over your microgreen tray. If you can feel a breeze from your AC or your winter heating vent, move the tray. Drafts are the enemy of baby plants.

    Troubleshooting Your Apartment Microgreen Garden

    Even when you know exactly how to grow microgreens in small apartments, things can get weird. Here is how I fix common issues:

    • Leaves are turning yellow: Your plants are starving for light. If you are relying on a window, the winter sun might not be strong enough. Move them closer to the glass or grab a cheap LED bulb.
    • Brown, crispy tips: This usually means uneven watering or low humidity. Make sure the edges of your tray aren’t drying out faster than the center.
    • They are falling over and dying at the soil line: This is “damping off,” a fungal disease caused by poor airflow and soggy soil. Ease up on the water and put a small fan nearby to keep air circulating.

    Personal Pro-Tip: If I notice a section of my tray looks a little weak or yellow, I literally rotate the tray 180 degrees. Plants stretch toward the light, and rotating them ensures an even, upright canopy.

    Toxicity Warning: Are Indoor Microgreens Safe for Pets?

    Toxicity Warning Are Indoor Microgreens Safe for Pets
    Toxicity Warning Are Indoor Microgreens Safe for Pets

    This is a huge deal for us apartment dwellers with furry roommates. Dogs and cats love to nibble on fresh greens, especially when they are sitting right on the kitchen island.

    The good news? Most common microgreens like broccoli, kale, sunflower, and radish are completely safe and even healthy for cats and dogs.

    The danger comes from the Nightshade family. Never grow tomato, pepper, eggplant, or potato microgreens. The stems and leaves of these plants contain solanine, which is highly toxic to dogs, cats, and humans! We only eat the fruit of these plants, never the foliage.

    Personal Pro-Tip: My cat is obsessed with sunflower shoots. To keep her out of my main harvest, I actually grow a tiny, separate 2-inch pot of oat grass right next to my microgreens. It acts as a perfect decoy!

    FAQs on How to Grow Microgreens in Small Apartments

    I spend a lot of time on Reddit and Quora talking to fellow indoor gardeners. Here are the questions that pop up constantly about how to grow microgreens in small apartments.

    Q1. Is that white fuzzy stuff mold or roots?

    90% of the time, it’s root hairs! If the white fuzz is clinging tightly to the taproot and looks like a tiny caterpillar, it’s just the plant looking for water. If it looks like a spiderweb spreading across the top of the soil, that’s mold.

    Q2. Can I use paper towels instead of potting soil?

    You can, but I don’t recommend it. Paper towels dry out incredibly fast in air-conditioned apartments, and the plants won’t grow as thick or hold as much flavor compared to using a good potting mix.

    Q3. Do I really need expensive grow lights?

    Not at all. While a south-facing window is great, an ordinary LED shop light from the hardware store works perfectly. Just keep it about 2 inches above the plants.

    Q4. How many harvests can I get from one seed?

    Only one. Microgreens are harvested at the cotyledon (first leaf) stage. Once you snip the stem, the plant is done. You’ll need to compost the soil and start fresh.

    Q5. Will my apartment smell like a farm?

    Nope! Healthy microgreens just smell faintly of fresh earth and the vegetable they are (radish microgreens smell surprisingly like radishes!). If it smells foul or sour, you have mold from overwatering.

    The Takeaway: Your Countertop is Your New Garden

    When I first started looking into how to grow microgreens in small apartments, I honestly thought it would be a messy, complicated process that would ruin my kitchen counters. But as you can see, it really just comes down to a few basic supplies and about three minutes of your day. You don’t need a sprawling backyard in the suburbs or perfect spring weather to enjoy fresh, organic greens. You just need a little bit of space and the willingness to try.

    Whether you are looking to upgrade your weekend salads, avoid those crazy premium prices at the grocery store, or just bring a little bit of vibrant, living energy into your indoor space, these tiny plants deliver massive results. Grab a tray, pick out some seeds, and get your hands a little dirty. You’ve got this!

    Personal Pro-Tip: Take a photo of your tray on day one, and then another on day seven. Because you share a living space with your indoor garden and see it constantly, you might not notice the explosive daily growth. Comparing those two pictures is the absolute best motivation to keep planting your next batch!

  • Open vs Closed Terrarium: Which Is Better for Beginners? (A No-Nonsense Guide)

    Open vs Closed Terrarium: Which Is Better for Beginners? (A No-Nonsense Guide)

    I still remember my first “glass grave.” It was a beautiful, vintage candy jar I’d stuffed with delicate ferns and moss, only to watch it turn into a swampy, molded mess within two weeks because I didn’t understand the airflow. Whether you’re a seasoned gardener or someone who usually kills “unkillable” plastic plants, choosing between an open vs closed terrarium which is better for beginners is the first real fork in the road.

    In my years of consulting for indoor gardeners across the US—from the humid Southeast to the bone-dry high deserts—I’ve seen that your success depends less on your “green thumb” and more on picking the system that fits your lifestyle.

    Quick Comparison: Open vs Closed Terrarium At a Glance

    If you’re a “skimmer,” here is the high-level breakdown to help you decide on an open vs closed terrarium which is better for beginners.

    FeatureOpen TerrariumClosed Terrarium
    Ideal PlantsSucculents, Cacti, Air PlantsFerns, Mosses, Nerve Plants
    Humidity LevelLow (Matches your room)High (Self-sustaining cycle)
    Watering FrequencyOnce every 1–2 weeksOnce every few months
    MaintenanceMedium (Needs manual watering)Low (Once balanced)
    Risk FactorLow (Harder to “rot” plants)High (Easy to overwater/mold)
    Best For“Forgetful” waterers“Set it and forget it” lovers

    Defining the Basics: Open vs Closed Terrarium Which Is Better for Beginners?

    Defining the Basics Open vs Closed Terrarium Which Is Better for Beginners
    Defining the Basics Open vs Closed Terrarium Which Is Better for Beginners

    When we talk about an open vs closed terrarium which is better for beginners, we’re really talking about two completely different climates.

    An open terrarium is essentially a glass planter with no lid. Think of it like a tiny, stylish desert. Because air circulates freely, moisture evaporates quickly. This makes it perfect for plants that hate “wet feet.”

    A closed terrarium, on the other hand, is a sealed ecosystem. Moisture evaporates from the leaves, condenses on the glass, and “rains” back down into the soil. It’s a miniature rainforest.

    Personal Pro-Tip: If you live in an area with heavy Air Conditioning (AC) use during US summers, your indoor air is likely very dry. This is actually great for open terrariums but can make balancing a closed one tricky if you keep it too close to a vent!

    Why Your Home’s Environment Matters for the Beginner Debate

    I’ve found that the “best” choice often depends on where you live. If you’re in USDA Hardiness Zone 9 or 10 (like Florida or Texas), the ambient humidity is already high, which helps closed terrariums thrive. However, if you’re up in Zone 4 (think Minnesota) and your furnace is blasting dry heat all winter, an open terrarium will dry out even faster than usual.

    When deciding open vs closed terrarium which is better for beginners, consider your patience level. I always tell my clients: do you want to play “scientist” or “decorator”?

    • The Scientist: Will love the closed terrarium’s water cycle.
    • The Decorator: Will likely prefer the ease of an open succulent bowl.

    Personal Pro-Tip: Never use a “tap” or faucet with softened water for your terrariums. The salts in softened water can build up in the glass and kill sensitive mosses. I always use distilled or rainwater for my builds.

    Picking the Best Plants for an Open vs Closed Terrarium

    Picking the Best Plants for an Open vs Closed Terrarium
    Picking the Best Plants for an Open vs Closed Terrarium

    The biggest mistake I see beginners make is putting a cactus in a closed jar. That is a one-way ticket to a “mushy” cactus. When choosing an open vs closed terrarium which is better for beginners, your plant choice is non-negotiable.

    Top Choices for an Open Glass Setup

    • Echeveria & Jade: Classic American favorites that love the dry air.
    • Zebra Haworthia: Very hardy and handles lower light than most succulents.
    • Cacti: Only if you have a very wide-mouthed open container.

    Best Beginner Plants for a Sealed Ecosystem

    • Fittonia (Nerve Plant): They “faint” when they need water, making them great communicators.
    • Lemon Button Fern: One of the hardiest ferns I’ve ever grown indoors.
    • Sheet Moss: Essential for that “forest floor” look.

    Personal Pro-Tip: When buying potting soil, don’t just grab the cheapest bag. For open terrariums, look for “Cactus and Succulent Mix.” For closed ones, I prefer a mix of peat moss, perlite, and a little horticultural charcoal to keep things fresh.

    Common Pitfalls: Why Most Beginners Fail

    After years of troubleshooting, I’ve noticed a few “American-specific” habits that lead to terrarium failure.

    1. The Greenhouse Effect: We love our big, sunny US windows. But if you put a closed terrarium in direct sunlight, the glass acts like a magnifying glass and literally cooks your plants.
    2. Over-loving (Overwatering): Most beginners treat an open terrarium like a standard houseplant. If you water it every day, you’ll rot the roots.
    3. No Drainage Layer: In a glass container with no hole at the bottom, water has nowhere to go. You must use a layer of gravel or pebbles at the bottom.

    Personal Pro-Tip: If you see “fog” on the glass of your closed terrarium all day long, it’s too wet! Take the lid off for a few hours to let some moisture escape. You want a light mist in the morning, but clear glass by noon.

    Troubleshooting Your Glass Garden

    Troubleshooting Your Glass Garden
    Troubleshooting Your Glass Garden

    Is your project looking a little sad? Don’t panic. Here is how I fix the most common issues when debating open vs closed terrarium which is better for beginners.

    • Yellowing Leaves: Usually a sign of overwatering. In an open terrarium, stop watering for two weeks. In a closed one, leave the lid off for 48 hours.
    • White “Fuzz” (Mold): This happens in closed systems with no airflow. I suggest adding “Springtails” (tiny beneficial bugs) or simply removing the affected leaf and reducing humidity.
    • Brown, Crispy Tips: Your open terrarium is likely too close to a heating vent or needs a drink.

    Toxicity Warning: Is It Safe for Pets?

    This is a huge deal for US pet owners. Many common terrarium plants are toxic if chewed.

    • Safe (Pet-Friendly): Most Mosses, Peperomia, and Haworthia.
    • Toxic (Keep Away): Ivy (Hedera helix), Peace Lilies, and some Ferns can cause stomach upset in cats and dogs.

    Personal Pro-Tip: Always check the specific species on the ASPCA website before you build. I once had a client whose cat knocked over a beautiful open succulent bowl—luckily it was just a mess, not a trip to the vet!

    FAQ: Everything You’re Asking About Open vs Closed Terrariums

    Q1. Which one is actually easier to start with?

    Honestly, an open vs closed terrarium which is better for beginners usually comes down to “open” being the winner. It’s more forgiving if you make a mistake with water.

    Q2. Can I use moss in an open terrarium?

    I wouldn’t recommend it. Moss needs constant humidity. In an open container, it usually turns into a crispy brown carpet within a week unless you mist it daily.

    Q3. Do I ever need to fertilize my terrarium?

    Hardly ever! I actually avoid it. You want your plants to stay small so they don’t outgrow the glass. Maybe a tiny bit of diluted liquid fertilizer once a year in the Spring.

    Q4. How long do closed terrariums actually live?

    If you balance the water correctly, they can live for years! I’ve seen some that haven’t been opened in a decade, though for a beginner, expect to “tinker” with it every few months.

    Q5. Why is my open terrarium smelling like rotten eggs?

    That is root rot. It means water is sitting at the bottom and the soil has gone anaerobic. You’ll need to repot with fresh potting soil and a better drainage layer.

    Q6. Can I put bugs in my terrarium?

    In a closed terrarium, yes! “Springtails” are a beginner’s best friend—they eat mold and keep the ecosystem clean. Avoid putting bugs in open terrariums; they’ll just wander into your living room.

    Q7. Does the size of the glass matter?

    Yes. For beginners, a medium-sized jar (about half a gallon or a quart) is the “sweet spot.” Tiny jars are hard to plant, and huge ones are hard to balance.

    My Final Thoughts on open vs closed terrarium which is better for beginners

    Ultimately, deciding on an open vs closed terrarium which is better for beginners comes down to how much you want to interact with your plants. I’ve found that most folks across the US from rainy Seattle to sunny Phoenix thrive when they match the jar to their own natural energy.

    If you’re a “set it and forget it” person, a closed jar is a tiny miracle of nature. If you like to get your hands in the potting soil every now and then to check on things, go with an open design. Just remember: there’s no such thing as a failed project, only a “learning opportunity” for your next build!

    Personal Pro-Tip: If you’re still torn on an open vs closed terrarium which is better for beginners, I suggest starting with an open one using a Zebra Haworthia. It’s tough as nails, handles the dry AC air in American homes perfectly, and won’t throw a fit if you forget to water it for a week while you’re away for the holidays. It’s the ultimate “low-stakes” entry into the hobby!

  • Concrete Jungle Harvest: A Local’s Guide to the Easiest Edible Plants to Grow in a NYC Apartment

    Concrete Jungle Harvest: A Local’s Guide to the Easiest Edible Plants to Grow in a NYC Apartment

    Finding the easiest edible plants to grow in a NYC apartment is the secret to thriving as an urban gardener. I have spent years helping New Yorkers turn tiny, fire-escape windowsills into lush, productive salad bowls. While gardening in Manhattan or Brooklyn offers unique challenges, you can still enjoy a fresh harvest. Specifically, you must manage intense steam heat and limited UV rays. This “human-first” guide helps you navigate those hurdles to grow food in even the smallest studio.

    Quick Care Guide: NYC Apartment Edibles

    Plant TypeLight NeedsWater FrequencyBest Location
    MicrogreensLow to MediumDaily (Mist)Kitchen Counter
    MintMediumHigh (Keep moist)Near the Kitchen Faucet
    BasilHigh (Direct)MediumSouth-facing Window
    ChivesMediumLowWindow Ledge
    Loose-Leaf LettuceMediumMediumBright indirect light

    Why You Should Start With the Easiest Edible Plants to Grow in a NYC Apartment

    In my experience, the biggest hurdle for New Yorkers isn’t a lack of a “green thumb”—it’s the environment. NYC falls into USDA Hardiness Zone 7b, but indoors, your climate is controlled by your AC unit and those aggressive pre-war radiators. I always tell my clients to start small. Growing your own food in a studio apartment isn’t just about the harvest; it’s about the mental “reset” of seeing something green in a concrete jungle.

    1. Microgreens: The Easiest Edible Plants to Grow in a NYC Apartment with Low Light

    If you have zero luck with plants, start here. Microgreens (radish, kale, or arugula) are just baby versions of vegetables. Because you harvest them when they are only two inches tall, they don’t need the intense sun that a full-sized tomato does.

    Personal Pro-Tip: Don’t bother with fancy planters. I’ve grown award-winning microgreens in recycled plastic takeout containers. Just poke holes in the bottom for drainage and use a high-quality potting soil.

    2. Mint: One of the Easiest Edible Plants to Grow in a NYC Apartment for Beginners

    I’ve found that mint is practically immortal. In fact, I usually warn people never to plant it in the ground because it’s so aggressive—but in a pot on a New York windowsill, that’s exactly what you want. It handles the fluctuating temperatures of a drafty apartment better than almost anything else.

    Personal Pro-Tip: Mint loves “wet feet.” If you’re the type who tends to overwater, this is the plant for you. Keep the soil feeling like a wrung-out sponge.

    3. Basil: A Sun-Loving Favorite for Bright Kitchen Windows

    Basil is a staple, but it’s a bit of a diva. It needs at least 6 hours of sun. If your apartment faces a brick wall, you might need a small LED grow light. I’ve noticed that basil leaves will wilt the second they get thirsty, which is actually helpful because it tells you exactly when to head to the faucet.

    Personal Pro-Tip: Always pinch off the top “flowers.” If you let the plant bloom, the leaves turn bitter. I keep a pair of kitchen shears right next to the pot for quick pruning.

    Common Mistakes When Growing the Easiest Edible Plants to Grow in a NYC Apartment

    I see the same three mistakes over and over again in NYC homes:

    1. The “Radiator Death Trap”: Placing your herbs directly on top of a steam radiator. It will cook the roots and dry out the potting soil in hours.
    2. Using “Dirt” from Outside: Never use soil from Central Park or a backyard. It’s too heavy and likely contains hitchhiking pests. Use a bag of sterile potting soil meant for containers.
    3. The AC Blast: If your AC unit is in the window right next to your plants, the cold, dry air will shrivel the leaves. I’ve lost many a basil plant to a July heatwave because my AC was pointed right at it.

    Troubleshooting Your Indoor Edibles

    • Yellow Leaves? You’re likely overwatering. Most of these plants want to be moist, but not sitting in a swamp. Make sure your pot has a drainage hole!
    • Stretching/Leggy Stems? Your plant is “reaching” for the sun. It needs more light. Move it closer to the glass or rotate the pot every few days.
    • Tiny Flies? Those are Fungus Gnats. They love wet soil. Let the top inch of soil dry out completely before watering again.

    Toxicity Warning for Pet Parents

    Most New Yorkers share their tiny spaces with a cat or dog.

    • Safe: Basil, Chives (in very small amounts, but technically toxic to cats in large quantities—be careful!), and Lettuce are generally fine.
    • Caution: Mint contains essential oils that can upset a dog’s or cat’s stomach if they decide to eat the whole plant. I keep my mint on a high shelf away from my curious tabby.

    FAQs: Gardening in the Big Apple

    Q1: Do I need a grow light for the easiest edible plants to grow in a NYC apartment?

    If you face North or have a courtyard view (aka a brick wall), yes. A simple $20 LED clip-on light from a hardware store makes a world of difference.

    Q2: Can I use tap water in NYC?

    Actually, yes! NYC water is famous for a reason. I’ve used water straight from the faucet for years with no issues. However, if you’re worried about chlorine, let the water sit in a pitcher overnight before using it.

    Q3: My apartment is tiny. What’s the smallest plant I can grow?

    Microgreens. You can grow a “crop” in a space no bigger than a postcard.

    Q4: Why is my basil turning black?

    It’s likely too cold. Basil hates temperatures below 50°F. If you leave your window cracked in the winter, move the basil away from the draft.

    Q5: How often should I fertilize?

    In a small apartment, less is more. I use a liquid organic fertilizer once a month during the Spring and Summer. I skip it in the Winter when growth slows down.

    Q6: What is the best potting soil for NYC windowsills?

    Look for a “Professional Potting Mix” that contains peat moss or coco coir and perlite. This keeps the soil light and airy so the roots don’t suffocate.

    Q7: Can I grow tomatoes in a NYC apartment?

    You can, but they aren’t the easiest. They need massive amounts of light and huge pots. Stick to herbs and greens if you want a guaranteed win!

    My Final Thoughts on the Easiest Edible Plants to Grow in a NYC Apartment

    I’ve spent a lot of time in cramped kitchens and on tiny balconies across the five boroughs, and if there’s one thing I’ve learned, it’s that New Yorkers are resilient—and our plants have to be too. You don’t need a backyard in the Hamptons to enjoy the taste of fresh-picked basil or spicy microgreens. Even if your “view” is a brick wall and your only light comes from a dusty air shaft, there is a way to make it work.

    In my years of consulting, I’ve seen people successfully grow entire salads in a studio apartment just by paying attention to the details—like keeping the potting soil moist during a heatwave or moving pots away from a freezing window in the middle of a January cold snap. It’s all about working with the space you have, not the space you wish you had.

    Start with just one or two of these easiest edible plants to grow in a NYC apartment, and I promise you’ll catch the bug. There is a specific kind of “city magic” in clipping fresh mint for a mojito or chives for your morning bagel without ever having to leave your front door. Gardening here isn’t just about the food; it’s about reclaiming a little bit of nature in the middle of the chaos.

    Personal Pro-Tip: Don’t get discouraged if your first plant doesn’t make it. In my early days, I lost plenty of herbs to the “radiator effect” before I figured out the right rhythm. Every dead leaf is just a lesson for your next harvest. Grab a bag of soil, head to the faucet, and give it a shot.

  • The Best Low-Light Office Plants for Windowless Rooms: A Survival Guide

    The Best Low-Light Office Plants for Windowless Rooms: A Survival Guide

    Finding the best low-light office plants for windowless rooms can transform a gloomy cubicle into a vibrant sanctuary. Many professionals believe that plants require natural sunlight to survive. However, specific species thrive using only artificial office lighting. Consequently, you can maintain a lush workspace without any windows at all.

    Let’s be honest: working in a windowless office or a basement cubicle can feel a bit like living in a submarine. I’ve spent years consulting for office managers across the US from rainy Seattle to humid Miami and the number one question I get is, “Can I actually grow anything here without a window?”

    The answer is a resounding yes. While no plant grows in total darkness (they aren’t mushrooms, after all), many species are perfectly happy “eating” the light from your overhead fluorescent or LED fixtures. I’ve seen Pothos vines thrive for a decade under nothing but office ballasts.

    Below is my curated list of the best low-light office plants for windowless rooms, designed to survive the unique “climate” of an American office—think blasting AC in the summer and bone-dry heaters come fall.

    Quick Care Comparison Table

    Plant NameLight NeedWatering Frequency“Forgetfulness” Level
    Snake PlantLow / ArtificialEvery 3–4 weeksHigh (Hard to kill)
    ZZ PlantLow / ArtificialEvery 3–4 weeksExtreme (Thrives on neglect)
    PothosLow / ArtificialEvery 1–2 weeksMedium (Will wilt to tell you)
    Cast Iron PlantVery LowEvery 1–2 weeksHigh (Tough as nails)
    Peace LilyLow / MediumWeeklyLow (A bit of a drama queen)

    My Top Recommendations for the Best Low-Light Office Plants for Windowless Rooms

    In my time at the nursery, I’ve realized that we often overthink plant care. We want to “nurture” our plants by watering them every time we walk by with a half-empty coffee mug. In a windowless room, that is a death sentence. Because there’s no sun to evaporate moisture, the soil stays damp much longer.

    These plants are my top picks because they have adapted to survive on the forest floor or in harsh climates where light is a luxury. They are “slow burners”—they don’t need much fuel to keep their leaves green and your workspace feeling human.

    The Snake Plant: A Top-Tier Choice Among Best Low-Light Office Plants for Windowless Rooms

    If you want something that looks like modern art and requires the effort of a plastic plant, look no further. The Snake Plant (Dracaena trifasciata) is the gold standard for best low-light office plants for windowless rooms. Its architectural, sword-like leaves grow vertically, so it won’t take up your precious desk real estate.

    In my experience, the biggest threat to a Snake Plant isn’t the lack of sun—it’s the faucet. Because these plants store water in their thick, waxy leaves, they only need a drink once the potting soil is bone-dry all the way to the bottom.

    Personal Pro-Tip: If your office is particularly chilly because of the AC vents, go for the ‘Zeylanica’ or ‘Black Coral’ varieties. They handle the “office tundra” better than the variegated yellow types.

    ZZ Plants: Why They Lead the List of Best Low-Light Office Plants for Windowless Rooms

    The ZZ Plant (Zamioculcas zamiifolia) is practically a “set it and forget it” machine. Its leaves are so glossy they almost look polished, which helps reflect the dim artificial light of a windowless room back into its system.

    I’ve had clients leave these in conference rooms that stay dark all weekend, and they come back Monday looking better than the employees. They grow from potato-like “rhizomes” under the soil that store water for emergencies.

    Personal Pro-Tip: Don’t be alarmed if your ZZ plant doesn’t grow for months. In low light, they enter a “holding pattern.” They aren’t dying; they’re just being patient. Resist the urge to fertilize them to “force” growth in the winter—wait until spring!

    Pothos: The Versatile Favorite for Best Low-Light Office Plants for Windowless Rooms

    You’ve seen this plant everywhere for a reason. Pothos is the quintessential “cubicle vine.” It’s incredibly communicative. When it’s thirsty, the leaves go limp and look sad; give it a splash of water from the office faucet, and it perks up within hours.

    While “Golden Pothos” is the most common, I personally love the ‘Jade’ variety for windowless rooms. Since it has more chlorophyll (the green stuff) and less variegation (the white/yellow spots), it is much more efficient at processing low levels of light.

    Personal Pro-Tip: If your Pothos starts looking “leggy”—meaning long vines with very few leaves—don’t be afraid to give it a haircut. Snipping the ends encourages the plant to bush out at the top, keeping your desk looking lush instead of stringy.

    Peace Lilies: Managing Expectations for Best Low-Light Office Plants for Windowless Rooms

    Peace Lilies are famous for their elegant white blooms, but here is the “expert secret”: In a windowless office, your Peace Lily will likely stop flowering. Producing flowers takes a massive amount of energy. When the plant is living on artificial light alone, it switches to “survival mode,” focusing all its energy on keeping its dark green leaves healthy. I’ve seen so many people think they are failing because the white spathes disappear, but as long as the leaves are glossy and upright, your plant is perfectly happy being a foliage-only resident.

    Personal Pro-Tip: Because Peace Lilies love humidity, they often struggle with dry office air. If the tips of the leaves start to brown, it’s not a watering issue—it’s a “dry air” issue. Try placing the pot on a tray of pebbles with a little water to boost the local humidity.

    Why Many Americans Struggle with Office Plants in Windowless Rooms

    The number one killer of office greenery isn’t a lack of light—it’s Death by Cubicle Climate. Here are the three most common mistakes I see:

    1. The “Monday Morning” Overwater: We feel guilty leaving plants over the weekend, so we drown them on Monday. In a room with no sun, that water just sits there, leading to root rot.
    2. AC Vent Placement: Most US offices have powerful HVAC systems. If your plant is directly under a vent blowing 68°F air, it’s going to get “freeze-dried.” Move it at least three feet away from any direct drafts.
    3. Using the Wrong Soil: Never use “garden soil” from your backyard. Use a high-quality, well-draining potting soil (look for mixes with perlite or peat moss) to ensure the roots can breathe.

    Troubleshooting Common Issues with Your Windowless Office Plants

    • Yellow Leaves: Usually a sign of overwatering. Check the bottom of the pot. If it’s sitting in a puddle inside a decorative “cachepot,” dump it out immediately.
    • Brown, Crispy Tips: This is usually due to low humidity caused by the building’s air conditioning. Try a quick misting, or better yet, group a few plants together to create a micro-climate.
    • Dusty Foliage: In an office, dust builds up fast. If the leaves are dusty, they can’t “breathe” or take in light. Every few months, take a damp paper towel and gently wipe the leaves down.

    Safety First: Toxicity and Your Pets

    If you’re a “hybrid” worker and might bring these plants home, or if your office is pet-friendly, pay attention to these warnings:

    • Snake Plants & ZZ Plants: Toxic if chewed. They contain calcium oxalate crystals that can cause mouth irritation and tummy troubles for cats and dogs.
    • Pothos & Peace Lilies: Mildly toxic; keep them high on a shelf where curious paws can’t reach.
    • Cast Iron Plant: Completely non-toxic! This is the “Gold Medal” winner for pet safety.

    Frequently Asked Questions About Growing Plants Without Windows

    Q1. Can a plant really survive on 100% artificial light?

    Yes, but only certain ones. Most “low-light” plants evolved under dense jungle canopies. To them, your overhead office lights are just a steady, dim sun.

    Q2. Should I leave the office lights on 24/7?

    Actually, no. Plants have a “circadian rhythm” just like we do. They need a period of darkness to process the energy they gathered during the day. 8–12 hours of light is perfect.

    Q3. Do I need a special “grow light”?

    For the plants on this list, usually no. Standard LED office panels provide enough of the spectrum for them to survive. However, if your plant looks like it’s reaching toward the nearest light source, a small $15 “clip-on” grow light can work wonders.

    Q4. How do I know when to water if I can’t see the soil?

    The “Finger Test” is your best friend. Stick your finger two inches into the potting soil. If it feels even slightly damp, walk away. Only water when it’s dry to the touch.

    Q5. Why is my plant growing so slowly?

    Light is food for plants. In a windowless room, they are on a “diet.” They won’t grow at the same rate as a plant in a sunny spring garden, and that’s okay!

    Q6. Can I use tap water from the office faucet?

    In most US cities, yes. However, if your city treats water heavily with chlorine (you can usually smell it), let a pitcher of water sit on your desk overnight before using it.

    Q7. Is it okay to move my plant to a window every weekend?

    I don’t recommend it. Plants “acclimate” to their environment. Moving them back and forth creates “light shock,” which can cause leaves to drop. Pick a spot and let them settle in.

    Final Thoughts from the Greenhouse

    When selecting the best low-light office plants for windowless rooms, the most important thing to remember is that you are creating an artificial ecosystem. Don’t expect your office ZZ plant to look like a tropical rainforest specimen overnight. These plants are built for endurance, not speed.

    If you treat your plants as quiet companions rather than demanding projects—and respect the “dry soil” rule—you’ll find that even the darkest cubicle can become a sanctuary. Whether you’re in a high-rise in NYC or a home office in a basement in the Midwest, a little green goes a long way for your mental health.