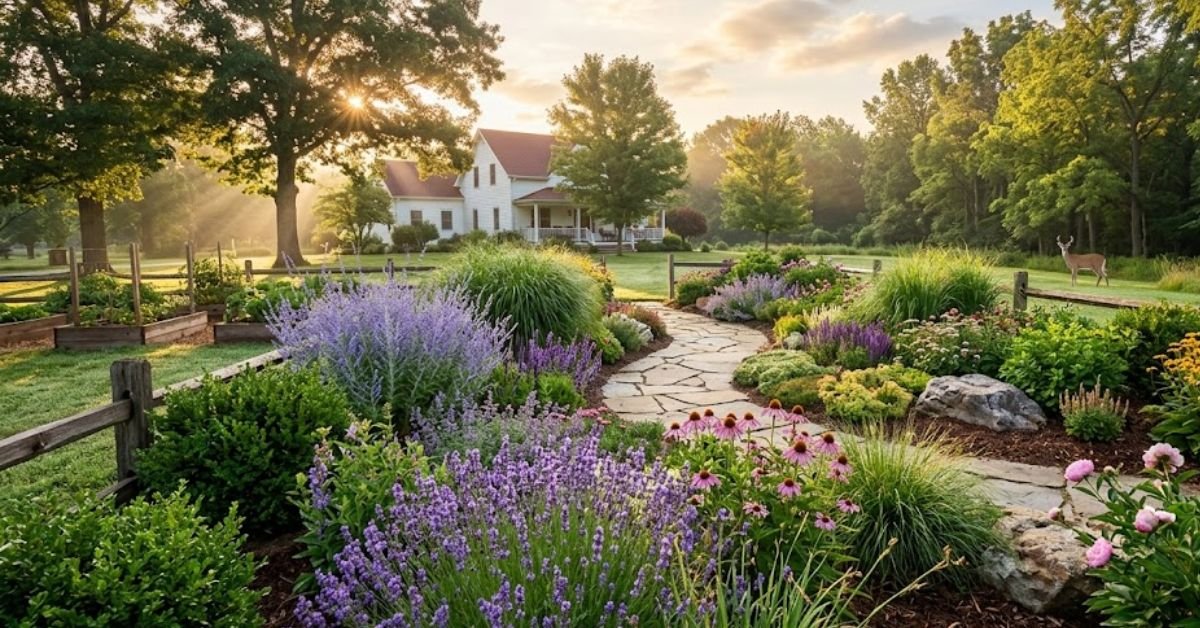
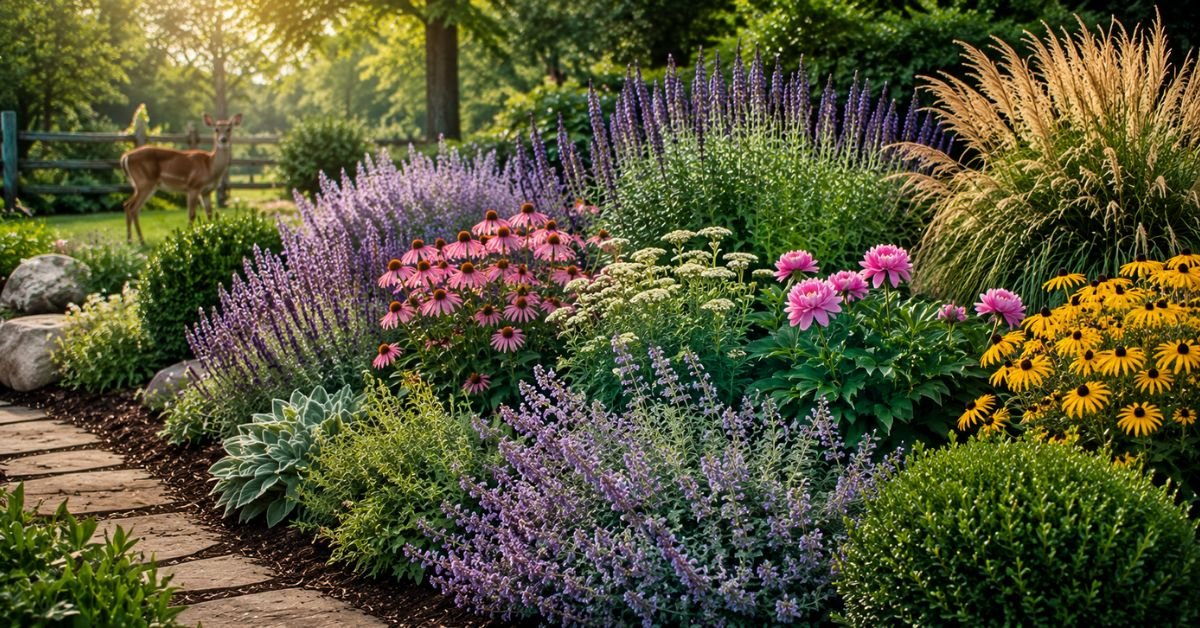
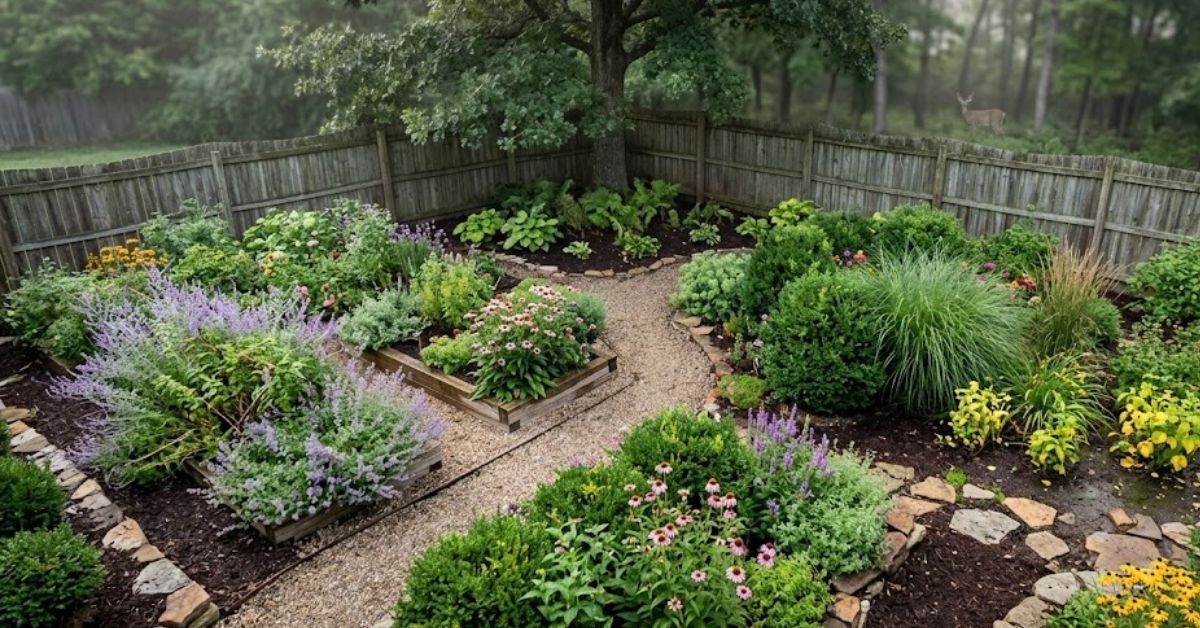
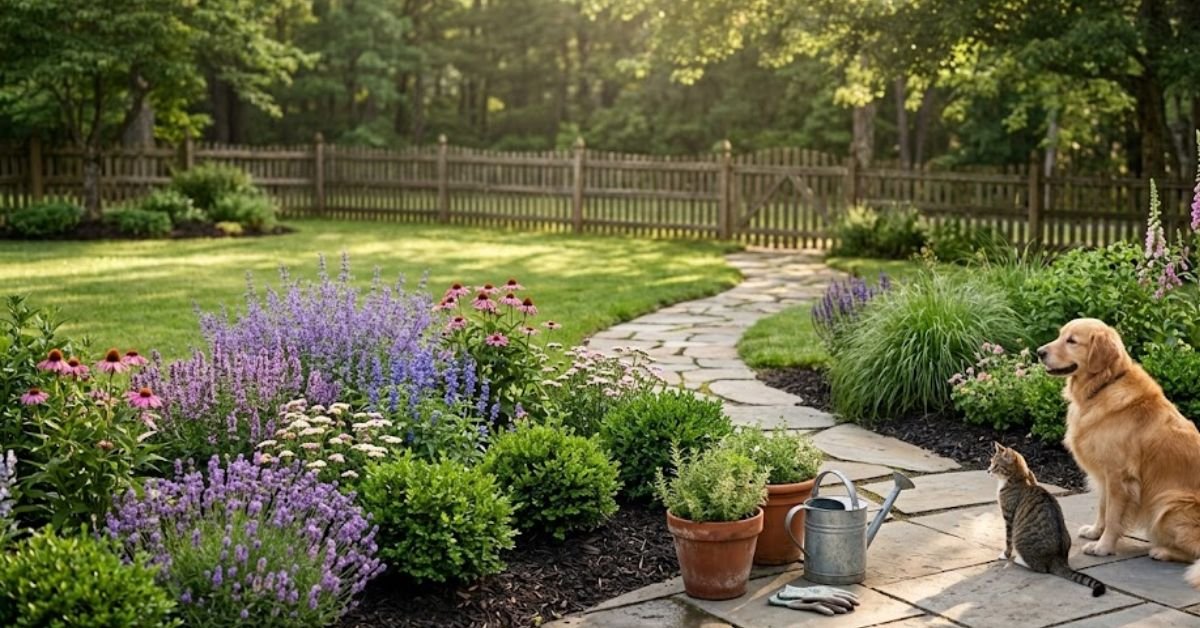
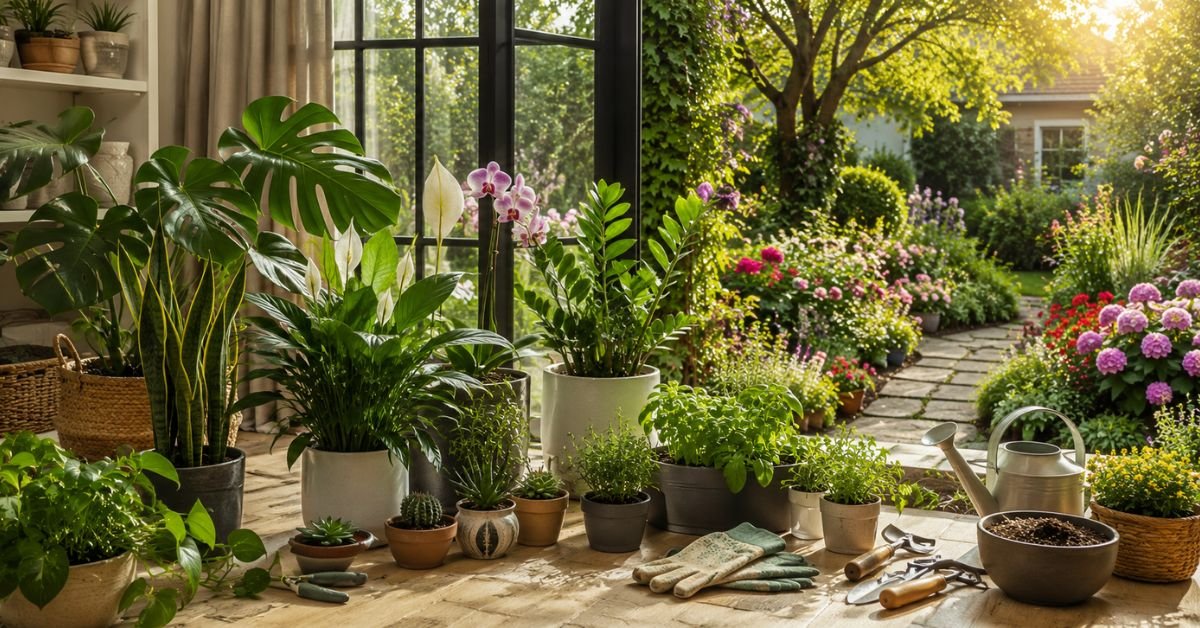
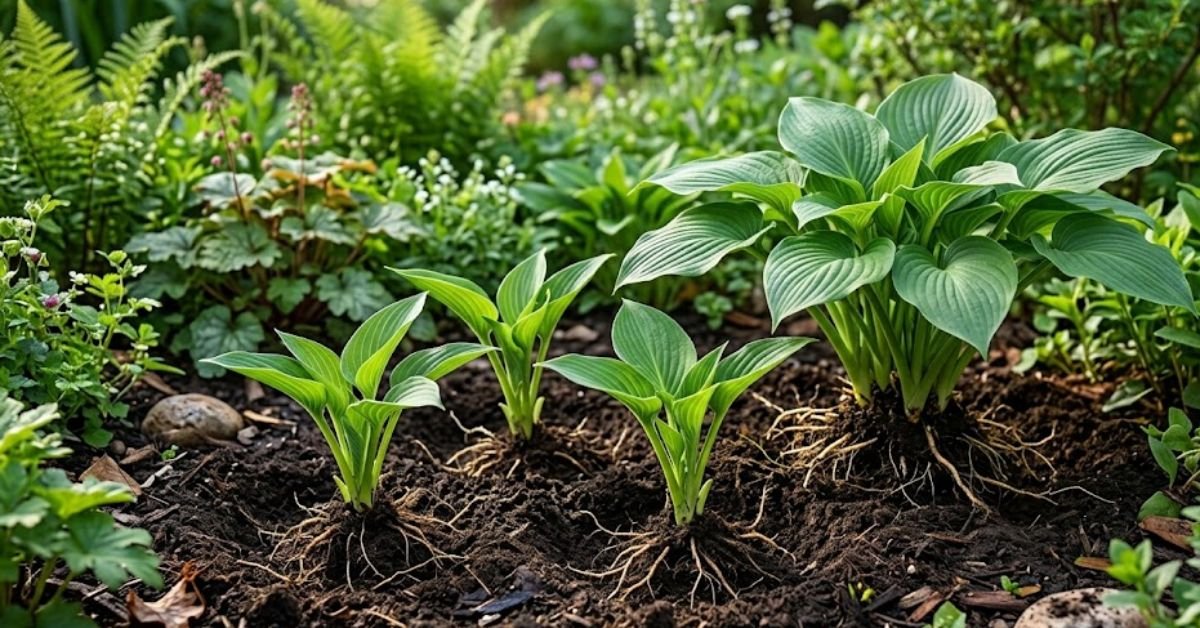
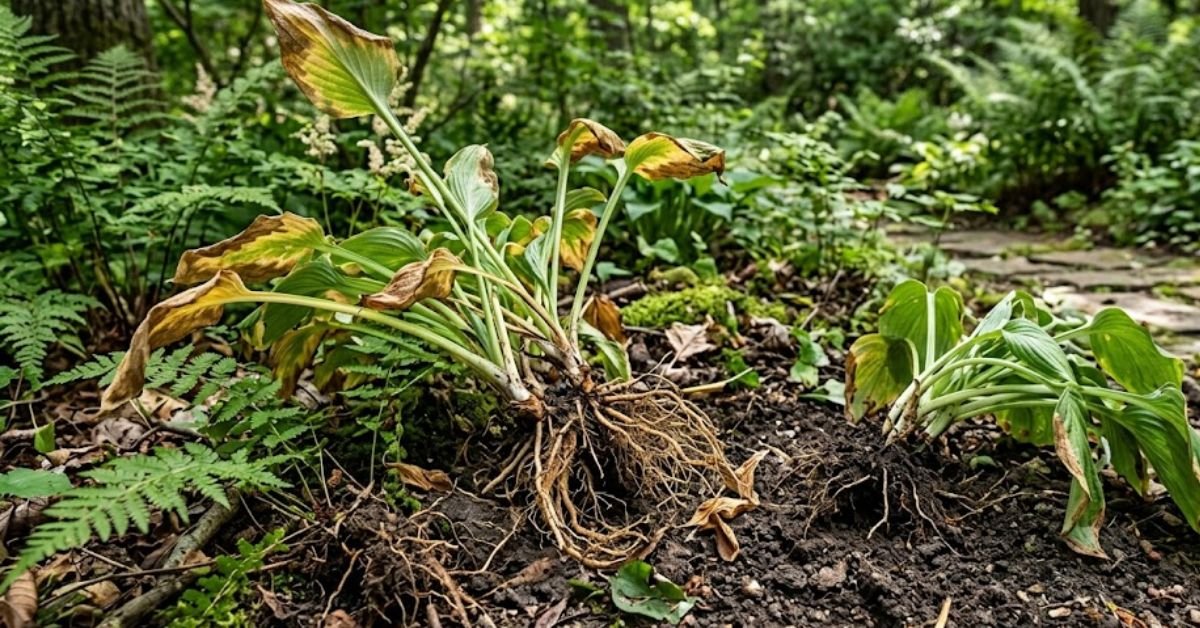
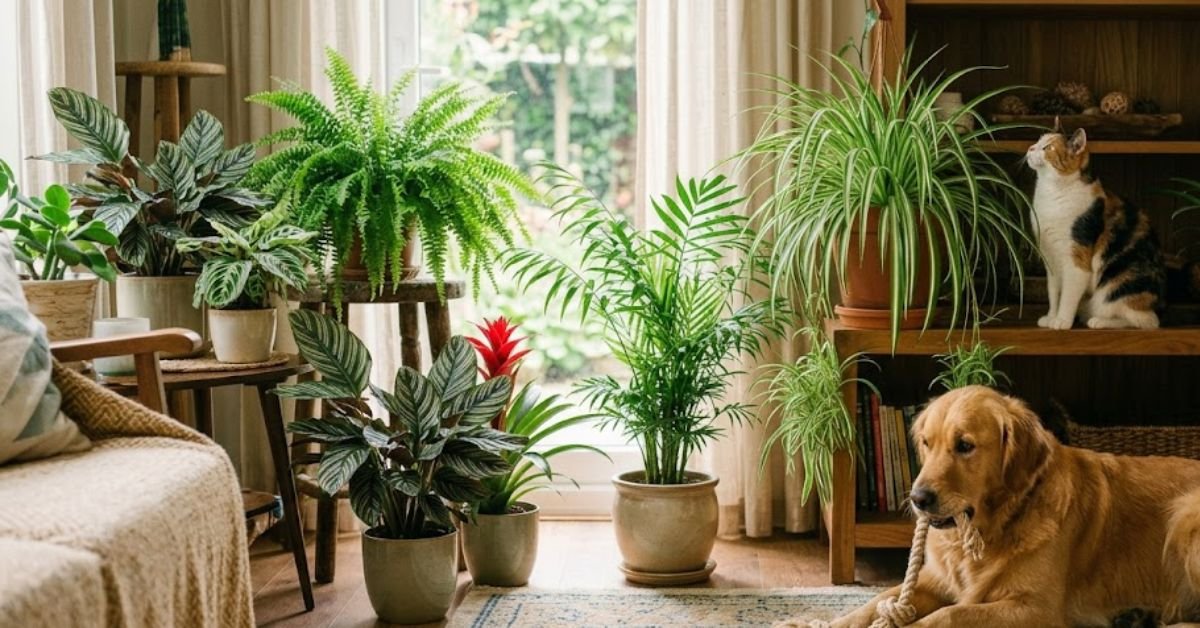
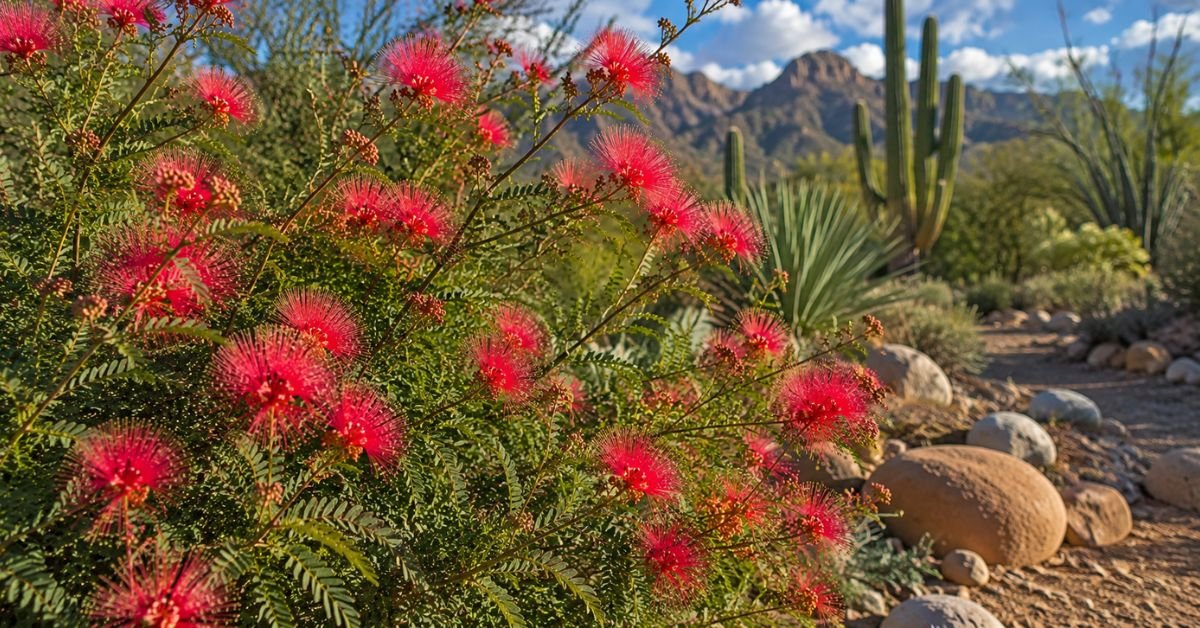
Growing deer hardy plants is the single best way to protect your landscape if you’re tired of local wildlife turning your flowers into an overnight snack. Planting a fresh bed only to wake up to chewed-down stems is beyond frustrating. Fortunately, strategically picking resilient, critter-resistant varieties lets you build a colorful, full yard that deer naturally pass right over.
Quick Care Summary for Deer Hardy Plants
Feature
Details for Deer Hardy Plants
USDA Zones
Varies widely (typically Zones 3-9). Always check your local zone map.
Varies by species. Check dirt moisture before turning on the faucet.
Soil Preference
Well-draining potting soil for containers; loose soil in garden beds.
Natural Defense
Repels browsers using potent scents, rough foliage, or bitter sap.
The Best Plants for American Gardens
Finding options that look great while deterring hungry critters takes a bit of testing. Here are two standout performers I rely on across various USDA Hardiness Zones.
Russian Sage: A Drought-Tolerant Deer Hardy Plant
USDA Zones 4-9. Russian Sage is an absolute workhorse in my garden. It throws up silvery stems topped with light purple spikes that bloom for weeks. Deer dislike the pungent herbal scent of its foliage. Even better, once its root system gets settled, it rarely asks for extra water.
Personal Pro-Tip: Mix a handful of coarse perlite into your potting soil when planting Russian Sage in patio containers. It hates wet, heavy dirt around its roots.
Bee Balm: A Deer Hardy Plant for Pollinators
USDA Zones 3-9. Also sold as Monarda. If you want to welcome hummingbirds without attracting deer, this is a top-tier choice. Its intense minty fragrance acts as a strong natural deterrent against browsing animals.
Personal Pro-Tip: Late-summer humidity in many US regions can lead to powdery mildew on Bee Balm. I always run a soaker hose along the ground rather than spraying foliage overhead.
Common Mistakes We Make With Deer Hardy Plants
Even rugged, critter-resistant flora can struggle if we make simple growing errors. I have lost a few good varieties over the years by making these basic mistakes.
Overwatering is the biggest killer. We often feel compelled to drench our garden beds daily with the hose. In reality, most deer hardy plants prefer the dirt to dry out slightly between waterings.
Another frequent issue involves indoor and outdoor climate control. If you start young seedlings inside during early Spring, keep them far away from central air conditioning vents. Cold AC drafts strip moisture right out of tender leaves. Outside, avoid planting right next to an air conditioner condenser unit. The intense hot air exhaust will scorch your greenery in mid-July.
Personal Pro-Tip: Push your index finger an inch into the dirt. If it feels moist, hold off on using the faucet for another day or two.
Troubleshooting Issues With Deer Hardy Plants
When trouble strikes, quick action saves the plant. Here is how I address the two most common symptoms in my garden beds.
Foliage turning pale yellow? Root suffocation from overwatering is usually the culprit. Heavy clay soil holds stagnant water around root systems. If growing in containers, ensure drainage holes are open. In garden beds, work organic matter into the dirt to loosen it up.
Crispy brown leaf tips? This typically indicates excess fertilizer or prolonged dry heat. Give the soil a thorough flush with clean water from your garden hose to leach out built-up salts.
Personal Pro-Tip: Grab an inexpensive moisture meter from your local hardware store. It takes all the guessing out of your daily routine.
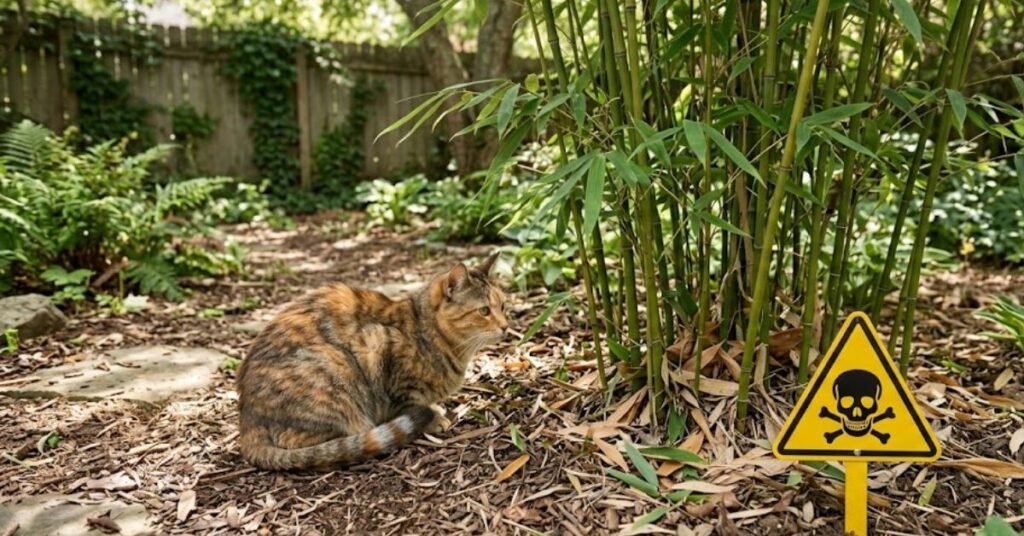
Toxicity Warning: Are Deer Hardy Plants Safe for Pets?
This is a critical consideration for pet owners. The exact characteristics that keep wildlife away like toxic compounds or bitter sap can also harm domestic animals.
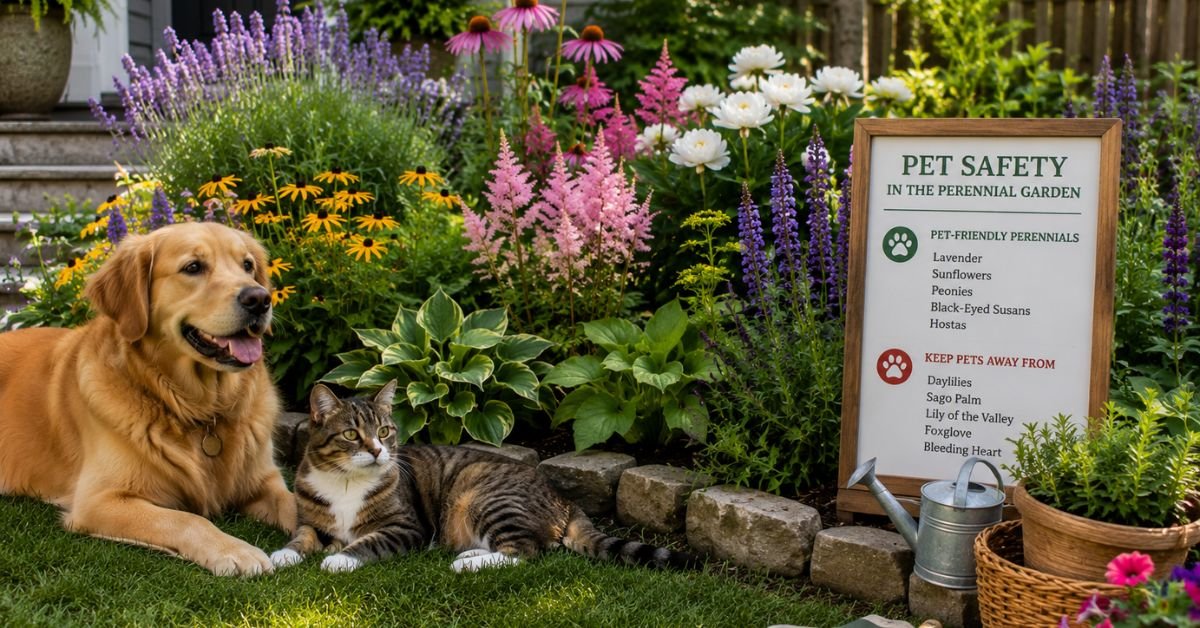
Foxglove and Bleeding Heart are fantastic deer hardy plants, but they are highly toxic to dogs and cats. If you have pets that chew on outdoor foliage, stick with safe options such as Coral Bells or creeping thyme. Always check the ASPCA plant safety database before introducing new species to your yard.
Personal Pro-Tip: Keep toxic, deer-resistant varieties strictly in your front yard beds. Keep your enclosed backyard 100% safe for pets to roam freely.
Frequently Asked Questions
Q1: What specific features make a plant deer hardy? Deer usually pass on foliage with strong herbal scents, rough or prickly textures, or bitter, milky sap. They prefer soft, mild-tasting greenery.
Q2: Are any deer hardy plants 100% deer-proof? No. During harsh winters when natural food sources are scarce, hungry deer will sample almost any foliage to survive.
Q3: Can I grow deer hardy plants in patio containers? Yes. Ensure you fill your containers with a lightweight, free-draining potting soil and choose pots with open drainage holes.
Q4: Do I still need spray repellents on deer hardy plants? Applying a mild repellent during early Spring helps protect soft, tender shoots on young plants while they establish their natural defenses.
Q5: How do I find my local USDA Hardiness Zone? Enter your zip code into the official USDA Plant Hardiness Zone Map online to find your exact regional growing zone.
Q6: Why is my deer hardy plant wilting in high summer heat? Check both your soil moisture and placement. Planting near heat sources like AC exhaust vents or overwatering heavy clay dirt can both cause severe wilting.
Q7: Is Spring or Fall better for planting deer hardy plants? Fall is ideal in most US regions. Warm soil lets root systems settle while cool air reduces stress on the foliage before winter dormancy.
MYFinal Thoughts
Building a gorgeous landscape shouldn’t mean fighting an endless war with local wildlife. By stocking your beds with established deer hardy plants matched to your USDA zone, you can sit back and enjoy the view. Don’t hesitate to move a shrub or perennial if it isn’t happy in its original spot. Gardens are always a work in progress!
Personal Pro-Tip: Take a few quick photos of your garden beds before the winter frost. It makes planning new additions much easier when Spring rolls back around.
Amin Khalid is a professional horticulturist and the founder of LeafyWisdom. With a deep passion for home gardening and horticultural research, he specializes in providing practical, easy-to-follow care guides for indoor plants. Amin’s goal is to simplify gardening for everyone and help fellow plant lovers build their own thriving green spaces.
If you’re tired of spending a small fortune on annuals every single May only to watch them turn to black sludge after the first frost, you’ve come to the right spot. I’ve spent over two decades digging in the dirt across various American backyards, and I can tell you that perennial plants are the ultimate cheat code for a stunning landscape. They rest through the winter cold and pop back up every Spring, bigger and better than before.
Below is my raw, practical guide to making them work in your own yard.
Quick Care Guide for Perennial Plants
Care Aspect
Standard Advice
My Real-World Backyard Rule
Light Needs
Full sun to deep shade depending on species
Match the tag, but give full-sun varieties at least 6 hours of direct summer sun.
Watering Routine
1 inch of water per week
Deep soak twice a week during hot July heat instead of shallow daily squirts from the hose.
Soil Type
Rich, well-draining garden soil
Mix local garden soil with organic compost; use fresh potting soil for outdoor patio pots.
Hardiness
Check plant tag for USDA Zone
Buy varieties rated one zone colder than your home zone for maximum winter survival.
Fertilizer
Balanced fertilizer in early Spring
A light top-dressing of organic leaf mold or compost in April is usually all you ever need.
What Are Perennial Plants and How Do They Work?
I still remember the first flower border I planted over twenty years ago. I dumped way too much cash on annual petunias and marigolds, only to watch a single October cold front wipe out the whole bed in Zone 6. That was the exact year I converted completely to perennial plants.
Simply put, perennials are long-term investments for your property. Unlike annuals that finish their whole life cycle in one quick burst, perennials go quiet when winter hits, keeping their root systems safe underground until warmth returns.
Some hold onto their foliage all year. Others known as herbaceous perennials die clear back to the soil line when real cold sets in. Don’t let that fool you. The roots are wide awake down below, just waiting for March or April.
Personal Pro-Tip: In my years of growing these long-lived garden staples, I’ve learned that patience is everything. Keep the classic gardener’s adage in mind: Year one they sleep, year two they creep, year three they leap. Don’t panic if your new bed looks a little sparse during its first summer!
Choosing the Best Perennial Plants for Your USDA Zone
If you buy a specimen rated for USDA Zone 8 and stick it in a Zone 4 Minnesota yard, it isn’t going to make it through December. It’s that simple.
Our American climate varies wildly. A muggy July afternoon in Georgia feels nothing like a dry, windy afternoon in Eastern Washington. That is why USDA Hardiness Zones matter so much when selecting perennial plants.
Northern Climates (Zones 3-5): Look for ultra-hardy options like Coneflowers (Echinacea), Siberian Iris, and Hostas. These actually require a solid winter chill to set proper spring flowers.
Mid-Atlantic & Midwest (Zones 6-7): You hit the sweet spot. Black-Eyed Susans, Russian Sage, and Salvia flourish easily in these regions without much babysitting.
Southern & Southwestern Climates (Zones 8-10): Focus on brutal heat and drought tolerance. Agastache, Lantana, and heat-tolerant Daylilies handle blazing summer sun without crisping up.
Personal Pro-Tip: Microclimates exist right in your own yard! A south-facing brick wall traps radiant heat all day. I often use those warm nooks to push the envelope and grow perennial plants rated one zone warmer than my local climate zone.
Why Perennial Plants Fail in American Gardens
Ever wonder why your neighbor’s flower bed looks like a botanical garden while yours struggles? I see the same three mistakes across suburban yards year after year.
First off, folks overwater with spray nozzles. Misting leaves for two minutes every evening does nothing except invite powdery mildew. You need deep soaking down where the roots live.
Second, poor drainage in heavy clay soil kills more roots during winter freezes than cold air ever could. Wet, frozen roots equal dead stock by March.
Third, bringing outdoor patio containers inside for winter without accounting for indoor environments. Place a pot next to an active heat register or air conditioning vent, and those drafts will zap the moisture right out of the leaves within forty-eight hours.
Personal Pro-Tip: Always grab water directly from an outdoor spigot or faucet rather than running softened indoor tap water outside. Home water softeners use sodium salts that build up in garden soil over time and stunt plant growth.
How to Fix Common Problems with Perennial Plants
Plants talk to us; we just need to learn their language. Here is how I diagnose trouble in the garden bed:
Yellowing Leaves on Perennial Plants
This almost always means roots are suffocation-level wet. Check your drainage. If the soil feels like swampy grease three inches down, put down the hose and let the bed dry out.
Crispy Leaf Edges During Summer
Crispy edges point to heat stress or severe underwatering. During 90°F heatwaves in August, set a slow drip near the base early in the morning so the moisture reaches the taproots before noon.
Weak Flowers and Flopping Stems
If tall stems fall over like sleepy toddlers, they either aren’t getting enough direct sunlight or you gave them way too much nitrogen fertilizer. Excess nitrogen creates weak, floppy green growth instead of sturdy flower stems.
Personal Pro-Tip: Every three to four years, lift crowded clumps in Fall with a sharp spade and split the root ball in half. Replanting these divided sections instantly restores vigor and gives you free extra stock for the rest of your beds!
Pet Safety: Keeping Dogs and Cats Safe Around Perennial Plants
As a dog owner myself, this is something I check before putting anything in the ground. Not all beautiful choices play nice with curious noses and paws.
True lilies (like Daylilies and Easter Lilies) are dangerously toxic to cats even small amounts of pollen licked off their fur can trigger acute kidney issues. Hostas, while wildly popular in American shadier spots, contain saponins that cause stomach upset in both dogs and cats.
Safe & Pet-Friendly Options:
Catmint (Nepeta): Extremely hardy, pollinators love it, and cats find it absolute paradise.
Coneflowers (Echinacea): Non-toxic, tough as nails, and colorful.
Coral Bells (Heuchera): Excellent foliage color for shady spots, completely safe for pets.
Personal Pro-Tip: Check the official ASPCA toxic plant database on your phone while standing in the checkout aisle at the nursery. It takes thirty seconds and saves endless worry later.
Frequently Asked Questions
Q1: When is the absolute best time to put perennial plants in the ground?
Early Fall is my absolute favorite time, followed closely by early Spring. Autumn planting allows roots to establish in cool, moist soil without battling scorching summer heatwaves right away.
Q2: How often should I water newly set perennial plants?
Water thoroughly right after planting. For the first two weeks, give them a deep soak every two to three days. Once established, ease back to about an inch of water a week from rainfall or supplemental hose soaking.
Q3: Do perennial plants come back every year automatically?
Yes! As long as you choose varieties rated for your local USDA Hardiness Zone and give them decent soil, they will return year after year.
Q4: Can I grow perennial plants in containers on an outdoor patio?
You sure can. Just use a high-quality potting soil mix and select a container with plenty of drainage holes. Remember: plants in pots freeze faster in winter, so pick varieties rated two zones colder than your local area.
Q5: How do I cut back perennial plants before winter hits?
Wait until a hard frost turns foliage brown in late Fall. Use clean hand pruners to snip dead herbaceous stems down to about two inches above ground level. Leave ornamental grasses and seed-head plants like coneflowers intact for winter texture and bird food.
Q6: What are the easiest perennial plants for beginners in Zone 6 or 7?
You can’t go wrong with Black-Eyed Susans, Salvia, Sedum (‘Autumn Joy’), or Catmint. They are practically bulletproof and forgive minor watering oversights.
Q7: Why are my perennial plants blooming less this season?
They are likely overgrown and rootbound, or getting too much shade as nearby trees mature. Try dividing the clump in early Spring or late Fall to jumpstart bloom production.
Final Thoughts
Building a vibrant garden takes a little patience, but nothing beats the feeling of seeing green shoots poke through thawing soil every Spring. Pick the right spot for your sun exposure, pay attention to your hardiness zone, and keep your hose routines simple. Once your roots get established, these heavy lifters will do most of the work for you.
Amin Khalid is a professional horticulturist and the founder of LeafyWisdom. With a deep passion for home gardening and horticultural research, he specializes in providing practical, easy-to-follow care guides for indoor plants. Amin’s goal is to simplify gardening for everyone and help fellow plant lovers build their own thriving green spaces.
Figuring out the right types of plants for your home or yard is harder than it sounds, and I’ve spent years with soil under my fingernails watching people get it wrong in the same handful of ways. My neighbor asked me this exact question last spring while I was hauling a dying fiddle leaf fig out to the curb. Fair question. There are thousands of species out there, and most guides just dump a list on you without telling you which ones actually survive in a real American living room with a dry HVAC vent blowing on them all winter.
This guide breaks down the major types of plants you’ll actually encounter, whether you’re filling a windowsill in Ohio or planting a border bed in Zone 8b Georgia. I’m going to be blunt about what fails and why, because that’s more useful to you than another glossy list of “50 gorgeous plants.”
Quick Care Table: Types of Plants at a Glance
Plant Category
Light Needs
Water Frequency
Difficulty
Pet Safe?
Succulents & Cacti
Bright, direct
Every 2-3 weeks
Easy
Mostly no
Tropical Foliage (Pothos, Monstera)
Bright, indirect
Weekly
Easy-Moderate
No
Flowering Houseplants (African Violet)
Bright, indirect
1-2x weekly
Moderate
Varies
Ferns
Low-medium, indirect
Frequent, keep moist
Moderate-Hard
Mostly yes
Herbs (Basil, Mint)
Full sun / bright
Frequent
Easy
Yes
Perennial Garden Flowers
Full sun to part shade
Weekly (established)
Easy-Moderate
Varies
Annual Bedding Plants
Full sun
Frequent
Easy
Varies
Trees & Shrubs
Depends on species
Deep, infrequent
Moderate
Varies
Keep this table bookmarked. I’ll go section by section below, because “it depends” is the honest answer to almost every plant question, and I want to actually tell you what it depends on.
Succulents and Cacti: The Types of Plants for People Who Forget to Water
These are usually where I point beginners, and for good reason. In my years growing these, the plant almost never dies from neglect. It dies from love. Specifically, overwatering.
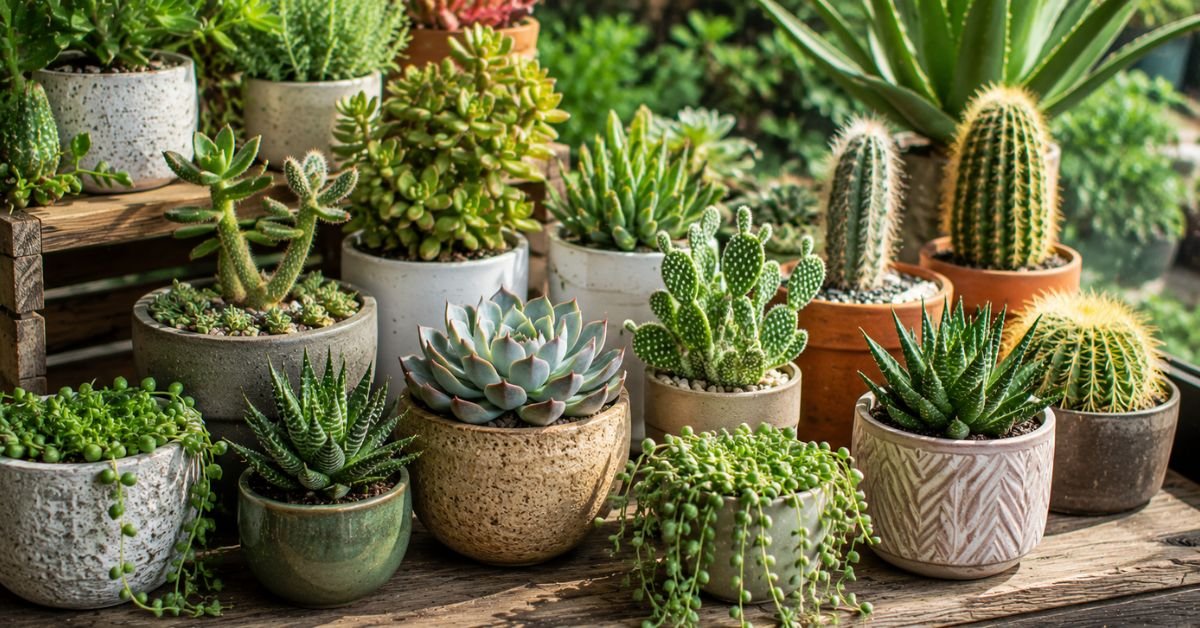
Succulents store water in their leaves and stems, so they evolved for drought, not for a well-meaning owner topping them off every Sunday like clockwork. Common ones you’ll find at Home Depot or your local nursery: Echeveria, Haworthia, Jade Plant, and true cacti like Barrel or Bunny Ears.
How Often Should You Water Succulents and Cacti? Only when the potting soil is bone dry, all the way down. In summer that might be every 10 days. In winter, when growth slows, you could stretch it to a month. Stick your finger two inches in before you even think about the watering can.
Personal Pro-Tip: I keep my succulents on the driest side of a south-facing windowsill, away from the AC vent that blows cold, dry air directly onto my Monstera across the room. Succulents actually don’t mind that dry blast. It’s the tropical plants that hate it.
Common Mistakes Americans Make With Succulents
Regular potting soil holds too much moisture for these guys. You need a cactus/succulent mix, or regular potting soil cut with perlite or coarse sand at about 50/50. And please, use a pot with a drainage hole. I don’t care how cute the ceramic pot without a hole is at TJ Maxx.
Troubleshooting Succulent Problems
Leaves turning mushy and translucent? That’s overwatering, not a disease. Stop watering immediately and check the roots for rot.
Stretching and leaning toward the window (etiolation)? Not enough light. Move it closer to a south or west-facing window.
Brown, crispy patches? Usually sunburn from moving a plant too fast from low light to a hot window. Ease them into bright spots over a week or two.
Toxicity Warning: Most succulents are non-toxic, but Jade Plant, Aloe Vera, and several Euphorbia species (like the Pencil Cactus) are mildly to moderately toxic to cats and dogs. Check the ASPCA’s plant list before buying if you’ve got a curious pet who eats everything.
Tropical Foliage Plants: The Types of Plants That Dominate Instagram
Pothos, Monstera Deliciosa, Snake Plant (now technically Dracaena trifasciata, botanists keep renaming it), Philodendron, ZZ Plant. This category is where most “plant person” starter homes live, and it’s also where I see the most frustration.
How Often Should You Water Your Snake Plant? Honestly, less than you think. Every 2-3 weeks is plenty, and even less in winter. The Snake Plant is basically a succulent wearing a tropical plant’s clothes, and it’s one of the most forgiving plants you can own.
How Often Should You Water Your Pothos or Monstera? Weekly, roughly, but check the top inch of soil first. My rule of thumb: when the leaves start to look slightly less perky than usual, that’s your cue, not a fixed calendar day.
Personal Pro-Tip: Central heating and air conditioning are the silent killers of tropical foliage in American homes. These plants evolved under a rainforest canopy with humidity in the 60-80% range. Your living room in January is probably sitting at 20-30% humidity. I run a small humidifier near my Calathea from October through March, and it made a night-and-day difference in leaf browning.
Common Mistakes With Tropical Houseplants
Placing them directly in the path of an AC vent or a heating register is the number one mistake I see. The constant blast of dry, temperature-swinging air stresses these plants badly, even if the room temperature itself seems fine. Second mistake: watering on a schedule instead of checking the soil. Third: using a pot with no drainage and letting water pool at the bottom.
Troubleshooting Yellow Leaves and Brown Tips
Yellow leaves, especially lower ones, feeling soft? Overwatering. Let the soil dry out more between waterings.
Brown, crispy tips but the rest of the leaf is green? Usually low humidity or a buildup of minerals/salts from tap water. Try filtered water from your faucet or let tap water sit out overnight before using it.
New leaves coming in small or pale? Probably needs more light, or it’s hungry. A diluted liquid fertilizer during spring and summer usually fixes this.
Toxicity Warning: This is a big one for US pet owners. Pothos, Philodendron, and Monstera all contain calcium oxalate crystals and are toxic to cats and dogs if chewed. Snake Plant is mildly toxic too. If you’ve got a chewer, look at Parlor Palm, Spider Plant, or Calathea instead, all of which are pet-safe.
Flowering Houseplants: Types of Plants That Bloom Indoors
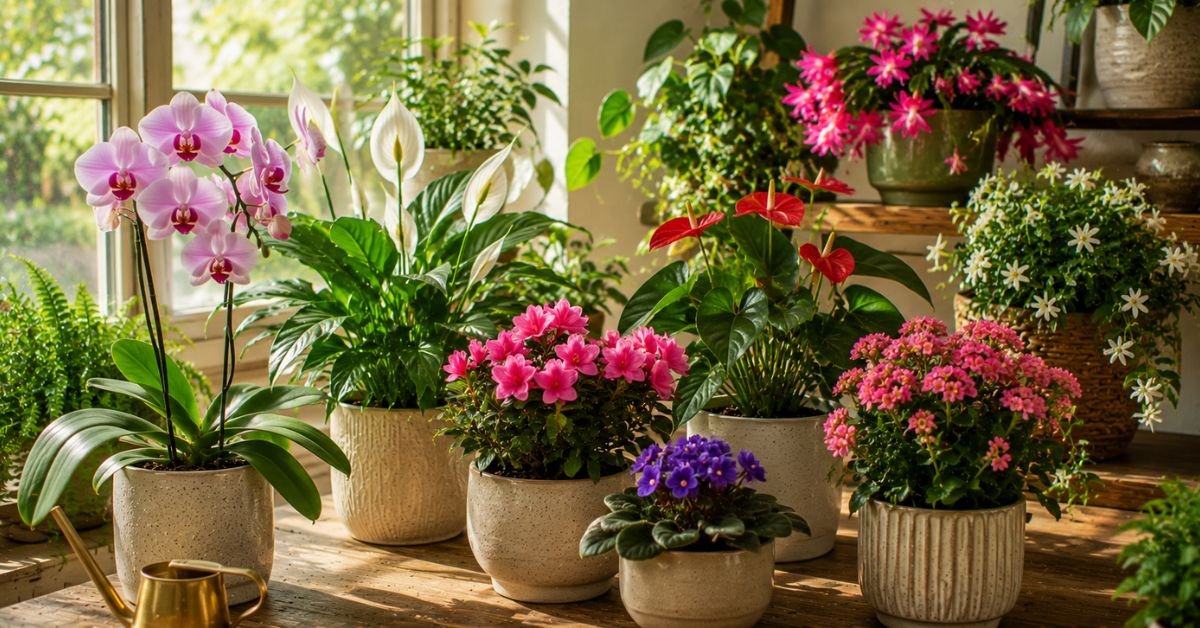
African Violets, Peace Lily, Orchids, Anthurium. These bring color indoors, but they’re generally fussier than foliage plants.
Personal Pro-Tip: African Violets hate getting water on their leaves. I water mine from the bottom, setting the pot in a saucer of water for 20 minutes and letting it wick up through the drainage hole. Water sitting on the fuzzy leaves causes ugly brown spotting.
Common Mistakes
People treat Peace Lilies like they need constant water because they’re dramatic droopers. Actually, that drooping is useful. It tells you exactly when to water. The problem is people panic-water at the first sign of a slightly less perky leaf, and root rot follows.
Troubleshooting
Peace Lily not flowering? Needs brighter, indirect light. It’ll survive in low light but won’t bloom there.
Orchid roots turning brown and mushy? Overwatering, almost always. Orchid roots should look silvery-green when dry and bright green after watering, never brown and soft.
Toxicity Warning: Peace Lily is toxic to cats and dogs. True lilies (Lilium species, different from Peace Lily) are extremely dangerous to cats specifically, capable of causing kidney failure from even small amounts of pollen. If you own a cat, I’d skip true lilies entirely. Orchids and African Violets are generally pet-safe.
Ferns: Types of Plants for Humid Corners and Bathrooms
Boston Fern, Maidenhair Fern, Bird’s Nest Fern. I’ll be honest, ferns are the category where I’ve killed the most plants personally, and I’m supposed to be the expert.
Personal Pro-Tip: A bathroom with a window is honestly the best spot in most American homes for a fern, because the daily shower steam gives it the humidity it’s begging for. My Boston Fern lives in my bathroom now after two failed attempts in my dry home office.
Common Mistakes
People place ferns in a typical living room and expect them to thrive with weekly watering like a Pothos. Ferns want consistent moisture, not the dry-out-between-waterings approach that works for tropicals.
Troubleshooting
Fronds turning brown and crispy at the edges? Low humidity, almost every time. Group plants together, use a pebble tray, or move it to a steamier room.
Whole fronds collapsing? The soil probably dried out completely at some point. Ferns don’t forgive that the way a Pothos does.
Toxicity Warning: Most true ferns, including Boston Fern and Bird’s Nest Fern, are non-toxic to cats and dogs, making them a solid pick for pet households that still want lush greenery.
Herbs: Edible Types of Plants for Kitchen Windowsills
Basil, Mint, Rosemary, Thyme, Parsley. These straddle indoor and outdoor life depending on your climate zone.
Personal Pro-Tip: Mint will take over an entire garden bed if you let it. I learned this the hard way and now I only grow mine in a container, even when it’s sitting right in the middle of my garden. Sink the whole pot into the ground if you want the look of an in-ground herb without the invasion.
Common Mistakes
Basil in a north-facing kitchen window rarely gets enough light and turns leggy and pale. It really wants 6+ hours of direct or very bright light, a south or west window at minimum, or a grow light in winter.
Troubleshooting
Basil going to flower quickly? Pinch off flower buds as soon as you see them, or the plant redirects energy away from leaf production and the leaves turn bitter.
Rosemary dying indoors over winter? This is incredibly common. Rosemary hates the combo of low light and constant warm, dry indoor air. A cool, bright spot works better than a warm one.
Toxicity Warning: Culinary herbs are generally safe for pets in small amounts, though large quantities of some (chives and their onion-family relatives) can cause issues. Basil, mint, rosemary, and thyme are all considered pet-safe.
Perennial Garden Flowers: Outdoor Types of Plants That Come Back Every Year
Coneflower, Black-Eyed Susan, Hosta, Daylily, Peony. This is where USDA Hardiness Zones actually matter, a lot.
Your zone tells you the average minimum winter temperature in your area, and it determines whether a perennial will survive your winter or need to be treated as an annual instead. A Peony that comes back reliably in Zone 5 Minnesota might actually struggle in Zone 9 Florida because it needs a certain number of winter chill hours to bloom well.
Personal Pro-Tip: Before I buy any perennial now, I check two numbers on the plant tag: the hardiness zone range and my own zone. If my zone falls outside that range, I either skip it or accept I’m growing it as an annual. Saves a lot of disappointment in April when nothing comes back.
Common Mistakes
Planting too early in spring before the last frost date for your region is a classic one. Also, a lot of people plant perennials too deep, burying the crown, which invites rot.
Troubleshooting
Perennial didn’t come back this spring? Check if it was actually hardy in your zone, or if the site had poor drainage over winter, which is often a bigger killer than cold itself.
Lots of leaves, no flowers? Usually too much nitrogen fertilizer or not enough sun.
Toxicity Warning: Daylilies are extremely toxic to cats, even causing kidney failure. Hostas are toxic to dogs and cats too. Coneflower and Black-Eyed Susan are generally considered pet-safe.
Annual Bedding Plants: Types of Plants for Instant Seasonal Color
Petunias, Marigolds, Impatiens, Zinnias. These live one growing season and then die, but they give you fast, reliable color for a Spring or Fall planting.
Personal Pro-Tip: I always deadhead my Zinnias, snipping off the spent blooms, because it tricks the plant into producing more flowers instead of going to seed. Takes five minutes a week and roughly doubles how much bloom I get out of a bed.
Common Mistakes
Planting annuals outside too early, before your last frost date, is probably the single most common mistake in American gardens every Spring. Impatiens especially sulk or die outright in a late cold snap.
Troubleshooting
Leggy, stretched-out plants with few flowers? Not enough sun, or they need a light pinch-back early in the season to encourage bushier growth.
Wilting despite regular watering? Check for root-bound plants that were never properly loosened at planting time.
Toxicity Warning: Marigolds and Zinnias are pet-safe. Petunias are non-toxic too. Impatiens are generally considered safe in small amounts, though I’d still discourage a pet from grazing on any ornamental.
Trees and Shrubs: The Long-Term Types of Plants for Your Yard
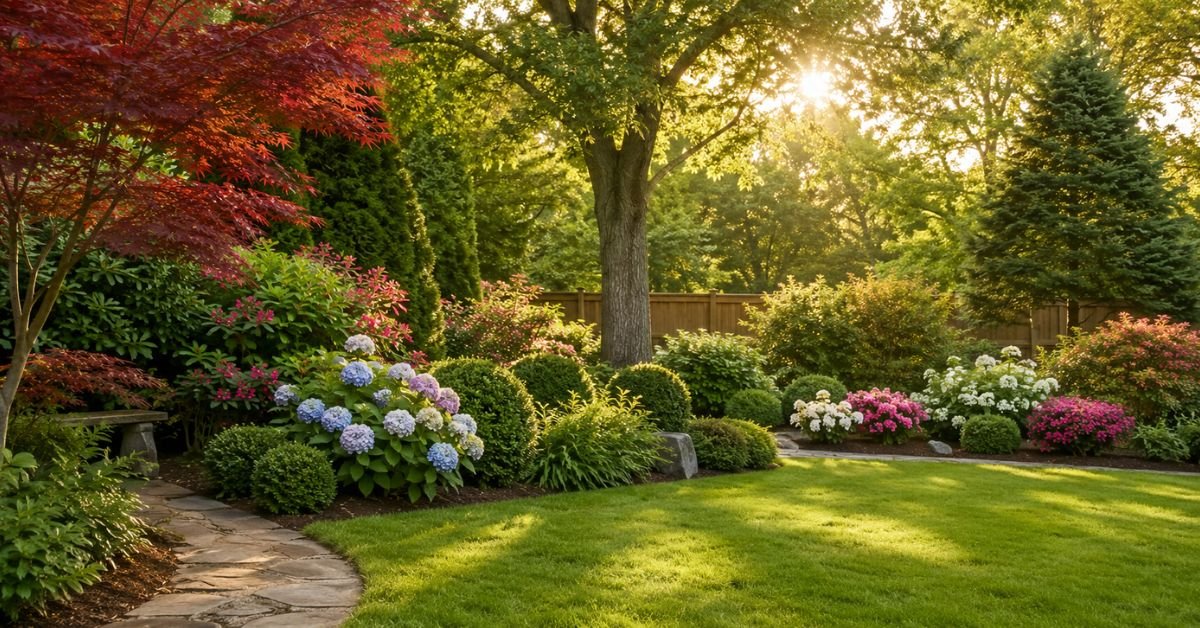
Japanese Maple, Hydrangea, Boxwood, Arborvitae. These are the bones of a landscape, and mistakes here are expensive because you’re not replacing a $4 annual, you’re replacing a $150 tree.
Personal Pro-Tip: I always dig the planting hole twice as wide as the root ball but no deeper than it. Planting too deep is the single biggest killer of new trees and shrubs I see in client yards, and it’s completely avoidable.
Common Mistakes
Overwatering a newly planted tree because people assume “more water equals faster establishment.” Actually, deep, infrequent watering that encourages roots to grow downward beats frequent shallow watering every time.
Troubleshooting
Hydrangea not blooming? Depends on the type. Some bloom on old wood, and pruning at the wrong time of year removes next season’s flower buds entirely.
Boxwood turning brown patches? Could be Boxwood Blight, a real problem spreading through parts of the US, or simply winter burn from cold wind and sun.
Toxicity Warning: Japanese Maple is generally non-toxic. Hydrangea is mildly toxic to pets if large amounts are eaten. Boxwood and Arborvitae contain compounds that are toxic to pets and livestock in quantity, so keep grazing animals and curious dogs away from hedges.
Frequently Asked Questions
Q1: What are the 4 main types of plants? Botanically, plants are often grouped into four broad categories: flowering plants (angiosperms), conifers, ferns, and mosses. For home gardening purposes though, most people think in terms of houseplants, perennials, annuals, and trees/shrubs, which is the breakdown I used throughout this guide.
Q2: What is the easiest type of plant to keep alive indoors? Snake Plant and Pothos are usually my top two recommendations for beginners. Both tolerate irregular watering, low light, and general neglect better than almost anything else you’ll find at a nursery.
Q3: What plants are safe if I have cats? Spider Plant, Boston Fern, Parlor Palm, and Calathea are all non-toxic and pet-safe options that still look lush. Avoid Lilies, Pothos, Philodendron, and Peace Lily if your cat likes to chew on leaves.
Q4: How do I know my USDA Hardiness Zone? You can look it up on the official USDA Plant Hardiness Zone Map by entering your zip code. It’s the single most useful piece of information before buying any perennial, tree, or shrub, since it tells you whether that plant will actually survive your winter.
Q5: Why do my houseplants keep dying in winter even though I water them the same? Central heating dries the air out drastically in winter, often dropping indoor humidity to 20-30%, far below what most tropical plants prefer. It’s usually not your watering routine that changed, it’s the air around the plant.
Q6: What type of plant grows fastest for a new gardener who wants quick results? Annuals like Marigolds or Zinnias from seed, or a fast-growing houseplant like Pothos, will show visible growth within just a couple weeks, which is encouraging for someone just starting out.
Q7: Can I keep an outdoor perennial as a houseplant, or vice versa? Generally no, not successfully long-term. Outdoor perennials are adapted to seasonal temperature swings and dormancy periods that an indoor environment doesn’t provide, and true houseplants usually can’t handle direct outdoor sun or frost. There are exceptions, like moving potted tropicals outside for summer, but they need to come back in before the first frost.
Final Thoughts
If I had to boil down everything above into one sentence, it’d be this: match the plant to the actual conditions in your home or yard, not the conditions you wish you had. A north-facing apartment in Chicago and a south-facing patio in Phoenix need completely different plant strategies, even if the plant tag says the same thing at the garden center.
Start with something forgiving if you’re new to this, a Snake Plant or a Pothos indoors, a Black-Eyed Susan outdoors. Get a feel for how your specific space behaves, the light, the humidity, the way your heating system dries the air out every winter. Then branch into the fussier categories once you’ve got a read on your own home.
Amin Khalid is a professional horticulturist and the founder of LeafyWisdom. With a deep passion for home gardening and horticultural research, he specializes in providing practical, easy-to-follow care guides for indoor plants. Amin’s goal is to simplify gardening for everyone and help fellow plant lovers build their own thriving green spaces.
I killed my first tropical rainforest plant in about six weeks. It was a Monstera, and I was watering it like a tomato, on a strict Sunday schedule, no matter what the soil actually looked like. It rotted from the roots up, and I didn’t understand why until I started reading about where these plants actually come from.
That’s the thing about tropical rainforest plants. They didn’t evolve on a windowsill in Ohio. They evolved under a forest canopy where the light is filtered, the air is thick with moisture, and the soil almost never fully dries out but also almost never sits soggy for long. Once I started treating my houseplants like tiny transplants from that world instead of generic “greenery,” everything changed. This guide is what I wish someone had handed me back then.
Quick Care Table for Popular Tropical Rainforest Plants
Skimming for the basics? Start here, then read the sections below for the details that actually matter.
Plant
Light
Watering
Humidity
USDA Zones (Outdoor)
Pet Toxicity
Monstera deliciosa
Bright, indirect
When top 2″ of soil is dry
60%+
10–12
Toxic to cats & dogs
Pothos (Epipremnum)
Low to bright, indirect
When top 1–2″ is dry
40%+ (forgiving)
10–12
Toxic to cats & dogs
Philodendron
Medium to bright, indirect
Weekly-ish, adjust by season
50%+
9–11
Toxic to cats & dogs
Calathea
Medium, indirect only
Keep lightly moist
60%+
10–12
Non-toxic
Peace Lily
Low to medium
When it starts to droop slightly
50%+
11–12
Toxic to cats & dogs
Fiddle Leaf Fig
Bright, indirect
Weekly, deep soak
40%+
10–11
Toxic to cats & dogs
What Makes a Plant a True Tropical Rainforest Plant?
Not every houseplant with big leaves counts. Genuine tropical rainforest plants come from the understory or canopy layers of jungles in places like the Amazon Basin, Southeast Asia, and Central America. They’re used to warmth that rarely dips below 65°F, humidity that would fog up a bathroom mirror, and light that filters down through layers of leaves above them rather than hitting them directly.
I think this origin story is the single most useful thing a beginner can learn. It explains almost every “mystery” problem people run into. Brown, crispy edges? Probably not enough humidity. Leggy growth reaching toward a window? Not enough filtered light. Once you know the plant’s backstory, the troubleshooting gets a lot less confusing.
Why Tropical Rainforest Plants Struggle in Typical American Homes
Here’s my honest take: most US homes are basically the opposite of a rainforest. Central heating and air conditioning strip moisture out of the air. Forced-air vents create little dry, drafty microclimates. In my own living room, the humidity sits around 30% most of winter — a rainforest floor would be more than double that.
I’ve found that acknowledging this mismatch upfront saves people a lot of frustration. You’re not failing at plant care. You’re compensating for a climate your plant was never designed for.
How to Water Tropical Rainforest Plants the Right Way
This is where I went wrong originally, and it’s where I see the most questions in plant groups and on Reddit. Watering tropical rainforest plants isn’t about a calendar. It’s about reading the plant and the potting soil.
Stick a finger about two inches into the potting soil before you touch that watering can. Dry at that depth on a Monstera or Philodendron? Water thoroughly until it runs from the drainage holes. Still damp? Wait. Calatheas and Peace Lilies want to stay a bit more consistently moist, never bone dry, but they still hate sitting in a swamp.
Personal Pro-Tip: I keep a cheap moisture meter in my gardening drawer. It’s not fancy, and purists will tell you to just trust your finger, but on darker winter days when I can’t tell if the top layer is genuinely dry or just cool, that little probe has saved more than one plant from an unnecessary drink.
Should You Use Tap Water or Filtered Water?
Honestly, for most people, faucet water is fine. If your municipal supply is heavily chlorinated or you’ve got hard water with a lot of mineral buildup, I let a full watering can sit out on the counter overnight so some of the chlorine dissipates before it touches the roots. Calatheas in particular can develop crispy brown edges from mineral-sensitive tap water, so that’s one plant where I’d actually bother with filtered or distilled water.
Humidity, Light, and the Air Conditioning Problem
I want to spend real time here because this is genuinely the part competitors gloss over, and it’s the part that determines whether your tropical rainforest plants actually settle in.
Do Tropical Rainforest Plants Need a Humidifier?
For most jungle-native houseplants, yes, especially if you run central AC through the summer or forced-air heat through winter. A small humidifier set near your plant grouping can push ambient humidity from a dry 25–30% up into the 50–60% range these species actually want. Grouping plants together also helps they release moisture through their leaves and effectively humidify each other.
Avoid placing any tropical species directly under or near an AC vent or a heating register. The blast of dry, temperature-swinging air dehydrates leaves fast, and I’ve watched perfectly healthy Calatheas develop crispy tips within a week of being moved near a vent.
What Kind of Light Do These Plants Actually Want?
“Bright, indirect light” gets thrown around so often it’s basically meaningless at this point. Practically, it means a spot a few feet back from an east or south-facing window, or right in front of a north-facing one. Direct, hot afternoon sun through unfiltered glass will scorch the leaves of most rainforest species, since in nature that light was always broken up by a canopy overhead.
Personal Pro-Tip: I rotate every pot a quarter turn each time I water. Plants lean toward light, and a couple months of unchecked leaning gives you a lopsided, top-heavy specimen that’s annoying to photograph and honestly a little sad to look at.
Common Mistakes Americans Make With Tropical Rainforest Plants
I’m going to be blunt here because I think most care guides are too gentle about this. In my experience, three mistakes account for the vast majority of dead tropical houseplants in US homes.
Overwatering out of anxiety. New plant owners water constantly because they’re worried, not because the plant needs it. Soggy potting soil suffocates roots faster than a dry spell ever will.
Parking plants near AC vents or drafty windows. This is such a common layout choice in American living rooms, and it’s brutal on humidity-loving species.
Using the wrong pot. A decorative ceramic pot with no drainage hole, filled to the brim with water, is basically a slow-motion root rot machine. I learned this one the expensive way.
Troubleshooting: Yellow Leaves, Brown Tips, and Other Warning Signs
Why Are the Leaves on My Tropical Rainforest Plant Turning Yellow?
Nine times out of ten in my experience, yellowing leaves mean overwatering. The soil’s staying wet too long, oxygen can’t reach the roots, and the plant starts sacrificing older leaves to survive. Let the soil dry out more between waterings, and check that your pot actually drains. Occasionally, especially in Peace Lilies and Pothos, a single yellow leaf here and there is just normal aging not every yellow leaf is a crisis.
Why Does My Plant Have Brown, Crispy Tips?
This one almost always points to low humidity, mineral buildup from tap water, or both. Move the plant away from vents, add a humidifier or pebble tray, and consider switching to filtered water if you’ve got hard water. Trim the crispy parts with clean scissors; the plant won’t heal that section, but it’ll stop looking worse.
Why Is My Plant Dropping Leaves Suddenly?
Sudden leaf drop is often shock a big move, a cold draft, a repotting that disturbed the roots. Give it a few weeks in a stable spot before you panic and start changing your whole routine.
Personal Pro-Tip: I keep a note on my phone logging when I water each plant and what I notice. It sounds excessive, but after a month you start seeing patterns like “every time I water on a Thursday, the Calathea sulks by Saturday” that a memory alone won’t catch.
Are Tropical Rainforest Plants Toxic to Cats and Dogs?
This matters enormously for US households, and I don’t think enough guides lead with it. Several extremely popular species Monstera, Pothos, Philodendron, Peace Lily, and Fiddle Leaf Fig among them contain calcium oxalate crystals that cause mouth irritation, drooling, and vomiting if a cat or dog chews on the leaves. It’s rarely fatal, but it’s genuinely unpleasant for the animal and worth a vet call if symptoms are severe.
If pets are part of your household, Calatheas are one of the few popular jungle plants that are non-toxic, and they’re a safer choice for low shelves or spots your cat can actually reach. For everything else, hanging planters and high shelves are your friend.
USDA Hardiness Zones for Outdoor Tropical Rainforest Plants
Most tropical rainforest plants are grown as houseplants across the US simply because they can’t survive frost. If you’re in USDA Zone 10 or 11 think South Florida, coastal Southern California, or Hawaii you can actually grow many of these outdoors year-round, including Monstera, Philodendron, and even Fiddle Leaf Fig in a sheltered spot. Everywhere else, they’re either houseplants full time or “patio plants” that come back inside the moment nighttime temperatures threaten to dip below 50°F in fall.
Frequently Asked Questions
Q1. Can tropical rainforest plants survive in a low-light apartment? Some can. Pothos and certain Philodendron varieties are genuinely tolerant of lower light, though “tolerant” means they’ll survive, not necessarily grow fast. A Monstera or Fiddle Leaf Fig in a genuinely dim room will likely stretch out and struggle over time.
Q2. How often should I mist my tropical plants? Misting gives a very brief humidity bump that fades within minutes, so it’s more of a nice ritual than an effective long-term fix. A humidifier or pebble tray does far more for the plant.
Q3. Why is my tropical plant not growing at all? Check the season first — most tropical species slow down or pause growth entirely in fall and winter, even indoors, responding to shorter days. If it’s spring or summer and growth has stalled, look at light levels and whether the plant’s outgrown its pot.
Q4. Is potting soil different from regular garden soil for these plants? Yes, and this trips people up constantly. Garden soil compacts in a container and drowns roots. Use a well-draining potting soil, ideally one with added perlite or orchid bark for tropical aroids like Monstera and Philodendron.
Q5. Can I keep tropical rainforest plants outside in summer? In most of the US, yes, on a shaded patio once nighttime temperatures stay reliably above 55°F. Just remember to acclimate them slowly to outdoor light and bring them back in before the first fall frost.
Q6. Why does my plant look fine in the store but decline at home? Nurseries and big box stores run high humidity and bright, controlled light. Your home is a different environment, and plants need a few weeks to adjust some leaf loss during that adjustment period is normal and not always a sign you’re doing something wrong.
Q7. Do tropical rainforest plants need fertilizer? During active growth in spring and summer, yes a diluted balanced liquid fertilizer every 4–6 weeks helps. I skip fertilizing entirely from about October through February, since the plant isn’t actively growing and unused fertilizer salts can actually damage the roots.
Final Thoughts
None of this is complicated once you stop thinking of tropical rainforest plants as ordinary houseplants and start thinking of them as tiny transplants from a very specific, very humid corner of the world. Match their light, don’t drown their roots, keep them away from your AC vents, and check on toxicity before you put one anywhere near a curious cat. I still lose the occasional leaf to a cold draft or a distracted week of care. That’s normal. The goal isn’t perfection, it’s giving these plants a reasonable approximation of home.
Amin Khalid is a professional horticulturist and the founder of LeafyWisdom. With a deep passion for home gardening and horticultural research, he specializes in providing practical, easy-to-follow care guides for indoor plants. Amin’s goal is to simplify gardening for everyone and help fellow plant lovers build their own thriving green spaces.
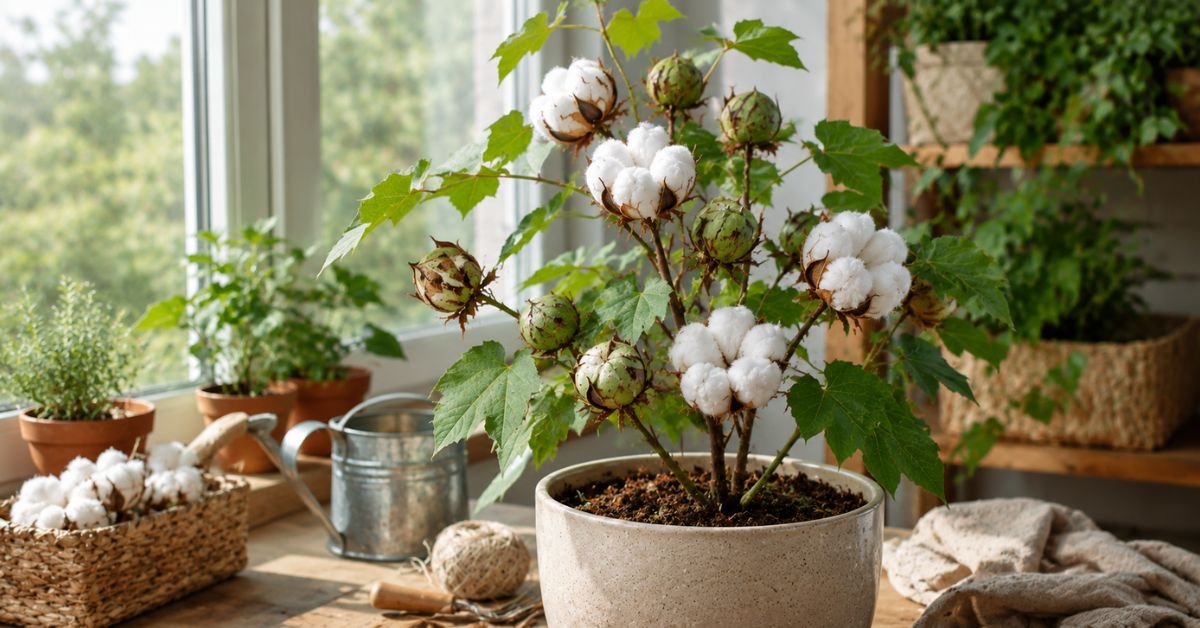
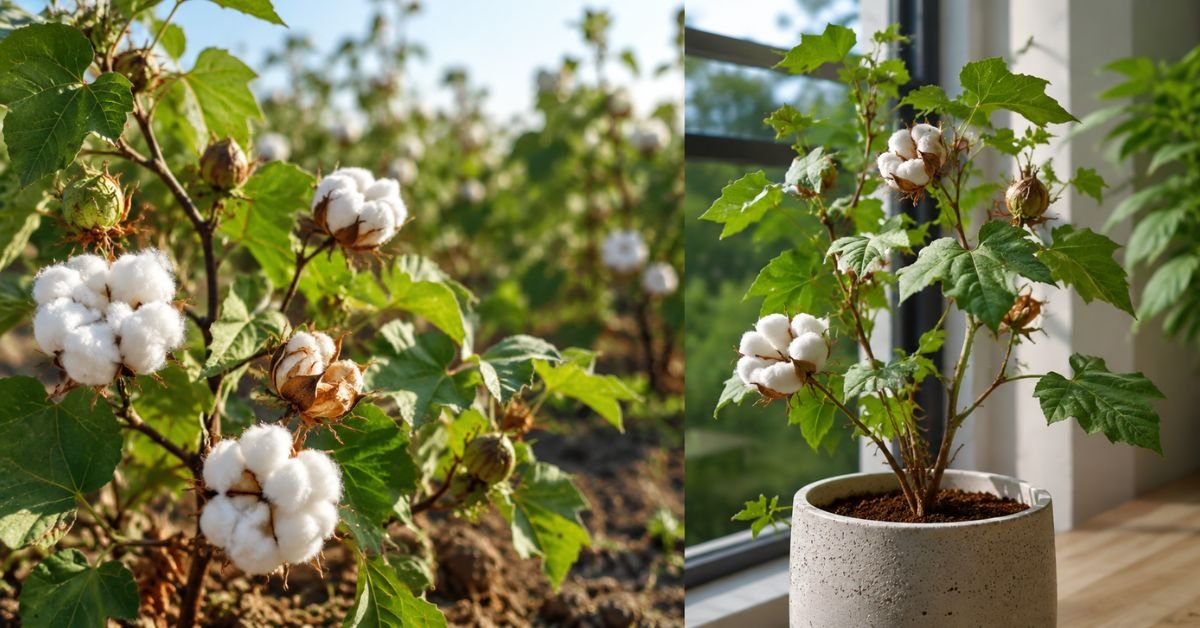
I’ve spent years getting my hands dirty with all sorts of greenery across the US. But getting a fluffy, white harvest from your very own living room or backyard? That’s something special. Growing cotton plants isn’t just for massive commercial farms down south. You can actually do it right at home. I’ll walk you through the real-world, practical steps to make it happen, without any complicated jargon.
Quick Care Table
Feature
Details
USDA Hardiness Zones
8-11 (Perennial outdoors); Anywhere (Indoors or Annual)
Sunlight
Full sun (4-5 hours minimum)
Watering
Wait until the top 2 inches of soil are dry
Soil
Standard potting soil mixed with perlite or sand
Temperature
65°F to 85°F
Why Growing Cotton Plants Indoors or Outdoors is Easier Than You Think
When I first tried putting seeds in a pot, I fully expected them to fail. They didn’t. Cotton is surprisingly resilient. If you live in USDA Hardiness Zones 8 through 11, you can drop seeds straight into the garden come Spring. For the rest of the country dealing with chilly Fall weather and freezing winters, keeping them in containers works beautifully. I’ve noticed that as long as you treat them like drought-tolerant sun-lovers, they do just fine.
Personal Pro-Tip: I always soak my seeds in warm water for about 12 hours before planting. It softens the hard outer shell and speeds up germination significantly.
Essential Care Guide for Your Cotton Plants
How Much Sun Do Cotton Plants Really Need?
Sunlight is non-negotiable. They need a lot of it. We are talking bright, direct light. If you have a south-facing window, use it. Without enough sun, the stems get leggy and you won’t see a single fluffy boll.
If your house is shaded, you might need a grow light. I had a batch in a somewhat dim room once. They grew, sure. But they just looked sad and stretched out.
Personal Pro-Tip: Rotate your pot a quarter turn every couple of days. This keeps the stem growing straight instead of leaning heavily toward the window.
Watering Cotton Plants: Directly From the Faucet
This is where most folks mess up. Cotton is drought-tolerant. Do not constantly flood the pot. I usually wait until the top two inches of the potting soil feel completely dry to the touch before I grab my watering can.
You can use plain tap water right from the faucet. No fancy filtered water needed. Just drench it until water runs out the bottom, and then leave it alone.
Personal Pro-Tip: If your tap water smells heavily of chlorine, fill your watering can and let it sit overnight before using it. The chemicals will evaporate.
The Best Potting Soil for Indoor Cotton Plants
Forget heavy outdoor dirt. You want a well-draining potting soil. I like to mix a standard bag of potting soil with a handful of perlite or sand. It keeps the roots from sitting in muck. If the roots stay wet, they rot. Fast.
Personal Pro-Tip: Make sure your container has drainage holes. I once lost a beautiful plant because I used a decorative pot without a hole. The water just sat at the bottom and drowned it.
Common Mistakes When Raising Cotton Plants in the US
We do a lot of things to make our homes comfortable. Sadly, those things can ruin indoor plants.
The biggest culprit? Air conditioning. Placing your pot right next to an AC vent is a death sentence. The cold, dry air blasts the leaves, causing them to drop off.
Another massive issue is overwatering. Because it’s a commercial crop, people assume it needs constant hydration. It doesn’t. Stop hovering over it with a watering can.
Personal Pro-Tip: I keep my pots at least five feet away from any heating or cooling vents. The ambient temperature in a normal US home is fine, but direct blasts of artificial air will shock the system.
Troubleshooting Cotton Plant Issues
Things go wrong. It happens to me, and it will happen to you. Here is exactly how you fix it.
Leaves turning yellow? You are giving it too much water. Or the soil isn’t draining. Check the drip tray. If it’s full of standing water, dump it out. Let the soil dry out for a week and see if the new growth looks green.
Brown, crispy tips? That’s a humidity issue or salt buildup from fertilizer. Flush the soil with clean water from the faucet. If you live in a super dry climate, lightly misting the air around the pot can help.
Personal Pro-Tip: Don’t panic and rip off leaves at the first sign of yellowing. Let the plant naturally shed them. It reabsorbs nutrients from dying leaves.
Toxicity Warning: Are Cotton Plants Safe for Cats and Dogs?
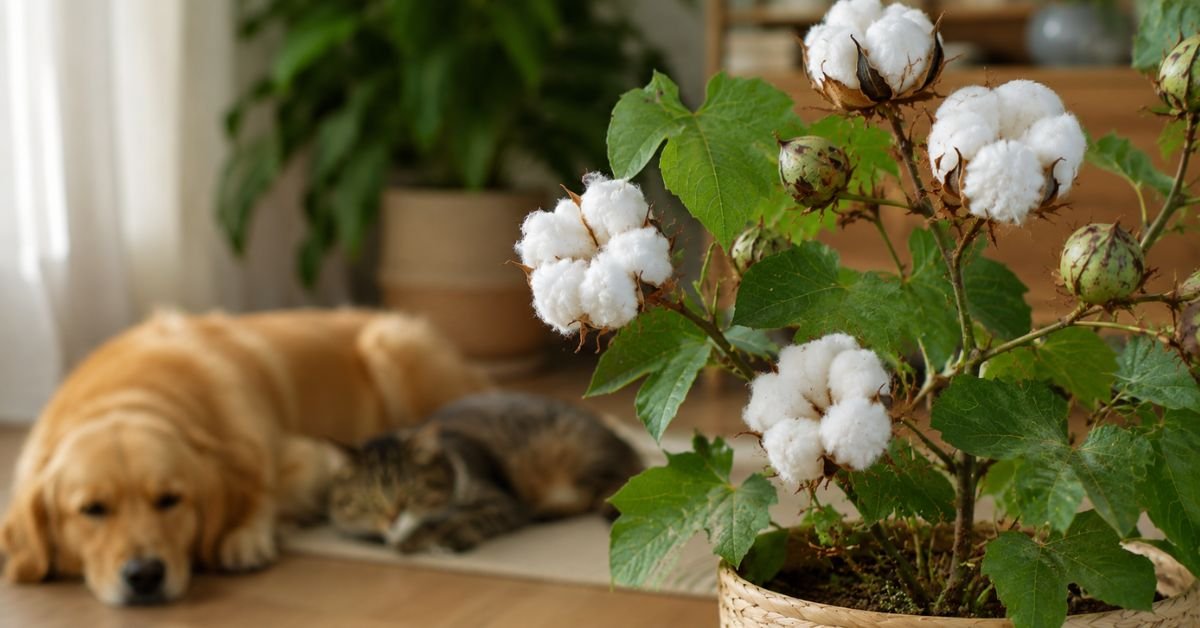
Cotton plants contain a natural compound called gossypol. It is highly toxic to dogs, cats, and even humans if ingested in large amounts. The whole plant has it, but the seeds are especially dangerous.
If your golden retriever eats the leaves, you are looking at severe vomiting, diarrhea, lethargy, and potential heart issues. Keep these out of reach. Period. If you have pets that love to chew on greenery, this might not be the right indoor project for you.
Personal Pro-Tip: I use heavy, elevated plant stands. My cat can’t reach the foliage, which gives me peace of mind. If you suspect your pet ate any part of the plant, call your vet immediately.
Frequently Asked Questions (FAQs) About Cotton Plants
Q1: How long does it take to grow cotton from seed to harvest?
It takes a while. Expect anywhere from 130 to 160 days. You need patience. The bolls take their sweet time to split open.
Q2: Can I grow a cotton plant indoors year-round?
Yes, you absolutely can. As long as you provide enough warmth (above 65°F) and intense light, they will grow indoors regardless of the season outside.
Q3: Do I need to fertilize my indoor cotton plants?
I recommend a balanced liquid houseplant fertilizer once a month during the Spring and Summer. Don’t overdo it. Too much nitrogen gives you giant leaves but zero cotton.
Q4: Will a cotton plant survive the winter outdoors?
Only if you live in USDA Hardiness Zones 8 through 11 where the ground doesn’t freeze. Frost will kill it instantly. If you live further north, you have to treat it as an annual or bring it inside.
Q5: Why are the flowers on my plant changing color?
That’s normal and actually really cool to watch. The blooms open up white or pale yellow. By the second day, they turn a deep pink or purple before falling off.
Q6: What size container do I need?
Go big. They have a long taproot. A pot that is at least 12 inches deep is the absolute minimum. 18 inches is much better.
Q7: Is it legal to grow cotton plants at home?
In most US states, yes, for ornamental use. But a few states (like Texas or California) have strict rules or require permits to prevent agricultural pests like the boll weevil. Always check your local agricultural extension office first.
Final Thoughts
Growing cotton plants is a fantastic, hands-on way to connect with agriculture right on your back porch or windowsill. It requires a bit of patience, a lot of sunlight, and the discipline to step away from the watering can. Give it a shot this Spring. You might just find yourself completely obsessed with watching those green bolls finally crack open to reveal real, fluffy cotton.
Amin Khalid is a professional horticulturist and the founder of LeafyWisdom. With a deep passion for home gardening and horticultural research, he specializes in providing practical, easy-to-follow care guides for indoor plants. Amin’s goal is to simplify gardening for everyone and help fellow plant lovers build their own thriving green spaces.
Let’s get one thing straight right away: a successful water management plant strategy is the single most important factor keeping your indoor greenery alive. Most folks don’t actually have a black thumb—they just don’t know how water actually behaves inside a pot, or how to handle the dry air of winter heating and summer AC.
The Quick Care Cheat Sheet
Factor
Your Action Plan
Why It Matters
Potting Soil Blend
High-quality potting soil mixed with 30% perlite or pumice.
Creates essential air pockets so roots can breathe.
Water Treatment
Use a cheap aquarium de-chlorinator or distilled water.
Faucet water has chloramine, which does not evaporate overnight.
Moisture Check
The wooden chopstick or finger test (2 inches deep).
Prevents premature watering and root rot.
Climate Control
Shield plants from direct AC vents and heater drafts.
Forced air rapidly saps moisture and stresses leaves.
Personal Pro-Tip: Don’t just blindly water on Sundays because it’s your day off. Lift the pot first. If it feels unusually light, the soil is dry. If it’s heavy, leave it alone.
Why Your Home Needs a Custom Water Management Plant Strategy
When you buy a pothos or a monstera at a local garden center in Ohio or Georgia, it usually comes with a generic plastic tag. “Water once a week,” it says. That tag is lying to you.
It has to. It doesn’t know where you live, what USDA Zone you’re in, or how you run your home.
For instance, during a brutal Texas summer, your air conditioning runs almost non-stop. That AC unit doesn’t just cool the air; it strips moisture out of it. Your potting soil will dry out way faster than you think. Conversely, if you’re up in Zone 6 during the freezing winter months, your forced-air heating is blasting dry heat. The top of the soil might look dry, but the bottom of the pot could still be a swamp.
We have to stop watering on a rigid calendar schedule. Your home’s microclimate changes with the seasons. In the Spring, as days get longer and plants kick into active growth, they drink more. In the Fall, they slow down. If you keep the same schedule year-round, you are setting yourself up for heartbreak.
Personal Pro-Tip: I like to do a quick walk-through of my house every Wednesday. I don’t water everything. I just inspect. If a pot feels light, it gets carried to the sink. If it’s heavy, I pass it by.
The Physics of the Pot: The Science Behind Indoor Water Management Plant Habits
To truly master how you water, we need to talk about basic physics. This isn’t just about pouring liquid from a watering can; it’s about how water behaves inside a confined space under the influence of two competing forces: gravity and capillary action.
Capillary action is the physical phenomenon where water flows into narrow spaces, defying gravity entirely. It’s how water climbs up a paper towel when you dip the corner in a spill. Inside your pot, capillary action is what allows the roots to draw water upward to maintain turgor pressure. Turgor pressure is the internal fluid pressure that keeps your plants standing upright instead of flopping over like wet spaghetti.
But gravity is always pulling downward. When these two forces meet in a container, they create what scientists call a Perched Water Table.
This is a layer at the very bottom of the pot where the soil stays permanently saturated. Why? Because the capillary pull of the soil particles is stronger than gravity’s ability to pull the water out through the drainage hole.
Let’s bust a massive gardening myth right now. For decades, well-meaning gardeners have suggested putting a layer of gravel or broken terracotta pieces at the bottom of a pot without drainage holes to “create drainage.”
Please, do not do this.
When you put coarse gravel underneath fine potting soil, you don’t create drainage. Because of how water moves through different textures, the water actually refuses to cross the boundary into the gravel until the soil above it is completely saturated. You have essentially moved the perched water table higher up in the pot. You’ve made the usable soil space smaller and brought the soggy, root-rotting zone right up to your plant’s sensitive roots.
Always use pots with actual drainage holes. Let gravity do its job.
Personal Pro-Tip: If you have a gorgeous decorative ceramic pot with no holes, use it as a cachepot. Keep your plant in a cheap plastic nursery pot that does have holes. Slip it inside the fancy pot. When it’s time to water, take the plastic pot to the kitchen sink, water it thoroughly, let it drain completely for ten minutes, and then pop it back into its decorative home.
Common Pitfalls in Household Water Management Plant Design
Let’s talk about that faucet. Most people assume tap water is perfectly fine for all plants. For some tough species like snake plants or spider plants, it is. But for sensitive beauties like Calatheas, Dracaenas, or peace lilies, our tap water is a chemical minefield.
In the old days, cities treated water with chlorine gas. You could easily leave a pitcher of water on your counter overnight, and the chlorine would evaporate into the air. Today, most US municipalities use chloramine because it’s more stable. The catch? Chloramine does not evaporate. If you let tap water sit out for 24 hours, you still have chloramine in it. This chemical buildup eventually burns delicate root systems.
Another massive error is using a dense, heavy garden soil inside a container. Garden soil from your backyard belongs in the ground. In a pot, it packs down tightly like concrete, suffocating the roots and trapping water indefinitely. Always use a dedicated indoor potting soil, and mix in plenty of coarse perlite or orchid bark to keep things airy.
Personal Pro-Tip: If you notice your tap water has a strong chemical scent, buy a cheap bottle of aquarium water conditioner. Just a single drop in your watering can will instantly neutralize chloramine and heavy metals, saving your plants from chemical burn.
Troubleshooting Your Dynamic Water Management Plant Problems
Your plants are constantly speaking to you. You just need to learn the language. When something goes wrong with your watering, the foliage will show you the signs.
Yellowing Leaves: Are the bottom leaves turning yellow and feeling soft or limp? You’re looking at classic overwatering. The roots are drowning, and they are starting to rot. If the soil smells sour or moldy, you need to act fast. Gently slide the plant out of its pot, cut away any black, mushy roots, and repot it in fresh, dry potting soil.
Drooping Stems: If the leaves are drooping but feel dry and paper-thin, your plant is parched. Give it a deep, thorough watering.
Crispy Brown Tips: This is usually caused by low humidity (often from winter heating or summer AC vents) or mineral buildup from tap water. Cut those brown tips off with clean scissors, but leave a tiny sliver of brown so you don’t cut into the live green tissue.
Personal Pro-Tip: If your potting soil has dried out completely, it might become hydrophobic. When you pour water on it, the water will just run down the inside of the pot and out the bottom without actually soaking the soil. To fix this, use the “bottom-watering” method. Fill your sink with a few inches of water, set the pot in it, and let it drink from the bottom for 30 minutes until the top of the soil feels damp.
Keeping Pets Safe: A Crucial Part of Your Water Management Plant Blueprint
Before you bring any new green baby home, you have to think about your fur babies. Many incredibly common houseplants are highly toxic to cats and dogs.
Plants like Monsteras, Pothos, and English Ivy contain calcium oxalate crystals. If a curious cat or dog chews on a leaf, these microscopic crystals act like tiny shards of glass, causing severe mouth irritation, drooling, swelling, and vomiting. If you have pets that love to nibble on salad, stick to safe options like Boston Ferns, Parlor Palms, or Peperomias.
Personal Pro-Tip: If you really want to keep a toxic plant, hang it high. Hanging macrame baskets are a great way to keep pothos or philodendrons completely out of reach of jumping cats and curious pups.
FAQs: Real Solutions for Your Water Management Plant Routine
Here are the questions I get asked most often by plant parents across the country.
Q1: How do I know exactly when to water? Don’t rely on a calendar. Stick your index finger two inches deep into the soil. If it feels cool and damp, wait. If it feels dry and dusty, it’s time. You can also use a wooden chopstick—insert it into the soil, pull it out, and if soil sticks to it like wet cake batter, the pot is still wet.
Q2: Is rainwater better than tap water? Absolutely. Rainwater is naturally soft, free of municipal chemicals, and slightly acidic, which indoor plants love. If you can collect it in a rain barrel, your plants will thank you.
Q3: Does misting my plants help with overall humidity? Not really. Misting only raises the humidity for a few minutes. It also leaves wet spots on the leaves, which can invite fungal diseases. If you want to boost humidity, run a small humidifier nearby.
Q4: Should I water from the top or the bottom? Both methods have merits. Top-watering is great for flushing out built-up fertilizer salts. Bottom-watering ensures the entire root ball gets evenly saturated without compacting the soil. I like to alternate between the two.
Q5: What is the best pot material for proper drainage? Terracotta is my personal favorite because it’s porous. It allows air and water to pass through the walls, helping the soil dry out faster. Plastic and glazed ceramic trap moisture, which is fine for ferns but dangerous for succulents.
Q6: Why is my plant drooping even though the soil is wet? This is a major red flag. It usually means the roots have already rotted from overwatering. When the roots die, they can no longer absorb water, so the plant droops from dehydration even though it’s sitting in mud.
Q7: Should I change my watering habits during the winter? Yes, significantly. Most plants go semi-dormant in the winter. Because they aren’t growing actively and the days are shorter, they use far less water. Cut your watering frequency in half compared to your summer schedule.
Final Thoughts
Getting a handle on how water moves and how your plants react to your home’s unique climate takes some practice. You might lose a leaf or two along the way, but that is just part of the learning process. Keep an eye on the soil, skip the gravel, and protect your plants from drafts. With a little patience, you will find your rhythm.
Amin Khalid is a professional horticulturist and the founder of LeafyWisdom. With a deep passion for home gardening and horticultural research, he specializes in providing practical, easy-to-follow care guides for indoor plants. Amin’s goal is to simplify gardening for everyone and help fellow plant lovers build their own thriving green spaces.
If you are tired of spending a fortune at your local US garden center every spring, I have some great news. You do not need to buy new plants to fill out your yard or your living room. You just need to learn how to split the ones you already have.
In my fifteen years of working with everything from delicate indoor ferns to massive outdoor ornamental grasses, nothing has saved me more money or kept my garden looking more lush than mastering the art of dividing plants.
Below is a quick snapshot of how to succeed before we get our hands dirty.
Quick Care & Division Snapshot
Parameter
Best Practices for Divided Plants
Ideal Timing
Early Spring (as new growth starts) or Early Fall
Best US Zones
Outdoor: Zones 3-10 (timing varies by zone) / Indoor: Year-round
Soil Requirement
Fresh, sterile US potting soil (avoid heavy garden dirt indoors)
Watering
Keep evenly moist, never soggy (use faucet water at room temp)
Light & Air
Indirect light; keep far away from active AC vents
Recovery Time
2 to 4 weeks for root re-establishment
Why is the Physical Plant Division the Ultimate Gardening Hack?
Most gardeners I meet are absolutely terrified of ripping their plants apart. I get it. Taking a sharp serrated knife to your favorite peace lily feels wrong. It feels like botanical murder.
But here is the truth: physical plant division actually rejuvenates aging plants. Over time, clump-forming plants choke themselves out. The center of the plant dies, the leaves get smaller, and they stop blooming. By performing a physical plant division, you literally give them a second lease on life.
Plus, it is a direct clone. You get the exact same traits, leaf patterns, and flowers as the parent plant. No waiting for seeds to sprout.
Personal Pro-Tip: Do not divide a sick or pest-infested plant. If your plant is struggling with spider mites or root rot, splitting it will not save it, it will just stress it to death. Fix the health issues first, then split.
When is the Best Time for a Physical Plant Division in the US?
Timing is everything. For outdoor perennials, your local USDA Hardiness Zone dictates your schedule.
If you live in USDA Zones 3 through 6 (think chilly Midwest or Northeast), early Spring is your golden window. The ground is finally workable, and the plants are just waking up. If you are down South in Zones 8 to 10, early Fall is often better because it avoids the brutal summer heat.
Indoors, things are a bit more forgiving. However, our modern American homes present a unique challenge: blasting air conditioning. AC units dry out the air, which can torture a newly divided houseplant. I always recommend doing your indoor physical plant division during active growing months (Spring through late Summer) so the new roots can recover quickly.
My Personal Advice: If you live in a hot southern zone, never divide plants in July. The intense heat combined with transplant shock is a death sentence. Wait for the autumn cool-down.
Step-by-Step: How I Perform a Successful Physical Plant Division
Here is exactly how I do it on my potting bench.
A successful physical plant division starts with preparation. Water the parent plant thoroughly a day before. Dry soil falls apart too quickly and tears delicate root hairs.
Gently slide the plant out of its container, or dig it up with a clean spade if it’s outdoors.
Inspect the root ball. Find the natural “crowns” or clumps where the leaves join the roots.
Make the cut. For soft plants like spider plants or ferns, you can often just wiggle them apart with your fingers. For tough, woody roots or stubborn snake plants, I pull out a sterilized soil knife and slice straight down through the root crown. Don’t worry about the ripping sound. Plants are tougher than you think.
Pot them up. Grab clean pots and fill them with high-quality potting soil. Do not use garden soil for indoor pots; it is too heavy and suffocates the roots.
Water gently at the kitchen faucet with lukewarm water.
Pro-Tip from my Bench: Clean your tools! Wipe your knife blades down with rubbing alcohol before you slice. This prevents transferring nasty soil-borne fungi from one plant to another.
Avoid These Pitfalls: Common Mistakes During Plant Division
People fail at plant division for a few classic reasons.
The biggest culprit? Overwatering. When you split a plant, it loses a portion of its roots. Less roots mean it drinks less water. If you keep the potting soil soaking wet, the remaining roots will rot and die.
Another massive issue in US households is placement. We love our AC vents. But placing a freshly divided plant directly in the path of cold, dry air from an AC unit will dehydrate the foliage before the roots can recover. Keep them in a humid, draft-free spot.
Also, do not throw them into direct, blasting sunlight immediately. They need a couple of weeks in bright, indirect light to heal.
My Golden Rule: Think of your newly divided plant as a patient recovering from surgery. It needs rest, warmth, gentle humidity, and absolutely no harsh direct sun or cold drafts for at least three weeks.
Troubleshooting After-Care Issues Post-Division
You did the split, and now your plant looks sad. Don’t panic yet. Shock is totally normal.
Drooping Leaves: If the plant droops right after, it is likely suffering from transplant shock. Put a clear plastic bag over it to create a mini-greenhouse. This locks in humidity and stops the leaves from losing water while the roots heal.
Yellowing Leaves: This is usually a sign of overwatering or root rot. Let the potting soil dry out a bit more between waterings. Feel the soil two inches deep. If it’s wet, walk away.
Brown, Crispy Tips: Your home is too dry, or the faucet water you are using has too much chlorine. Try letting your faucet water sit out overnight before using it, or run a humidifier nearby.
Quick Pro-Tip: If you see a few lower leaves yellow and drop off right after dividing, let them go. The plant is just shedding dead weight to focus its limited energy on growing new roots.
Toxicity and Pet Safety: What to Know Before You Split
Before you run to your garden shed, we need to talk about pet safety. Many popular plants we divide like peace lilies, snake plants, and ZZ plants are toxic to cats and dogs.
When you perform a physical plant division, you are cutting open stems and roots. This releases sap that contains calcium oxalate crystals. If your curious cat or dog licks your tools, eats the discarded roots on the floor, or nibbles the freshly cut stems, they can end up with severe mouth irritation, drooling, or vomiting.
Always clean up your workspace immediately. Keep your pets in another room while you are slicing and dicing. If you want a 100% pet-safe plant to practice on, try dividing spider plants or Boston ferns.
Pet Safety Pro-Tip: I always lay down old newspapers on my kitchen counter when dividing houseplants. Once I’m done, I can just roll up all the toxic scraps and throw them directly into the trash can outside, keeping my dog completely safe.
Your Questions Answered: FAQ on Physical Plant Division
Q1: Can I divide any indoor plant?
No, you cannot. You can only divide plants that grow in clumps or have multiple crowns, offsets, or runners (like snake plants, peace lilies, cast iron plants, and ZZ plants). Single-stemmed plants like rubber trees or fiddle leaf figs cannot be divided this way; they must be propagated by stem cuttings or air layering.
Q2: What is the difference between physical plant division and taking cuttings?
Taking cuttings involves snipping off a stem or leaf and forcing it to grow entirely new roots from scratch. Physical plant division is much faster because you are separating an already-established root system into multiple plants. You get a fully functional, mature plant right from day one.
Q3: Do divided plants grow slower?
For the first few weeks, yes. They redirect all their energy toward repairing damaged roots rather than pushing out new leaves. Once the root system recovers (usually in about a month), they will take off and grow at a normal rate.
Q4: Why is my plant wilting after I divided it?
It is going through classic transplant shock. Since the root system was disrupted and likely reduced, it cannot supply water to the leaves fast enough. Keep it out of direct sunlight, boost the humidity, and let it rest. It should perk back up in a week or two.
Q5: Can I use faucet water right after physical plant division?
Yes, but let it sit in an open container for 24 hours first. Fresh faucet water often contains chlorine and heavy minerals that can irritate raw, damaged root endings. Room temperature water is also gentler on shocked roots than freezing cold water.
Q6: How small can I divide a plant?
Each divided section must have at least one healthy leaf crown (or growth point) and a decent cluster of roots. If you divide it too small—like a single leaf with zero roots—the plant will have an incredibly hard time surviving.
Q7: Do I need to fertilize my newly divided plants right away?
Absolutely not. This is a huge mistake. Fertilizers contain salts that can easily burn tender, freshly cut roots. Wait at least 4 to 6 weeks for the plant to establish itself in its new potting soil before you even think about feeding it.
Final Thoughts
Dividing plants might feel intimidating at first. The first time I sliced a massive fern in half with a serrated knife, I was convinced I had killed it. But nature is resilient. With some high-quality potting soil, a little patience, and keeping them away from those freezing AC vents, your divided plants will grow beautifully. It is the cheapest, most rewarding way to double your plant collection and keep your home looking incredibly green.
Amin Khalid is a professional horticulturist and the founder of LeafyWisdom. With a deep passion for home gardening and horticultural research, he specializes in providing practical, easy-to-follow care guides for indoor plants. Amin’s goal is to simplify gardening for everyone and help fellow plant lovers build their own thriving green spaces.
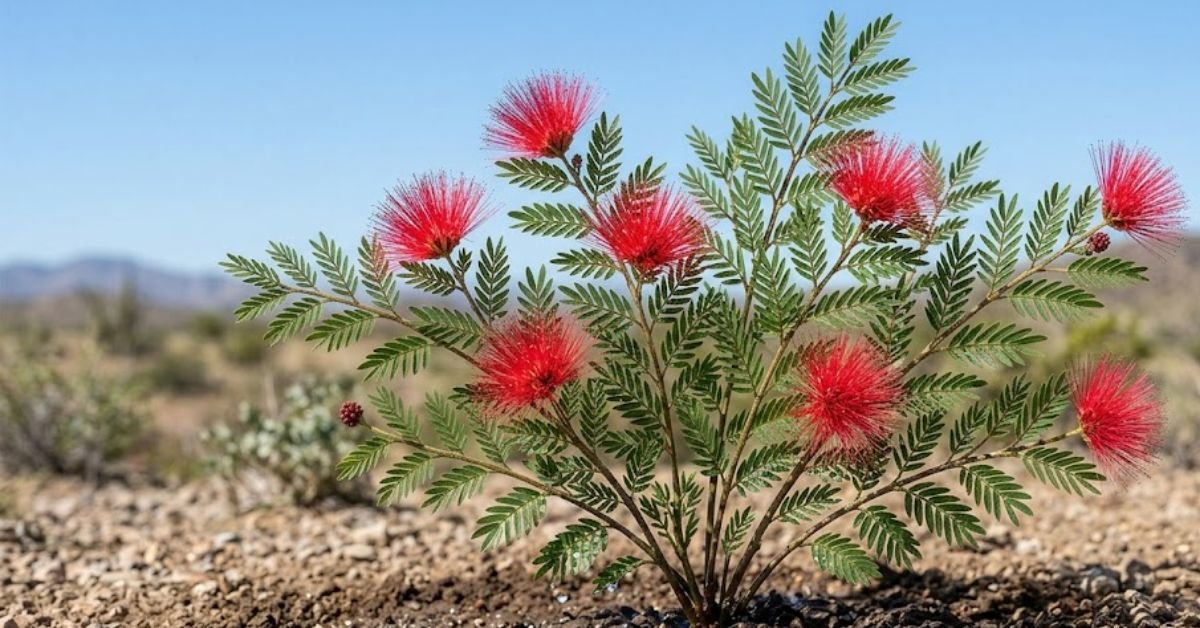
Are you looking to add a blast of fiery red color to a sun-baked, drought-tolerant yard? You need to meet the Baja fairy duster plant. I’ve spent years working with native desert species, and I can tell you firsthand that this rugged shrub is the ultimate low-maintenance hummingbird magnet. In this guide, I’m cutting through the botanical jargon to show you exactly how to grow a healthy, blooming Baja fairy duster plant right in your own landscape without babying it.
Feature
Details
Scientific Name
Calliandra californica
USDA Zones
9-11 (Hardy to 20°F)
Light
Full sun (6+ hours daily)
Water Needs
Low to moderate; highly drought-tolerant
Soil Type
Well-draining, sandy or loam
Mature Size
4-6 feet tall and wide
Pet Safe?
Yes, non-toxic to cats and dogs
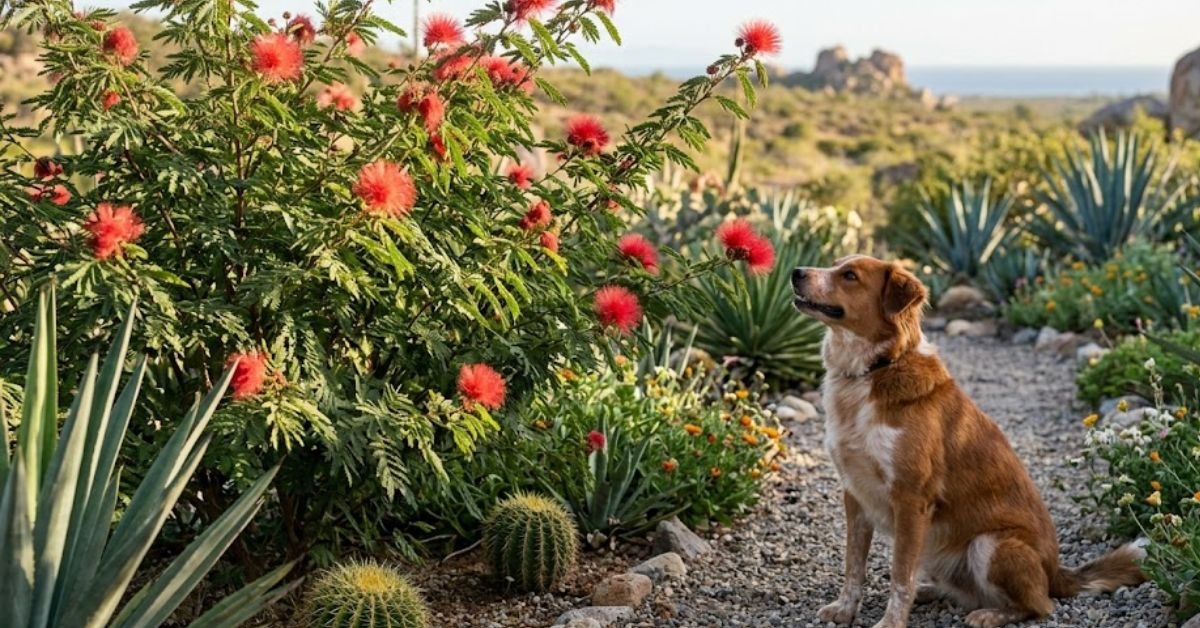
I still remember the first time I saw a Baja fairy duster plant in full bloom. The explosion of bright red, powder-puff flowers stopped me right in my tracks. If you live in the sun-baked stretches of the US especially the Southwest this native shrub is an absolute game-changer. We’re talking brilliant color, low maintenance, and a built-in magnet for hummingbirds.
This isn’t just another boring botanical manual. I’ve spent years working with native desert plants, and I’m going to walk you through exactly how to grow this incredible shrub in your own yard.
Why the Baja Fairy Duster Plant Belongs in Your Landscape
If you are tired of plants that wilt the second July hits, you need this shrub. Originating from the Baja California peninsula, this rugged beauty is practically indestructible once established.
Thriving effortlessly in USDA Hardiness Zones 9 through 11, it easily handles intense summer heat. Reflected sunlight off a hot brick wall or pavement won’t make it flinch. Instead, the resilient shrub just keeps pushing out vibrant flowers.I love using it as an accent plant against light colored stucco homes because the deep red blossoms pop beautifully against neutral backdrops. It works great as an informal hedge, a dramatic soft screen, or a standalone specimen plant in a dedicated xeriscape design.
Unlike many desert plants that only bloom for a couple of weeks in the spring, this one has a ridiculously long blooming season. In places like southern Arizona or southern California, you can expect to see flowers off and on for nearly the entire year, with major bursts in the Spring and Fall.
Personal Pro-Tip: I always recommend planting these near windows where you drink your morning coffee. The hummingbird activity you’ll see is better than watching TV! They will literally fight over this bush.
How Much Sun Does Your Baja Fairy Duster Plant Actually Need?
This desert native loves the sun. You want to give it at least six hours of direct sunlight every single day. Full, unrelenting sun is what triggers those gorgeous red blooms in the Spring and Fall.
Can you grow it in partial shade? Yes. But you will definitely notice fewer flowers and sparser foliage. The plant will stretch out, looking leggy and sad as it searches for light. It can handle the brutal afternoon sun in places like Phoenix, Las Vegas, or Palm Springs without breaking a sweat. It loves the heat. If you have a spot in your yard where every other plant bakes and dies, put this shrub there.
The only time sun becomes an issue is if you live in a border zone where frost hits. In those cooler microclimates, planting it against a south-facing wall can help trap heat during chilly winter nights.
Personal Pro-Tip: If your yard gets shaded by a large oak or pine tree in the afternoon, try placing your plant on the south or west side of your home for maximum light exposure. Avoid the north side entirely.
Watering Your Baja Fairy Duster Plant: The Goldilocks Rule
Plants confuses a lot of folks. We tend to over-love them with the garden hose.
When you first put it in the ground, water it deeply once a week. This mimics the heavy, infrequent downpours of its native habitat and encourages the roots to grow deep into the soil. Once it establishes deep roots (usually after the first year), you can back away. During the hot summer months, water it deeply every two to three weeks. In the winter, you can stretch that out to just once a month. Don’t just splash water on the leaves. Turn your faucet on low and let it soak deep into the root zone for an hour.
If you use a drip irrigation system, make sure the emitters are placed at the drip line of the shrub, not right against the main trunk. As the plant grows, move the emitters outward to follow the root expansion.
Personal Pro-Tip: The “taco test” works wonders here. If the tiny leaves stay tightly folded during the day, your plant is begging for a drink. They naturally fold up at night to conserve moisture, so only check this while the sun is up!
Best Potting Soil & Planting Tips for Your Baja Fairy Duster Plant
Heavy clay soils are a death sentence for desert shrubs. The roots will simply rot if they sit in standing water.
You need excellent drainage. If you are planting in a container on your patio, skip the heavy outdoor garden dirt. Grab a high-quality cactus and succulent potting soil and mix in some extra perlite or coarse sand. For in-ground planting, sandy or rocky loam is absolutely perfect.
When planting in the ground, resist the urge to fill the hole with rich potting soil or organic compost. This creates an “island” effect where the roots won’t want to leave the cozy hole to explore the native soil. Instead, backfill the hole with the exact same dirt you dug out.
Personal Pro-Tip: I like to dig the hole twice as wide as the root ball but no deeper. If your yard is pure clay, consider planting in a raised bed or a large terracotta pot instead to save yourself a massive headache.
Companion Planting Ideas for Your Baja Fairy Duster Plant
Creating a gorgeous desert landscape is all about texture and contrast. Because this shrub has a fine, airy texture with small leaflets, it pairs beautifully with structural, bold plants.
I love planting it alongside agaves, like the Whale’s Tongue Agave (Agave ovatifolia). The wide, blue-gray leaves of the agave look stunning against the fine green foliage and bright red bursts of the fairy duster. Another killer combination is pairing it with yellow-flowering desert plants. Try planting it near a Desert Marigold or a Yellow Bells (Tecoma stans) shrub. The red and yellow contrast is vibrant and keeps your yard looking alive even during the dog days of summer.
You can also throw in some purple trailing lantana around the base to act as a colorful groundcover that suppresses weeds while keeping the root zone slightly shaded.
Personal Pro-Tip: When planning your layout, always leave a three-foot buffer zone between this shrub and any walking paths. It spreads out horizontally as it matures, and you don’t want to constantly trim back the branches just to clear the sidewalk.
Common Mistakes Americans Make with the Baja Fairy Duster Plant
I see homeowners make the same errors every single season. Let’s fix them right now.
Trying to grow it indoors. This is not a houseplant. Central air conditioning vents will strip away any humidity, and indoor window light simply isn’t intense enough. Keep it outside where it can breathe and get baked by the sun.
Overwatering. This is the number one killer. Treat it like a tropical hibiscus or a lush rose bush and it will rot out within a few months.
Heavy shearing. Please put the electric hedge trimmers down. This shrub has a beautiful, natural vase shape with arching branches. Turning it into a tight, square box cuts off all the flower buds and ruins the wild, elegant look.
Over-fertilizing. People love to dump general-purpose plant food on everything in the spring. Don’t do it here. Too much nitrogen causes weak, floppy growth and stops flower production.
Personal Pro-Tip: If a freak winter cold snap hits (temperatures below 20°F) and all the leaves turn black and drop, don’t panic. Leave it alone until the danger of frost passes in the Spring, then prune off the dead wood. It almost always bounces back from the base.
Baja Fairy Duster Plant Troubleshooting Guide
Even the toughest plants have bad days. Here is how I fix the most common issues.
Yellowing leaves dropping off: Usually a massive sign of poorly draining soil or overwatering. Check the moisture down at the roots. If it’s soggy, stop watering immediately and let it dry out completely. If it’s in a pot, ensure the drainage hole isn’t clogged.
Brown, crispy leaf tips: This can happen during extreme, record-breaking heat waves combined with bone-dry soil. Give the plant a deep, slow soak at the base early in the morning.
No flowers appearing: It’s either not getting enough sun, or you pruned it at the wrong time. Make sure it’s in full sun and only prune right after the last frost in Spring.
White webbing or tiny pests: Occasionally, spider mites or aphids might attack a stressed plant. Hit them with a sharp blast of water from your garden hose faucet to knock them off. Avoid harsh chemical pesticides that kill the beneficial insects and hummingbirds visiting the flowers.
Personal Pro-Tip: I’ve noticed that sometimes a lack of blooms simply means the plant is too young. Give it a season or two to settle its root system into its new home before you begin to worry.
Is the Baja Fairy Duster Plant Toxic to Cats and Dogs?
This is a huge relief for pet owners across the US. The Baja fairy duster plant is completely non-toxic to dogs, cats, and even horses.
You can plant it around your yard without stressing about emergency vet bills if your golden retriever decides to take a curious bite out of a low branch. Keep in mind that those seed pods pop open forcefully with a distinct “snapping” sound when they are ripe and dry, which might occasionally spook a sleeping pet nearby!
While the plant is safe, eating massive amounts of any fibrous plant material can give an animal a mild upset stomach, so it’s still best to discourage your pets from using it as a chew toy.
Personal Pro-Tip: While it’s safe, the mature stems can get a bit woody and stiff. I purposely plant them slightly away from narrow dog runs or walkways so they don’t accidentally scratch sensitive pet eyes or snag on passing people.
Frequently Asked Questions
Q1. What is the difference between the Baja fairy duster and the pink fairy duster?
The native pink fairy duster (Calliandra eriophylla) is smaller, more cold-tolerant (down to 10°F), and has pale pink flowers. The Baja species (Calliandra californica) is larger with deep, fiery red flowers and handles extreme heat slightly better.
Q2. Does the Baja fairy duster plant lose its leaves in winter?
It is semi-evergreen. In a mild winter, it keeps its green leaves all year. If a hard freeze hits your zip code, it will drop them, look a bit bare, and go dormant until Spring returns.
Q3. How fast does a Baja fairy duster plant grow?
It has a moderate to fast growth rate. With proper sunshine and a little summer water, it can reach its mature height of 5 or 6 feet in just a few seasons.
Q4. Can I grow a Baja fairy duster plant in a pot?
Absolutely. Just use a very large, well-draining pot (at least 15 to 20 gallons) and high-quality cactus potting soil. Remember that potted plants dry out much faster than those in the ground, so you’ll need to water it a bit more frequently.
Q5. Do I need to fertilize my Baja fairy duster plant?
Nope! It’s a member of the legume family, meaning it fixes its own nitrogen directly from the air and soil. Adding chemical fertilizers can actually cause it to grow crazy amounts of weak leaves with zero flowers.
Q6. When is the best time to plant one in the US?
Fall is the absolute best time in hot regions like the Southwest. The cooler autumn weather lets the roots establish before the blistering summer hits. Early Spring is the second-best option once frost danger is gone.
Personal Pro-Tip: If you’re buying one from a garden center or nursery, pick a plant that looks a little small for its container rather than one that is huge and rootbound. The smaller, younger plants adapt much faster once in the ground.
Final Thoughts
The Baja fairy duster plant is easily one of my favorite shrubs for adding a punch of color to a dry landscape. It’s tough, it brings the local wildlife right to your front door, and it demands very little of your weekend time. Stick to the basics: lots of sun, minimal water, and no crazy pruning. Happy planting!
Amin Khalid is a professional horticulturist and the founder of LeafyWisdom. With a deep passion for home gardening and horticultural research, he specializes in providing practical, easy-to-follow care guides for indoor plants. Amin’s goal is to simplify gardening for everyone and help fellow plant lovers build their own thriving green spaces.
Everyone wants that lush, resort style backyard look. It feels like an instant vacation right in your own yard. But let’s be totally honest with each other here: Texas weather is a complete wild ride. One week it’s a blistering 105 degrees in Austin, and a few months later we’re facing a historic winter freeze up in Dallas that knocks out the power grid. I’ve spent over a decade as a professional horticulturist helping folks navigate this exact environmental insanity. If you are searching for the right palm plants texas nurseries offer that won’t immediately kick the bucket, you are in the right spot.
Let’s look at what actually works in our unique soil and climate so you can stop wasting hundreds of dollars on green investments that turn into sad brown sticks in a matter of weeks. It takes more than just digging a hole and hoping for the best.
The Lone Star Palm Sheet (For the Skimmers)
If you’re at the garden center right now and just need the fast facts, use this quick reference table.
Palm Type
Best Texas Region
Cold Tolerance
Soil Preference
Windmill Palm
North / Central Texas
Down to 10°F (Zone 8a)
Needs loose, amended soil
Sabal Texana
South / Coastal Texas
Extremely heat tough
Tolerates heavy clay better
Pindo Palm
Most of Texas
Down to 15°F (Zone 8b)
Loves sandy, sharp drainage
Majesty Palm
Indoor Only
No frost tolerance
Strictly rich potting soil
Personal Pro-Tip: Don’t just dig a hole in our brutal native clay and drop an outdoor palm straight into it. It will drown during the spring rains. I always build a slight mound or a raised earth berm for my outdoor landscape plantings. This gives the base of the tree a massive head start against standing water.
You cannot treat a yard in San Antonio the same way you treat a yard in El Paso or Amarillo. Texas spans multiple USDA Hardiness Zones from the freezing Zone 6 up in the Panhandle down to the true subtropical Zone 10 in McAllen. Most of us living along the busy I-35 corridor sit squarely in Zones 8a to 9a.
If you live in North Texas, cold-hardy choices are your only real option for the landscape. The Windmill Palm is my absolute go-to recommendation for this region. It looks incredibly tropical with its fan-shaped leaves, but it can easily shrug off a sudden ice storm that would melt a standard Florida queen palm to absolute mush.
For folks down near Houston or Corpus Christi, your biggest enemy isn’t the winter cold; it’s the intense summer humidity and sudden monsoon-style deluge rains. Native Sabals or dwarf palmettos are your best bets there because they evolved to handle the wet, heavy coastal plains.
Personal Pro-Tip: When shopping at big-box garden centers in the early Spring, look closely at the plant tags. Just because a store sells a tree locally does not mean it survives our winters. If the tag says Zone 10 and you live in Fort Worth, keep it in a heavy pot on wheels so you can drag it inside by late Fall.
Why Most Palm Plants Texas Homeowners Buy Drop Dead
We love our homes cool and our yards beautiful. Sadly, those two desires often clash when it comes to tropical greenery. In my years of consulting, I’ve noticed two primary killers that ruin these trees faster than anything else.
The Indoor AC Vent Danger
If you are trying to grow a tropical palm inside a typical American home, your central air conditioning is public enemy number one. Palms crave heavy, humid air to keep their fronds supple. Your central AC system works by stripping moisture out of the room to keep you comfortable.
I can’t tell you how many indoor parlor palms I’ve seen drop dead simply because they were placed directly under or over an AC vent. It blows freezing, bone-dry air directly over the foliage. This essentially freeze-dries the poor thing alive while it’s sitting in your living room.
Drowning in Raw Gumbo Clay
Outdoor selections face a very different, underground killer: suffocating roots. Much of our state is covered in thick, sticky, alkaline black clay often called “gumbo.” When you dump water from the garden hose onto raw clay, the water just sits there in the hole like a porcelain bathtub. The roots rot, the plant completely stops taking up nutrients, and it starves to death while standing in water.
[AC Vent blowing dry air] —> [Crispy, Brown Palm Leaves]
Personal Pro-Tip: If you’re growing an indoor parlor or majesty palm, keep it completely away from any airflow drafts. I use a cheap spray bottle filled with distilled water to mist my indoor varieties every single day during the peak summer months when the AC runs nonstop.
Troubleshooting Your Fading Palm Plants Texas Style
When things start going south, your palm will tell you. You just have to know how to read the leaves before the damage becomes permanent.
Yellowing Fronds
This is usually a loud cry for help regarding nutrients or drainage. Texas soils are notoriously alkaline because of all our underground limestone. This high pH locks up vital minerals like iron and magnesium. If your outdoor fronds are turning a pale, sickly yellow while the veins stay green, your soil is likely lacking the right food.
Crispy Brown Tips and The Chloramine Trap
Many growers notice the tips of their indoor palms turning a dry, crusty brown. A common piece of advice online is to let your tap water sit out overnight in a bucket so the chemicals can evaporate.
Do not fall for this trap. Major Texas metro water grids including Austin, Dallas, and Houston use stable chloramines rather than standard chlorine to treat their municipal water. Chloramines are chemically bound and will not off-gas or evaporate overnight, no matter how long you let the water sit.
Furthermore, our local water contains naturally high levels of mineral salts. Over time, these salts build up in your potting soil and burn the sensitive roots of indoor palms.
Personal Pro-Tip: If your indoor palms are showing severe mineral-burned tips, stop using water from the kitchen faucet entirely. Switch to collected rainwater or buy a few jugs of distilled water from the grocery store. Flush the potting soil thoroughly with this pure water to wash out the built-up municipal salts.
The Frost Protocol: How to Wrap Your Palm Before a Freeze
When a historic winter freeze or a major ice storm is forecast for North or Central Texas, don’t just sit on the porch and hope for the best. You need to protect the “spear” the delicate center growth point located at the very top of the palm trunk. If the spear freezes, gets wet, and rots, the entire palm dies. It cannot grow back from the roots like a perennial bush.
Follow this exact field-tested protocol to save your outdoor investment when the temperatures drop into the dangerous teens:
Step 1: Pull the Fronds Up
Gently gather all the upright fronds together toward the center sky. Tie them loosely with some heavy jute twine or a soft rope. This naturally bundles the leaves together, using the plant’s own foliage to shield and insulate the tender center bud from the biting wind.
Step 2: Wrap the Trunk
Wrap the main trunk and the core center bundle in multiple layers of breathable material. I highly recommend using natural burlap rolls, old heavy blankets, or a commercial frost blanket from the local nursery. Wrap it tight like a burrito to trap the natural heat radiating up from the ground.
Step 3: Avoid Raw Plastic
Never allow clear or black plastic sheeting to touch the green fronds directly. If the Texas sun comes out while the plastic is wet from overnight ice, it will rapidly heat up and literally cook the leaves underneath like a greenhouse. If you must use plastic to keep freezing rain off the burlap, make sure it is layered over the fabric, never directly against the plant tissue. Remove the entire wrapping system the very moment temperatures rise back safely above freezing.
Toxicity Warning: Are These Famous Palm Plants Texas Families Buy Safe for Pets?
Good news here, for the most part. True palms like the Majesty, Parlor, Kentia, and Areca palms are completely non-toxic to your cats and dogs. Your cat might love shredding the dangling fronds for fun, but eating them won’t hurt their stomach.
However, there is a massive, life-threatening exception: The Sago Palm.
You see Sago palms all over landscapes from Austin down to San Antonio and the coast. Here is the catch: The Sago Palm is not a true palm. It is a prehistoric cycad, and every single part of it is incredibly poisonous to domestic pets. The small orange seeds are especially deadly. If you have a dog that loves to chew on sticks or digging in the yard, do not plant a Sago. It causes liver failure within hours.
Personal Pro-Tip: If you already have a Sago palm in your yard and own a curious pup, trim off the lower cones or seed pods the second they form in the center of the plant. Better yet, dig it up completely and replace it with a beautiful, pet-safe Windmill palm.
FAQs About Palm Plants Texas Gardeners Ask Me Every Year
Q1: Can palm plants texas nurseries sell survive a hard winter freeze? Only if you choose cold-hardy varieties like the Windmill, Needle, or Sabal palms. Subtropical choices like the Queen Palm or Majesty Palm will freeze to the ground if temperatures dip below the mid-20s for more than a few hours.
Q2: How often should I water a newly planted outdoor palm? For the first hot summer, water it deeply three times a week. Run your garden hose at a slow trickle near the base of the trunk for about 20 to 30 minutes. Once established after two years, they become remarkably drought-tolerant.
Q3: Should I cut off the lower brown fronds? Yes, but only when they are entirely dead and brown. Palms actively pull nutrients from their older leaves to feed the new growth pushing out of the top. If a frond is still halfway green, leave it alone. Once it’s totally crispy, snip it off near the trunk with clean shears.
Q4: Why does my indoor palm look like it has tiny spider webs on it? Those are spider mites. They love the dry, stagnant air created by your home’s cooling and heating system. Wipe the leaves down with a damp cloth and spray the entire plant with organic neem oil to get rid of them.
Q5: What is the best potting soil for container-grown palms? Use a high-quality, lightweight potting soil mix. I always stir in an extra handful of coarse perlite or sharp builder’s sand to make sure the water drains out of the bottom drainage holes instantly. Never use heavy backyard dirt in a pot.
Q6: Can I grow a palm tree in North Texas? Absolutely. You just have to be incredibly picky. Stick to the Windmill Palm or the Dwarf Palmetto. They handle the cold winters of Dallas and Fort Worth without needing massive structural protection every single time it drops below freezing.
Q7: My palm looks completely dead after a freeze. Should I cut it down? Wait until late Spring! I’ve seen many palms look totally fried and gray in February, only to push out fresh green spears from the center bud once the warm May weather rolls around. Give the center spear a gentle tug; if it doesn’t slide right out of the trunk, the tree is still alive.
My Final Take on Growing Palms in the Lone Star State
Look, gardening in our state isn’t always easy. Our weather is incredibly moody, and our native dirt can feel like solid concrete during a dry summer spell. But you do not have to watch your hard-earned landscaping investments turn into sad, lifeless debris.
Pick a variety that matches your specific Texas winter zone, fix your soil drainage before you ever drop the plant in the ground, and keep those indoor pots away from your blasting AC vents. Protect the center spear when the rare winter ice storms blow through. With a little patience and the right water, you’ll have a gorgeous, tropical paradise that can handle whatever the Texas sky decides to throw at it.
Amin Khalid is a professional horticulturist and the founder of LeafyWisdom. With a deep passion for home gardening and horticultural research, he specializes in providing practical, easy-to-follow care guides for indoor plants. Amin’s goal is to simplify gardening for everyone and help fellow plant lovers build their own thriving green spaces.
Look, I get it. You saw a stunning picture of a dense, towering bamboo grove on Pinterest, and now you want that exact tropical privacy screen in your own backyard. It is a brilliant idea, but you absolutely must get your containment strategy right from day one. If you want to avoid a massive landscaping headache, planting bamboo barrier rolls underground is non-negotiable to keep those aggressive roots from hijacking your entire property. In my years of fixing landscaping disasters across the US, I’ve seen running bamboo punch straight through asphalt driveways and ruin neighbor’s lawns. You don’t have to be afraid of this plant; you just need to box it in. Let’s talk about doing this right the first time.
Quick Care & Setup
The Ground Rules
Trench Depth
24 to 30 inches deep.
Material Specs
60-mil to 80-mil thick HDPE plastic roll.
Above-Ground Lip
Leave 2 to 3 inches exposed above the dirt.
USDA Hardiness
Zones 5-10 (varies heavily by running species).
Sunlight
Full Sun to Part Shade.
Soil Preference
Well-draining native dirt mixed with quality potting soil.
Quick Checklist Before Planting Bamboo Barrier
For the skimmers out there, the table above shows exactly what you need to know before picking up a shovel. Getting this step correct is the difference between a lush property border and a neighborhood feud.
Personal Pro-Tip: Never use roofing metal or poured concrete for your enclosure. Concrete cracks when the ground freezes during an East Coast winter. Metal will rust out in the damp earth. Always stick to heavy-duty HDPE plastic on a continuous roll.
The Realities of Setting Up a Bamboo Rhizome Barrier
I’ve spent a massive chunk of my career ripping out renegade yards.
People plant running varieties for quick privacy. Then, three years later, it’s coming up through their deck. Running bamboo spreads via underground horizontal stems called rhizomes. These things are absolutely relentless. But setting up a physical blockade is all it takes to tame them.
Personal Pro-Tip: Fall or early Spring is the absolute best time for this project. Digging a deep trench in the middle of a sweltering July afternoon is a miserable experience.
How to Go About Planting Bamboo Barrier Without Losing Your Mind
The Realities of Setting Up a Bamboo Rhizome Barrier
The physical labor will definitely make you sweat. The strategy itself is pretty simple, though. You are essentially building an underground plastic swimming pool without a bottom.
Digging the Trench for Your Plastic Wall
You need a narrow trench encircling the entire planting area. If you live in a rocky area like New England, do yourself a favor and rent a mechanical trencher from a local hardware store. For softer soils down South, a trenching spade will do the trick just fine. You need to dig down about 24 to 28 inches.
Angling and Sealing the Enclosure
Drop your plastic sheet into the trench.
You must leave a 2-inch lip sticking out above the ground. If you bury it flush with the lawn, rhizomes will sneak right over the top under the cover of fallen autumn leaves. You’ll never see them until they’ve already escaped.
When connecting the two ends of the plastic, overlap them by at least a few feet. Seal them tightly with heavy-duty double-sided seam tape or stainless steel clamping bars.
Personal Pro-Tip: Angle the barrier slightly outward at the top. When an underground root hits the plastic, the outward angle forces it to bend upwards to the surface instead of diving down deeper. Once it pops out of the dirt, you just snip it off with your garden pruners.
Common Mistakes Americans Make When Planting Bamboo Barrier
Common Mistakes Americans Make When Planting Bamboo Barrier
We love taking shortcuts. Taking shortcuts with this specific plant is a disaster waiting to happen.
Burying it too shallow. Going 18 inches down isn’t enough for larger timber varieties. They will just dive right under.
Ignoring the AC unit. I see this constantly. People plant a grove right next to their outdoor air conditioning compressor to hide the ugly metal box. The constant blast of hot, dry exhaust air will scorch the leaves fast. Keep the planting area at least a few feet away.
Suffocating roots in clay. Sitting in a bathtub of heavy clay soil will rot the root system. If your yard doesn’t drain well, mix in some good potting soil and coarse sand to loosen it up.
Personal Pro-Tip: Don’t put black weed fabric over the top of the contained area. It makes it impossible to see when runners are trying to jump the plastic lip.
Troubleshooting Growth and Bamboo Root Barrier Breaches
Things happen in the garden. Even with the best setup, you have to keep an eye on things.
Leaves turning yellow? This is usually a sign of poorly draining soil or severe overwatering. Let the top few inches of dirt dry out before you hit it with the hose again. If you’re watering from an outdoor faucet with heavily chlorinated city water, let the water sit in a bucket for a day to off-gas before pouring it on young, sensitive shoots.
Crispy brown leaf tips? The air is just too dry. This is often exacerbated by strong winds outside or indoor AC vents if you have smaller varieties potted inside your house. Give the leaves a gentle misting during dry spells.
Finding random shoots in the lawn? Your barrier has a leak somewhere. Either a seam burst, or a rhizome dove underneath the plastic. You will have to trace that stray shoot back to the source, cut it, and patch the breach.
Personal Pro-Tip: Every autumn, I walk the perimeter of my beds and physically scrape away the mulch touching the plastic lip. I am looking for any sneaky rhizomes trying to vault over the edge.
Toxicity Warning: Pets and Bamboo
Toxicity Warning Pets and Bamboo
This is a huge relief for a lot of US homeowners. True bamboo (Phyllostachys species) is generally non-toxic to dogs and cats.
However, beware of “Heavenly Bamboo” (Nandina domestica) or “Lucky Bamboo” (Dracaena sanderiana). Neither of these are actual bamboos, and both are toxic to pets. If you are growing the real running stuff, your Golden Retriever is totally safe.
Personal Pro-Tip: Even though it’s non-toxic, don’t let your dog chew on the thick woody canes. The fibrous material can splinter and cause severe digestive blockages.
FAQs on Planting Bamboo Barrier
Q1: How thick does the plastic really need to be?
A minimum of 60-mil. If you are putting in massive timber bamboo, step up to 80-mil.
Q2: Can I just grow clumping types instead of planting bamboo barrier?
Yes. Clumping types grow in tight circles and generally stay put. But they don’t give you that spread-out, open-grove look that running types do. Also, many clumpers aren’t cold-hardy enough to survive northern USDA Zones.
Q3: How much above ground should the barrier be?
Leave 2 to 3 inches completely exposed.
Q4: Will a metal barrier work?
No. Galvanized metal eventually rusts in damp soil. Once it rusts through, the roots escape immediately.
Q5: Can it break through concrete?
Absolutely. Over time, ground freezing and thawing creates micro-cracks in concrete. The plant will find those cracks and shatter them.
Q6: What happens if I just mow the escaped shoots?
Mowing kills the new leafy shoots. The underground network, however, remains alive and connected to the main plant. It will just keep trying to pop up elsewhere in your yard.
Q7: Can I use an old pond liner instead?
Pond liners are usually too soft and pliable. The underground stems have sharp points and can easily pierce through flexible rubber. Stick to rigid HDPE.
Personal Pro-Tip: If you’re overwhelmed by the digging, call your local utility locator first (dial 811 in the US). Slicing through a buried internet or gas line with a shovel will ruin your entire month.
Final Thoughts on Planting Bamboo Barrier
Taking the time to do this the right way saves you endless headaches down the road. Running bamboo is a spectacular, fast-growing plant that can totally transform a boring yard into a private sanctuary. Put in the sweat equity this weekend. Lock down that perimeter. You’ll get to enjoy the greenery for decades without the constant stress of chasing rogue roots across your lawn.
Amin Khalid is a professional horticulturist and the founder of LeafyWisdom. With a deep passion for home gardening and horticultural research, he specializes in providing practical, easy-to-follow care guides for indoor plants. Amin’s goal is to simplify gardening for everyone and help fellow plant lovers build their own thriving green spaces.