Author: Amin khalid

  • Tropical Plants Care

    Tropical Plants Care

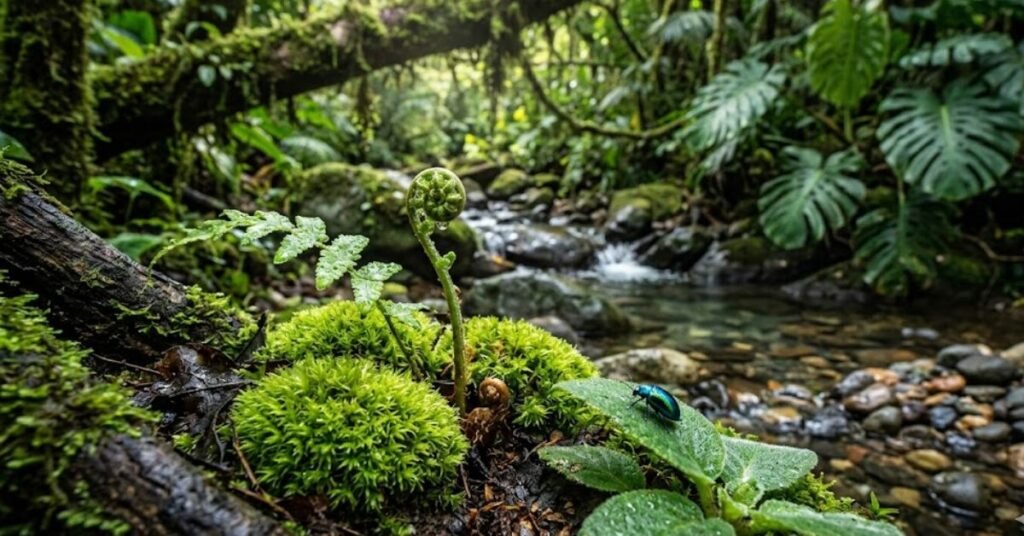
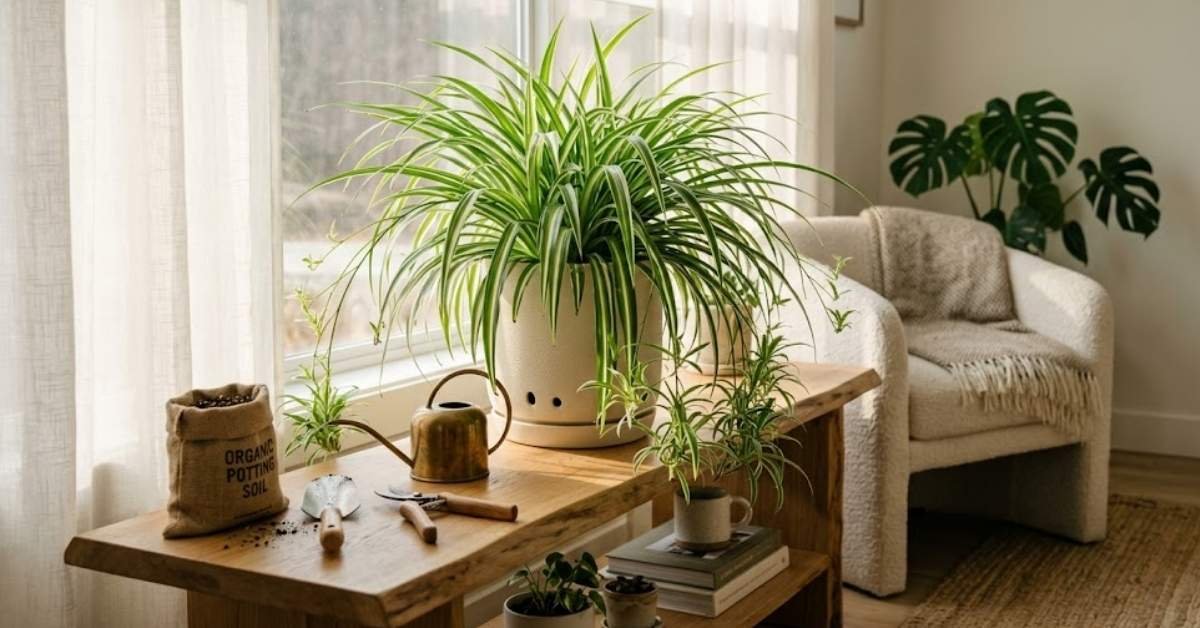
    This tropical plant care guide will help you understand exactly what your indoor plants need to grow healthy, strong, and vibrant throughout the year. Tropical plants originally come from warm rainforest environments where they naturally grow under filtered sunlight, high humidity, and rich, well-draining soil. Because of this, their care requirements are quite different from typical houseplants, especially when it comes to light exposure, watering habits, humidity levels, and temperature control. In this guide, you’ll learn how to recreate those natural conditions inside your home so your plants don’t just survive—but truly thrive.

    Quick Care Snapshot Tropical Plants

    Care FactorWhat They NeedPriority
    LightBright, indirect light (most varieties)High
    WaterTop 1–2 inches dry before wateringHigh
    Humidity50–70% preferredHigh
    Temperature65–85°F; min 55°FMedium
    SoilWell-draining, organic-rich potting mixMedium
    FertilizerMonthly, spring–fall onlyMedium
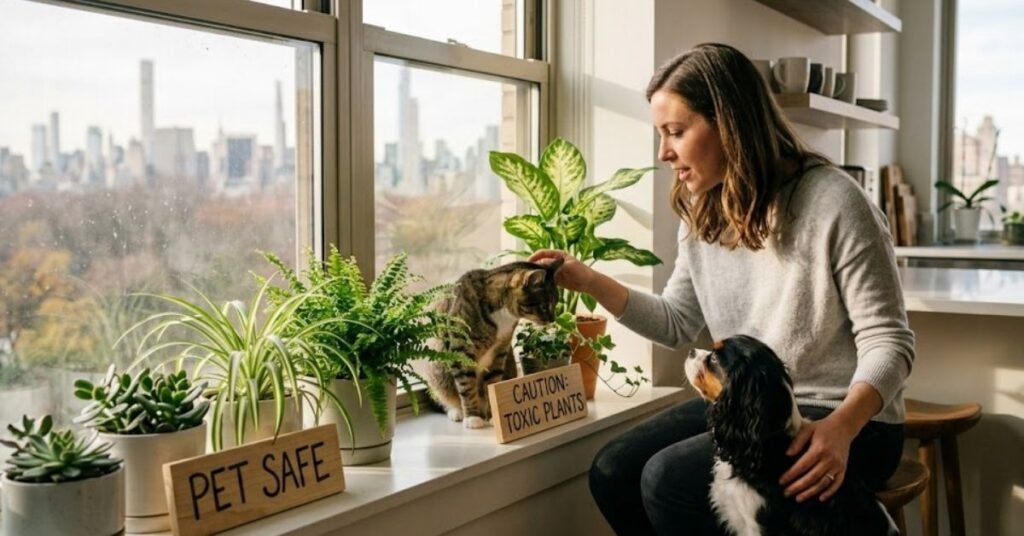
    ToxicityMany varieties toxic to pets & kidsCritical

    Light: What Tropical Plants Actually Want

    Most tropical plants evolved under a thick forest canopy—filtered, dappled light, not blasting sun. Indoors, that means bright, indirect light: a spot 2–4 feet from a large east- or south-facing window is often ideal.

    Light: What This Tropical Plant Care Guide Actually Says

    • Direct Sun: Midday sun through a window can scorch leaves, causing bleached patches and crispy edges.
    • Low Light: A dark corner leads to leggy, weak growth and loss of color.

    Pro Tip: No good natural light? A quality LED grow light on a 12-hour timer is a game-changer for low-light apartments.

    How to Water Tropical Plants (Without Killing Them)

    Overwatering kills more tropicals than any other cause. The finger test never fails: push your finger 1–2 inches into the soil. If it’s dry, water thoroughly until it drains from the bottom. If it feels damp, wait.

    Warning: If your tap water is heavily treated with fluoride or chlorine, let it sit overnight or switch to filtered water. Many plants (like Calatheas) develop brown tips from chemical buildup.

    Humidity and Temperature

    Tropical plants thrive in 60–90% humidity. Average homes sit at 30–45%. Signs of low humidity include brown crispy tips and curling leaves.

    Effective Ways to Boost Humidity:

    1. Cool-mist humidifier: The gold standard for plant health.
    2. Pebble tray: Place a tray of pebbles and water under the pot (don’t let the pot touch the water).
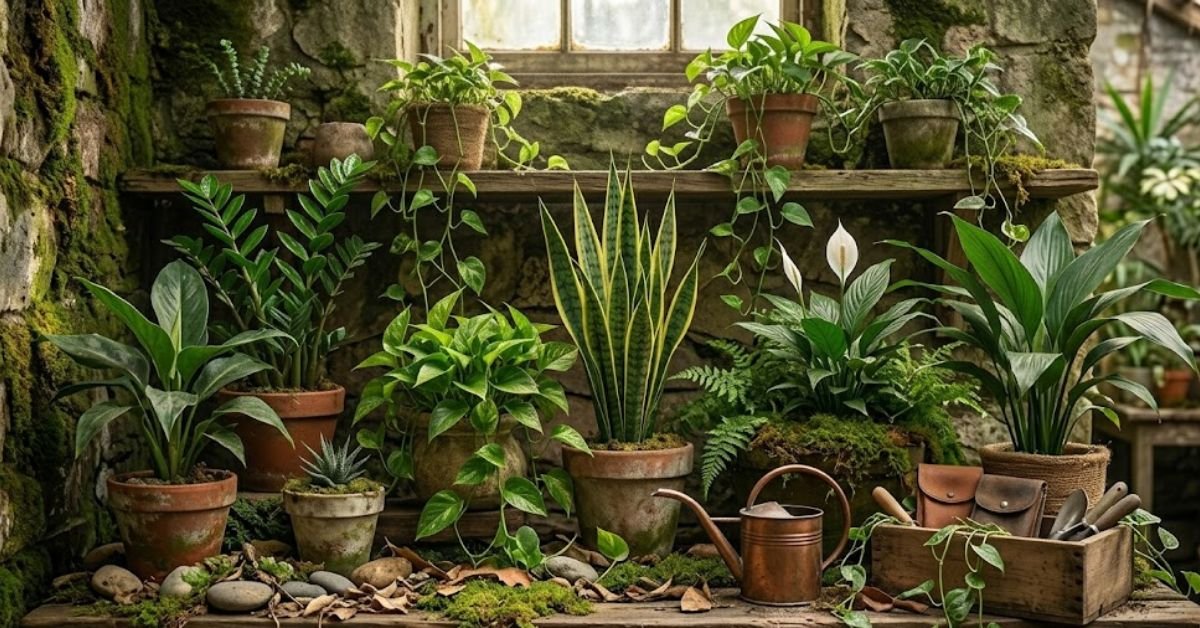
    3. Plant grouping: Cluster tropicals together to create a shared humid microclimate.
    4. Temperature: Keep plants between 65–85°F. Keep them away from AC vents and heaters.

    Best Tropical Plants for Beginners Comparison

    PlantLightDifficultyToxic to Pets?Best Feature
    Monstera deliciosaBright indirectEasyYes (mild)Dramatic split leaves
    PothosLow–BrightVery easyYesThrives on neglect
    Bird of ParadiseBright–DirectModerateYes (mild)Stunning height
    CalatheaLow–MediumModerateNoExotic leaf patterns
    HibiscusFull sunEasy (outdoor)No Bold summer blooms
    Snake PlantLow–BrightVery easyYes (mild)Indestructible

    Toxicity Warning: Always verify a plant’s toxicity status via the ASPCA database before bringing it into a home with pets or children.

    Seasonal Care Calendar

    Spring: Grow Mode

    • Resume watering and start fertilizing.
    • Repot if the plant has outgrown its container.
    • Propagate cuttings for new plants.

    Summer: Peak Growth

    • Water frequently and boost humidity.
    • Move hardy varieties outdoors if desired.
    • Inspect weekly for pests.

    Fall: Wind Down

    • Reduce watering frequency.
    • Stop fertilizing by October.
    • Bring outdoor plants back inside before temps drop below 55°F.

    Winter: Rest

    • Water only every 10–14 days.
    • Run a humidifier to combat dry indoor heat.
    • Avoid pruning or repotting.

    Pest & Disease Solutions

    ProblemSignsFix
    Spider MitesTiny webbing, dusty leavesWipe leaves; Neem oil every 7 days
    MealybugsWhite cottony fluff70% isopropyl alcohol on a swab
    ScaleBrown bumps; sticky residueScrape off; horticultural oil
    Root RotWilting + soggy soilRepot; trim rotten roots; improve drainage

    Common Beginner Mistakes to Avoid

    1. Watering on a Fixed Schedule: Always check the soil moisture first; don’t just water because it’s “Monday.”
    2. Ignoring Winter Humidity: Heating systems dry out the air. Don’t wait for leaves to turn brown before acting.
    3. Fertilizing in Winter: Plants are resting. Unused fertilizer builds up as salt, burning the roots.
    4. Choosing the Wrong Pot Size: A pot that is too large stays wet too long. Only go up 1–2 inches in diameter.

    FAQ: Quick Hits

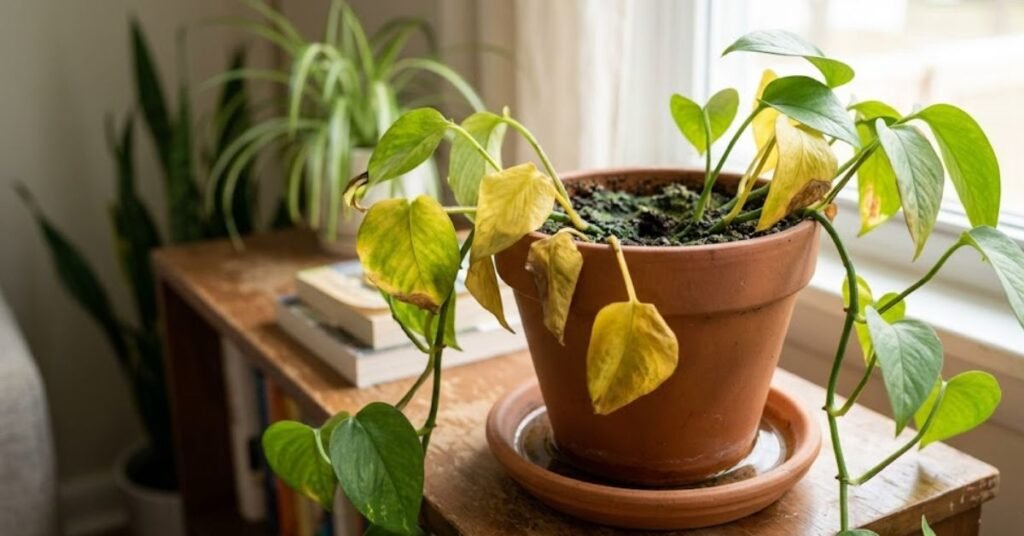
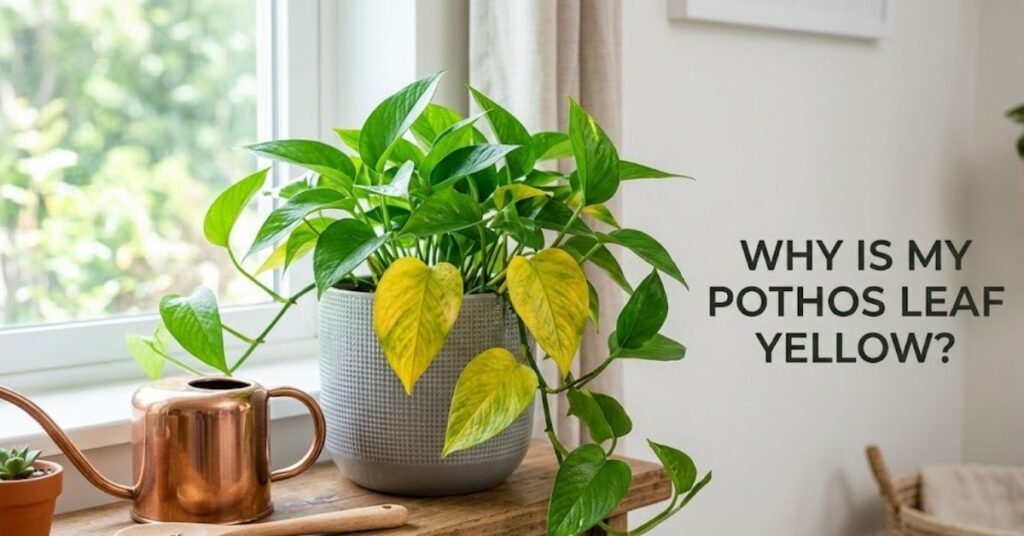
    • Why are my leaves yellow? Usually overwatering. If the soil is soggy, back off. If it’s bone-dry, it’s thirsty.
    • How do I check humidity? Look at the tips. Brown and crunchy means the air is too dry.
    • Is tap water okay? For Pothos, yes. For “divas” like Calatheas, no. Use filtered or rain water to avoid chemical burn.
    • Should I fertilize in winter? No. Plants rest when it’s dark and cold. Feeding them now can fry the roots.
    • When should I report? Every 1–2 years, specifically in Spring to give them a head start for the growing season.

    Conclusion: The Bottom Line

    Success with tropical plants isn’t about luck — it’s about recreating rainforest conditions inside your home. Prioritize the “big three”: bright, indirect light; elevated humidity; and always checking soil moisture before watering. Avoid over-caring during their winter dormancy, and monitor regularly for early signs of pests. Stay consistent, keep your routine simple, and your 2026 indoor jungle will flourish with surprisingly minimal effort.To sum up this tropical plant care guide, success with tropical plants depends on light, humidity, and proper watering habits.

  • Hoya Plant Care Guide: Complete Beginner’s Guide to Growing a Thriving Wax Plant

    Hoya Plant Care Guide: Complete Beginner’s Guide to Growing a Thriving Wax Plant

    If you’ve ever seen a trailing vine with thick, shiny leaves and tiny star-shaped flowers, you were probably looking at a hoya plant. Hoya plant care is simple once you understand the basics, making it one of the most rewarding indoor plants for beginners.

    Hoyas (pronounced HOY-ah) are tropical vining plants from Southeast Asia and Australia. They belong to over 600 known species and go by fun nicknames like Wax Plant, Porcelain Flower, and Hindu Rope Plant.

    They’re loved for good reason:

    • They live 20–30+ years with basic care
    • Many produce fragrant flowers that smell like chocolate or vanilla
    • They are non-toxic to dogs and cats
    • They tolerate some neglect without dying
    • They work as hanging, trailing, or climbing plants

    Hoya Quick Care Summary Table

    Care FactorWhat Hoya Needs
    LightBright indirect light (4–6 hours daily)
    WaterEvery 1–2 weeks; let soil dry between waterings
    SoilWell-draining, chunky mix with perlite
    PotTerracotta with drainage holes
    Temperature60–85°F (15–29°C)
    Humidity40–60%
    FertilizerBalanced liquid feed every 2–4 weeks (spring/summer only)
    RepottingEvery 2–3 years
    ToxicityGenerally non-toxic to pets and humans

    Light Requirements

    Hoyas love bright, indirect light. A south- or east-facing window with a sheer curtain is ideal. Aim for 4–6 hours of filtered light per day.

    They survive in lower light but will grow slowly and rarely bloom. Midday direct sun causes leaf burn watch for pale, washed-out, or papery leaves as a warning sign.

    Hoya plant care requires bright, indirect light to keep the plant healthy and encourage blooming.

    Pro Tip: No bright window? A grow light set 6–12 inches above the plant for 12–14 hours daily works great as a substitute.

    Watering Guide

    How Often to Water

    This is where most people go wrong. Hoyas store water in their thick leaves, so they need far less water than most houseplants.

    Simple rule: Water when the top 1–2 inches of soil feel dry. In most homes, that means every 7–14 days in summer and every 2–3 weeks in winter.

    Proper Hoya plant care depends heavily on correct watering habits, as overwatering is the most common mistake.

    How to Water

    1. Water slowly until it drains from the bottom
    2. Empty the saucer within 30 minutes — never let it sit in standing water
    3. Wait until soil dries before the next watering

    Warning Signs

    OverwateredUnderwatered
    Yellow, mushy leavesWrinkled, limp leaves
    Soft, brown stem baseBone-dry soil pulling from pot edges
    Musty smell from soilSlow growth in warm season

    Pro Tip Stick a wooden chopstick 2 inches into the soil. If it comes out damp, wait a few more days.

    Best Soil and Pot

    Hoyas need airy, fast-draining soil — not regular potting mix alone.Good Hoya plant care also starts with the right soil mix that drains quickly and prevents root rot.

    DIY Hoya Soil Mix

    • 50% standard potting mix
    • 25% perlite
    • 25% orchid bark or coco coir

    This blend dries at the right pace and mimics the loose, bark-heavy surfaces hoyas cling to in the wild.

    Best pot: Terracotta. It’s porous, pulls moisture away from the roots, and reduces root rot risk. Always use a pot with drainage holes — no exceptions.

    Temperature and Humidity

    Hoyas grow best at 60–85°F (15–29°C). Keep them away from cold drafts, AC vents, and heating vents. Temperatures below 50°F can cause leaf drop and stress.

    For humidity, 40–60% is ideal but most hoyas adapt to normal indoor levels. If tips turn crispy, try a pebble tray with water under the pot or a small nearby humidifier.

    Pro Tip Skip daily misting — it doesn’t raise humidity enough and can cause fungal spots on leaves.

    Fertilizing

    Hoyas aren’t heavy feeders, but regular feeding in the growing season boosts both growth and blooms.

    • Spring & Summer: Feed every 2–4 weeks with a balanced liquid fertilizer (10-10-10 or 20-20-20)
    • Fall: Taper to once a month
    • Winter: Stop completely — the plant is resting

    Always dilute fertilizer to half the recommended strength to avoid root burn.

    How to Get Your Hoya to Bloom

    Blooms are the reward every hoya grower works toward. Here’s what actually triggers them:

    1. Bright light — The single biggest factor. Move it closer to a bright window.
    2. Be patient — Plants under 2 years old rarely bloom. Maturity matters.
    3. Never cut old flower stalks (peduncles) — Hoyas rebloom from the same stalks year after year. Removing them delays future flowers by 1–2 years.
    4. Let it get slightly root-bound — A snug pot encourages blooming.
    5. Winter rest — Slightly cooler temps (60–65°F) and less water in winter mimics natural seasonal cycles and triggers spring blooms.

    Seasonal Care Guide

    SeasonKey Actions
    Spring Resume regular watering, start fertilizing, repot if needed
    Summer Water more often, fertilize every 2–3 weeks, watch for pests
    Fall Reduce watering, taper fertilizer, bring outdoor plants inside
    Winter Water sparingly, stop fertilizing, allow cooler nights to trigger blooms

    Common Pests and How to Fix Them

    PestSignsFix
    MealybugsWhite cottony clusters in leaf jointsDab with 70% isopropyl alcohol; spray neem oil weekly
    Spider MitesFine webbing, dull/stippled leavesShower the plant; apply neem oil every 5–7 days
    AphidsClusters on new growthRinse with water; apply insecticidal soap
    Fungus GnatsTiny flies around the soilLet soil dry out; use yellow sticky traps
    ScaleHard brown bumps on stemsScrape off; treat with neem oil

    For root rot (caused by overwatering): remove the plant, trim mushy roots, let dry for a day, then repot in fresh dry soil.

    Common Beginner Mistakes to Avoid

    1. Overwatering The number one hoya killer. When in doubt, wait another few days before watering.

    2. Cutting old flower stalks Those bare-looking stalks are where future blooms come from. Leave them alone.

    3. Repotting too often Hoyas prefer to be slightly root-bound. Only report when roots escape the drainage holes or growth has stalled for a long time.

    4. Moving the plant when buds appear Even turning the pot can cause flower buds to drop. Once buds form, don’t touch or move the plant.

    5. Using regular potting soil alone Too dense, holds too much water, leads to root rot. Always add perlite and orchid bark.

    6. Fertilizing in winter is a mistake a resting plant can’t use those nutrients. You’ll just build up salt in the soil, which damages roots.

    Is Hoya Toxic to Pets?

    Great news: most popular hoya varieties — including Hoya carnosa — are listed as non-toxic to dogs and cats by the ASPCA. The plant sap may cause mild skin irritation in very sensitive individuals, so wash hands after handling.

    As a precaution, keep plants out of reach of pets that tend to chew on leaves.

    Popular Hoya Varieties at a Glance

    VarietyLeaf LookDifficultyWhy It’s Loved
    Hoya carnosaOval, glossyEasy Classic, fragrant blooms
    Hoya kerriiHeart-shapedEasy Cute gift plant
    Hoya pubicalyxLong, lance-shapedEasy Fast grower, dark flowers
    Hoya obovataRound, silver-fleckedEasy Stunning large leaves
    Hoya compactaTwisted rope-likeModerate Unique curled texture
    Hoya linearisThin, fuzzy, pencil-likeModerate Unusual trailing look

    FAQ,s

    1. How fast does a hoya plant grow? Hoyas are slow to moderate growers. In ideal conditions, expect 1–3 feet of new vine growth per growing season. Growth stalls in winter — that’s completely normal.

    2. Why are my hoya leaves turning yellow? Almost always overwatering or root rot. Let the soil dry out fully, check if roots are mushy, and reduce watering frequency going forward.

    3. Why won’t my hoya bloom? Not enough light is the top reason. Other causes: plants are too young, pots are too large, or old flower stalks were removed. Move it to a brighter spot and never cut peduncles.

    4. Can I grow hoya in water only? Cuttings root easily in water. For long-term growing, a well-draining soil mix is better for overall health and bloom production.

    5. Is the sticky stuff on my hoya normal? Yes! That’s nectar — a healthy, natural sign your plant may be about to bloom. Place a tray underneath to catch drips.

    6. How do I know when to report? When roots grow out of drainage holes, the soil dries out unusually fast, or it’s been 2–3 years. Only size up 1–2 inches at a time.

    7. Can hoyas grow outdoors? In warm climates (USDA Zones 10–12), yes — year-round. In cooler zones, move them outside in summer (morning sun, afternoon shade) and bring them inside before temperatures drop below 55°F.

    Conclusion

    Hoya plants are one of the most rewarding houseplants you can own. They’re forgiving, long-lived, and capable of producing stunning, fragrant blooms that will impress anyone who walks into your home.

    Get four things right bright indirect light, infrequent watering, good drainage, and patience and your hoya will thrive for decades.

    Start with a beginner-friendly variety like Hoya carnosa, Hoya pubicalyx, or Hoya obovata. Grab a terracotta pot, mix up a well-draining soil blend, find your brightest indirect-light spot — and enjoy the journey.

    Have a question about your hoya? Drop it in the comments we’d love to help. By following this complete Hoya plant care guide, your plant can thrive for decades with minimal effort.

  • Ground Cover Plants: The Complete Beginner’s Guide

    Ground Cover Plants: The Complete Beginner’s Guide

    Tired of mowing a lawn that keeps dying in shady spots? Struggling with a muddy slope every time it rains? Ground cover plants are the perfect solution for these common problems. These low-growing, spreading plants carpet your soil, block weeds, prevent erosion, and add year-round beauty to your garden. And the best part? Most ground cover plants are nearly maintenance-free after the first season.

    What Are Ground Cover Plants?

    Ground cover plants are low-growing plants — usually under 12–18 inches tall — that spread naturally to fill open soil. They grow in clumps, creep along the ground, or send out runners to cover wide areas over time.

    Think of them as living mulch and many of them flower.

    Why Use Ground Cover Plants?

    • Stop weeds – Dense growth blocks sunlight so weeds can’t sprout
    • Prevent erosion – Roots hold soil on slopes and hills
    • Save water – Shaded soil dries out more slowly
    • Cut maintenance – No mowing, less weeding, no re-mulching
    • Add beauty – Color, texture, and seasonal interest all year
    • Support wildlife – Many attract bees, butterflies, and birds

    How to Choose the Right Ground Cover

    Before buying any plant, answer these four questions:

    1. How much sun does the area get?

    • Full sun = 6+ hours of direct sunlight per day
    • Part shade = 3–6 hours
    • Full shade = under 3 hours

    2. What’s your soil like?

    • Sandy (drains fast) vs. clay (holds water) vs. loam (ideal)
    • Wet vs. dry vs. average moisture

    3. What USDA Hardiness Zone are you in?

    • Check your zone at planthardiness.ars.usda.gov
    • This tells you which plants survive your winters

    4. Will there be foot traffic?

    • Most ground covers can’t handle regular foot traffic
    • Creeping thyme and blue star creeper are walkable exceptions

    Quick Comparison Table: Top 12 Ground Cover Plants

    PlantSunUSDA ZonesRHS RatingHeightWater NeedsPet Safe?
    Creeping ThymeFull sun4–9H5–H62–4 inLowYes
    Ajuga (Bugleweed)Part shade3–9H6–H74–6 inMediumNo
    Creeping PhloxFull sun3–9H64–6 inLowYes
    PachysandraFull shade4–8H5–H66–8 inLowNo
    Sedum (Stonecrop)Full sun3–9H6–H72–6 inVery LowNo
    Vinca minorPart shade4–8H64–6 inLowNo
    Sweet WoodruffFull shade4–8H68–12 inMediumYes
    EpimediumPart/Full shade5–9H5–H66–12 inLowNo
    Ice PlantFull sun5–10H3–H43–6 inVery LowYes
    HostasFull shade3–9H6–H712–24 inMediumNo
    Lamb’s EarFull sun4–9H5–H68–12 inLowYes
    Creeping JennyPart shade3–9H62–4 inMediumNo

    The Best Ground Cover Plants (Detailed Guide)

    For Full Sun Areas

    Creeping Thyme (Thymus serpyllum) One of the most popular ground covers for good reason. It grows just 2–4 inches tall, produces tiny purple flowers in summer, and smells wonderful when brushed. It’s drought-tolerant once established and can even handle light foot traffic. Plant it between stepping stones or along pathways. Zones 4–9.

    Creeping Phlox (Phlox stolonifera) In spring, creeping phlox explodes with color — white, pink, lavender, or purple blooms completely cover the foliage. After flowering, it stays as a tidy evergreen mat for the rest of the year. Great for slopes and rock gardens. Zones 3–9.

    Sedum (Stonecrop) (Sedum spp.) The ultimate plant for hot, dry, rocky spots where nothing else survives. Sedum stores water in its fleshy leaves and almost never needs watering once it’s settled in. ‘Dragon’s Blood’ adds striking red foliage. Zones 3–9.

    Ice Plant (Delosperma spp.) Vivid magenta, pink, or yellow daisy-like flowers cover this succulent all summer. Excellent for slopes in warm climates. Very drought-resistant. Zones 5–10.

    For Shade and Part Shade

    Pachysandra (Pachysandra terminalis) The go-to shade ground cover for a reason. It thrives in dry, deep shade under trees where almost nothing else grows. It spreads steadily and creates a clean, tidy look. Almost zero maintenance after planting. Zones 4–8.

    Ajuga (Bugleweed) (Ajuga reptans) Fast-spreading with striking bronze, purple, or variegated foliage and bold blue flower spikes in late spring. A great choice if you want ground coverage fast. Keep it away from lawns — it can spread aggressively. Zones 3–9.

    Sweet Woodruff (Galium odoratum) A charming woodland plant with delicate white spring flowers and fresh, hay-like fragrance. Works beautifully under trees and pairs well with hostas. Deer-resistant too. Zones 4–8.

    Epimedium (Bishop’s Hat) (Epimedium spp.) One of the best ground covers for dry shade — a notoriously tough spot. Heart-shaped leaves and delicate spring flowers in red, white, yellow, or purple. Very drought-tolerant once established. Zones 5–9.

    For Slopes and Erosion Control

    Creeping Juniper (Juniperus horizontalis) A tough evergreen shrub that hugs the ground and controls erosion on steep banks. It handles poor soil, drought, and harsh winters without complaint. Zones 3–9.

    Crown Vetch (Coronilla varia) Aggressive spreader that quickly covers large slopes. Excellent for banks along roadsides or areas too large to manage any other way. Note: it can become invasive — check with your local extension office first. Zones 3–9.

    How to Plant Ground Covers: Step-by-Step

    Step 1: Prepare the Soil

    Remove all weeds before planting. This is the most important step. Any weeds left behind will compete with your new plants and win in the early months.

    Options to clear weeds:

    • Hand-pull or use a hoe
    • Smother with cardboard (sheet mulching) for 4–6 weeks
    • Apply a non-selective herbicide and wait 2 weeks before planting

    Till or loosen the top 4–6 inches of soil. If your soil is very poor, mix in a 2-inch layer of compost.

    Step 2: Plan Your Spacing

    Spacing matters a lot. Too close together wastes money. Too far apart leaves gaps for weeds to fill.

    General spacing guide:

    • Small plants (under 6 in): space 6–12 inches apart
    • Medium plants (6–12 in): space 12–18 inches apart
    • Larger spreading types: space 18–24 inches apart

    Use this simple formula to estimate how many plants you need:

    Area in square feet ÷ (spacing in feet × spacing in feet) = number of plants

    Step 3: Plant Correctly

    1. Dig a hole slightly wider than the root ball
    2. Set the plant so the crown (where roots meet stems) sits at soil level
    3. Fill in around the roots and firm the soil gently
    4. Water thoroughly right after planting

    Step 4: Mulch Between Plants

    Apply a 2-inch layer of mulch between plants right after planting. This keeps moisture in and holds back weeds while your ground cover fills in. You’ll need less mulch each year as plants spread and close the gaps.

    Step 5: Water Regularly for the First Season

    Most ground covers need consistent moisture for the first 4–8 weeks while roots establish. After that, most are quite drought-tolerant.

    Seasonal Care Guide

    Spring

    • Remove any dead or winter-damaged foliage
    • Apply a slow-release balanced fertilizer (10-10-10 works well)
    • Top up mulch where it has broken down
    • Divide or trim plants that have overgrown their boundaries

    Summer

    • Water during extended dry spells, especially for young plants
    • Deadhead flowers to encourage fresh blooms (if desired)
    • Check for pests or disease — act early if you spot problems

    Fall

    • Cut back deciduous ground covers after the first frost
    • Plant new ground covers in early fall — roots establish well in cool soil
    • Do not fertilize after early September (encourages tender growth that gets frost-damaged)

    Winter

    • Leave evergreen ground covers alone — they still protect soil
    • In Zone 5 and colder, protect borderline plants with a light straw mulch after the ground freezes
    • Plan any new beds or replacements for spring

    Common Beginner Mistakes to Avoid

    1. Not removing weeds first. The biggest mistake of all. Weeds already in the soil will push through your ground cover for years if not fully removed before planting.

    2. Planting the wrong plant for your conditions. A sun-loving plant in full shade will struggle and never fill in. Always match plants to locations.

    3. Spacing plants too far apart. Gaps stay open for years. Follow spacing guidelines — wider than you think feels wrong, but plants fill in.

    4. Planting invasive species. Some ground covers (English ivy, goutweed, Japanese knotweed) spread so aggressively they become serious problems. Research your choice before buying.

    5. Skipping the mulch. Newly planted ground covers leave bare soil exposed. Mulch is essential in the first year to control weeds while plants fill in.

    6. Overwatering established plants. Most ground covers are drought-adapted. Once established, too much water causes root rot.

    7. Not containing spreading types. Ajuga, creeping Jenny, and vinca can escape into lawns and garden beds. Use edging or plant barriers to keep them where you want them.

    Pro Tips & Troubleshooting

    Quick wins from the garden:

    • Mix 3–4 ground covers together for a natural, disease-resistant look
    • Use pachysandra, sweet woodruff, or epimedium under trees where grass fails
    • Creeping thyme and blue star creeper handle light foot traffic between stepping stones
    • Mulch alone beats weed fabric — fabric blocks spreading roots
    • One spring fertiliser application is all most established plants ever need

    Spot a problem? Fix it fast:

    SymptomCauseFix
    Yellowing leavesOverwateringReduce watering, improve drainage
    Brown dry patchesDrought or wrong sunWater more, reassess plant placement
    White powdery coatingPowdery mildewBetter airflow + neem oil
    Slime trailsSlugs / snailsIron phosphate bait
    Plants dying in patchesCrown rotImprove drainage, replant higher

    Quick Care Summary Table

    TaskWhenHow Often
    Watering (new plants)First 8 weeks2–3x per week
    Watering (established)During droughtAs needed
    FertilizingEarly springOnce per year
    MulchingSpring or fallAnnually (top up)
    Trimming/edgingSpring or fall1–2x per year
    Weed checkSpring through fallMonthly
    Dividing overcrowded plantsFall or early springEvery 3–4 years

    Frequently Asked Questions (FAQ)

    Q1: How long does it take for ground cover plants to fill in? Most fill in within one growing season for small areas, or 2–3 seasons for larger spaces. Fast spreaders like ajuga and creeping jenny close gaps quickest.

    Q2: Can ground cover plants replace a lawn? Yes — creeping thyme, micro-clover, and moss all work well as lawn alternatives with far less maintenance. Most won’t tolerate heavy foot traffic, so keep a path or stepping stones for regular routes.

    Q3: Are ground cover plants safe for pets? Not all. Creeping thyme, sweet woodruff, and lamb’s ear are generally safe. Ajuga, vinca, pachysandra, and sedum are toxic to dogs and cats. Always verify before planting in a pet-accessible area.

    Q4: Which ground cover grows fastest? Ajuga, creeping jenny, and vinca minor spread quickest — but manage their edges or they’ll escape into lawns.

    Q5: What works in deep dry shade under trees? Pachysandra, epimedium, and sweet woodruff all handle dry, rooty, shaded soil well. Amend with compost at planting time for best results.

    Conclusion

    Ground cover plants are one of the smartest investments you can make in your yard. One-time planting effort. Years of low-maintenance beauty. Less mowing.

    The key is choosing the right plant for your specific spot — sun, shade, slope, soil, and climate all matter. Start with just one area: maybe that bare patch under your tree, or the slope you dread mowing. Plant it right, keep weeds out for the first season, and watch it transform.

    Ready to start? Pick one plant from the table above that matches your conditions and order 6–10 plants for a small test area. Most online nurseries ship in spring — perfect timing for a new planting.

  • Terrarium Plants: The Complete Beginner’s Guide to Choosing, Growing, and Caring for Your Mini Garden

    Terrarium Plants: The Complete Beginner’s Guide to Choosing, Growing, and Caring for Your Mini Garden

    Terrarium plants are the foundation of a healthy miniature ecosystem. Choosing the right plants determines whether your terrarium thrives for years or fails within weeks. In this guide, you’ll discover the best terrarium plants for both closed and open setups, along with expert tips to keep them alive with minimal effort.

    Not every plant belongs in a terrarium. The best choices share three key traits:

    • Small size — they fit the space without overcrowding
    • Slow growth — they won’t outgrow the container in weeks
    • Low maintenance — they thrive with minimal fuss once established

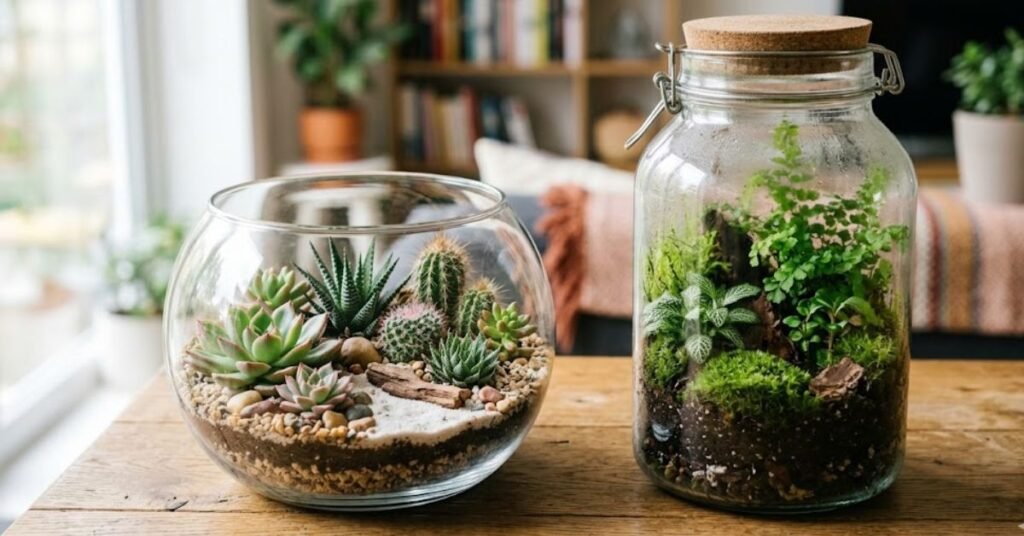
    The most important rule before choosing any plant: decide on your terrarium type first. Closed and open terrariums are almost opposites in their conditions, and the plants that thrive in one will fail in the other.

    Closed vs. Open Terrariums — Know This Before You Buy a Single Plant

    This is the section most guides gloss over — and the reason most beginner terrariums fail.

    FeatureClosed TerrariumOpen Terrarium
    HumidityVery high (70–90%)Low to medium (30–50%)
    AirflowMinimalGood
    WateringOnce a month or lessEvery 2–4 weeks
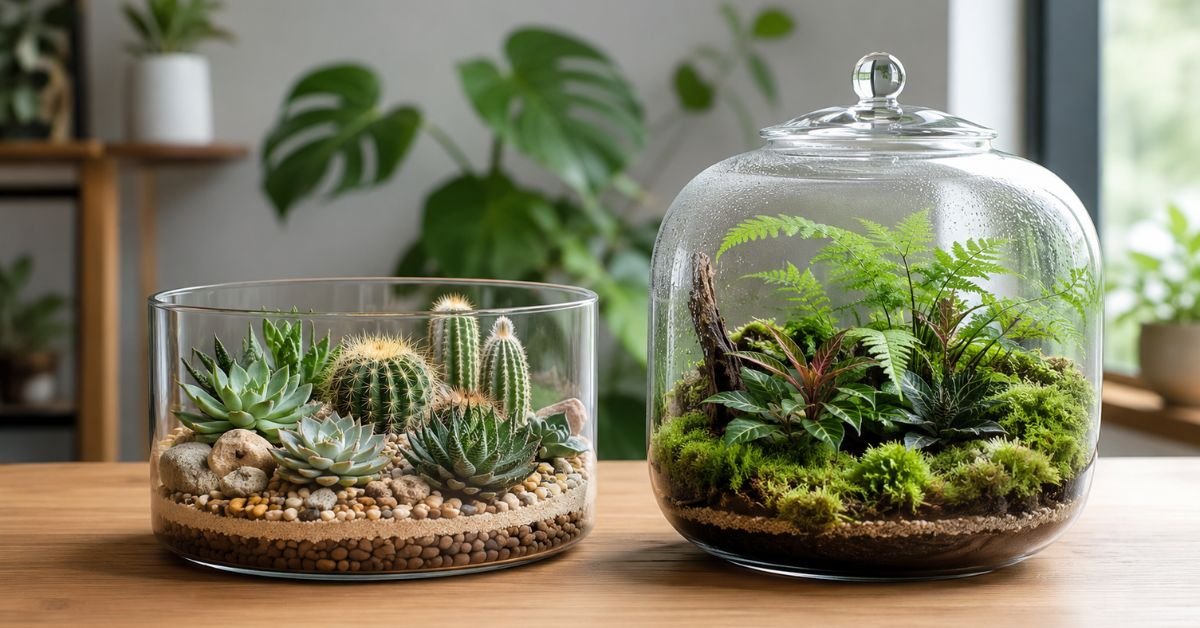
    Best PlantsFerns, moss, Fittonia, PileaSucculents, cacti, Haworthia
    LightBright indirect onlyDirect or bright indirect
    Self-sustaining?Yes — can go weeks untouchedNo — requires regular checks
    Beginner-friendly?VeryYes, but needs drier soil discipline

    Quick Care Summary Table

    Care FactorClosed TerrariumOpen Terrarium
    LightBright indirect (no direct sun)Bright indirect to gentle direct
    WaterMist lightly once a monthEvery 2–4 weeks when soil is dry
    SoilMoisture-retentive tropical mixSandy, fast-draining mix
    Drainage LayerPebbles + activated charcoalPebbles + sand
    Temperature65–80°F (18–27°C)60–85°F (15–29°C)
    FertilizerRarely — diluted liquid feed once in springOnce per season at half-strength
    RepottingEvery 2–3 yearsWhen roots crowd the container

    Best Plants for Closed Terrariums

    1. Fittonia (Nerve Plant) — Best Overall Beginner Pick

    Fittonia is the go-to plant for first-time terrarium builders. Its deep green leaves are criss-crossed with white, pink, or red veins — giving it a striking, mosaic-like look.

    It signals when it needs water by wilting dramatically, then springing back to life after a drink. This built-in alarm system makes it nearly impossible to kill.

    • Light: Low to medium indirect
    • Water: Keep soil moist
    • Size: 3–6 inches tall — perfect for small containers

    2. Moss — The Foundation of Every Great Closed Terrarium

    Moss is not just decoration — it is the backbone of a healthy closed terrarium ecosystem. It covers bare soil, retains moisture, filters the water cycle, and creates that lush, forest-floor look every terrarium builder aims for.

    Common terrarium mosses: Cushion Moss (Leucobryum), Sheet Moss (Hypnum), Mood Moss (Dicranum)

    • Light: Low — actually prefers shade
    • Water: Loves consistent moisture — never let it dry out fully
    • Size: Ground-hugging — won’t outcompete other plants

    3. Ferns — Instant Tropical Atmosphere

    Ferns bring height, texture, and a deeply tropical feel to closed terrariums. The trick is choosing compact varieties — large ferns like Boston Fern quickly outgrow small containers.

    Best compact fern choices:

    • Maidenhair Fern (Adiantum) — delicate, elegant, loves humidity
    • Button Fern (Pellaea rotundifolia) — tough, tolerant, stays small
    • Bird’s Nest Fern (Asplenium nidus) — glossy, bold, easy

    4. Peperomia — The Set-and-Forget Champion

    The entire Peperomia genus is practically born for terrariums. With hundreds of varieties available, there’s a trailing type, a compact mound type, and a bushy type for every design.

    They tolerate humidity, indirect light, and occasional neglect better than almost any other terrarium plant.

    Top picks: Peperomia caperata (ripple leaf), Peperomia rotundifolia (trailing jade), Peperomia prostrata (string of turtles)

    5. Pilea — Color, Texture, and Contrast

    Pilea varieties split neatly into two roles in a terrarium: statement plants (larger, feature foliage) and accent fillers (tiny, trailing).

    • Pilea involucrata (Friendship Plant) and Pilea mollis (Moon Valley) — statement plants with deeply textured leaves
    • Pilea glauca (Silver Sparkle) and Pilea depressa (Baby Tears) — delicate fillers that root wherever they touch soil

    6. Creeping Fig (Ficus pumila) — Self-Carpeting Easy Grower

    If you want a plant that practically installs itself, drop a Ficus pumila cutting into your terrarium and step back. It roots up fast in humid conditions, carpets bare surfaces, and creates a lush green backdrop for other plants.

    Keep it trimmed to prevent it from overwhelming smaller plants.

    Closed Terrarium Plants at a Glance

    PlantLightSizeBest RoleToxicity
    Fittonia (Nerve Plant)Low–Medium3–6 inForeground, colorNon-toxic
    Moss (various)LowGround coverBase layerNon-toxic
    Button FernMedium6–8 inMid-layerNon-toxic
    PeperomiaLow–Medium4–8 inMid-layer, fillersNon-toxic
    Pilea glaucaMedium2–3 inAccent fillerNon-toxic
    Creeping FigLow–MediumTrailingGround coverMildly irritant

    Best Plants for Open Terrariums

    Open terrariums have lower humidity, better airflow, and drier soil. They suit desert-adapted plants perfectly.

    Succulents — Easy, Colorful, Forgiving

    Succulents store water in their thick leaves, making them ideal for the drier open terrarium environment. Mix different shapes, sizes, and colors for a striking desert landscape.

    Top picks:

    • Echeveria — rosette form, many colors, very slow-growing
    • Haworthia — striped, architectural, tolerates low light (unusual for succulents)
    • Crassula (Jade Plant) — classic, drought-tolerant, long-lived

    Cacti — The Lowest Maintenance Option

    Slow-growing cacti are virtually foolproof in open terrariums. Use a mix of types — tall columnar, rounded barrel, and padded flat shapes — for a dramatic desert display.

    • Water every 3–4 weeks (less in winter)
    • Always use sandy, fast-draining soil
    • Use gloves when planting — obvious, but often forgotten

    Air Plants (Tillandsia) — No Soil Needed

    Air plants are epiphytes — they get nutrients from air and water, not soil. They can be placed on rocks, driftwood, or tucked into gaps in an open terrarium, creating a truly unique display.

    • Mist 2–3 times per week or soak for 20 minutes every 1–2 weeks
    • Keep in good indirect light with airflow
    • Never let them sit in standing water

    How to Build a Terrarium: Layer by Layer

    Getting the substrate layers right is what makes the difference between a thriving terrarium and a rotting one.

    Closed Terrarium Layers (Bottom to Top)

    1. Drainage layer (1–2 inches): Pebbles, gravel, or LECA
    2. Separation layer (thin): Mesh or sheet moss to prevent soil migration
    3. Activated charcoal (½ inch): Filters water, prevents mold and odor
    4. Substrate (2–3 inches): Moisture-retentive tropical potting mix
    5. Top dressing: Decorative moss, small stones, or bark

    Open Terrarium Layers (Bottom to Top)

    1. Drainage layer (1–2 inches): Coarse gravel or pebbles
    2. Activated charcoal (½ inch): Prevents fungal buildup
    3. Substrate (2–3 inches): Cactus/succulent mix or sandy loam
    4. Top dressing: Fine sand, decorative pebbles, or grit

    Terrarium Pest and Disease Guide

    ProblemSignsFix
    Fungus GnatsTiny flies around soilLet soil dry; use yellow sticky traps; add carnivorous plant
    MealybugsWhite cotton clusters on leavesRemove with alcohol-dipped cotton swab; isolate affected plant
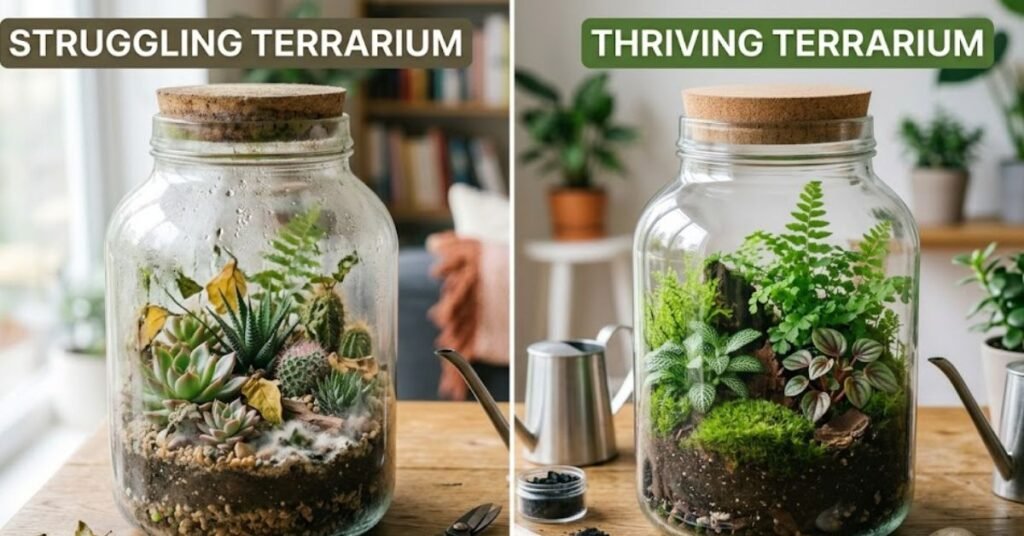
    Mold on SoilWhite fluffy patchesRemove lid; let air circulate for a day; reduce watering; add charcoal
    Algae on GlassGreen film on inside wallsToo much direct sun; move to bright indirect light; wipe glass
    Root RotWilting, slimy roots, bad smellRemove affected plant; let soil dry; improve drainage layer
    Condensation BuildupGlass completely fogged, water poolingRemove lid for a few hours; rebalance moisture level

    Seasonal Terrarium Care Guide

    SeasonClosed TerrariumOpen Terrarium
    Spring Check for overgrowth; trim if needed; light fertilizeResume watering; repot crowded plants; fresh top dressing
    Summer Keep out of direct sun; remove lid if overheatingWater slightly more; watch for pest activity
    Fall Minimal intervention; check moisture levelReduce watering frequency; check for root crowding
    Winter May need zero watering; reduce light exposureWater very sparingly; move succulents to brightest spot

    Plants to AVOID in Terrariums

    Most guides tell you what to use. Fewer tell you what not to use — and that’s often more valuable.

    PlantWhy It Fails
    PothosGrows too fast; takes over in weeks
    Peace LilyNeeds more space than terrariums allow
    Spider PlantSends out runners that crowd everything
    MintExtremely invasive; will dominate the container
    Regular BambooGrows too aggressively; breaks glass in some cases
    Carnivorous plants (most types)Need special substrate and different humidity than typical terrariums

    Common Beginner Mistakes to Avoid

    1. Mixing closed and open terrarium plants Succulents and moss cannot coexist. One needs wet soil; the other dies in it. Always match every plant in the container to the same moisture and humidity needs.

    2. Skipping the charcoal layer Without activated charcoal, stagnant water in the drainage layer becomes a breeding ground for mold, bacteria, and bad odors. This one layer prevents most closed terrarium failures.

    3. Overwatering a closed terrarium A properly built closed terrarium with the right plants barely needs water. If the glass is consistently foggy and water is pooling at the base, you’ve over-watered. Remove the lid for a day or two to rebalance.

    4. Placing in direct sunlight, glass magnifies heat. Direct sun turns a terrarium into a slow cooker — scorching leaves and killing plants within days. Always use bright indirect light.

    5. Choosing fast-growing plants Plants like pothos or mint look fine for two weeks and then completely take over the container. Always choose confirmed slow growers and miniature varieties.

    6. Using regular potting soil without a drainage layer Standard potting soil in a sealed glass container with no drainage becomes waterlogged and anaerobic. Always build your substrate layer properly before planting.

    7. Not researching toxicity before buying Several common terrarium plants are toxic to pets and children. Asparagus Fern, Cycas, and Sago Palm are popular choices that can cause serious harm if ingested. Always check before buying.

    Toxicity Guide for Common Terrarium Plants

    PlantToxic to Pets?Toxic to Humans?
    Fittonia (Nerve Plant)Non-toxicNon-toxic
    PeperomiaNon-toxicNon-toxic
    Moss (most varieties)Non-toxicNon-toxic
    PileaNon-toxicNon-toxic
    Asparagus FernToxic to cats & dogsMildly irritant
    Creeping FigMildly toxicSkin irritant
    Succulents (most)Non-toxicNon-toxic
    HaworthiaNon-toxicNon-toxic

    FAQ: Terrarium Plant Questions Answered

    1. How often do I water a closed terrarium? A well-built closed terrarium may need watering as rarely as once a month — or even less in winter. The key sign is condensation: if you see some on the glass in the morning that clears by midday, moisture levels are perfect. If no condensation ever appears, mist lightly.

    2. Can I put succulents in a closed terrarium? No. Succulents need dry conditions, good airflow, and infrequent watering. The high humidity inside a closed terrarium causes them to rot quickly. Always pair succulents with open terrariums only.

    3. Why is my closed terrarium getting moldy? Mold usually means too much moisture, no activated charcoal in the substrate, or a plant that’s beginning to rot. Remove the lid to air it out, take out any decaying plant material, and consider adding charcoal to your substrate if you didn’t originally.

    4. What is the easiest terrarium plant for a beginner? Fittonia (Nerve Plant) is the top choice. It’s forgiving, visually striking, signals its water needs clearly, and thrives in the humid closed terrarium environment with minimal care.

    5. How long does a closed terrarium last? A well-built closed terrarium with the right plants can last for years — even decades with occasional maintenance. The world record for an unwatered closed terrarium is over 40 years.

    Conclusion

    The secret to a thriving terrarium is simple: match your plants to your container, build your substrate layers correctly, and resist the urge to overwater.

    Start with a closed terrarium using Fittonia, moss, and Peperomia — three forgiving, beginner-friendly plants that practically take care of themselves once established. Get that right, and you’ll be building more complex terrariums within months.

    Ready to start? Pick up a glass container with a lid, a bag of activated charcoal, and two or three Fittonia plants from your local nursery or garden center. Your first thriving mini-ecosystem is closer than you think.

    Have a question about your terrarium? Drop it in the comments — we answer every one.

  • Arrowhead Plant Care: Complete Guide to Growing podophyllum

    Arrowhead Plant Care: Complete Guide to Growing podophyllum

    Arrowhead plant care is simple, making the arrowhead plant (Syngonium podophyllum) one of the most beginner-friendly and adaptable houseplants in 2026. Loved for its fast growth, colorful varieties, and forgiving nature, it fits perfectly in modern homes, small apartments, and plant-filled shelves.

    Whether you’re a first-time plant parent or expanding your indoor jungle, this complete guide to arrowhead plant care covers everything: light, watering, soil, humidity, toxicity, propagation, seasonal care, and troubleshooting.

    What Is an Arrowhead Plant?

    Syngonium podophyllum is a tropical vine native to Central and South America. In the wild, it climbs trees using aerial roots. Indoors, it can grow as:

    • A bushy tabletop plant
    • A trailing hanging plant
    • A climbing plant on a moss pole

    Why It’s So Popular in 2026

    • Comes in pink, white, green, and variegated varieties
    • Tolerates moderate neglect
    • Grows quickly
    • Easy to propagate
    • Works in both bright and medium light

    Young plants have classic arrow-shaped leaves. As they mature (especially when climbing), leaves become larger and develop multiple lobes.

    Quick Care Requirements (At a Glance)

    FactorWhat It Needs
    LightBright, indirect light
    WaterWhen top 1 inch of soil is dry
    Humidity50–60% preferred
    Temperature60–80°F (15–27°C)
    SoilWell-draining, airy mix
    FertilizerMonthly (spring–summer)
    ToxicityToxic to pets & humans

    Arrowhead Plant Light Requirements

    Light is the biggest factor affecting growth and color.

    Ideal Lighting

    Bright, indirect light near:

    • East-facing window
    • A few feet from a south-facing window
    • Behind sheer curtains

    Can It Grow in Low Light?

    Yes — but growth slows, and variegated or pink varieties may revert to green. Stems may stretch and become leggy.

    Signs It Needs More Light

    • Long, stretched stems
    • Large gaps between leaves
    • Loss of variegation
    • Pale foliage

    Too Much Sun?

    Direct afternoon sun causes:

    • Brown crispy patches
    • Bleached leaves
    • Curling edges

    Rotate the plant every few weeks for even growth.

    How to Water an Arrowhead Plant Properly

    Overwatering is the most common mistake.

    The Correct Method

    1. Insert your finger 1 inch into the soil.
    2. If dry — water thoroughly.
    3. If moist — wait a few days.

    Overwatering is the most common mistake in indoor plant care, including plants like croton.

    How Often to Water

    • Spring/Summer: Every 5–7 days (depending on light & temperature)
    • Fall/Winter: Every 10–14 days

    Signs of Overwatering

    • Yellow lower leaves
    • Mushy stems
    • Sour-smelling soil
    • Drooping despite wet soil

    Signs of Underwatering

    • Dry, curling leaves
    • Crispy edges
    • Soil pulling away from pot sides

    Best Soil Mix for Arrowhead Plants

    Good drainage is essential.

    Ideal Soil Recipe

    • 50% indoor potting mix
    • 30% perlite
    • 20% coco coir or orchid bark

    This creates airflow around roots and prevents rot.

    Choosing the Right Pot

    • Always use drainage holes
    • Terra cotta dries faster
    • Plastic retains moisture longer

    When repotting, increase pot size by only 1–2 inches.

    Humidity and Temperature Needs

    Being tropical, this plant prefers humidity above 50%.

    How to Increase Humidity

    • Use a small humidifier
    • Group plants together
    • Place on a pebble tray
    • Keep away from heaters

    Temperature Range

    Ideal: 60–80°F (15–27°C)
    Avoid temperatures below 55°F (13°C).

    Cold drafts and air conditioners can cause leaf drop.

    Is the Arrowhead Plant Toxic?

    Yes. Syngonium podophyllum contains calcium oxalate crystals.

    Toxic To:

    • Cats
    • Dogs
    • Humans (if ingested)

    Possible Symptoms

    • Burning sensation in mouth
    • Drooling
    • Vomiting
    • Swelling

    Keep the plant out of reach of pets and children. Place on high shelves or in hanging planters.

    How to Propagate an Arrowhead Plant

    Propagation is simple and beginner-friendly.

    Water Propagation (Most Popular Method)

    1. Cut just below a leaf node.
    2. Remove lower leaves.
    3. Place nodes in water.
    4. Keep in bright, indirect light.
    5. Change water weekly.

    Roots appear in 2–4 weeks. Pot when roots reach 1–2 inches.

    Soil Propagation

    You can plant the cutting directly into moist soil. Keep humidity high during the first few weeks.

    Best Time to Propagate

    Spring and early summer during active growth.

    Seasonal Care Guide

    Spring

    • Resume regular watering
    • Begin monthly fertilizer
    • Repot if rootbound
    • Propagate cuttings

    Summer

    • Increase watering frequency
    • Boost humidity
    • Check for pests
    • Avoid harsh afternoon sun

    Fall

    • Reduce watering
    • Stop fertilizing
    • Prepare for lower light

    Winter

    • Water less frequently
    • No fertilizer
    • Protect from cold drafts
    • Use humidifier if heating dries air

    Common Arrowhead Plant Problems and Solutions

    Yellow Leaves

    Usually overwatering. Let soil dry and inspect roots.

    Brown Tips

    Low humidity or mineral buildup. Use filtered water and raise humidity.

    Leggy Growth

    Move closer to a brighter window.

    Root Rot

    Remove plant from pot, trim black roots, and repot in fresh dry soil.

    Common Pests

    • Spider mites
    • Mealybugs
    • Fungus gnats

    Wipe leaves regularly and inspect undersides. Neem oil works as a preventive treatment.

    Frequently Asked Questions

    Q1How fast does an arrowhead plant grow?

    Quite fast in spring and summer several inches per month under good conditions.

    Q2Can it grow in water permanently?

    Yes. Change water weekly and add diluted liquid fertilizer monthly.

    Q3Does it need a moss pole?

    Not required, but climbing encourages larger, more mature leaves.

    Q4How do I make it bushier?

    Pinch growing tips regularly. You can also plant multiple cuttings in one pot.

    Final Thoughts

    The arrowhead plant continues to be one of the best indoor plants for beginners in 2026. It’s adaptable, fast-growing, and available in stunning color varieties with the right arrowhead plant care routine, your podophyllum will thrive for years indoors

    If you remember just three rules, you’ll succeed:

    • Don’t overwater
    • Provide bright, indirect light
    • Maintain moderate humidity

    Follow those basics, and your Syngonium podophyllum will reward you with lush, vibrant growth for years.

  • Bamboo Plant: The Complete Care Guide for Beginners

    Bamboo Plant: The Complete Care Guide for Beginners

    Bamboo is a versatile and striking plant that can transform any garden or indoor space. Whether you’re drawn to the towering outdoor bamboo or the elegant, compact lucky bamboo, each type has unique care needs. Understanding the differences and proper care techniques is key to keeping your bamboo healthy and thriving for years this complete bamboo plant care guide will help you understand how to grow and maintain both lucky bamboo and true bamboo easily

    Bamboo Plant Care Quick Summary

    Care FactorTrue Bamboo (Outdoor)Lucky Bamboo (Indoor)
    LightFull sun (6+ hours)Bright, indirect light
    Water1 inch/weekFresh water every 7–10 days
    SoilMoist, well-drainingPebbles + water, or light potting mix
    Temperature60–95°F65–90°F
    FertilizerBalanced; twice a yearDiluted liquid; every 2 months
    Pet Safe?YesMildly toxic
    DifficultyEasy–ModerateVery Easy

    These basic bamboo plant care tips make it easy for beginners to keep their plants healthy.

    True Bamboo vs Lucky Bamboo Care Guide

    This is the #1 mistake beginners make. There are two completely different plants sold as “bamboo.”

    True bamboo (Bambusoideae) is a fast-growing grass. It produces hollow canes, grows outdoors, and can shoot up several feet per season.

    Lucky bamboo (Dracaena sanderiana) is NOT real bamboo. It’s a tropical houseplant from West Africa, related to asparagus. It grows in water or light soil and thrives indoors.

    They have completely different care needs — so knowing which one you have is essential before doing anything else.

    Types of True Bamboo for Better Plant Care

    If you’re planting outdoors, you need to know this before you dig a single hole.

    Running bamboo spreads aggressively underground via roots called rhizomes. It needs a root barrier to stay contained and can spread several feet per year. Great for privacy screens in large spaces.

    Clumping bamboo grows slowly outward — just a few inches per year. No barrier needed. Perfect for small gardens, patios, and containers.

    Bamboo Plant Light Requirements (Sunlight Guide)

    True bamboo: Loves full sun — at least 6 hours of direct sunlight per day. Most species also tolerate part shade, but growth will be slower. In very hot climates, some afternoon shade protects leaves from burning.

    Lucky bamboo: Needs bright, indirect light only. Direct sun will scorch and curl the leaves. A north or east-facing window works well. A sheer curtain filters harsh afternoon light nicely.

    How to Water Bamboo Plants (Essential Care Tips)

    True Bamboo

    Aim for at least 1 inch of water per week. Water deeply — slow and thorough — so moisture reaches the roots.

    • First 4 weeks after planting: Water daily to help roots establish
    • After establishment: Supplement rainfall only during dry periods

    Signs of underwatering: Leaves curl inward, tips turn brown Signs of overwatering: Leaves yellow, base feels mushy, soil smells bad

    Lucky Bamboo in Water

    • Change the water every 7–10 days
    • Always use distilled or rainwater — tap water contains chlorine and fluoride that yellows leaves
    • Keep water high enough to cover roots at all times
    • Clean the container every 2–3 months to prevent algae

    Lucky Bamboo in Soil

    • Let the top inch of soil dry out between waterings
    • Water thoroughly, then let it fully drain
    • Never let the pot sit in standing water

    Best Soil for Bamboo Plant Care

    True bamboo grows best in slightly acidic, loamy, well-draining soil (pH 6.0–6.5).

    How to plant:

    1. Dig a hole 1.5–2x wider than the root ball
    2. Mix 50% compost into the existing soil
    3. Plant so the top of the root mass is level with the ground
    4. Add 2–3 inches of mulch on top
    5. Water deeply right after planting

    Pro Tip: Don’t rake up fallen bamboo leaves. They break down and return silica — a key bamboo nutrient — directly back into the soil.

    Lucky bamboo in soil: Use a light potting mix with 20% perlite for drainage. Avoid dense, heavy soils that hold water.

    Bamboo Plant Fertilizer Guide

    True bamboo is a heavy feeder. It responds best to high-nitrogen fertilizer.

    • Apply a balanced granular fertilizer (10-10-10) in spring and again in late summer
    • Sprinkle around the base — not touching the canes — and water in well
    • Organic mulch works as a natural slow-release alternative

    Lucky bamboo needs very little feeding — over-fertilizing is a common killer.

    • Use liquid fertilizer diluted to 1/4 strength
    • Feed once every 2 months only
    • For water-grown plants, add just a few drops to the water

    Bamboo Plant Care and Pet Safety Guide

    This is one of the most searched questions — and the answer depends entirely on which plant you have.

    PlantSafe for Pets?
    True Bamboo (Bambusoideae)Non-toxic (ASPCA confirmed)
    Lucky Bamboo (Dracaena sanderiana)Mildly toxic — causes vomiting, lethargy
    Heavenly Bamboo (Nandina domestica)Toxic — keep away from all pets

    If your pet eats lucky bamboo, contact your vet or the ASPCA Poison Control Hotline: (888) 426-4435.

    Bamboo Plant Care Mistakes to Avoid

     Not knowing your bamboo type. Running bamboo without a root barrier can spread into neighboring yards within a few seasons.

     Using tap water for lucky bamboo. Chlorine and fluoride cause those trademark yellow tips. Switch to distilled or rainwater.

     Overwatering outdoor bamboo. Deep but infrequent watering is better than frequent shallow watering.

     Over-fertilizing lucky bamboo. Always dilute to 1/4 strength. Feed every 2 months — not more.

     Pruning at the wrong time. Never prune in late summer — it stimulates tender new growth right before winter. Wait until late winter or early spring.

    Avoiding these mistakes is essential for successful bamboo plant care

    Seasonal Care Guide

    SeasonTrue BambooLucky Bamboo
    SpringFertilize; water new shoots dailyResume regular watering
    SummerDeep water during heat waves; watch for pestsKeep away from AC vents and hot windows
    FallSecond fertilizer round; add mulchMove away from drafty windows
    WinterWrap young plants; 6 inches of mulch; reduce wateringKeep above 50°F; avoid cold drafts

    Pest & Disease Quick Guide

    ProblemSignsFix
    Spider mitesFine webbing, yellow specklingNeem oil spray; increase humidity
    AphidsSticky residue, distorted growthWipe with damp cloth; diluted neem oil
    MealybugsWhite cottony clustersAlcohol-soaked cotton swab
    Root rotMushy base, bad smellImprove drainage; repot; trim black roots
    Fungal spotsDark spots on canesCopper-based fungicide or remove cane

    Troubleshooting Yellow Leaves

    Yellow leaves are the most common complaint — here’s how to diagnose it fast:

    • Tap water → Switch to distilled water (lucky bamboo)
    • Overwatering → Let soil dry out; check drainage
    • Too much direct sun → Move to indirect light
    • Over-fertilizing → Flush soil with water; reduce feeding frequency
    • Root rot → Repot; trim damaged roots

    FAQ

    Q: How fast does bamboo grow? Giant species can grow up to 3 feet per day at peak. Most garden varieties add 1–3 feet per week in spring. Lucky bamboo grows just a few inches per year.

    Q: Can bamboo grow indoors? True bamboo doesn’t thrive indoors long-term — it needs full sun. Lucky bamboo is the ideal houseplant.

    Q: Is bamboo invasive? Running bamboo can be invasive without a root barrier. Some varieties are restricted in certain U.S. counties. Clumping bamboo is not invasive.

    Q: How do I stop bamboo from spreading? Install a high-density polyethylene (HDPE) root barrier at least 24–30 inches deep around the planting area. Check and trim escaping rhizomes every spring.

    Q: Why are my lucky bamboo leaves yellow? Almost always tap water. Switch to distilled or rainwater immediately.

    Q: How long does lucky bamboo live? With proper care, 5–10+ years. The key is clean water, indirect light, and minimal fertilizer.

    Q: Does bamboo need a lot of sun? True bamboo: yes — 6+ hours preferred. Lucky bamboo: no — indirect light only.

    Conclusion

    Bamboo is one of the easiest plants to grow once you understand what you’re working with. The single most important step is knowing whether you have true bamboo or lucky bamboo — everything else follows from there.

    Give outdoor bamboo full sun, deep watering, and rich mulch. Give lucky bamboo indirect light, clean distilled water, and minimal fertilizer. Do those two things right, and your bamboo will thrive for years.

    By following this bamboo plant care guide, you can grow healthy and beautiful bamboo plants for years

  • Peanut Plant: The Complete Beginner’s Guide to Growing, Caring, and Harvesting

    Peanut Plant: The Complete Beginner’s Guide to Growing, Caring, and Harvesting

    The peanut plant is not actually a nut — it is a legume closely related to peas and beans, and they grow underground. The peanut plant originated in South America over 3,500 years ago and is now widely cultivated in home gardens and commercial farms in warm climates.

    What makes peanuts unique is their growth process: the plant flowers above ground, but the pods form underground. After pollination, a peg-like stem grows downward into the soil, where the peanut pod develops. This rare process is called geocarpyhttps://en.wikipedia.org/wiki/Geocarpy.

    Quick Care Summary

    Care FactorRequirement
    LightFull sun, 6–8 hours daily
    SoilLoose, sandy loam, pH 5.8–6.2
    Water1 inch per week; increase during flowering
    TemperatureSoil >65°F; grows best 70–95°F
    SpacingSeeds 4–6 inches apart; rows 24–36 inches
    DepthPlant seeds 2 inches deep
    Days to Harvest100–140 days (varies by variety)
    FertilizerCalcium at flowering; avoid high nitrogen
    MulchingLight mulch around base (not under plant)
    ToxicitySafe for humans; potentially harmful to dogs

    Peanut Plant Varieties: 4 Types You Should Know

    Choosing the right variety for your climate and purpose is essential:

    VarietySizeDays to HarvestBest ForNotes
    VirginiaLarge130–140Roasting, snackingPopular, great flavor
    RunnerMedium130–150Peanut butterHighest commercial yield
    SpanishSmall120Candy, oilReddish skin, faster harvest
    ValenciaMedium75–90Boiling freshIdeal for short-season climates

    Pro Tip: In northern regions, select Valencia or fast-maturing varieties. Start seeds indoors 3–4 weeks before the last frost date.

    How to Plant a Peanut Plant Step by Step

    Step 1: Choose the Right Time

    Plant outdoors 2–3 weeks after the last frost, when soil temperature is at least 65°F. Cold soil can cause seed rot.

    Step 2: Prepare the Soil

    Peanuts prefer loose, well-draining sandy soil:

    • Loosen soil 6–8 inches deep
    • Mix in compost
    • Maintain pH 5.8–6.2
    • Amend heavy clay with sand and compost

    Step 3: Prepare Seeds

    • Use raw, unroasted peanuts or untreated seed peanuts
    • Optionally apply bacterial inoculant to fix nitrogen

    Step 4: Plant the Seeds

    • Plant 2 inches deep, 4–6 inches apart
    • Rows 24–36 inches apart
    • Water gently after planting
    • Seeds germinate in 5–10 days

    Peanut Plant Care Guide for Beginners

    Watering

    • Keep soil consistently moist, especially from flowering to pod development
    • Stop watering 10–14 days before harvest

    Hilling

    • When plants reach 6 inches, mound loose soil around the base
    • Repeat every few weeks
    • This helps pegs grow downward into soil and increases yield

    Mulching

    • Apply 2-inch straw or grass layer around plants (not beneath)
    • Retains moisture, controls weeds, prevents soil hardening

    Fertilizing

    • Avoid high-nitrogen fertilizers
    • Use calcium-rich fertilizer during flowering
    • Bacterial inoculant reduces fertilizer needs

    Peanut Plant Seasonal Care Guide

    SeasonKey Tasks
    SpringStart seeds indoors, prep soil, plant after frost
    Early SummerHill plants, regular watering, apply mulch
    Mid-SummerFlowers appear, increase water, apply calcium fertilizer, watch pests
    Late SummerPegging begins, keep soil moist, hand-weed
    FallStop watering 2 weeks before harvest, harvest before frost

    Peanut Plant Pests and Diseases (Complete Guide)

    Common Pests

    PestSignsSolution
    AphidsSticky leaves, curled growthNeem oil or insecticidal soap
    ArmywormsHoles in leavesBacillus thuringiensis (Bt), encourage predators
    WirewormsTunnels in podsBeneficial nematodes
    ThripsSilver scars on leavesOverhead watering, insecticide if severe
    Velvetbean CaterpillarSkeletonized leavesNatural predators

    Common Diseases

    • Early & Late Leaf Spot: Brown/black spots; rotate crops, avoid overhead watering, apply fungicide
    • Tomato Spotted Wilt Virus (TSWV): Caused by thrips; use resistant varieties and control thrips
    • Root Rot / Aflatoxin: Caused by wet soil; harvest and cure peanuts properly

    Growing a Peanut Plant in Containers

    • Pot 18–20 inches wide and 18 inches deep per plant
    • Well-draining mix with perlite
    • Full sun exposure
    • Water frequently
    • Slightly lower yield than garden-grown

    Harvesting Peanuts

    Signs of Readiness

    • Leaves yellowing and dropping
    • Pod shell shows dark veining
    • Kernels firm

    How to Harvest

    • Stop watering 10–14 days before harvest
    • Loosen soil, lift entire plant
    • Dry plants in sun for 1 week
    • Remove pods, cure in ventilated area for 2–3 weeks

    Storage

    • Store in cool, dry place
    • In-shell peanuts: 6–12 months
    • Shelled peanuts: refrigerate or freeze

    Toxicity

    • Safe for humans unless allergic
    • Peanut plant leaves can upset pets’ digestion; avoid pet contact
    • Ensure peanuts are fully cured to prevent aflatoxin

    Common Beginner Mistakes

    1. Planting in cold soil
    2. Skipping hilling
    3. Deep weeding near base
    4. Watering until harvest
    5. Using high-nitrogen fertilizers
    6. Harvesting too late
    7. Storing undried peanuts

    FAQ,s

    Q1: How long to harvest?
    A: 100–140 days, Valencia 75–90 days

    Q2: Can I grow store-bought peanuts?
    A: Only raw, unroasted peanuts; treated seeds perform better

    Q3: How many peanuts per plant?
    A: 25–50 in good conditions

    Q4: Do peanuts come back every year?
    A: No, they are annuals

    Q5: Why are leaves yellowing?
    A: Normal late-season yellowing or water/nutrient issues

    Q6: Is the peanut plant easy to grow?
    A: Yes, the peanut plant is beginner-friendly if grown in warm soil with proper care.

    Conclusion

    Growing peanuts is rewarding. With the right variety, soil, watering, and care, you can enjoy fresh, homegrown peanuts straight from your garden.

  • Dragon Fruit Plant Care: Complete Growing Guide for Beginners

    Dragon Fruit Plant Care: Complete Growing Guide for Beginners

    Dragon fruit looks exotic but it’s actually one of the easier fruiting plants to grow. This guide covers everything from soil and support to pollination, harvesting, and the mistakes that stop most beginners from ever seeing fruit.

    Quick Care Summary

    Care FactorDetails
    Scientific NameHylocereus undatus (white flesh) / H. costaricensis (red flesh)
    Plant TypeTropical climbing cactus
    LightFull sun — 6–8 hours per day
    WaterWhen top 3 inches of soil are dry
    SoilSandy, well-draining (pH 6–7)
    Temperature65–85°F; never below 32°F
    SupportTrellis, post, or stake required
    ToxicityNon-toxic to humans and pets
    Hardiness ZonesOutdoors year-round in zones 10–12
    Years to First Fruit2–3 years from cutting; 5–7 from seed
    DifficultyEasy–Moderate

    Dragon Fruit Plant Explained (Beginner’s Care Guide)?

    Dragon fruit is a tropical climbing cactus from Mexico and Central America. Like many tropical plants, dragon fruit shares similar care needs with ornamental plants such as crotons It produces large, dramatic flowers and bright, heavy fruit. Unlike desert cacti, it loves some humidity and needs more water than most people expect.

    The flowers open for just one night they’re enormous, white, and fragrant. Without bats or moths to pollinate them naturally, you’ll need to hand-pollinate to get fruit.

    Common Varieties

    VarietyFlesh ColorSelf-Fertile?
    H. undatusWhiteNo — needs a partner
    H. costaricensisRed/PurpleNo — needs a partner
    H. megalanthus (Yellow)WhiteYes
    American BeautyPinkYes

    Pro Tip: If growing just one plant, choose a self-fertile variety like Yellow Dragon Fruit or American Beauty. Non-self-fertile types need two compatible plants to produce fruit.

    Sunlight

    Dragon fruit needs 6–8 hours of full sun per day. Without it, the plant grows but never flowers or fruits.

    • Best outdoor spot: south-facing wall, fence, or open bed
    • Indoors: within 1 foot of a south-facing window, or use a grow light 12–14 hours/day
    • In extreme heat (100°F+): afternoon shade protects stems from burning

    Watering

    Dragon fruit is more water-tolerant than most cacti but overwatering still kills it.

    The rule: Water deeply, then wait until the top 3 inches of soil are completely dry before watering again.

    • Spring/summer: About once a week
    • Fall/winter: Once every 2–3 weeks

    Signs of overwatering: Soft, mushy stems; yellow discoloration; foul-smelling soil

    Signs of underwatering: Wrinkled or shriveled stems; no new growth

    Soil, Support & Fertilizing

    Soil: Use a 50/50 mix of cactus potting mix and compost. Add perlite in humid climates. Avoid standard potting soil — it holds too much water.

    Support: Dragon fruit is a climber. Without support it sprawls and rarely fruits. Use a 6–8 foot post, stake, or strong trellis. A fully loaded plant can weigh 25–50 lbs — the structure must be solid and well-anchored.

    Fertilizing:

    • Balanced fertilizer (10-10-10) every 4–6 weeks in spring and summer
    • Avoid high-nitrogen formulas — they push green growth and reduce flowering
    • Stop fertilizing completely in winter

    Pollination — The Step Nobody Explains

    This is the main reason people grow beautiful plants that never produce fruit.

    Most varieties are not self-fertile. Pollen from one open flower must reach the stigma of another. Each flower opens for just one night — you have an 8–12 hour window.

    How to Hand-Pollinate

    1. Go out after dark — flowers open fully after sunset
    2. Find the stamen (the yellow pollen-covered parts surrounding the center)
    3. Find the stigma (the multi-tipped structure in the middle)
    4. Use a small paintbrush or Q-tip to collect pollen from the stamen
    5. Transfer it directly onto the stigma of another open flower (or the same flower if self-fertile)

    If successful, the base of the flower swells into fruit within a few days. If the flower drops off within 2–3 days without swelling, pollination fails — try again with the next bloom.

    When to Harvest

    After pollination, fruit takes 30–50 days to ripen. Look for these signs:

    • Skin has fully developed its color (bright pink/red or yellow)
    • The wing-like flaps on the skin start to wither slightly
    • Fruit feels mildly soft when gently squeezed — like a ripe avocado

    Cut with clean scissors or shears, leaving about 1 inch of stem. Ripe fruit keeps in the refrigerator for 2–3 weeks.

    Seasonal Care Guide

    SeasonWhat to Do
    SpringResume watering and fertilizing; repot if needed; check trellis
    SummerWater weekly; hand-pollinate night flowers; watch for pests
    FallReduce watering; prune dead or crowded stems
    WinterMinimal watering; no fertilizer; protect from frost; bring containers inside below 40°F

    Pest & Disease Solutions

    ProblemSignsFix
    Root/Stem RotMushy stems; foul smellCut away rot; improve drainage; copper fungicide
    AphidsSticky residue; distorted growthInsecticidal soap spray
    Scale InsectsBrown bumps on stemsScrape off; horticultural oil
    MealybugsWhite cottony clustersAlcohol swab; neem oil
    SunscaldWhite patches on stemsShade cloth in extreme heat

    Common Beginner Mistakes

    Starting from seed. Seeds take 5–7 years to fruit. Always start from a cutting (2–3 years to fruit).

     Planting one non-self-fertile variety. You’ll never get fruit. Buy two compatible plants or choose a self-fertile variety.

     Overwatering. It’s a cactus. When in doubt, wait another week.

     No support structure. A plant without a trellis or post sprawls and rarely fruits.

     Missing the pollination window. Flowers open one night only. Check your plant on summer evenings and be ready to hand-pollinate.

    Heavy clay soil. Roots rot fast without drainage. Use raised beds or amend heavily with grit and compost.

    Troubleshooting

    SymptomCauseFix
    No flowersToo little light or plant too youngFull sun; wait until 2+ years old
    Flowers but no fruitPollination failureHand-pollinate next bloom; add second variety
    Yellow/mushy stemsOverwatering or rotReduce watering; treat with fungicide
    Wrinkled stemsUnderwateringWater deeply and consistently
    Slow growthLow light or no fertilizerFull sun; resume feeding in spring

    FAQ,s

    Q: How long does dragon fruit take to grow? From a cutting, expect fruit in 2–3 years. From seed, 5–7 years. Always use cuttings.

    Q: Can I grow dragon fruit in a pot indoors? Yes — use a 15–25 gallon container, a strong support pole, and a grow light or very sunny window. Fruiting indoors is possible but requires extra effort.

    Q: Do I need two plants? Most varieties do. Self-fertile types like Yellow Dragon Fruit and American Beauty can produce fruit with just one plant.

    Q: Is dragon fruit toxic to pets? No. Dragon fruit is non-toxic to dogs, cats, and humans. The spines can cause physical injury, but the plant itself is safe.

    Q: Why won’t my plant flower? Most likely insufficient sunlight or an immature plant. Ensure 6–8 hours of full sun daily and give it time — most plants don’t flower before 2–3 years old.

    Q: How often should I water? About once a week in summer. Every 2–3 weeks in winter. Always let the top 3 inches of soil dry out first.

    Q: How do I know when to pick the fruit? Fully colored skin, slightly withered wing flaps, and a gentle give when pressed. Harvest 30–50 days after pollination.

    Conclusion

    Dragon fruit rewards patient growers with one of the most spectacular plants in home gardening. Get the basics right full sun, fast-draining soil, a solid trellis, and a hand-pollination plan and you’ll be harvesting your own exotic fruit within a couple of seasons.

  • Croton Plant Care Guide: How to Grow Bold, Colorful Foliage

    Croton Plant Care Guide: How to Grow Bold, Colorful Foliage

    Croton plant care is essential for anyone who wants their tropical plants healthy and vibrant. In this croton plant care guide, we’ll cover everything from light and watering to humidity and fertilizer, helping your croton leaves stay bold and colorful indoors or outdoors

    Quick Care Summary

    Care FactorDetails
    Scientific NameCodiaeum variegatum
    LightBright, indirect to direct sun (4–6 hrs/day)
    WaterWhen top 2 inches of soil are dry
    Humidity50% or more preferred
    Temperature60–85°F; never below 50°F
    FertilizerBalanced liquid; monthly in spring/summer
    ToxicityToxic to pets and humans
    HardinessOutdoors in USDA zones 9–12 only
    DifficultyModerate

    What Is a Croton Plant?

    The croton (Codiaeum variegatum) is a tropical evergreen shrub native to Southeast Asia and the Pacific Islands. Indoors it stays compact — usually 2–4 feet tall. Outdoors in warm climates, it can reach 6–10 feet.

    What sets it apart is the foliage. Deep green, bright yellow, fiery orange, red, and purple can all appear on the same plant at once — sometimes on the same leaf.

    Popular varieties:

    VarietyLeaf ShapeKey Feature
    PetraBroad, ovalBold yellow, orange, and red veins
    MammyLong, twistedDeep green, red, orange, and purple
    Gold DustNarrowDark green with yellow speckles
    OakleafOak-shapedBronze with yellow and red veins

    Light — The Secret to Vibrant Color

    More light = more color. This is the most important rule for crotons.

    In low light, leaves slowly fade to plain green. The plant survives but loses all its drama.

    • Indoors: At least 4–6 hours of bright, indirect light per day
    • Best spots: East or west-facing windows
    • Avoid: Deep shade or north-facing windows — leaves will green out within weeks

    Proper croton plant care means giving your plant enough bright, indirect light. Without adequate sunlight, even the best croton plant care routine won’t maintain vibrant leaf colors

    How to Water a Croton

    Crotons like consistently moist soil — but hate sitting in soggy conditions.

    The method: Push your finger 2 inches into the soil. If it’s dry at that depth, water thoroughly until it drains from the bottom. Empty the saucer after 30 minutes.

    • Spring/summer: Every 5–7 days
    • Fall/winter: Every 10–14 days

    Signs of underwatering: Wilting leaves, crispy brown edges, soil pulling from the pot sides

    Signs of overwatering: Yellow leaves, mushy stem base, sour-smelling soil

    Humidity — The Step Most Guides Skip

    Crotons are tropical and prefer humidity of 50% or higher. Most homes run at 30–50%, which can stress the plant.

    Signs of low humidity: Brown, crispy leaf tips and unexpected leaf drop.

    How to boost it:

    • Set the pot on a pebble tray filled with water
    • Mist leaves 2–3 times per week with room-temperature water
    • Group tropical plants together — they raise humidity around each other
    • Use a small humidifier near the plant

    Soil, Repotting & Fertilizing

    Soil: Well-draining, slightly acidic mix (pH 5.5–6.5). Combine standard potting soil with 20–30% perlite.

    Repotting: Every 2 years, or when roots escape drainage holes. Always repot in spring. Wear gloves — the sap irritates skin.

    Fertilizing:

    • Spring through late summer: balanced liquid fertilizer once a month
    • Fall: every 6–8 weeks
    • Winter: stop completely — the plant is resting

    Avoid high-nitrogen fertilizers. They push fast green growth and actually mute the leaf colors.

    Is Croton Toxic?

    Yes — and this detail is missing or vague in most guides.

    All parts of the plant are toxic — leaves, stems, roots, and especially seeds.

    RiskDetails
    Dogs & CatsVomiting, diarrhea, drooling, lethargy
    Humans (sap contact)Skin rash and irritation
    Humans (ingestion)Nausea, vomiting, diarrhea

    If your pet eats croton, call the ASPCA Poison Control: (888) 426-4435 immediately.

    Always wear gloves when pruning or repotting, and keep out of reach of young children.

    Pest & Disease Quick Guide

    ProblemSignsFix
    Spider MitesFine webbing, dull leavesNeem oil; increase humidity
    MealybugsWhite cottony clustersAlcohol swab; insecticidal soap
    Scale InsectsBrown bumps on stemsScrape off; horticultural oil
    Root RotYellow leaves, mushy baseRepot; trim black roots; improve drainage
    Powdery MildewWhite dusty coatingNeem oil spray

    Seasonal Care Guide

    SeasonWhat to Do
    SpringResume monthly fertilizing; repot if needed; increase watering
    SummerWater more often; mist leaves; watch for spider mites
    FallReduce watering and fertilizing; bring outdoor plants inside before 55°F
    WinterStop fertilizing; water every 10–14 days; keep above 60°F; use humidifier

    Common Beginner Mistakes

     Moving the plant constantly. Every move triggers leaf drop. Pick a bright, permanent spot and leave it there.

    Not enough light. Medium-light rooms will slowly drain the color from the leaves. This plant needs a genuinely bright spot.

     Overwatering. Always check the soil first. Moist is good — soggy is dangerous.

     Ignoring humidity. Crispy brown tips are almost always a humidity problem, not a watering problem.

     Fertilizing in winter. The plant is resting. Stop feeding from November through February.

     Panicking about leaf drop. A newly bought or recently moved croton will drop leaves. This is normal. Give it 2–3 weeks to settle in.

    Troubleshooting

    SymptomCauseFix
    Leaves turning greenToo little lightMove to a brighter spot
    Yellow leavesOverwateringCheck soil; improve drainage
    Brown crispy tipsLow humidity or fluoride in waterBoost humidity; use filtered water
    Leaf dropStress from moving or draftsFind a stable permanent location
    Stunted growthLow light or no fertilizerMove closer to window; resume feeding

    FAQ

    Q: Why is my croton dropping leaves? Almost always stress from being moved or a change in environment. Give it 2–3 weeks to settle before assuming something is wrong.

    Q: How do I make my croton more colorful? Give it more light. Bright indirect sun for 4–6 hours a day restores vivid color. Outdoors in zones 9–12, full sun produces the most intense colors.

    Q: How often should I water? Check the soil, not the calendar. Water when the top 2 inches feel dry — roughly every 5–7 days in summer, every 10–14 days in winter.

    Q: Is croton safe for pets? No. It is moderately toxic to dogs, cats, and horses. Keep it out of reach and call your vet if ingested.

    Q: Can I grow croton outdoors? Yes, in USDA zones 9–12. In cooler climates, grow in a container and bring it inside before the first frost.

    Q: Why are my leaf tips brown? Low humidity is the most common cause. Add a pebble tray or humidifier. Fluoride in tap water also causes tip browning — switch to filtered water.

    Q: How big do crotons get? Indoors, 2–4 feet. Outdoors in tropical climates, 6–10 feet. Prune in early spring to control size and encourage bushier growth.

    Conclusion

    The croton’s reputation for being difficult is mostly undeserved. Find it a bright, stable spot, keep the humidity up, and water carefully without overdoing it — and it will reward you with some of the most spectacular foliage of any houseplant you can own with these croton plant care tips, your tropical plant will thrive year-round, rewarding you with bold, colorful foliage