Day: May 29, 2026

  • The Ultimate Guide to the Summer Beauty Allium Plant: A Tough, Gorgeous Perennial for American Gardens

    The Ultimate Guide to the Summer Beauty Allium Plant: A Tough, Gorgeous Perennial for American Gardens

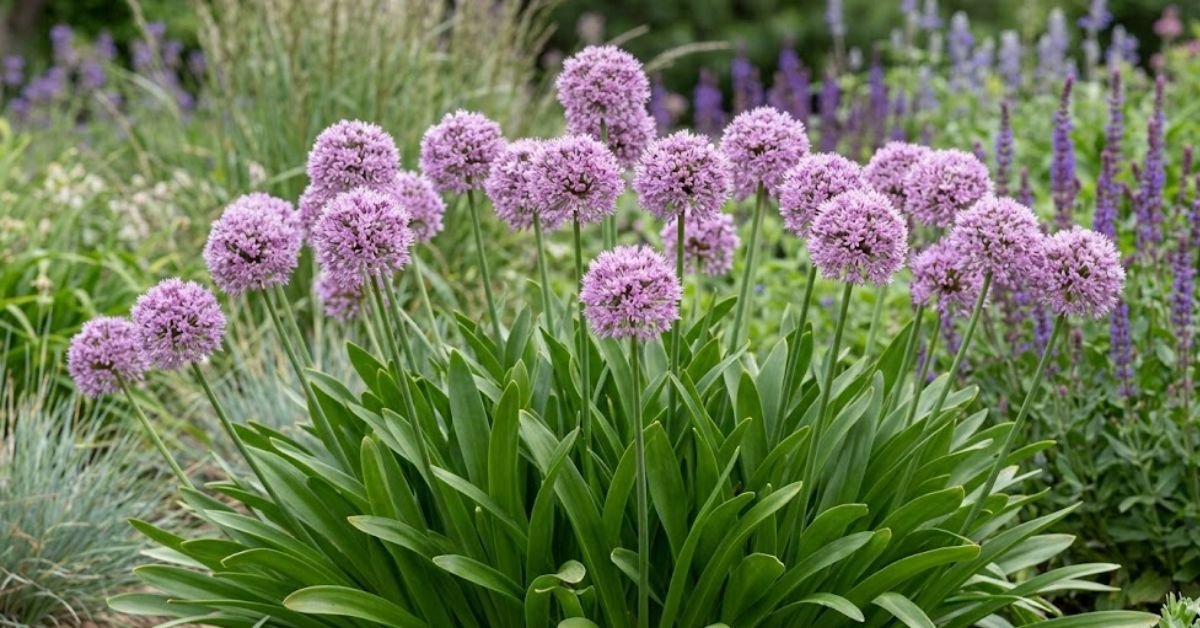
    If you’re tired of high-maintenance perennials that drop dead the moment a summer heatwave hits, you’re going to love this plant. While most spring-blooming bulbs leave behind messy, yellowing foliage by June, the summer beauty allium plant (Allium lusitanicum ‘Summer Beauty’) does the exact opposite. It stays crisp, green, and gorgeous all year, culminating in stunning lavender-pink globes that pollinators go absolutely crazy for.

    I first planted a row of these along my walkway about five years ago, and they’ve become the absolute backbone of my mid-summer garden landscape.

    Here’s the quick care breakdown if you just want the fast facts before we jump into the details.

    Quick Care Summary

    Care CategoryRequirements & Details
    Common NameSummer Beauty Allium, Ornamental Onion
    USDA Hardiness ZonesZones 4 to 9 (Handles cold northern winters and hot southern summers)
    Sunlight NeedsFull sun to light afternoon shade (6+ hours of direct sun is best)
    Watering NeedsAverage; highly drought-tolerant once established
    Soil PreferenceLoose, sandy, or loamy soil. Must drain perfectly
    Foliage Height12 to 18 inches tall; flower stalks reach up to 20 inches
    Toxicity WarningHighly toxic to dogs and cats (Keep away from curious pets)

    Why the Summer Beauty Allium Plant is a Game-Changer for Your Yard
    Why the Summer Beauty Allium Plant is a Game Changer for Your Yard
    Why the Summer Beauty Allium Plant is a Game Changer for Your Yard

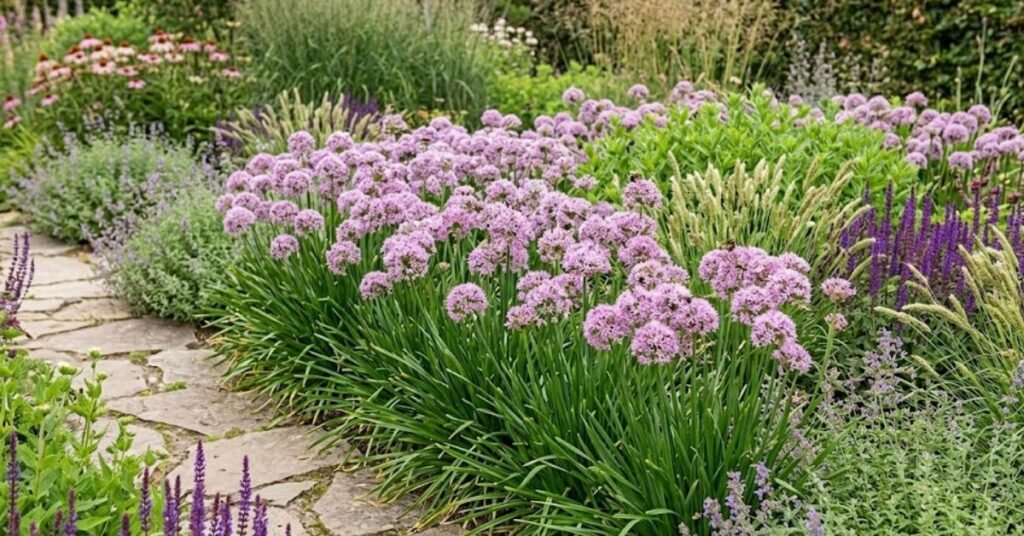
    Unlike the giant globes that pop up in early spring and quickly turn into brown, crispy eyesores, this specific variety acts much more like a traditional clumping perennial. The foliage emerges in early April as a lush, glossy mound of strap-like green leaves. It holds that clean look all through the dog days of July and August when other plants start looking completely burned out.

    The flowers themselves are beautiful two-inch spheres of soft lavender-pink. They sit on top of perfectly stiff, upright stems that don’t flop over after a heavy summer thunderstorm.

    Personal Pro-Tip: Don’t cut the dried flower heads off when the color fades in late August. I leave mine standing all through the winter. They dry out into beautiful tan spheres that catch the morning frost, adding great structural interest to a boring, snowy winter yard.

    Ideal Growing Conditions and USDA Zones for This Ornamental Onion

    This perennial is incredibly tough. It can reliably survive winters down in USDA Zone 4 (think Minnesota or Maine) and withstands the blistering heat all the way down to Zone 9.

    To get the maximum amount of round purple blossoms, you want to put this plant in full sun. In my own yard, the clumps that get blasted with eight hours of intense midday sun produce twice as many flowers as the ones I mistakenly tucked under the light shade of my oak tree. If you live in an exceptionally scorching southern climate like parts of Texas or Georgia, a little bit of late afternoon shade will keep the leaf tips from looking scorched.

    Personal Pro-Tip: If you are starting these as young container plants from a local nursery in the spring, give them a deep soak right out of the pot. It helps the root system settle into your native soil before the real summer heat hits.

    Watering Rules to Avoid Root Rot in Your Summer Beauty Allium Plant

    When you first put your new plants in the ground, water them thoroughly about once a week to help the roots establish. Once those roots dig deep into the earth, this perennial becomes remarkably drought-tolerant. You can practically forget about it.

    During a typical American summer, normal rainfall is usually more than enough. If you hit a severe dry spell where it doesn’t rain for three weeks, turn on your garden hose or outdoor faucet and give the base of the plants a good, deep soak. But always let the ground dry out completely before you even think about watering them again.

    Personal Pro-Tip: If you have an automatic lawn sprinkler system that fires off every single night, do not plant this allium nearby. Constant shallow watering keeps the bulbous root plates perpetually soggy, which is a fast track to fungal rot.

    Common Mistakes Americans Make with This Perennial
    Common Mistakes Americans Make with This Perennial
    Common Mistakes Americans Make with This Perennial

    I see many well-meaning gardeners make the same few mistakes with this variety, often treating it like a delicate indoor houseplant rather than the rugged outdoor survivor that it is.

    Treating It Like an Indoor Houseplant Near Air Conditioning Vents

    Sometimes folks try to grow these inside a sunny porch or bring them indoors during a heatwave. If you keep them inside an air-conditioned room, the dry, artificial airflow from your AC vents will rapidly sap the humidity out of the air and cause the flower buds to blast and drop before they ever open. Keep them outside where they belong; they love the natural summer heat.

    Planting in Heavy Clay Without Amendments

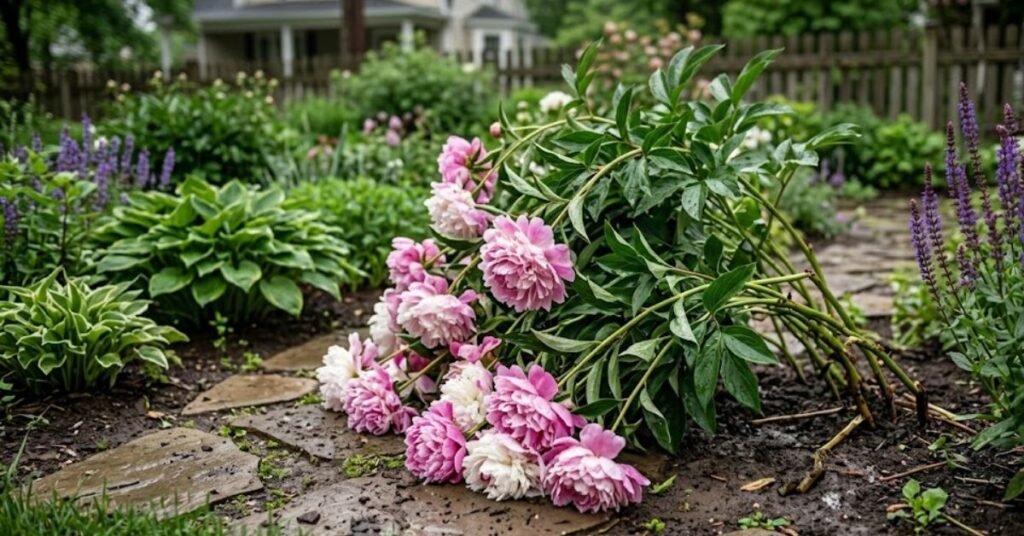
    Plunking a summer beauty allium plant straight into raw, unamended clay is the number one reason they fail to return the following spring. The roots drown during the winter thaw. Always mix in grit or build a raised bed if your yard is mostly heavy clay.

    Personal Pro-Tip: If you notice your soil holds onto water for hours after a rainstorm, build a small, simple mounded earth bed or rock garden. Elevating the plant just 6 inches above the surrounding ground completely changes the drainage game.

    Troubleshooting Common Issues with the Summer Beauty Allium Plant

    This variety is almost entirely pest- and disease-free because the faint onion scent of the foliage keeps bugs, deer, and rabbits far away. But you might still run into a couple of visual issues.

    Leaf Tips Turning Yellow Prematurely

    If the long, strappy leaves start turning bright yellow in the middle of summer, check the moisture level of your soil. Nine times out of ten, yellowing foliage means the ground is way too wet. Hold off on using the outdoor faucet and let the soil dry out.

    Crispy, Dried Brown Tips on the Leaves

    While some older alliums naturally get ugly, brown foliage right as they bloom, ‘Summer Beauty’ usually stays remarkably green. If your leaf tips look like they’ve been singed by a lighter, it’s a sign of extreme drought combined with scorching winds. Give the soil a deep, thorough watering at dawn.

    Personal Pro-Tip: If you see any mushy, foul-smelling growth at the very base of the stems, it’s a sign of a fungal issue. Snip away the damaged leaves immediately and dust the crown of the plant with a little bit of organic garden sulfur to stop the fungus from spreading.

    Is the Summer Beauty Allium Plant Safe for Cats and Dogs?
    Is the Summer Beauty Allium Plant Safe for Cats and Dogs
    Is the Summer Beauty Allium Plant Safe for Cats and Dogs

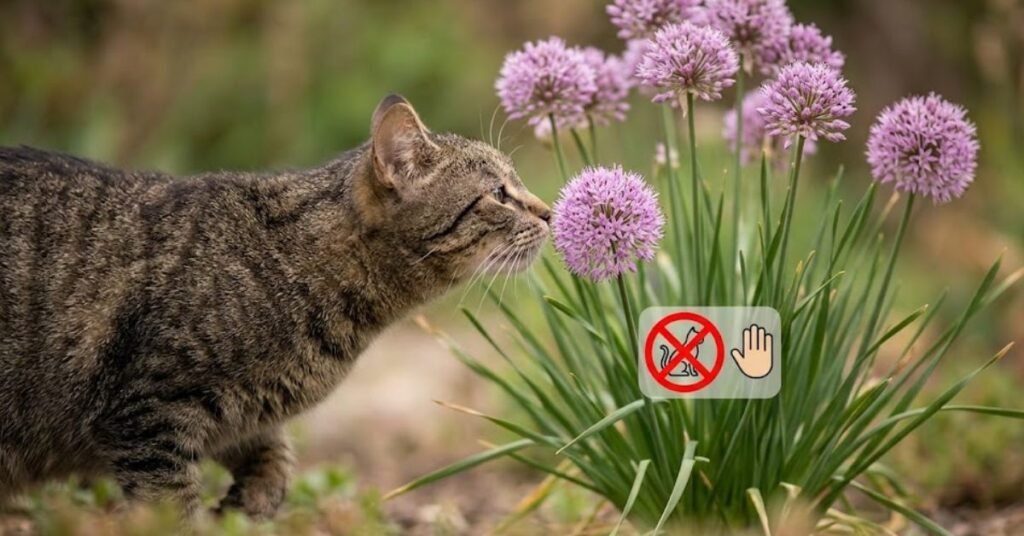
    This is an incredibly critical point for American pet owners: No, it is not safe. Because this plant belongs to the Allium genus, it contains specific compounds called disulfides and thiosulfates. If your dog or cat decides to chew on the onion-scented leaves or flowers, these toxins will damage their red blood cells, potentially causing a dangerous condition called hemolytic anemia.

    Signs of onion poisoning in pets include lethargy, pale gums, vomiting, and a racing heart rate. While the strong scent usually deters most animals from taking a bite, some curious puppies or indoor/outdoor cats might still nibble out of boredom.

    Personal Pro-Tip: If you have a dog that loves to dig or chew everything in sight, plant your alliums in the center of a wide garden bed surrounded by prickly companion plants like coneflowers. This creates a natural physical barrier that keeps your furry friends safe.

    Frequently Asked Questions About the Summer Beauty Allium Plant

    Q1. When is the best time of year to plant or divide the summer beauty allium plant?

    Spring or early fall are the absolute best times. Digging them up and splitting the clumps during the mild, cool days of autumn allows the roots to settle into the soil without having to battle the intense summer heat.

    Q2. Do I need to deadhead the spent globes after they finish blooming?

    You don’t have to. This specific variety is sterile, which means it won’t drop seeds and aggressively take over your entire garden. Deadheading is purely a personal stylistic choice. If you prefer a clean look, snip the stalks at the base; if you like winter texture, leave them alone.

    Q3. Why are the leaves on my summer beauty allium plant turning yellow early?

    Soggy soil is almost always the culprit. This plant needs to dry out between waterings. Double-check your garden beds to ensure water isn’t pooling around the root zone, and cut back on supplemental watering.

    Q4. Can I grow this ornamental onion in containers on my patio?

    Absolutely. They look fantastic in large terra cotta pots. Just ensure you use a lightweight potting soil and a container with substantial drainage holes so excess water can escape easily.

    Q5. How does this variety differ from the popular ‘Millenium’ allium?

    ‘Summer Beauty’ typically begins blooming a couple of weeks earlier than ‘Millenium’. It also grows slightly taller, features a slightly lighter, softer shade of lavender-pink, and has wider, glossier green leaves that hold their color incredibly well.

    Final Thoughts on Adding This Ornamental Onion to Your Landscape

    Adding the summer beauty allium plant to your yard is one of the easiest ways to guarantee dependable color and lush texture without tying yourself to a grueling maintenance routine. It steps up to the plate exactly when the rest of the garden starts to look tired and worn down by the August heat. Give it plenty of bright sunshine, keep its feet out of standing water, and it will reward you with gorgeous, pollinator-friendly blooms year after year.

    Personal Pro-Tip: Take a close look at the blooms on a sunny afternoon in July. You’ll see an absolute festival of native bumblebees and butterflies covering the globes. It’s one of the most rewarding sights for any backyard gardener.

  • The Practical Guide to Japa Plant Care: How to Keep Tropical Hibiscus Blooming Indoors and Out

    The Practical Guide to Japa Plant Care: How to Keep Tropical Hibiscus Blooming Indoors and Out

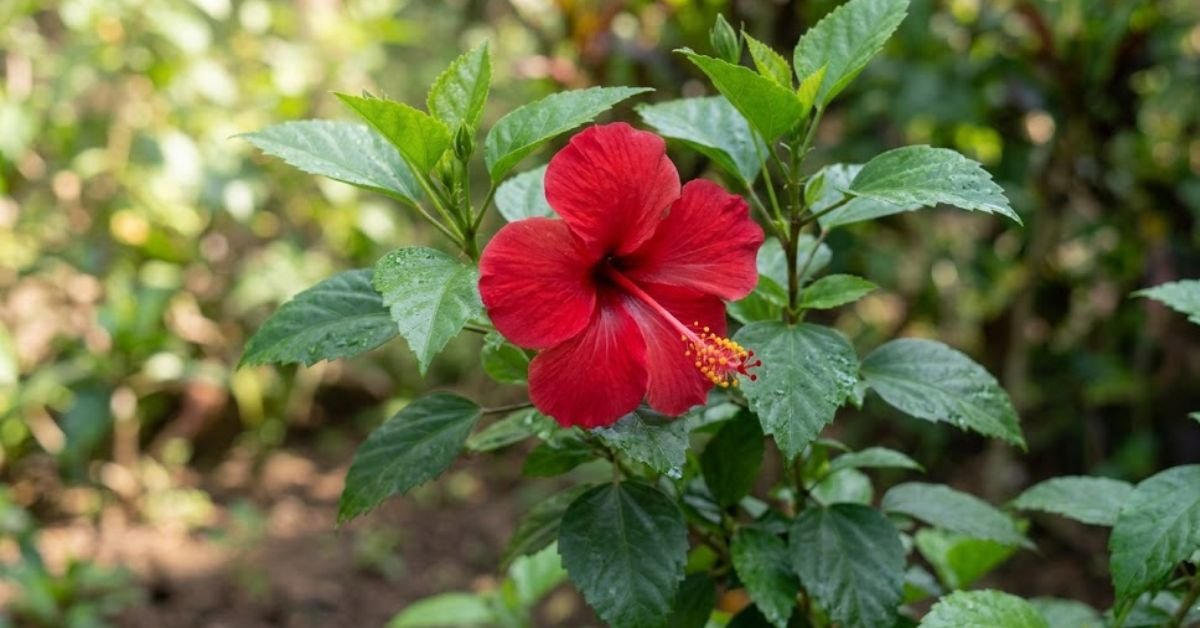
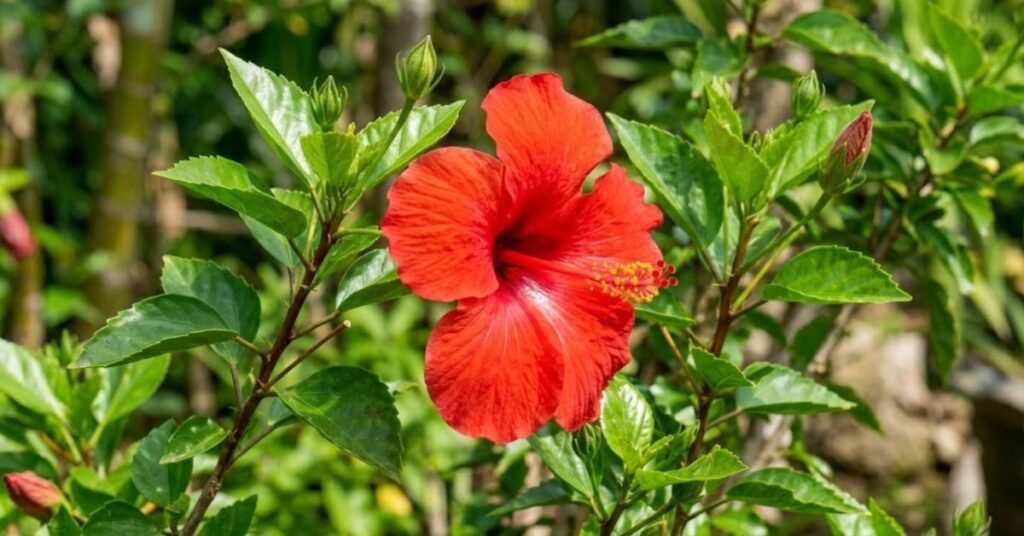
    If you want your backyard patio or living room to feel like a five-star Hawaiian resort, you need this plant. To most American gardeners, it is known as the tropical hibiscus or the Chinese rose. However, in ancient Ayurvedic and Sanskrit traditions, it is called the japa plant (Hibiscus rosa-sinensis). It is famous for its massive, dinner-plate-sized blossoms that instantly steal the spotlight.

    I still remember the first time I grew one in my greenhouse years ago. The sheer intensity of the fiery red petals stopped everyone in their tracks. It brings immediate drama to any space.

    Here is a quick-reference guide for anyone looking to master this tropical beauty without any guesswork.

    Care RequirementQuick Guidelines
    Common NamesJapa plant, Tropical Hibiscus, Chinese Rose, Gudhal
    LightDirect, full sun (minimum 6 hours daily)
    WateringKeep soil evenly damp; never allow it to sit in standing water
    USDA ZonesOutdoor perennial in Zones 9–11; bring indoors for Fall/Winter elsewhere
    Soil TypeLightweight, well-draining potting soil with a slightly acidic pH
    ToxicityGenerally non-toxic to cats and dogs (can cause minor stomach upset if eaten)

    What is a Japa Plant and Why Should You Grow One?

    What is a Japa Plant and Why Should You Grow One
    What is a Japa Plant and Why Should You Grow One

    The japa plant is a spectacular evergreen shrub that loves heat and rewards you with gorgeous, showy flowers throughout the warmer months. People across the globe love it not just for its looks, but also for its traditional uses in hair oils and herbal teas. It is a fast grower when given the right environment.

    Personal Pro-Tip: Do not freak out when individual flowers drop off after just 24 hours. A single blossom opens up for exactly one day before collapsing. That is completely normal! A happy, healthy specimen will continuously push out fresh buds all summer long.

    Where to Grow a Japa Plant: Light and USDA Zones

    Geography dictates how you should handle this shrub. If you live in a frosty northern climate, you cannot leave it outside year-round. It is a true tropical.

    If you reside in sunny Southern California, Florida, or the southern tip of Texas which fall into USDA Hardiness Zones 9 through 11 you can plant it straight into the ground. It will grow into a massive, gorgeous landscape shrub. For the rest of us living in the Midwest or Northeast, containers are mandatory.

    This plant needs a minimum of six hours of blasting, direct sunlight daily to build up the energy to create its iconic flowers. Indoors, your best bet is a bright, unobstructed south facing window.

    Personal Pro-Tip: When you inevitably move your container indoors for the winter, expect a major tantrum. It will likely drop a large portion of its leaves. I used to panic when this happened, but it is just the plant adapting to lower light levels. Don’t overreact; just reduce your watering and let it rest.

    How to Water a Japa Plant Without Rotting the Roots

    Watering this beauty is a fine balancing act. During the absolute peak of a hot American summer, a large container-grown specimen drinks like a marathon runner. You might find yourself watering it every single morning.

    Run water from your kitchen faucet or garden hose until it streams freely out of the bottom drainage holes. But here is the critical catch: it despises swampy, waterlogged dirt. If the root system sits in a stagnant puddle inside a decorative saucer, the roots will quickly suffocate, rot, and die.

    Personal Pro-Tip: Always do the finger test before picking up your watering can. Shove your index finger two inches deep into the potting soil. If it feels wet or sticky, step away. If it feels dry and dusty, give it a deep, satisfying drink.

    The Best Potting Soil Mixture for a Container Japa Plant

    Never dig up regular dirt from your backyard to put into a container. It packs down way too tightly, trapping moisture and choking out oxygen.

    Instead, buy a premium, lightweight potting soil from your local garden center. Look for a mix that includes ingredients like peat moss and perlite. The peat moss provides the slight acidity that this shrub loves, while the perlite ensures excellent drainage.

    Personal Pro-Tip: Choose an unglazed terra cotta or clay pot instead of plastic. Terra cotta is porous, which means it allows the soil to breathe from the sides. This helps dry out the soil evenly and protects you from the dangers of accidental overwatering.

    Common Mistakes Americans Make with the Japa Plant

    Common Mistakes Americans Make with the Japa Plant
    Common Mistakes Americans Make with the Japa Plant

    I see indoor gardeners fail with this plant all the time. Usually, it comes down to two specific household factors.

    Blasting Your Greens with Dry Air Conditioning Vents

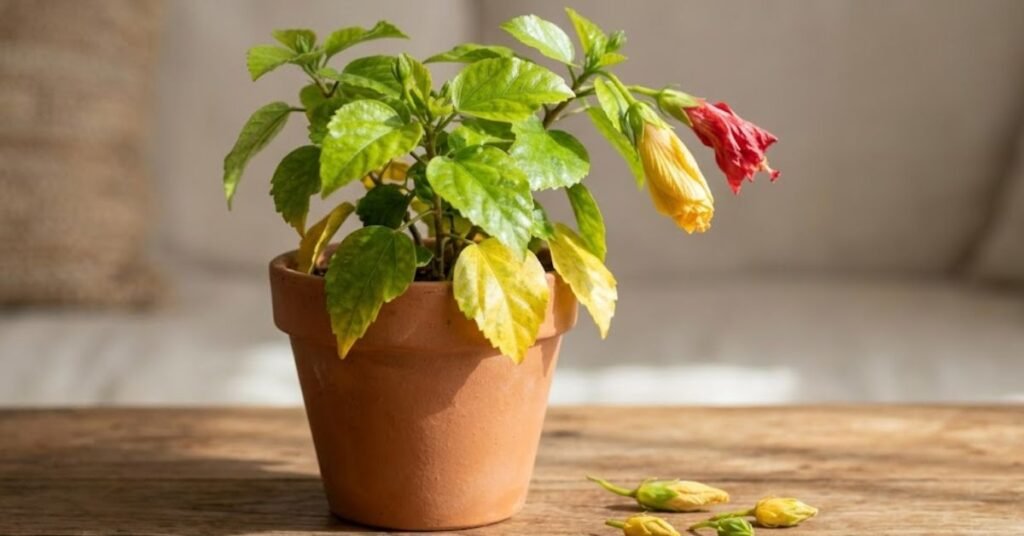
    In the US, we love cranking up our central air conditioning during July and August. Your tropical greens absolutely hate it. If you place your indoor pot directly beneath or next to an AC vent, the continuous draft of freezing, dry air will cause the developing flower buds to turn yellow and drop off before they ever get the chance to open.

    Forgetting to Move an Outdoor Japa Plant Indoors for Fall

    Autumn has a habit of sneaking up on us. A sudden, surprise overnight frost can turn a stunning, vibrant green shrub into a pile of black mush in a matter of hours. Keep a close eye on your local weather app as summer winds down. When overnight lows consistently trend toward 50°F, carry that pot inside immediately.

    Personal Pro-Tip: If your indoor winter air is bone-dry from your home’s heating system, place the pot on a shallow tray filled with pebbles and water. As the water evaporates, it creates a pocket of humidity around the leaves. Just make sure the bottom of the pot isn’t resting directly in the water.

    Troubleshooting Your Japa Plant Issues

    Plants talk to us through their leaves. You just have to learn how to interpret the signals.

    Why Are My Japa Plant Leaves Turning Yellow?

    Widespread yellowing leaves especially the older ones near the base of the branches usually mean you are being way too generous with the watering can. Give the dirt time to dry out. However, if the leaves look yellow but the veins remain dark green, your plant is suffering from chlorosis. This means it lacks nutrients and needs a dose of balanced fertilizer with micronutrients.

    What Causes Crunchy Brown Tips on a Japa Plant?

    This is a classic cry for humidity or a sign of severe underwatering. If you miss a few watering cycles and the soil turns bone-dry, the edges of the foliage will crisp up like potato chips. Trim away the dead, crunchy edges and establish a more consistent watering schedule.

    Personal Pro-Tip: Keep an eye out for tiny, faint webbing on the undersides of the leaves. These are spider mites, and they love dry indoor air. Take the plant to your bathroom shower and wash the foliage down with lukewarm water, or wipe them out using an organic insecticidal soap.

    Toxicity Warning: Is It Safe for Cats and Dogs?

    Japa Plant Toxicity Warning Is It Safe for Cats and Dogs
    Japa Plant Toxicity Warning Is It Safe for Cats and Dogs

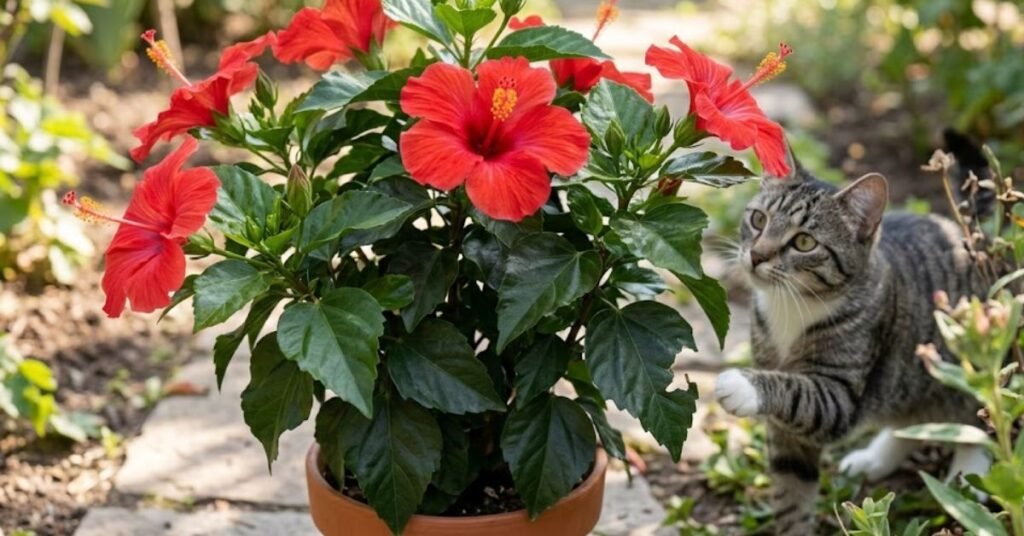
    Good news for pet owners. The ASPCA officially lists Hibiscus rosa-sinensis as non-toxic to dogs, cats, and horses. You can breathe a sigh of relief if your curious cat takes a playful swipe at a fallen bloom.

    With that said, no plant material is truly part of a carnivore’s natural diet. If your dog decides to eat half the bush, they will likely end up with a mild stomach ache, nausea, or a messy cleanup on your living room rug.

    Personal Pro-Tip: Keep the pot elevated on a heavy plant stand if you have pets that love to chew. It keeps your animals safe from an upset belly, and more importantly, it protects your hard work from being torn to shreds.

    Frequently Asked Questions

    Q1. How do I get my japa plant to produce more flowers?

    Sunlight is the main secret. If your shrub isn’t blooming, it almost always means it needs a brighter location. Additionally, feed it a fertilizer that is high in potassium but low in phosphorus during the spring and summer months to boost bud production.

    Q2. Can I use water straight from my home faucet?

    Yes, standard tap water from the faucet is fine. However, if your local city water is heavily chlorinated, let the water sit out in an open pitcher for 24 hours before using it so the chemicals can dissipate.

    Q3. Why are the flower buds falling off before they even open?

    Bud drop is a classic reaction to environmental shock. Check for hidden pests like thrips, ensure the soil isn’t swinging between bone-dry and waterlogged, and verify that the plant isn’t sitting in front of a freezing AC vent.

    Q4. How large does a japa plant actually get?

    Outdoors in places like Florida, they can easily reach 8 to 10 feet tall. When restricted to an indoor living room container, you can easily keep them pruned to a very manageable 3 to 4 feet.

    Q5. When is the best time of year to prune my shrub?

    Prune it in the early spring just as the plant wakes up from its winter resting phase. This encourages heavy branching. Because flowers only form on fresh, new wood, smart spring pruning leads to an explosion of blooms later in the season.

    Q6. Do I need to deadhead the old, wilted flowers?

    Yes. Plucking off the faded, spent flowers keeps the plant looking neat and tidy. It also stops the plant from expelling its energy trying to create unnecessary seed pods.

    Q7. Why does my plant look wilted even though the potting soil is soaking wet?

    This is a major warning sign of root rot. When soil stays waterlogged for too long, the roots drown and die. Because the dead roots can no longer pull up moisture, the top of the plant wilts from dehydration. Stop watering immediately, check the roots for mushiness, and repot into fresh, dry soil if necessary.

    Final Thoughts on Growing This Gorgeous Shrub

    Caring for a japa plant doesn’t require a master’s degree in botany. Give it a massive dose of sunshine, keep the soil evenly moist, and protect it from freezing winter weather and harsh indoor AC drafts. Do those simple things right, and you will enjoy a stunning, colorful piece of the tropics right inside your own home.

    Personal Pro-Tip: Take plenty of pictures when your first big bloom opens up! The vivid colors are incredibly rewarding, and tracking your plant’s progress season after season is the absolute best part of being a plant parent.

  • The Ultimate Guide to Styling a Rectangle Planter for Your Patio or Living Room

    The Ultimate Guide to Styling a Rectangle Planter for Your Patio or Living Room

    Choosing a rectangle planter represents one of the easiest ways to instantly elevate your outdoor patio or indoor living space. Specifically, these sleek, elongated containers provide a clean architectural line that standard round pots simply cannot replicate.

    However, many homeowners struggle to properly arrange their flowers or maintain adequate soil moisture in these elongated troughs. Don’t worry, though. Once you understand the basic setup rules, it is an incredibly rewarding container to style. Let’s look at exactly how to make your greenery flourish.

    Quick Care Table for Rectangular Containers

    Care AspectIdeal RequirementUS Home Environment Consideration
    SunlightDependent on plant choice (Match all plants in the box to the same light level)Rotate the box 180 degrees every two weeks so back plants don’t starve.
    WateringSoak thoroughly until water runs out the bottom; let the top 2 inches dry out.Blast the soil less during humid summer months; water more when winter heating kicks on.
    Soil TypePremium, lightweight indoor/outdoor potting soil (never backyard dirt).Mix in extra perlite to keep the middle section from staying swampy.
    DrainageCritical. At least 2 to 3 holes spaced evenly along the base.Use a tray indoors to save your hardwood floors from stains.
    TemperatureKeep between 60°F and 85°F for most standard setups.Keep the box completely clear of direct blasting from vents or air conditioning units.

    Why You Need a Rectangle Planter in Your US Home

    Why You Need a Rectangle Planter in Your US Home
    Why You Need a Rectangle Planter in Your US Home

    I love using these containers because they solve architectural problems that round pots just can’t touch. They act as natural room dividers.

    Personal Pro-Tip: If you live in an apartment or a modern open-concept home, placing a 36-inch trough planted with tall snake plants right behind your couch instantly creates a gorgeous, distinct entryway zone.

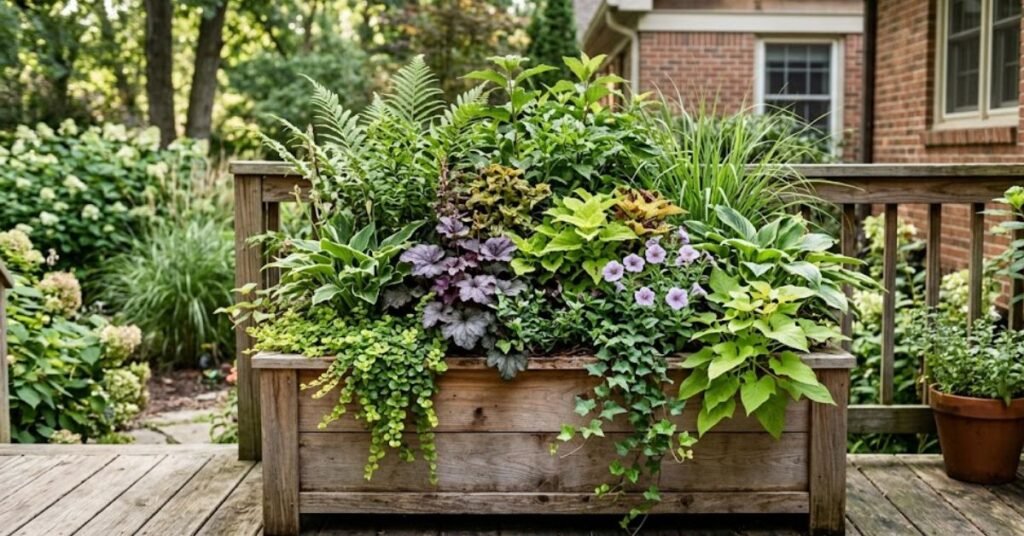
    When you pack plants into a linear space, they behave differently. The roots have room to spread out horizontally rather than just down. I’ve found that grouping compatible species together in a single long box actually creates a tiny, resilient microclimate. They trap humidity around each other’s leaves, which helps them stay green even when your air conditioning runs all day during a blistering July heatwave.

    Choosing the Right Soil Mix for Your Rectangular Container

    Please don’t just scoop dirt from your backyard. I see folks do this all the time in Zone 7 where the heavy clay just suffocates the roots within a month.

    Containers need oxygen. You must use a dedicated, high-quality potting soil.

    Because a rectangle planter holds a larger volume of soil in a concentrated block, the center can easily become a stagnant, muddy mess if the mix is too heavy. I always buy a standard peat or coco-coir based potting mix and manually toss in a few handfuls of coarse perlite or orchid bark before planting. This ensures that when you pour water from the faucet, it moves freely through the entire length of the box instead of pooling in the middle.

    [Correct Soil Structure for Long Planters]

    Top: 1 inch of mulch or space for watering

    Middle: Premium potting soil + Perlite mix (High aeration)

    Bottom: Drainage holes + Fine mesh screen to prevent soil loss

    Personal Pro-Tip: Before putting any soil into your long box, lay down a single layer of paper towels or a strip of drywall mesh over the drainage holes. It lets water escape freely while keeping your soil from washing out onto your patio bricks or indoor rugs.

    How to Plant a Stunning Arrangement in a Rectangle Planter

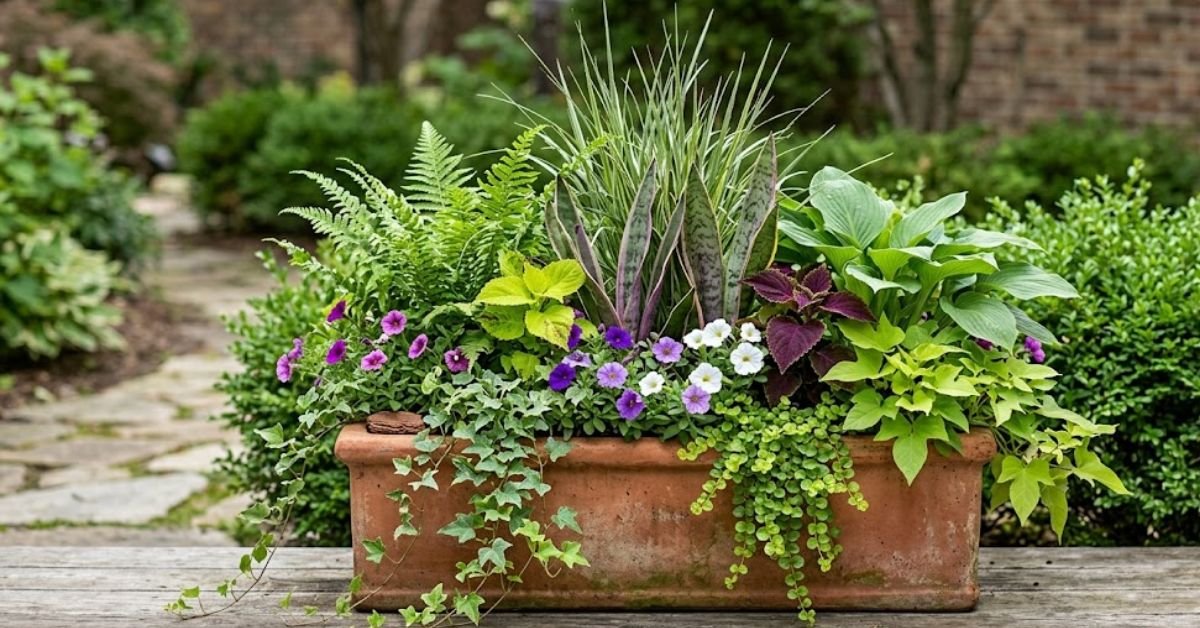
    Designers love the “Thriller, Filler, Spiller” method, and it works beautifully in a linear setup.

    First, place your tall focal points (the Thrillers) toward the back or center. Think structural options like Sansevieria or feather reed grass if you are outdoors in a milder climate. Next, surround them with your bushier mid-sized options (the Fillers). Finally, tuck trailing plants like Pothos or English Ivy near the front rim so they can cascade over the edge (the Spillers).

      [ Thriller ]     [ Thriller ]

    [Filler]  [Filler]  [Filler]  [Filler]

      [Spiller]           [Spiller]

    Keep your spacing realistic. It is incredibly tempting to jam twelve individual 4-inch pots into a single 24-inch rectangle planter to make it look full on day one. Don’t do it. Give each plant a few inches of breathing room. They will fill out the space by the end of Spring, and you won’t have to rip them apart next year because their roots choked each other out.

    Personal Pro-Tip: Always match your plants’ hydration personalities. Never mix a thirsty fern with a desert succulent in the same long box. One of them will end up miserable.

    Common Mistakes People Make with a Rectangle Planter

    Common Mistakes People Make with a Rectangle Planter
    Common Mistakes People Make with a Rectangle Planter

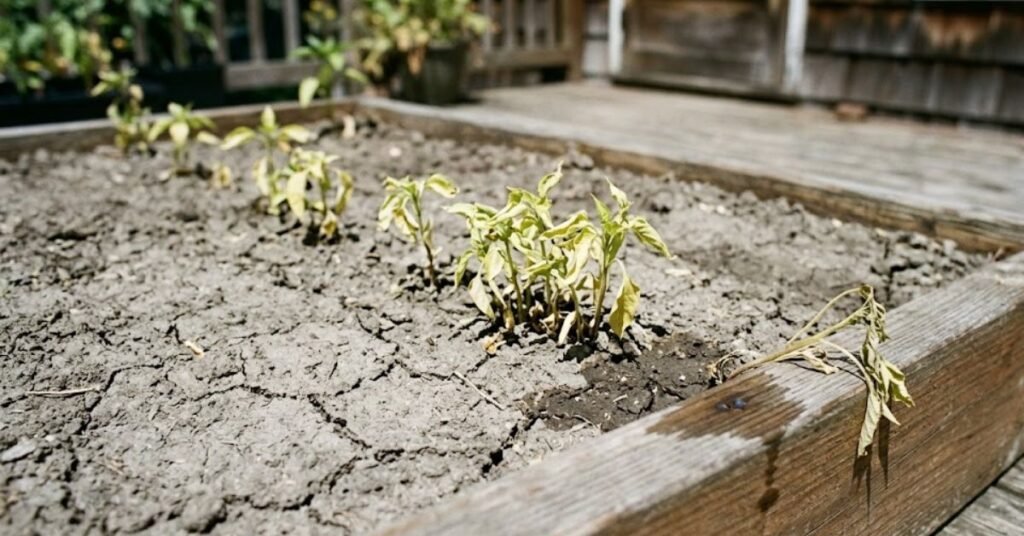
    The absolute number one reason people fail with a long planter box is uneven watering.

    When people use a watering can, they tend to dump all the water right into the center of the box, leaving the far left and right edges completely bone dry. Over time, the plants on the flanks slowly wither away while the centerpiece rots from overwatering.

    Another major issue for indoor growers is placement relative to windows and home climate control. If you place a long box parallel to a window, the side facing the glass gets blasted with sun while the backside stays in deep shadow.

    And watch those vents! If half of your long planter sits directly under an air conditioning vent, that specific section will drop leaves rapidly due to the constant, icy draft.

    Personal Pro-Tip: When watering a long container, treat it like painting a line. Start at one far end and walk the stream slowly across the entire surface twice.

    Troubleshooting Issues with Your Rectangular Planter Box

    Are things looking a bit sad? Let’s fix it fast.

    Yellowing Leaves at the Base

    If leaves throughout the planter are turning pale yellow and dropping, the middle of your soil mass is likely waterlogged. Feel the bottom drainage holes. If they feel muddy, hold off on watering until the top half of the container feels totally dry.

    Crispy, Brown Leaf Tips

    This is a classic sign of low humidity or chemical sensitivity from city tap water. If you notice this happening mostly during the winter when your home heater is running, mist the plants occasionally or set up a small humidifier nearby.

    Stunted Growth on One Side

    If one half of your arrangement is exploding with growth while the other side looks stunted, your light source is uneven. Give the entire container a half-turn every couple of weeks to distribute the sunshine evenly.

    Personal Pro-Tip: Keep a pair of clean pruning shears handy. Snip off any yellow or dead leaves immediately so the plants don’t waste precious energy trying to save dying foliage.

    Is a Rectangle Planter Setup Safe for Pets?

    Is a Rectangle Planter Setup Safe for Pets
    Is a Rectangle Planter Setup Safe for Pets

    As a pet owner myself, this is the very first thing I look at. Because these boxes often sit low on the floor or on low windowsills, they are prime targets for curious cats and dogs.

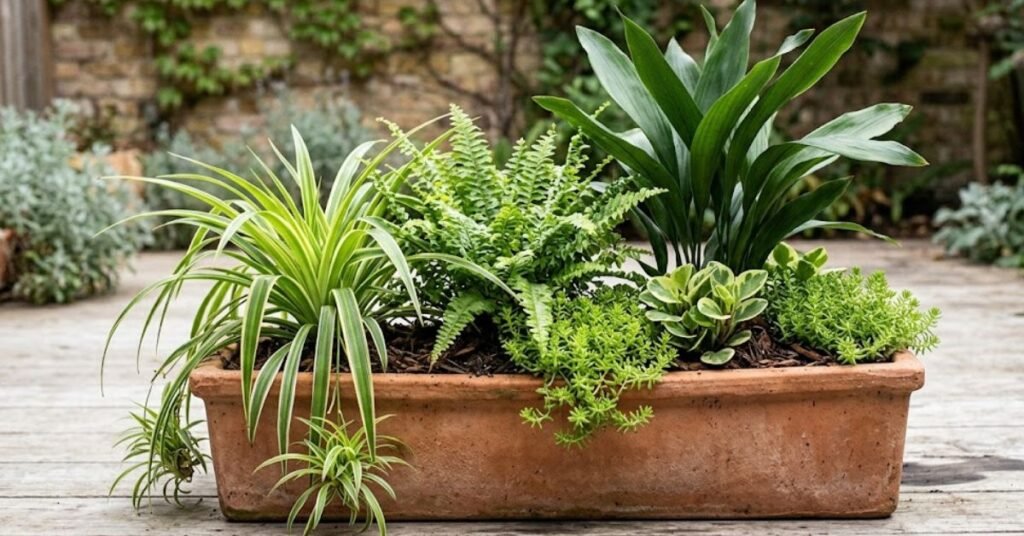
    If you want a gorgeous, completely pet-safe arrangement, skip the toxic options like peace lilies or English ivy. Instead, build your layout using a mix of Cast Iron Plants (for height), Boston Ferns (for fullness), and Spider Plants (to trail over the edge). All of these are completely non-toxic according to the ASPCA, giving you total peace of mind if your dog decides to take a sniff.

    Personal Pro-Tip: If your cat thinks your new long planter is an excellent alternative litter box or a personal salad bar, push a few decorative pinecones or wooden skewers into the open soil spaces. It safely deters them from stepping inside.

    Frequently Asked Questions About Rectangle Planters

    Q1Do rectangle planters absolutely need drainage holes?

    Yes. Without holes, water pools at the very bottom, rots the roots, and turns the soil sour. If you find a gorgeous box without holes, use it as a “cachepot”—keep your plants in plastic pots with drainage, and sit those plastic pots inside the decorative outer box.

    Q2How do I prevent a long wooden or plastic planter from bowing outward in the middle?

    The sheer weight of wet soil exerts massive outward pressure. Look for premium boxes that feature internal cross-braces or heavy-duty rolled lips. If you are building your own out of wood, always screw a support block right across the inside center.

    Q3What can I plant in a very skinny rectangle planter for a narrow windowsill?

    Stick to shallow-rooted beauties. Small succulents, echeverias, or a kitchen herb collection of thyme, oregano, and chives will do incredibly well without needing massive amounts of deep soil space.

    Q4How many individual plants can I comfortably fit in a standard 24-inch box?

    As a general rule, you can comfortably fit about 4 to 5 standard 4-inch nursery plants. This gives them enough immediate presence without crowding out their root zones too quickly.

    Q5Can I leave a resin or plastic rectangle planter outside during freezing winter months?

    It depends entirely on the material quality. Cheap plastic will turn brittle and snap when the temperature drops below freezing. Look specifically for frost-resistant resin or thick, UV-inhibited plastics if you live in northern USDA Zones where winters get severe.

    Q6Why does the soil in my long container dry out so much faster than my round pots?

    Long, shallow containers have a massive amount of surface area exposed to the air relative to their total volume of soil. This high evaporation rate means you will generally need to check them for water a bit more frequently than deep, round pots.

    Q7How do I stop dirt from leaking out of the bottom holes and ruining my deck?

    Line the inside base with a strip of fine landscape fabric, a coffee filter, or even a piece of old window screen before you add your soil. The water will flow out completely clear.

    Final Thoughts on Mastering the Look

    Creating a beautiful display in a long arrangement takes a tiny bit of planning, but the visual payoff is absolutely worth it. Just keep your soil light, watch your watering pattern from end to end, and make sure every plant sharing the box loves the same amount of sunlight. Once you get the balance right, your linear green wall will look incredible for years to come.