Day: June 8, 2026

  • The Honest American’s Guide on How to Plant Tulip Bulbs

    The Honest American’s Guide on How to Plant Tulip Bulbs

    If you are wondering exactly how to plant tulip bulbs this season, you’ve come to the right place. I’ve spent the better part of my life covered in dirt. Seriously. As a horticulturist working across various USDA Hardiness Zones, I’ve seen it all, and getting this specific Fall task right is my most frequently asked question around October.

    People want that magical Spring display they see in magazines. But then they treat the bulbs like regular seeds, toss them in the dirt, and wonder why nothing comes up. The truth is, getting those bright cups of color to pop up in your yard isn’t complicated. You just need to understand what the bulb actually wants. Let’s look at exactly what you need to do.

    Quick Care Table: How to Plant Tulip Bulbs at a Glance

    • When to Plant: Fall (usually September through November). Wait until the soil cools down.
    • USDA Zones: Zones 3-7 are perfect for direct planting. If you live in warmer Zones 8-10, you’ll need to pre-chill them in your fridge for 10-14 weeks.
    • Planting Depth: 6 to 8 inches deep. A good rule of thumb is three times the height of the bulb.
    • Sunlight: Full sun to partial shade.
    • Watering: Give them one deep soak straight from the faucet right after planting. Then ignore them until Spring.

    Personal Pro-Tip: Always give your bulbs a gentle squeeze before buying or planting. If they feel mushy or suspiciously light, throw them out. You want them to feel heavy and firm, kind of like a fresh garlic clove.

    My Proven Method for How to Plant Tulip Bulbs Outdoors

    My Proven Method for How to Plant Tulip Bulbs Outdoors
    My Proven Method for How to Plant Tulip Bulbs Outdoors

    In my years of growing these flowers, I’ve found that the biggest secret is timing and soil prep. You can’t just shove them into rock-hard clay and hope for the best.

    When to Put Your Spring Bulbs in the Ground

    Wait for the first real frost. The soil needs to be around 60°F or colder. If you plant them while it’s still warm, they might get confused, shoot up a sprout early, and then die when winter actually hits.

    Digging the Hole and Prepping the Soil

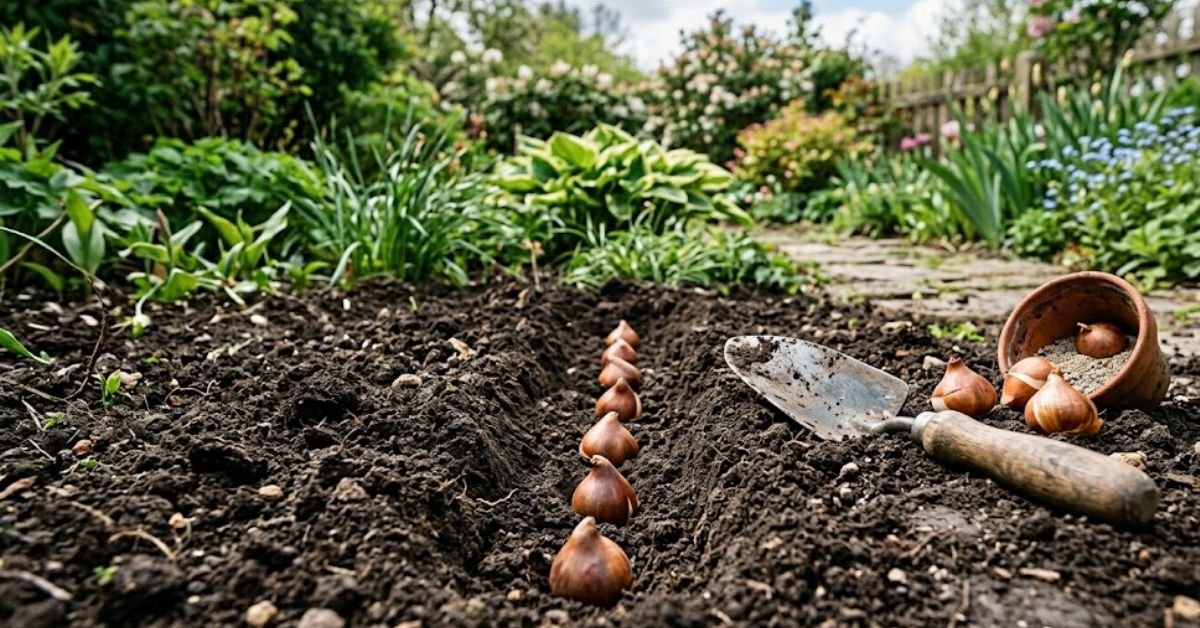
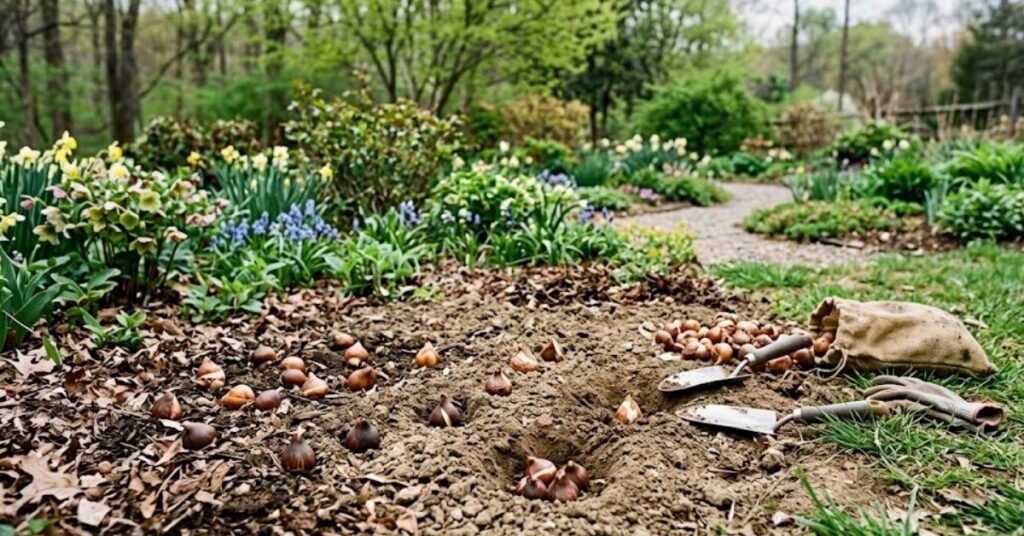
    Pick a spot that gets plenty of sunlight and doesn’t hold standing water. Puddles will rot your bulbs fast. Dig a hole about 6 to 8 inches deep. Drop the bulb in with the pointy side facing up. Flat side down. If your yard is heavy clay, mix in some sand or gravel to help the water drain away.

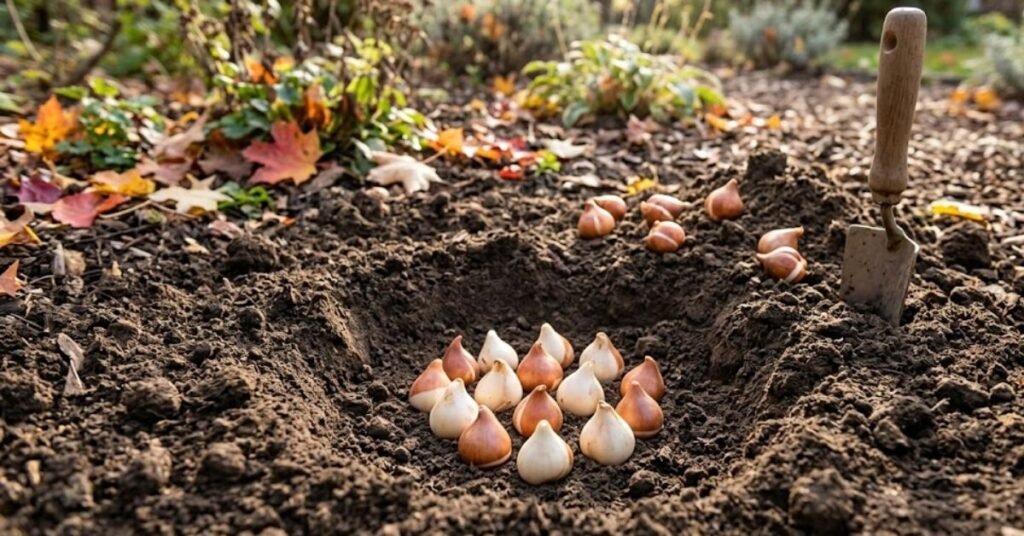
    Personal Pro-Tip: I never plant bulbs in single file lines. It ends up looking like a military parade. Instead, I dig a wide, shallow trench, toss about 10 to 15 bulbs in a loose cluster, and bury them together. It looks incredibly natural when they bloom.

    Growing Tulips Indoors: Beating the Winter Blues

    Yes, you can absolutely force these to grow inside your house. Learning how to plant tulip bulbs indoors is a lifesaver when February hits and you are desperately tired of the gray weather.

    Grab a pot with drainage holes. Do not use dirt from your yard. Grab a bag of high-quality potting soil. Fill the pot about halfway, arrange your bulbs closely together (they can almost touch), and cover them up so the very tips are just barely exposed.

    Here is the catch. They still need winter. You have to simulate a freeze by putting the pot in a cold, dark garage or a spare refrigerator (keep them away from apples, the gas ruins them) for about 12 weeks. Once you see a couple of inches of green growth, bring the pot out into a sunny room. Just keep them away from your AC vents or forced-air heating registers. That dry indoor air will crisp up the leaves in a matter of days.

    Personal Pro-Tip: When I bring my forced pots out of the cold, I start them in a slightly cooler room for a few days before moving them to a bright, warm window. The shock of going straight from 35°F to a 72°F living room can sometimes stunt the flowers.

    Common Mistakes Americans Make When Planting Tulip Bulbs

    Common Mistakes Americans Make When Planting Tulip Bulbs
    Common Mistakes Americans Make When Planting Tulip Bulbs

    We love to overdo it here in the US. More water, more fertilizer, more everything. That usually kills the plant.

    • Planting Too Shallow: If you only go 3 inches down, the winter freeze-thaw cycle will literally heave the bulb right out of the soil. The local squirrels will thank you for the free lunch.
    • Drowning Them: You only need to water them once when you plant them in the Fall. Unless you are having a freak, months-long winter drought, the natural rain and snow is enough.
    • Cutting the Leaves Too Early: This breaks my heart every year. After the flower dies in the Spring, the leaves look messy and yellow. People grab their shears and cut the leaves off to make the yard look neat. Stop! The plant is using those ugly leaves to soak up sunlight and store energy for next year’s flower. Leave the foliage alone until it turns completely brown and pulls away with zero resistance.

    Personal Pro-Tip: Squirrels and chipmunks treat my garden like a buffet. If you have pest problems, lay a piece of chicken wire flat over the soil after you plant your bulbs, then cover it with mulch. The shoots will grow right through the holes, but the rodents can’t dig down.

    Troubleshooting Guide: Fixing Sickly Tulips

    Sometimes things go wrong. It happens to the best of us.

    • Leaves Turning Yellow Too Early? If the flower hasn’t even bloomed yet and the leaves are yellowing, your soil is holding too much water. The bulb is drowning. Back off the watering immediately. If they are in a pot, check the drainage holes.
    • Brown, Crispy Tips? Usually a sign of dry, harsh winds outside, or sitting too close to a blasting AC vent inside.
    • No Flowers at All (Just Leaves)? This is called being “blind.” It usually means the bulb didn’t get enough chilling hours during the winter, or the bulb was too small and weak to produce a flower. It can also happen if they were planted in deep shade.

    Personal Pro-Tip: If you have a pot of indoor tulips that look droopy, check the soil moisture. I use the finger test. Jam your index finger an inch into the potting soil. If it’s completely dry, give them a drink from the faucet.

    Toxicity Warning: Keep Pets Away from Unplanted Bulbs

    Toxicity Warning Keep Pets Away from Unplanted Bulbs
    Toxicity Warning Keep Pets Away from Unplanted Bulbs

    This is incredibly important for US households, as so many of us have pets running around the yard.

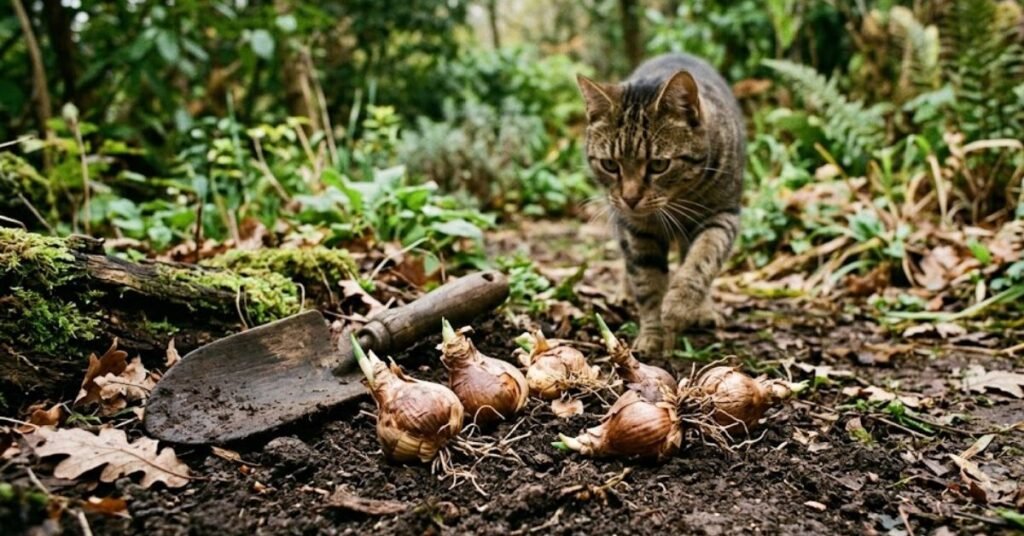
    Tulips are highly toxic to dogs, cats, and horses. The highest concentration of the toxin is actually in the bulb itself, not just the petals. If your Golden Retriever digs up a freshly planted bulb and chews on it, you are looking at heavy drooling, vomiting, and a very expensive emergency vet bill. Keep your pets away while you are planting.

    Personal Pro-Tip: I keep my bags of unplanted bulbs on a high shelf in the garage. Dogs are surprisingly attracted to the smell of them, so never leave an open bag sitting on the patio chair while you take a break.

    FAQs on How to Plant Tulip Bulbs

    Q1: Do I soak the bulbs in water before planting? No. Absolutely not. Soaking them will encourage rot. Put them in the ground dry.

    Q2: What happens if I plant them upside down? They will usually figure it out and grow around the bulb toward the surface, but it drains their energy. The flower will likely be smaller or delayed. Just look for the pointy end—that goes up.

    Q3: How late in the Fall can I put them in the ground? As long as you can stick your shovel in the dirt. If the ground is solidly frozen, you missed your window. I’ve planted them in late December during mild winters and they did perfectly fine.

    Q4: Do deer eat them? Yes. Deer view them as candy. If you have heavy deer pressure, you might want to look into planting Daffodils instead (deer hate Daffodils).

    Q5: Can I use regular yard dirt in my indoor pots? Please don’t. Yard dirt compacts inside a pot and turns into a brick. Always use a bagged potting soil mix for containers to ensure proper drainage and airflow.

    Q6: How often should I water them in the Spring? If you are getting standard Spring rain showers, you don’t need to water them at all. Only pull out the hose if it hasn’t rained in a few weeks and the soil is completely bone dry.

    Q7: Do they come back every year? Technically yes, but they rarely look as spectacular the second year. The Dutch breed them for one massive show. Many professional landscapers treat them as annuals, ripping them out and replanting fresh ones every Fall.

    Personal Pro-Tip: If you really want them to return year after year, look for varieties labeled as “Species” or “Darwin Hybrids.” These are the most reliable perennial performers in American gardens.

    Final Thoughts on Planting Spring Bulbs

    Getting your hands dirty in the chilly Fall air is a ritual. Figuring out how to plant tulip bulbs is less about perfect science and more about just mimicking nature. Give them good drainage, let them freeze through the winter, and don’t smother them with love and water. It requires a little bit of patience, but when those bright colors finally break through the soil in the Spring, you’ll be glad you put the work in.

    Personal Pro-Tip: I always buy 20% more than I think I need. A dense, packed planting always looks better than a sparse one, and you’re bound to lose one or two to rot or hungry critters anyway. Have fun out there!

  • The Ultimate No-Nonsense Guide on How to Plant Succulents and Keep Them Alive

    The Ultimate No-Nonsense Guide on How to Plant Succulents and Keep Them Alive

    Succulents are everywhere right now. They sit on Target desks, kitchen windowsills, and patio tables all across the country, but let’s be honest for a second: a lot of people struggle with how to plant succulents so they actually stay alive.

    I’ve spent over fifteen years working in greenhouses and homes across various USDA hardiness zones. In my years of handling these fleshy little plants, I’ve noticed that most folks accidentally kill them with kindness. Planting them isn’t hard, but you have to unlearn a few traditional gardening habits to get it right.

    Here is exactly how to plant succulents so they survive the transition into your home or garden.

    Quick Care Guide for Succulents

    Care FactorRequirements
    Light6+ hours of bright, direct sunlight daily
    Watering“Soak and dry” method (only when soil is bone dry)
    Best SoilGritty, fast-draining cactus and succulent mix
    ContainerTerracotta or ceramic with drainage holes
    TemperatureIdeal: 60°F – 80°F (Protect from frosty winters)

    Choosing Your Dirt and Container for Succulent Planting

    Choosing Your Dirt and Container for Succulent Planting
    Choosing Your Dirt and Container for Succulent Planting

    If you plant a succulent in regular garden soil or standard moisture-retaining potting soil, it will probably die. I can’t stress this enough. Succulents hate having wet feet.

    When you are figuring out how to plant succulents, your absolute best friend is drainage. I always opt for unglazed terracotta pots. Terracotta is porous, meaning it breathes and helps pull excess moisture out of the dirt. Whatever pot you pick, look underneath it. If there isn’t a drainage hole at the bottom, put it back or grab a drill.

    For the soil, head to your local garden center and buy a dedicated cactus and succulent potting soil.

    Personal Pro-Tip: Standard store-bought succulent mix is still a bit too heavy out of the bag for my liking. I always mix it 50/50 with perlite or coarse sand. This creates giant air pockets that let water flush straight through, mimicking their native rocky desert environments.

    Step-by-Step: How to Plant Succulents the Right Way

    Now for the actual process. Spring or early summer is the prime time for this because the plants are actively growing and adapt quickly to their new homes.

    [Bare Root Succulent] ➔ [Place in Empty Terracotta Pot] ➔ [Fill Around with Gritty Mix] ➔ [Wait 1 Week] ➔ [Water Deeply]

    First, gently remove the plant from its original plastic nursery pot. Squeeze the sides of the container to loosen the root ball. Don’t just yank it by the stem.

    Once it’s out, brush away the old, compacted nursery soil from the roots. We want those roots free and clear to touch our new, gritty soil mix. Inspect the roots while you are at it. Healthy roots look white or light brown; mushy black ones are a bad sign.

    Fill your new pot about halfway with your gritty potting soil. Center the plant, then gently fill in the gaps around the edges. Don’t bury the leaves—only the roots and the very base of the stem should be underground. Press the soil down gently with your fingers just to anchor the plant, but don’t pack it tight like brick mortar.

    Personal Pro-Tip: Do not water the plant immediately after potting it. This runs counter to everything we do with normal house plants, I know. Moving a plant causes micro-tears in the roots. If you pour water from the faucet onto torn roots right away, bacteria can enter and cause rot. Give it five to seven days to heal before its first deep drink.

    What Most Americans Get Wrong When Growing Succulents

    Choosing Your Dirt and Container for Succulent Planting (1)
    Choosing Your Dirt and Container for Succulent Planting

    We love our climate control, but our houses can actually be quite hostile to desert plants.

    The biggest silent killer in American homes is the air conditioning vent. I’ve visited countless clients who couldn’t figure out why their indoor plants were dropping leaves, only to find the container sitting directly in the path of a freezing AC draft. It shocks the plant. Keep them clear of vents.

    Another classic issue is the “ice cube watering” myth that circulates online. Giving your plant a tiny sip of water or a single ice cube every week ensures the roots at the bottom of the pot never actually get a drink, while keeping the top layer perpetually damp. It’s the worst of both worlds.

    Instead, soak the soil thoroughly under the kitchen faucet until water pours out of the bottom drainage hole, then leave it completely alone until the dirt is dry all the way through.

    Personal Pro-Tip: If your home stays cool and humid because of heavy AC use in the summer, your soil will take longer to dry out. Always poke your finger deep into the pot, or use a cheap wooden chopstick, to verify the soil is dry to the very bottom before watering again.

    Troubleshooting Common Succulent Planting Mistakes

    Plants talk to us through their leaves. You just need to know how to read them.

    Yellow, Mushy, or Translucent Leaves

    This is a classic sign of overwatering. The plant has taken in so much water that its cell walls are literally bursting. Stop watering immediately. If the stem is still firm, pull off the ruined leaves and let the whole setup dry out completely for a few weeks.

    Wrinkled, Puckered, or Crispy Leaves

    Your plant is thirsty. Succulents store water in their fleshy leaves for a rainy day. When they run dry, they start consuming their own reserves, causing the leaves to shrivel. Give it a deep, thorough soak. They usually plump right back up within 24 to 48 hours.

    Tall, Stretched, and Leggy Stems

    If your compact rosette starts looking like a weirdly tall vine with wide spaces between the leaves, it’s begging for sunlight. This is called etiolation. Move it closer to a south- or west-facing window where it can get real sun.

    Personal Pro-Tip: If your plant gets incredibly leggy, you can “behead” it. Cut the top rosette off with clean shears, let the cut end dry out and callous over for three days, then stick it right back into fresh soil. It will grow brand new roots!

    Safety First: A Note on Pet Toxicity

    Safety First A Note on Pet Toxicity
    Safety First A Note on Pet Toxicity

    Before you fill your home with greenery, you need to consider your furry housemates.

    Many common varieties like Echeveria, Sempervivum (Hens and Chicks), and Haworthia are entirely non-toxic to cats and dogs. They might get a mild stomach ache if they chew on them, but they aren’t poisonous.

    However, some very popular choices are highly toxic. The Jade plant (Crassula ovata), Aloe Vera, and Kalanchoe varieties can cause vomiting, lethargy, and heart rate issues if ingested by pets. Always verify the specific botanical name before putting a new plant within reach of a curious dog or cat.

    Personal Pro-Tip: If you absolutely love Jade plants but have a cat that likes to chew greenery, use hanging wall planters or high floating shelves to keep the toxic varieties completely out of the jump zone.

    Frequently Asked Questions

    Q1: How do I know if my succulent needs to be repotted?

    If you see roots growing wildly out of the bottom drainage hole, or if the plant has grown so wide that it completely blocks the top of the container making it impossible to water, it is time for a larger home.

    Q2: Can succulents survive outside during a northern winter?

    It depends entirely on the variety and your USDA Hardiness Zone. Most tropical options will die if the temperature drops below 40°F. However, cold-hardy varieties like Sempervivum can easily survive freezing winter snows outside in Zone 4 if planted in ground that drains beautifully.

    Q3: How much sunlight do indoor succulents actually need?

    They need a lot. Ideally, aim for six hours of bright light. A window facing south or west is usually your best bet in the United States. If your apartment only has dim, north-facing windows, you will likely need to buy a small LED grow light to keep them happy.

    Q4: Should I mist my succulents with a spray bottle?

    No, please don’t do this. Misting creates a humid environment right around the leaves, which can invite fungal diseases and rot. They want dry air and dry leaves, paired with occasional deep root watering.

    Q5: Can I plant multiple different succulents together in one pot?

    Yes, but make sure they share the same care requirements. Mix plants that all want full sun and minimal water together. Do not mix a shade-loving Haworthia in the same bowl as a sun-worshipping desert cactus, or one of them will suffer.

    Q6: Why are the lower leaves on my succulent drying up and falling off?

    If it’s just the very bottom leaves turning brown and crispy while the top of the plant looks vibrant and new, this is totally normal. It’s just the natural aging process as the plant grows upward. Simply gently pluck the dead leaves off and discard them.

    Q7: What is the best way to propagate a succulent?

    You can easily grow new ones from single leaves. Gently twist a healthy leaf off the stem, ensuring a clean break. Lay it flat on top of some dry soil out of direct sunlight. In a few weeks, tiny pink roots and a miniature baby plant will sprout from the base of the leaf.

    Final Thoughts

    Learning how to plant succulents successfully comes down to patience and restraint. Give them the right gritty dirt, a pot that drains, plenty of sunshine, and don’t fuss over them with constant watering. Once you get the hang of letting the soil dry out completely, you’ll find these resilient little desert plants are some of the easiest, most rewarding green companions you can keep in your home.