Day: June 4, 2026

  • How Often to Water a Spider Plant: A Complete Guide for US Homes

    How Often to Water a Spider Plant: A Complete Guide for US Homes

    When I first started growing houseplants in my drafty Midwest apartment years ago, I killed my fair share of green things. But the spider plant (Chlorophytum comosum) was the one that taught me how to actually read a plant’s signals. Figuring out how often to water a spider plant isn’t about following a strict calendar. It is about balancing your home’s unique environment, from dry winter radiators to blasting summer air conditioning.

    Here is the quick breakdown to keep your plant happy without overthinking it.

    Quick Care Reference Table

    Care FactorIdeal Condition for US Homes
    Watering FrequencyEvery 1 to 2 weeks (Let top 50% of soil dry out)
    Soil TypeWell-draining, standard American potting soil
    Light SetupBright, indirect sunlight (Avoid direct afternoon sun)
    US Hardiness ZonesZones 9–11 (Outdoors); Zones 1–8 (Indoors only)
    Temperature Range60°F to 75°F (Protect from cold drafts)

    Understanding How Often to Water a Spider Plant Indoors

    Understanding How Often to Water a Spider Plant Indoors
    Understanding How Often to Water a Spider Plant Indoors

    In my years of running a local greenhouse, the number one question I get from new plant parents is a simple one: “How often should I water my spider plant?” My answer is always the same: let the soil speak to you. Spider plants have thick, fleshy roots called rhizomes. Think of these roots like tiny underground water jugs. They store moisture for a rainy day or rather, a dry day. Because of this, these plants are incredibly forgiving if you forget a watering session.

    During the spring and summer active growing seasons, your plant works harder and drinks faster. You will likely find yourself watering every single week. But when winter rolls around and the days shorten, growth slows to a crawl. In most American households, central heating bone-dries the indoor air, but because the plant is resting, you might only need to water it once every two to three weeks.

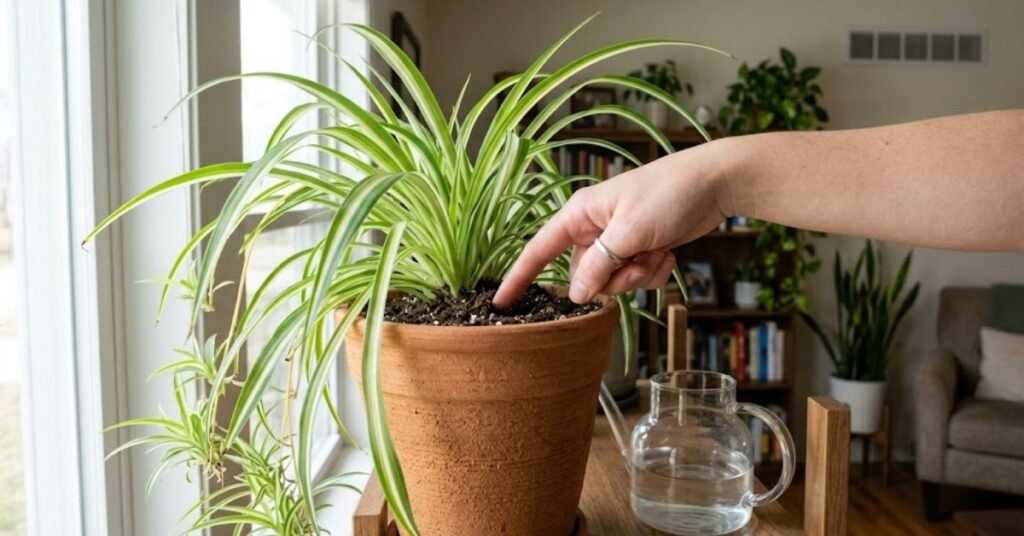
    Always check the soil first. Shove your pointer finger two inches deep into the potting soil. If it feels wet or damp, leave the faucet off. If it feels dry and dusty, it is time for a drink.

    Personal Pro-Tip: Don’t rely on cheap moisture meters; they often misread the chunky, thick roots of a spider plant. Trust your finger or the actual weight of the pot. A dry pot feels incredibly light when you pick it up.

    The Hidden Dangers: Common Mistakes with Spider Plant Watering

    Common Mistakes with Spider Plant Watering
    Common Mistakes with Spider Plant Watering

    Most Americans do not kill their spider plants with neglect. They kill them with too much love.

    Overwatering is the ultimate villain here. When you pour water into that pot every couple of days without letting it dry out, the soil turns into a swamp. Those thick, water-storing roots cannot breathe. They suffocate, turn to mush, and develop root rot.

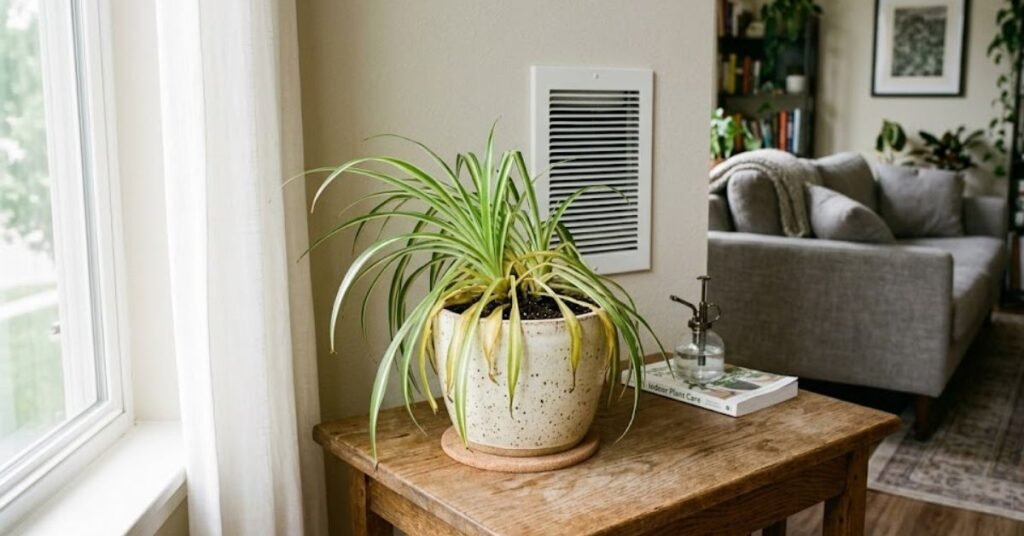
    Another massive issue unique to modern US homes is the placement of our heating and cooling systems. If you hang your basket directly underneath an air conditioning vent or right above a blasting winter radiator, the drafts will wreak havoc. Cold air from the AC mimics a sudden frost, slowing down water absorption and leaving the roots sitting in stagnant mud. Conversely, a heating vent bakes the leaves before the roots can pump up enough moisture.

    Personal Pro-Tip: Keep your plant at least four to five feet away from any direct HVAC vents. Consistent room temperatures make predicting your watering schedule infinitely easier.

    Troubleshooting: What Your Spider Plant is Trying to Tell You

    Your plant talks to you through its leaves. You just have to learn the language.

    Pale, Limp, or Drooping Leaves

    If the vibrant green stripes look washed out or gray, and the whole plant looks completely deflated, it is thirsty. I have noticed that a severely dehydrated spider plant loses its structural rigidity entirely.

    • The Fix: Take the pot to your kitchen sink and give it a deep, thorough soaking until water pours out of the bottom drainage holes.

    Crispy Brown Tips

    This is the most common complaint I hear. Brown tips can happen from low humidity, but in the US, it is usually caused by city tap water. Our municipal water lines are heavily treated with chlorine and industrial fluorides. Spider plants are highly sensitive to these chemicals, which accumulate in the leaf tips and burn them.

    • The Fix: Fill your watering can from the faucet 24 hours before you plan to water, leaving it out on the counter. This allows the chlorine to evaporate out. Alternatively, use captured rainwater or distilled water.

    Yellowing Leaves and Mushy Bases

    If the leaves near the center of the clump are turning yellow and feeling soft or slimy, you are dealing with a major overwatering issue.

    • The Fix: Stop watering immediately. Pull the plant out of its container and inspect the roots. Cut away any black or stinky mushy roots, repot the survivor into fresh, dry potting soil, and make sure your pot has functional drainage holes.

    Personal Pro-Tip: If you have to trim off ugly brown tips, cut them at an angle rather than straight across. This mimics the natural shape of the leaf blade so your plant still looks gorgeous.

    Is the Spider Plant Safe for Your Furry Friends?

    Is the Spider Plant Safe for Your Furry Friends
    Is the Spider Plant Safe for Your Furry Friends

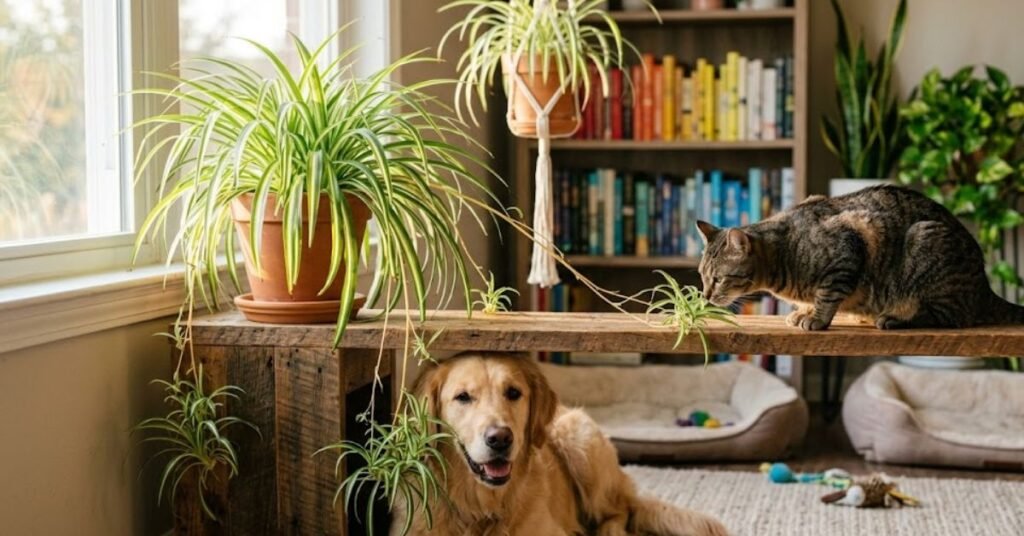
    If you share your home with mischievous pets, you are in luck. The ASPCA explicitly lists the spider plant as non-toxic to both dogs and cats.

    However, there is a weird behavioral quirk you need to know about: cats are absolutely obsessed with them. Spider plants contain mild chemical compounds that are structurally similar to opium, giving kitties a very mild hallucinogenic buzz. If your cat eats the leaves, they might get a mild stomach ache or vomit, not from poison, but simply from eating raw plant fiber.

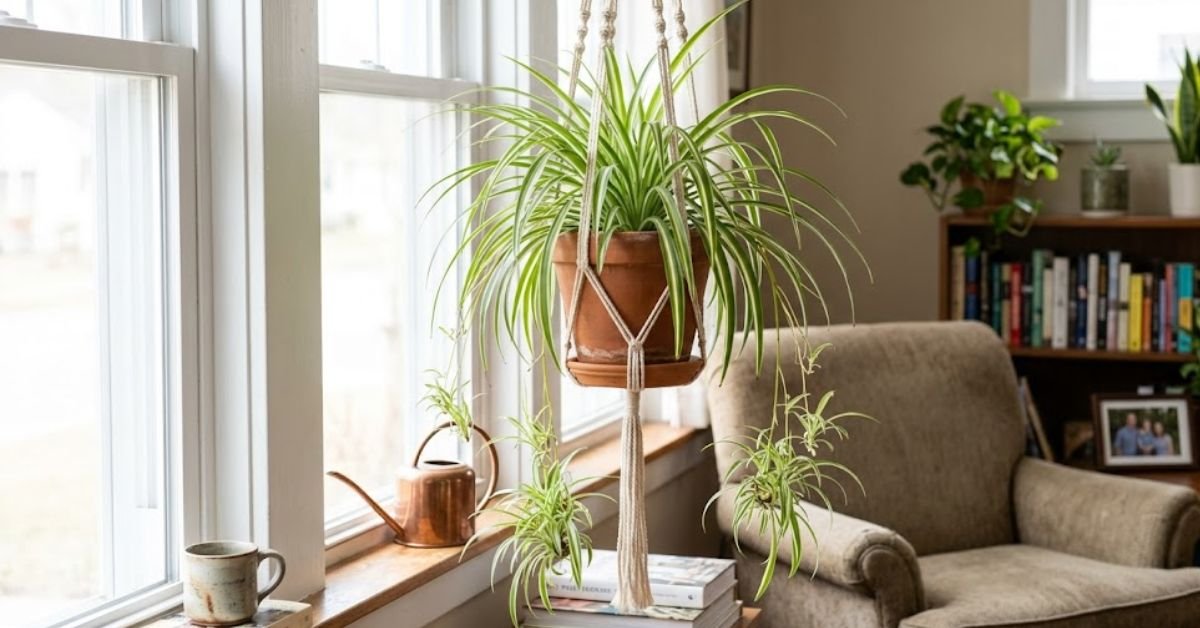
    Personal Pro-Tip: Hang your spider plants high up in ceiling hooks or place them on top of tall bookshelves. This protects your plant’s dangling “babies” from turning into a kitty salad bar.

    Frequently Asked Questions

    Q1: Can I water my spider plant with ice cubes?

    Absolutely not. These are tropical native plants. Sudden freezing temperatures shock the root system, causing tissue damage and immediate leaf drop. Stick to room-temperature water.

    Q2: Should I water the spider plant babies separately?

    Only if you want to propagate them. If the little plantlets are still attached to the main runner, they get all their moisture from the mother plant. If you cut them off and pot them in their own soil, keep that new soil consistently damp for the first few weeks until their new roots establish.

    Q3: Does the type of pot change how often to water a spider plant?

    Yes, dramatically. Terracotta and unglazed clay pots are porous; they pull moisture out of the soil and let it evaporate, requiring more frequent watering. Plastic and ceramic pots hold onto water much longer, meaning you need to wait longer between waterings.

    Q4: My soil is so dry that the water just runs right down the inside of the pot without soaking in. What do I do?

    Your potting soil has become hydrophobic. When peat-based soils dry out completely, they shrink and repel water. Use a method called bottom watering. Submerge the bottom half of the pot in a basin of water for 20 minutes until the soil drinks its fill from the bottom up.

    Q5: Should I mist my spider plant leaves?

    Misting only raises humidity for a few fleeting minutes and can invite fungal spots if air circulation is poor. If your American home gets incredibly dry during the winter, running a small humidifier nearby is a much better solution.

    Q6: How do I know if I need to repot my plant due to watering issues?

    If you find yourself needing to water your spider plant every two or three days because the soil dries out instantly, the plant is likely root-bound. There is simply more root mass than soil left to hold moisture. Move up to a pot that is two inches wider.

    Q7: Can a spider plant grow entirely in water without soil?

    They can survive in water jars for quite a while, but they won’t grow to their full potential or produce many babies. If you choose to keep one in water permanently, change the water weekly to keep oxygen levels up and prevent foul odors.

    Final Thoughts

    Learning the ropes with this houseplant is mostly a lesson in restraint. Neglect is a form of kindness here. Pay attention to your indoor climate, watch out for the drying effects of your home’s vents, and always let that soil dry out a bit before reaching for the watering can. Once you find that rhythm, your plant will reward you with long, beautiful arching green leaves and plenty of new babies to share with your neighbors.

  • The Ultimate Guide on How to Grow Broccoli in Pots Like a Pro

    The Ultimate Guide on How to Grow Broccoli in Pots Like a Pro

    If you want homegrown, crunchy veggies but lack a huge backyard, learning how to grow broccoli in pots is your ticket to success. Honestly, knowing how to grow broccoli in pots completely changes the game because brassicas can be incredibly finicky in traditional garden beds. Pests find them instantly, and soil-borne issues linger in the dirt for years.

    Once you master how to grow broccoli in pots on your patio or deck, you suddenly have total control over the soil, water, and placement. It makes a massive difference.

    Quick Care Cheat Sheet

    Care FactorIdeal Target
    Container SizeMinimum 5-gallon pot (12 inches deep & wide)
    Sunlight6+ hours of direct sun daily
    Soil MixtureLightweight potting soil + 30% organic compost
    Watering1 to 1.5 inches weekly (Keep soil evenly damp)
    Best Temperature40°F to 75°F
    USDA ZonesZones 3–10 (Adjust planting season by zone)

    Personal Pro-Tip: If an unexpected late-spring heatwave hits your town, you can simply pick up your pots and move them into a shaded spot. You absolutely cannot do that with an in-ground garden bed!

    Master the Basics: How to Grow Broccoli in Pots Successfully

    Master the Basics How to Grow Broccoli in Pots Successfully
    Master the Basics How to Grow Broccoli in Pots Successfully

    Let’s get real about what this plant needs. Broccoli has a reputation for being a heavy feeder. It drinks quite a bit of water and demands high-quality nutrients to grow big, dense crowns.

    Timing and climate are everything here. Broccoli is a classic cool-season crop. It grows beautifully during the crisp days of Spring and Fall. If you live in Northern states within USDA Hardiness Zones 3 through 7, get your starter plants out right after the last spring frost. If you are down South in Zones 8 through 10, completely skip spring planting. Put your broccoli outside in late summer so it grows during the cool autumn and winter days.

    Personal Pro-Tip: I always check my local University Cooperative Extension office calendar online before planting. They provide the exact week to put cool-season crops outside for your specific zip code.

    Choosing the Right Container: How to Grow Broccoli in Pots for Maximum Yield

    Pot size is where most home gardeners mess up. Do not try to grow broccoli in a shallow window box or a cheap little flower pot. The root system needs serious room to spread out.

    One single plant requires a container that is at least 12 inches deep and 12 inches wide. A standard 5-gallon bucket from the hardware store works perfectly if you drill drainage holes in it. Fabric smart pots are even better. They let the roots breathe and prevent the soil from turning into a swamp.

    Personal Pro-Tip: If you use plastic buckets, drill your drainage holes on the sides about an inch up from the bottom, rather than flat on the base. This creates a tiny water reservoir that stops the pot from drying out completely on breezy afternoons.

    Selecting the Best Potting Soil for Growing Broccoli in Containers

    Do not scoop up dirt from your backyard. It will pack down like concrete inside a container, suffocating the roots and stunting your harvest. Instead, buy a premium, lightweight potting soil.

    Mix in a few heavy handfuls of aged compost before you plant. Because watering washes nutrients out of containers quickly, I always mix a slow-release organic fertilizer right into the potting soil during setup.

    Personal Pro-Tip: Look for a fertilizer with a lower first number (Nitrogen) and higher middle/last numbers (Phosphorus and Potassium), like a 5-10-10 mix. Too much nitrogen gives you massive, beautiful leaves but a tiny, pathetic broccoli head.

    Avoid Early Flowering: How to Grow Broccoli in Pots During Warm Weather

    Sunlight is a double-edged sword for this veggie. Your potted broccoli needs at least 6 hours of direct sunlight daily to build up enough energy to form a head.

    But here is the catch. If the air temperature climbs consistently above 80°F, the plant panics. It thinks summer has arrived, stops growing leaves, and immediately shoots up bright yellow flowers. This is called “bolting,” and it makes your broccoli completely bitter and inedible.

    Consistent watering keeps the root system cool. Run water from your garden hose or faucet until it flows freely out of the bottom of the pot. On hot, windy days, expect to water daily.

    Personal Pro-Tip: Spread a two-inch layer of clean straw or shredded wood mulch over the top of the potting soil. This acts like a cooling blanket, keeping the soil damp and protecting the roots from the baking sun.

    Why Americans Fail: Common Mistakes When Growing Broccoli in Containers

    Common Mistakes Growing Broccoli
    Common Mistakes Growing Broccoli

    I’ve talked to hundreds of patio gardeners across the country, and the same few mistakes pop up every single season:

    • The AC Vent Trap: Many folks try to grow their pots indoors or on an enclosed porch. If your home’s central air conditioning vents blow cold, dry air directly onto the leaves, it will sap the moisture and stunt the plant.
    • The Backyard Exhaust Blaster: Placing your pots right next to your outdoor AC unit compressor will blast the plant with scorching hot air. It will bolt within days.
    • Using Dark Plastic Pots: Black plastic pots absorb solar heat like a sponge, cooking the roots. Stick to terra cotta, fabric, or light-colored options.
    • Overwatering to the point of rot: Damp soil is good. Muddy, waterlogged soil will rot the roots and kill the plant.

    Personal Pro-Tip: Stick your index finger two inches deep into the soil before reaching for the hose. If it feels wet, step away. Only water when the top inch feels dry to the touch.

    Troubleshooting Potted Broccoli Issues

    Plants talk to us through their leaves. Here is how to decode what your broccoli is trying to tell you:

    • Yellowing lower leaves: This usually means your plant is hungry for nutrients or you are overwatering. Cut back on the water and feed it a balanced liquid fertilizer.
    • Tiny holes in the leaves: You have cabbage worms. Look for little green caterpillars hiding on the undersides of the leaves. Pick them off by hand or spray the plant with organic Bt (Bacillus thuringiensis).
    • Purplish leaves: This is a classic sign of a phosphorus deficiency, often caused by cold soil in early spring. Don’t worry too much; it usually fixes itself as the weather warms up.

    Personal Pro-Tip: Check your plants early in the morning. That’s when caterpillars are active and easiest to spot before they hide from the midday sun.

    Is Broccoli Toxic to Dogs and Cats?

    Is Broccoli Toxic to Dogs and Cats
    Is Broccoli Toxic to Dogs and Cats

    Good news for pet owners! Broccoli is completely non-toxic to dogs and cats according to the ASPCA. In fact, my golden retriever loves to crunch on the leftover stems.

    Just keep an eye out if they eat too much of it. Broccoli contains compounds called isothiocyanates, which can cause mild gas or tummy upset in pets if they gorge themselves on the raw leaves.

    Personal Pro-Tip: If you spray your plants with organic pest controls like neem oil, keep your pets away until the leaves are completely dry.

    FAQs About Growing Broccoli in Containers

    Q1: Can you grow a full head of broccoli in a small pot?

    No. If the pot is smaller than 3 to 5 gallons, the root system gets bound. You will end up with a tiny, button-sized head instead of a full meal.

    Q2: How much sun does potted broccoli need?

    It needs a solid 6 to 8 hours of direct sunlight. If you grow it in the heavy shade, the plant gets leggy and stretched out, and it won’t form a tight crown.

    Q3: Why is my broccoli flowering before forming a head?

    This is bolting. It happens when the plant experiences heat stress, usually from temperatures climbing above 80°F, or because the roots ran out of room in a tiny container.

    Q4: What is the best fertilizer for container broccoli?

    Start with a rich potting soil mixed with compost. Once the plant settles in, feed it every two weeks with a water-soluble organic vegetable fertilizer that is slightly higher in phosphorus.

    Q5: How often do you water broccoli in a plastic pot?

    It varies by weather, but usually twice a week in cool weather and daily during hot, sunny spells. Always test the soil with your finger first.

    Q6: Can I grow broccoli indoors under an AC vent?

    Avoid it. Indoor AC vents create dry, artificial drafts that sap moisture from the foliage. If you must grow indoors, use a bright window or grow lights well away from any air vents.

    Q7: How do I know when my container broccoli is ready to harvest?

    Harvest when the main head is firm, tight, and roughly the size of a large fist, but before the tiny green buds start opening into yellow flowers. Use a sharp knife to cut the stem at an angle.

    Final Thoughts

    Growing your own food doesn’t require a massive backyard grid. By picking the right container size and keeping a close eye on the thermometer, you can easily harvest crisp, sweet broccoli right from your porch steps. Give it a shot this season!