Day: June 1, 2026

  • The Ultimate Lazy Yard Hack: Chaos Gardening for Beginners Who Hate Rules

    The Ultimate Lazy Yard Hack: Chaos Gardening for Beginners Who Hate Rules

    Stop obsessing over perfectly straight rows, expensive tools, and meticulous weekend chore lists that leave your back aching. Nature never used a plastic ruler to plant a stunning wild meadow, so why should you? Chaos gardening for beginners is the ultimate liberating backyard shift. With this low-maintenance approach, you literally toss your favorite seeds into a physical bucket, shake them up, hurl them across raw dirt, and let the strongest plants win the race. 

    Quick Reference: The No-Stress Breakdown

    If you are skimming this article while standing in the garden center aisle, here is the fast data you need before buying your seed packets.

    FactorWhat to Expect
    Effort LevelNear zero (just light prep, toss, and step back)
    Best US SeasonsEarly Spring (right post-frost) or late Fall
    Sunlight Needs6+ hours of full sun for most wild bloom/veggie mixes
    Ideal SetupOpen ground plots, neglected borders, or large fabric grow bags
    CostDirt cheap (perfect for clearing out old, forgotten seed packets)

    Why I Swear by Chaos Gardening for Beginners

    Why I Swear by Chaos Gardening for Beginners
    Why I Swear by Chaos Gardening for Beginners

    I spent over a decade obsessing over perfectly spaced rows, pulling every single microscopic weed, and sticking little plastic labels in my yard. It was exhausting. It was incredibly expensive. Honestly, it made me enjoy my yard a lot less.

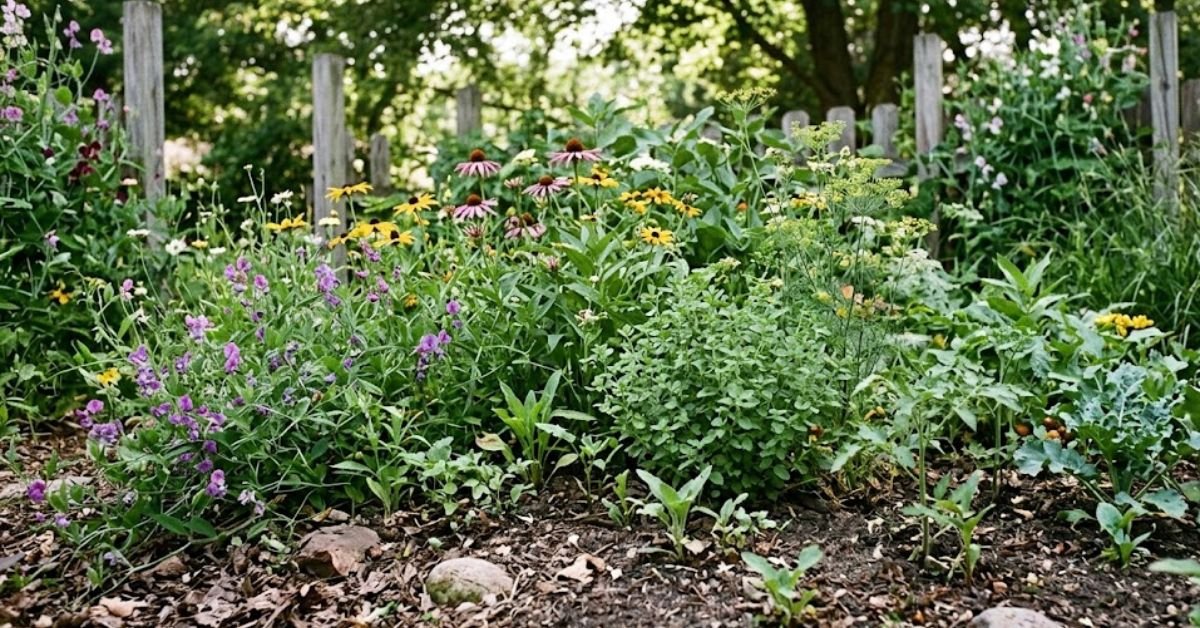
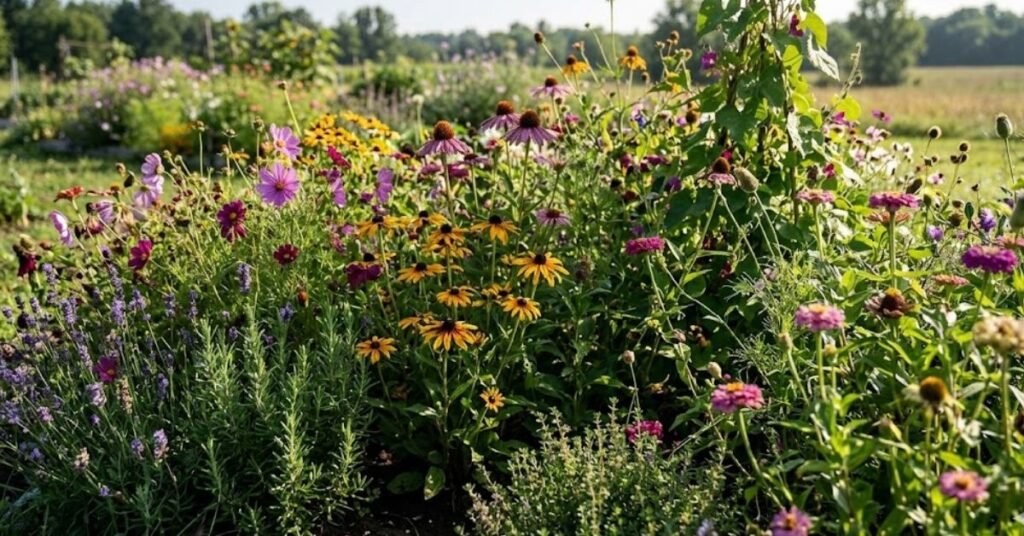
    When people first look up tips for chaos gardening for beginners, they think it is a complicated permaculture science. It isn’t. You take a giant handful of different seeds, mix them together completely at random, scatter them across a patch of bare ground, and let them fight it out for survival.

    It is the ultimate lazy gardening trend. Think about a wild American meadow. Nobody walks out into an open field with a trowel to plant wild coneflowers exactly six inches apart. Nature throws a beautiful tantrum of growth, and it works.

    Traditional planting guides tell you exactly how deep to dig and how many inches of breathing room to give every single tiny green sprout. We are tossing that script out. In my years running community garden workshops across the country, I have found that plants are far more adaptable than we think. They find the light. They crowd together naturally, creating a dense living canopy that shades the soil and blocks out nasty weeds without you lifting a finger.

    Personal Pro-Tip

    Do not try to organize your seeds by color, height, or type before throwing them. The whole magic relies on complete randomness. Just shake the bucket hard and let them fly.

    Picking the Right Seeds for Chaos Gardening for Beginners

    You cannot just grab any random tropical flower packet from a big-box store shelf and expect it to survive a tough, dry summer in the American Midwest. Success boils down to matching your seed mix with your actual regional climate.

    Your local climate dictates what lives and what dies. If you are throwing down seeds in the baking, humid heat of USDA Hardiness Zone 9 (like Florida or parts of Texas), your mix needs to look completely different than someone planting in the short, volatile growing season of Zone 5 in New York.

    I always tell folks to mix tough annual flowers with fast-growing vegetables. Try combining zinnias, cosmos, and marigolds with radishes and arugula.

    Radishes sprout incredibly fast, often within days. Their broad, early leaves shade the soil, which keeps the slower-growing flower seeds from getting totally baked and ruined by the intense midday sun.

    Personal Pro-Tip

    Always check the back of your seed packets for the recommended USDA zone numbers. If a plant requires delicate greenhouse care or constant misting, leave it out of your chaos mix. Stick to tough, self-seeding varieties that can handle severe neglect.

    My Step-by-Step Blueprint to Start Chaos Gardening for Beginners Today

    My Step by Step Blueprint to Start Chaos Gardening for Beginners Today
    My Step by Step Blueprint to Start Chaos Gardening for Beginners Today

    Setting up your first wild plot does not require a weekend of backbreaking labor. You can get a solid patch rolling in less than an hour if you follow a few basic steps.

    • Find your spot: Pick an area in your yard that gets at least six hours of direct sunlight.
    • Scrape the surface: You do not need a heavy, loud gas tiller. Just take a basic hand rake or hoe and rough up the top two inches of dirt so the seeds have open soil to cling to.
    • Mix the seeds with sand: Dump all your packets into an empty bucket. Throw in a few handfuls of dry play sand or dry potting soil. Because many seeds are tiny and brown, the light-colored sand helps you visually track where you have already thrown them so you do not end up with an accidental, overcrowded clump.
    • Broadcast: Walk around the space and scatter the mix evenly, like you are feeding chickens.
    • Press down: Walk over the scattered seeds or pat the ground down with the flat backside of a shovel. Good seed-to-soil contact is the secret to high germination.
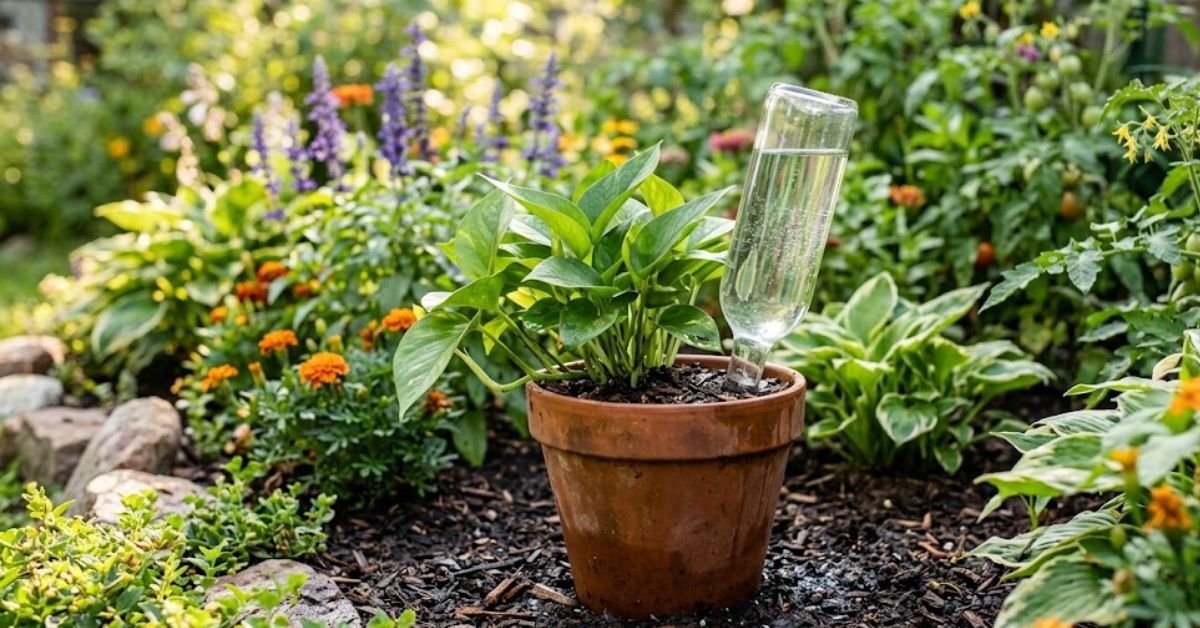
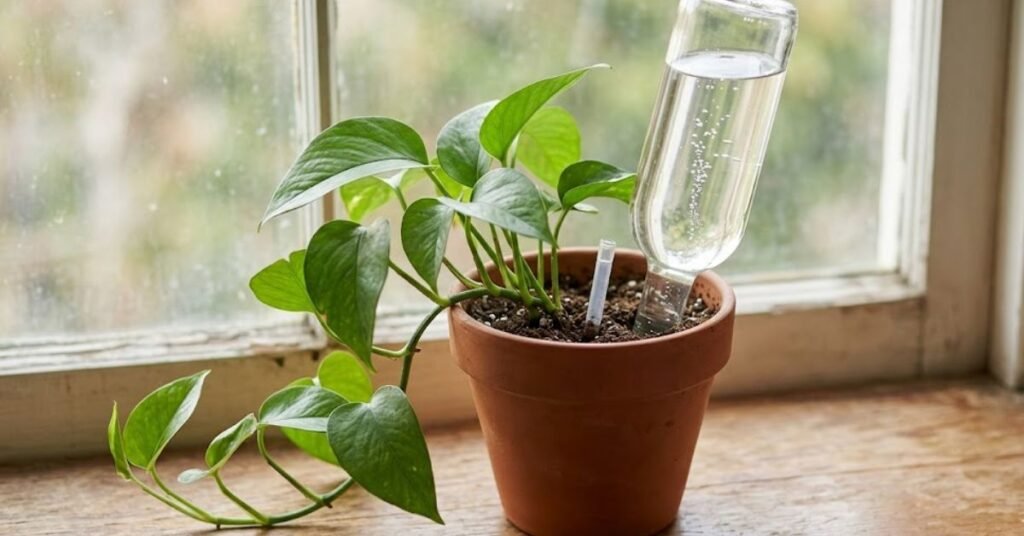
    • Water gently: Hook up your garden hose, turn the faucet on low, and use a misting nozzle.

    Personal Pro-Tip

    Never do this on a windy day. I once made the massive mistake of throwing a premium wild mix during a gusty spring afternoon, and half my budget ended up decorating my neighbor’s concrete driveway instead of my flowerbeds.

    Hidden Traps: Why Most US Homeowners Fail at This Wild Planting Method

    Even though this method is delightfully simple, I see backyard growers make the same major mistakes every single summer.

    First, Americans love our outdoor air conditioning units. If you scatter your chaos garden right next to your home’s central AC condenser unit, the constant blast of hot, dry exhaust air will cook your sprouts before they even grow an inch. Keep your patch away from those mechanical heat zones.

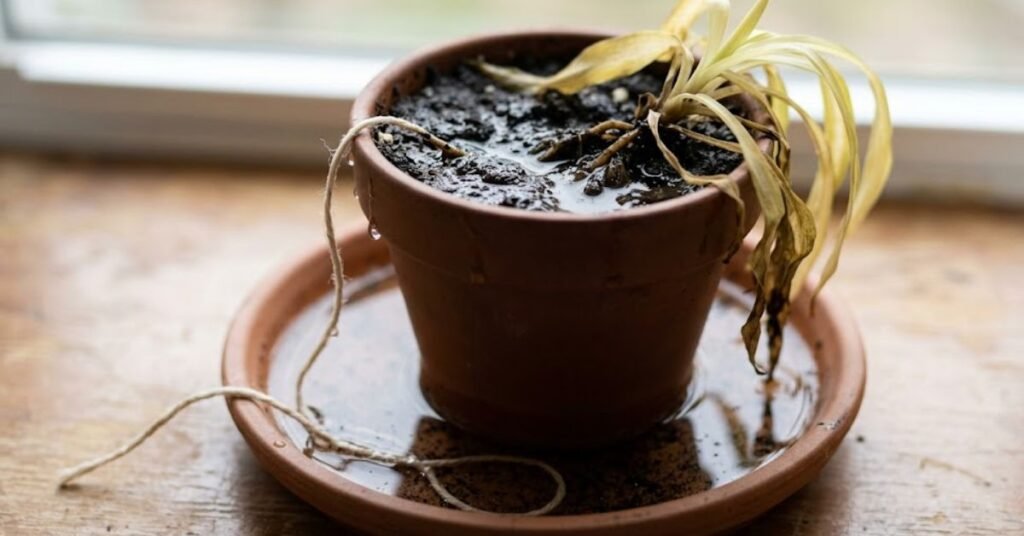
    Second, people overwater. In the US, we have a bad habit of pampering our outdoor spaces to death. If you run your automatic lawn sprinklers every single day until the ground turns into a muddy swamp, your seeds will simply rot in the dirt.

    Finally, local wildlife is incredibly smart. If you just drop seeds on hard, unraked ground and walk away, you are setting up a free morning buffet for every sparrow, blue jay, and squirrel in the county.

    Personal Pro-Tip

    If you have a major bird problem in your neighborhood, throw a very thin, quarter-inch layer of standard potting soil or loose straw over your scattered seeds to hide them from hungry eyes.

    Quick Fixes and Troubleshooting for Chaos Gardening for Beginners

    Since you are letting nature take the wheel, you are going to run into some weird situations. Do not panic when things look a little messy or unpredictable.

    If nothing sprouts after two weeks, check the moisture. When the soil is bone-dry and hard as concrete, the seeds cannot break through their shells. Give the area a gentle misting from the closest outdoor faucet every single morning.

    When plants look incredibly tall, skinny, and floppy, it means your spot is too shady. The plants are stretching their stems trying to find sunlight. You might need to trim back overhanging tree branches before next season.

    Yellowing leaves on young sprouts usually happen when the soil stays soggy for too long, or if you planted right under a roof gutter line where heavy rain flushes out all the natural soil nutrients.

    ProblemLikely CauseQuick Fix
    Seedlings dying off suddenly at the baseDamping-off fungus from stagnant air or muddy soilStop watering entirely and let the hot afternoon sun dry out the topsoil layer.
    One aggressive plant taking over everythingA dominant species or invasive weed mixed into the soilPull that specific variety out by hand to give the slower flowers some breathing room.

    Personal Pro-Tip

    Take photos on your phone every single week. Because different species grow at wildly different speeds, tracking the progress helps you learn which plants are winning the race in your specific yard’s soil.

    Is a Chaos Garden Safe for Your Four Legged Friends?

    Is a Chaos Garden Safe for Your Four Legged Friends
    Is a Chaos Garden Safe for Your Four Legged Friends

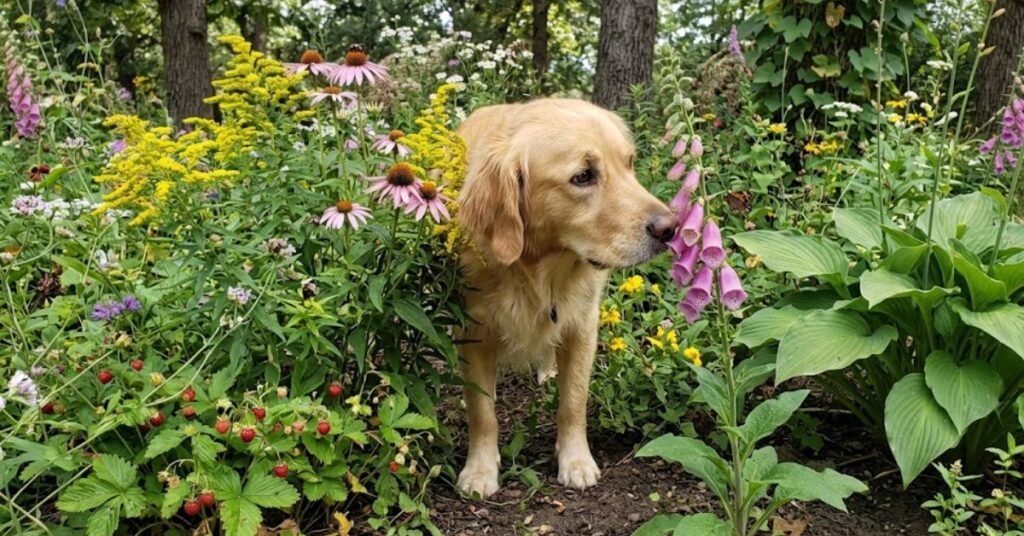
    This is a massive point that a lot of big lifestyle blogs completely ignore. When you buy cheap, generic “wildflower mix” bags from big-box stores, they often contain hidden dangers for your pets.

    Common chaos ingredients like foxglove, castor bean, morning glory, and certain types of wild poppies are highly toxic to dogs and cats. If you have a curious puppy or a cat who loves to chew on backyard greenery, you must read the specific ingredient list on your seed packets carefully.

    Stick to entirely pet-safe options like marigolds, sunflowers, zinnias, and basil for your custom mix. It gives you the exact same wild aesthetic without a stressful, late-night emergency trip to the vet clinic.

    Personal Pro-Tip

    If you cannot verify every single seed type in a pre-made commercial mix, fence off your chaos zone with a simple, cheap roll of green chicken wire until the plants mature.

    Real Answers to Reddit’s Hardest Questions About Chaos Gardening for Beginners

    Q1. Can I do this inside an apartment or on a balcony?

    You can, but you need to modify the strategy. Throwing seeds randomly into small indoor pots usually results in a crowded mess where plants choke each other out. Use a large, wide fabric grow bag or a long window box planter on a sunny balcony instead. Just ensure your indoor air conditioning vents aren’t blowing cold, drying air directly onto the soil surface.

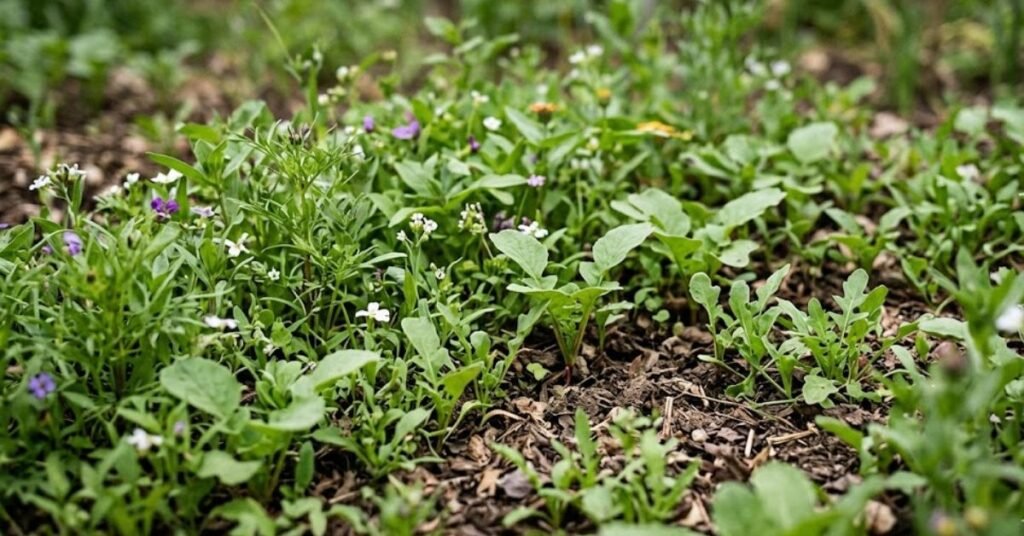
    Q2. How do I tell my actual sprouts apart from random weeds?

    This is the toughest part for beginners. My trick is to look for the patterns. If you see fifty identical tiny green leaves popping up uniformly across the area where you scattered your mix, those are your intended plants. If a strange, isolated weed pops up that looks totally different from everything else, pull it out.

    Q3. Do I need to buy expensive fertilizer?

    Usually, no. Part of the beauty of chaos gardening for beginners is that different plants utilize different layers of the dirt. Some have deep taproots that pull up buried minerals, while others have shallow roots that stabilize the top layer. Normal backyard dirt works fine. If your yard has terrible, rocky soil, just spread an inch of organic potting soil over the area before throwing your seeds.

    Q4. Will my Homeowners Association (HOA) get mad at me?

    They might if your front yard looks like an abandoned, overgrown lot. To keep your HOA inspectors happy, contain your chaos garden inside a clear, defined boundary. Use a raised bed, a clean wooden border, or a neat ring of landscape stones. It makes the wild growth look like an intentional design choice rather than pure neglect.

    Q5. Can I use old, expired seed packets?

    Yes! This is actually the best way to use them up. Germination rates drop as seeds age, so buying brand-new fresh packets just to throw them around can get expensive. Dumping all your old, forgotten packets from three years ago into a single chaos mix is a brilliant, zero-cost experiment.

    Q6. When is the absolute best time to plant in the US?

    For most of the country, early Spring right after the danger of the last hard frost has passed—is ideal. This gives the seeds plenty of natural moisture from spring rains to wake up. If you live in a winter mild state like southern California, Arizona, or Florida, late Fall is often better so the plants can establish during the cooler, gentler months.

    Q7. Do I need to clear out all the dead plants when Fall hits?

    Leave them alone until late winter if your neighborhood allows it. The dead flower heads hold tons of natural seeds that will drop straight into the soil for next year’s cycle. Plus, local birds and beneficial insects rely heavily on that dead brush for food and warm shelter during freezing winter weather.

    Final Thoughts on Letting Nature Take the Wheel

    At the end of the day, you have to accept that you are giving up total control over your yard. Some seeds will sprout beautifully, some will get eaten by bugs, and some might not show up at all. That is completely fine. The true joy of this method is the complete surprise of walking out to your yard on a warm morning in July and seeing a massive splash of color you completely forgot you planted. Grab some old packets, find a bare patch of dirt, turn on your garden faucet, and see what happens.

  • Keeping Your Garden Alive: How to Water Plants While Away on Vacation

    Keeping Your Garden Alive: How to Water Plants While Away on Vacation

    Packing your bags for a vacation is always exciting, but figuring out how to water plants while away can quickly trigger a massive amount of pre-trip anxiety. Nobody wants to spend their entire trip wondering if their expensive fiddle leaf fig or favorite monsteras are slowly shriveling up in a quiet, closed-up house. Walking through your front door after a great getaway only to find a living room full of crispy, dropped leaves and dead stems is an absolute nightmare.

    Learning this essential skill is what separates casual plant buyers from long-term indoor jungle curators.

    I have spent decades managing commercial greenhouses, sprawling backyard vegetable plots, and sensitive indoor collections. I have navigated scorching summer heatwaves in the American South and dry winter heating seasons in the Northeast. Over the years, I have tested almost every automated gadget and DIY trick on the market.

    You do not need to spend a fortune on high-tech irrigation setups or guilt-trip your neighbors into visiting your house every single day. This guide breaks down my favorite, field-tested strategies to keep your greenery perfectly hydrated while you are out enjoying the world.

    A Quick Blueprint on How to Water Plants While Away

    If you are currently packing your suitcase and need an immediate game plan, use this breakdown to match your vacation timeline with the right watering method.

    Trip LengthRecommended StrategyIndoor/Outdoor SplitPreparation Time
    1 to 4 DaysDeep watering session right before you step out the doorWorks for both5 minutes
    5 to 10 DaysThe inverted glass bottle trick or a capillary wicking setupBest for indoor pots20 minutes
    10 to 14 DaysGrouped bathtub soaking or a sealed plastic bag micro-greenhouseIndoor only30 minutes
    2+ WeeksAutomated faucet timers coupled with custom drip linesHighly recommended for both1 to 2 hours

    Personal Pro-Tip

    Never test a brand-new DIY watering setup the night before a long flight. I once rigged up an untested wicking system on my kitchen island before a trip to California. I returned to a completely drained water reservoir, a ruined laminate floor, and bone-dry ferns. Set your system up a week early so you can watch how fast the water actually drains.

    Classic Blunders Americans Make When Trying to Water Plants While Away

    Classic Blunders Americans Make When Trying to Water Plants While Away
    Classic Blunders Americans Make When Trying to Water Plants While Away

    The vast majority of plant losses during vacation do not happen because owners forgot to give them water. They happen because people misunderstand how their home environment changes when they leave.

    In the United States, our heavy reliance on central air conditioning creates a major variable. If you leave your AC blasting at 68°F while you are gone, that constant stream of dry, chilled air strips moisture away from your container’s potting soil incredibly fast.

    Conversely, turning your AC completely off during a July vacation can turn a closed-up house into a literal oven. This is especially true if you live down in USDA Hardiness Zones 8 through 11. High indoor temperatures skyrocket the evaporation rate of your soil.

    My sweet spot is setting the thermostat to a stable 76°F or 78°F. This keeps the air warm enough to prevent massive energy bills, but cool enough to slow down transpiration.

    Another massive mistake is overwatering out of pure panic. Drowning your monsteras or snake plants right before you walk out the door leaves them sitting in stagnant water. Without active airflow and normal light cycles, that stagnant pool causes root rot within days.

    [Too Much Water] + [No Air Circulation] = Suffocated Roots = Root Rot

    Outdoor container gardens face an uphill battle too. If you leave porch pots sitting in full afternoon sun while you are away, they will bake. Moving those containers into a shady, north-facing spot before you leave is non-negotiable for survival.

    Personal Pro-Tip

    Walk through your home and look for any pots sitting directly under or next to AC vents. Move them at least six feet away. The direct, artificial breeze from an HVAC system mimics a desert wind, drying out foliage far faster than stagnant air.

    Low-Cost DIY Hacks: How to Water Houseplants While Away

    Low Cost DIY Hacks How to Water Houseplants While Away
    Low Cost DIY Hacks How to Water Houseplants While Away

    You do not need fancy, expensive equipment to maintain proper soil moisture. These simple, budget-friendly strategies work beautifully if you set them up with care.

    The Inverted Wine Bottle Method

    This is my go-to choice for medium-to-large potted plants when I am going to be gone for roughly a week. Take a clean, empty glass wine bottle or a heavy-duty plastic soda bottle and fill it completely with fresh water.

    Quickly flip the bottle upside down and push the neck deep into the pot’s loose potting soil. Make sure you press it down at least three to four inches so it stays secure and sits near the main root ball.

    The soil will slowly draw moisture out of the bottle as it dries out.

    Setting Up a Capillary Wick System

    If you have a whole collection of small-to-medium plants grouped together, a capillary wick setup is incredibly efficient.

    Place a large five-gallon bucket or a giant mixing bowl full of water on top of a small stool or elevated surface. Arrange your potted plants on the floor around the base of that stool.

    Cut lengths of 100% cotton clothesline or thick cotton yarn long enough to reach from the bottom of the water bucket to the soil of each plant. Submerge one end of the cord deep into the water source. Push the other end an inch deep into the potting soil of your plant.

    The natural capillary action of the cotton draws water downward, keeping the soil perfectly damp without oversaturating it.

    [Elevated Water Reservoir] 

           \

            \  <– Cotton Wick (Capillary Action)

             \

          [Potted Plant on Floor]

     Personal Pro-Tip

    Gravity is the secret engine of a wicking system. Your water source must sit physically higher than the top of your plant pots. If the bucket sits on the exact same level as the containers, the water will not travel down the cord properly, and your plants will dry out.

    Post-Vacation Troubleshooting: Fixing Your Greenery After You Get Back

    Sometimes, despite your best efforts, you will return home to a few drama queens looking incredibly sad. Do not panic and throw them in the trash immediately.

    • Symptom: Mushy, yellowing leaves and a swampy smell. Your DIY system delivered way too much water, and the roots are currently drowning. Remove the pot from any decorative outer ceramic sleeve or drainage saucer. Let it sit in a bright room with good airflow until the top two inches of soil are completely dry. Hold off on watering for a couple of weeks.
    • Symptom: Crispy, brown leaf tips and drooping stems. Your plant ran out of moisture early and suffered from the dry indoor air. Take the pot straight to your bathroom or kitchen sink. Run the faucet on a gentle, lukewarm setting and give the soil a massive soak until water runs freely out of the bottom drainage holes. Let it drain completely, then clip away the completely dead leaves with clean shears.

    Personal Pro-Tip

    If a plant looks entirely dead, dry, and bare, do not give up just yet. Take your thumbnail and gently scratch a tiny piece of bark off the main stem near the base of the soil line. If you see a flash of bright green underneath, the plant is alive. Cut the dead top growth back and keep caring for it—it will likely sprout new leaves within a month.

    Pet Safety Warning: Keeping Furry Friends Safe from Travel Watering Setups

    Pet Safety Warning Keeping Furry Friends Safe from Travel Watering Setups
    Pet Safety Warning Keeping Furry Friends Safe from Travel Watering Setups

    Modifying your home environment to handle plant care can introduce unexpected risks for dogs and cats.

    Leaving large, open buckets of water on the floor or on low stools for a wicking system is a massive temptation for a curious pet. If you added liquid plant fertilizer to that water reservoir before leaving, your pets could ingest concentrated chemicals that can cause severe illness. Always use pure, unfertilized water for vacation setups. Better yet, confine your plant systems to a spare bedroom or bathroom that stays closed off from your pets.

    Moving plants around to group them together can also cause problems. You might accidentally place a toxic variety like a peace lily, monstera, or pothos—on a low table or floor space where your cat or dog can easily chew on it out of boredom or separation anxiety. Keep your pet-safe varieties low and leave the toxic plants securely elevated.

    Personal Pro-Tip

    Cats love to play with dangling strings. A collection of cotton wicking lines running from an elevated bucket is an incredibly tempting toy. Secure your wicking lines or place the entire setup inside a room that your pets cannot access while you are away.

    Frequently Asked Questions About How to Water Plants While Away

    Q1. Is it a good idea to leave my plants sitting in a bathtub full of water?

    This strategy works well, but only for specific moisture-loving varieties like ferns, calatheas, syngoniums, and pothos. Line your tub with an old towel to prevent scratching, add an inch or two of water, and set your plastic pots directly on top. Avoid doing this with succulents, cacti, or snake plants. Sitting in standing water for a week will rot their root systems completely.

    Q2. How many days can a typical houseplant survive without water?

    It depends heavily on the season and the species. During the spring and summer active growing periods, most tropical houseplants will start showing severe signs of stress after 7 to 10 days. During the winter, when plant metabolisms slow down dramatically, many varieties can go two to three weeks without any issue at all.

    Q3. Should I buy glass or plastic watering globes for my outdoor containers?

    If you are setting them up for outdoor porch containers or patio pots, always opt for plastic. Glass watering globes can act like a magnifying glass when direct, intense summer sunlight hits them. This creates a legitimate fire hazard if they are focused on dry mulch or dry leaves. Keep glass globes indoors.

    Q4. Will my backyard vegetable garden survive a week-long trip without irrigation?

    In-ground garden beds hold onto moisture significantly better than pots. If you apply a heavy, three-inch layer of clean straw, shredded leaves, or wood mulch across the soil surface, it locks in moisture. Give the garden a massive, deep soaking the morning you leave. An established vegetable garden can usually handle a week of summer weather under those conditions.

    Q5. Does the plastic bag greenhouse trick actually work for long trips?

    It is incredibly effective for smaller tropical plants that crave high humidity. Water the plant thoroughly, then wrap a clear plastic trash bag completely over the top of the plant. Use a few wooden chopsticks or bamboo stakes pushed into the soil to hold the plastic away from the actual leaves. This creates a sealed ecosystem where moisture evaporates, condenses on the plastic, and falls back into the soil. Keep this setup entirely out of direct sunlight so you don’t overheat the plant.

    Q6. Can I use regular nylon or polyester string for a DIY wicking system?

    No. Synthetic fibers like nylon, polyester, or acrylic are hydrophobic, meaning they repel water rather than absorbing it. They will not pull moisture from your reservoir. You must use 100% natural cotton rope, cotton clothesline, or genuine wool yarn for the capillary action to function properly.

    Q7. Should I close all my window blinds before I leave for vacation to save water?

    Do not shut them completely. While cutting down on light lowers the plant’s temperature and slows down water consumption, keeping plants in total darkness for two weeks straight will severely shock them. Tilt your window blinds upward. This reduces the intense, direct burning sun rays while still filling the room with plenty of bright, ambient light.

    Final Thoughts for a Stress-Free Trip

    Plants are remarkably tough, adaptive living things. Missing a routine watering by a few days is rarely a death sentence for a healthy, well-established plant.

    Select a method that aligns with how long you will be away, run a quick test ahead of time to make sure the physics are working, and then go enjoy your vacation. Stop worrying about your fiddle leaf fig and leave the home security camera apps closed!