Day: May 11, 2026

  • The Expert’s Guide: How to Grow Microgreens in Small Apartments

    The Expert’s Guide: How to Grow Microgreens in Small Apartments

    I remember staring at my tiny, cramped kitchen counter a few years ago, missing the massive backyard garden I had before moving to the city. I thought my days of fresh, homegrown produce were over. But in my years of growing plants indoors, I’ve found that you don’t need acres of land to get a massive harvest. If you’re wondering how to grow microgreens in small apartments, you are exactly where I was.

    Whether you live in freezing USDA Zone 3 or sweltering Zone 9, apartment gardening completely flips the script. You control the seasons.

    Quick Care Summary for Skimmers

    RequirementIdeal Condition
    Light4-8 hours of sunlight or a cheap LED grow light.
    WaterBottom-watering daily; keep soil moist but not soggy.
    SoilHigh-quality organic potting soil (avoid outdoor garden dirt).
    Temperature65°F – 75°F (Standard US indoor room temp).
    Harvest Time7 to 14 days after planting!

    Personal Pro-Tip: Don’t buy expensive “microgreen growing kits” right out of the gate. A shallow plastic takeout container with a few holes poked in the bottom works exactly the same as a $30 specialized tray.

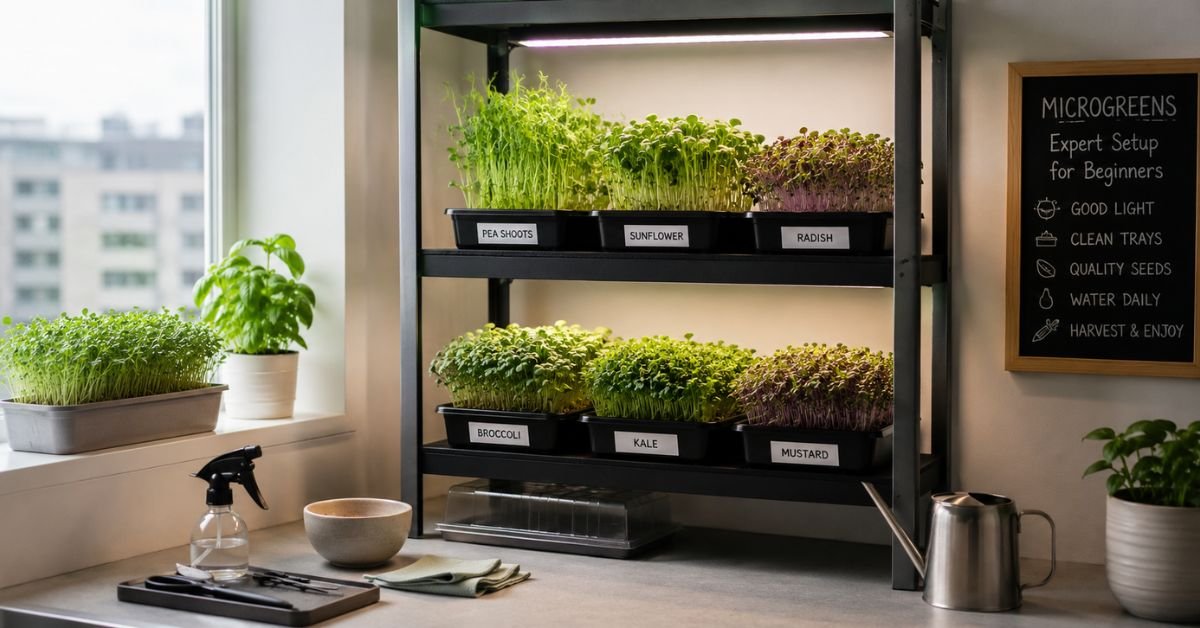
    Essential Supplies for Growing Microgreens in Small Apartments

    image
    image

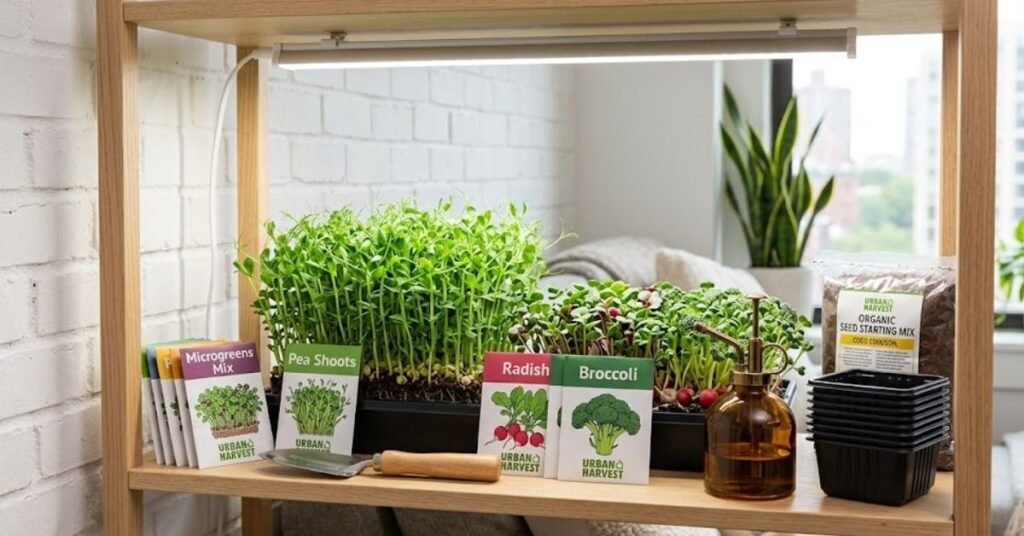
    Figuring out how to grow microgreens in small apartments starts with the right gear. Because we don’t have the luxury of outdoor space, we have to mimic nature on a countertop.

    You will need:

    • Shallow Trays: Two per batch. One with drainage holes, one without (for the bottom).
    • Potting Soil: A light, seed-starting potting soil. Don’t use heavy outdoor dirt; it won’t drain well in trays.
    • Seeds: Radish, broccoli, and sunflower are incredibly easy for beginners.
    • Spray Bottle: For misting the seeds with water straight from the faucet.

    Personal Pro-Tip: I learned the hard way that heavily chlorinated city water from the faucet can sometimes stunt sensitive seeds. I like to fill a pitcher with tap water and leave it on the counter for 24 hours to let the chlorine evaporate before watering my greens.

    Step-by-Step: How to Grow Microgreens in Small Apartments Year-Round

    The secret to mastering how to grow microgreens in small apartments lies in the setup.

    1. Prep the Soil: Fill your top tray (the one with holes) with about an inch of potting soil. Tamp it down gently so it’s flat and even.
    2. Sow the Seeds: Sprinkle your seeds thickly across the soil. It should look like a crowded dance floor—much closer together than you’d ever plant outdoors.
    3. Water and Weight: Mist the seeds heavily. Then, place an empty tray on top of the seeds with a small weight (like a soup can) on it. This simulates being buried under heavy spring soil and makes the stems grow thick and strong. Keep them in the dark like this for 3-4 days.
    4. Let There Be Light: Once the seeds sprout and push the top tray up, remove the weight and put them near a sunny window or under a light.

    Personal Pro-Tip: I love growing radishes in the Fall and Winter because they germinate incredibly fast, even if my apartment is a little drafty. They give that spicy, satisfying crunch when summer salads are long gone.

    Common Mistakes When Cultivating Microgreens in Tight Spaces

    Common Mistakes When Cultivating Microgreens in Tight Spaces
    Common Mistakes When Cultivating Microgreens in Tight Spaces

    When friends ask me why their indoor gardens fail, I usually find they are making one of two uniquely American home mistakes.

    The biggest culprit is the air conditioning vent. In the summer, we blast the AC. If your microgreen tray is sitting right under an air conditioning vent, the constant flow of dry, cold air will suck the moisture right out of your potting soil, leaving your tiny sprouts crispy in a matter of hours.

    The second mistake is overwatering from the top. Pouring water directly over delicate sprouts knocks them over and invites mold. Always bottom-water by pouring water into the solid bottom tray and letting the soil soak it up.

    Personal Pro-Tip: Hold your hand over your microgreen tray. If you can feel a breeze from your AC or your winter heating vent, move the tray. Drafts are the enemy of baby plants.

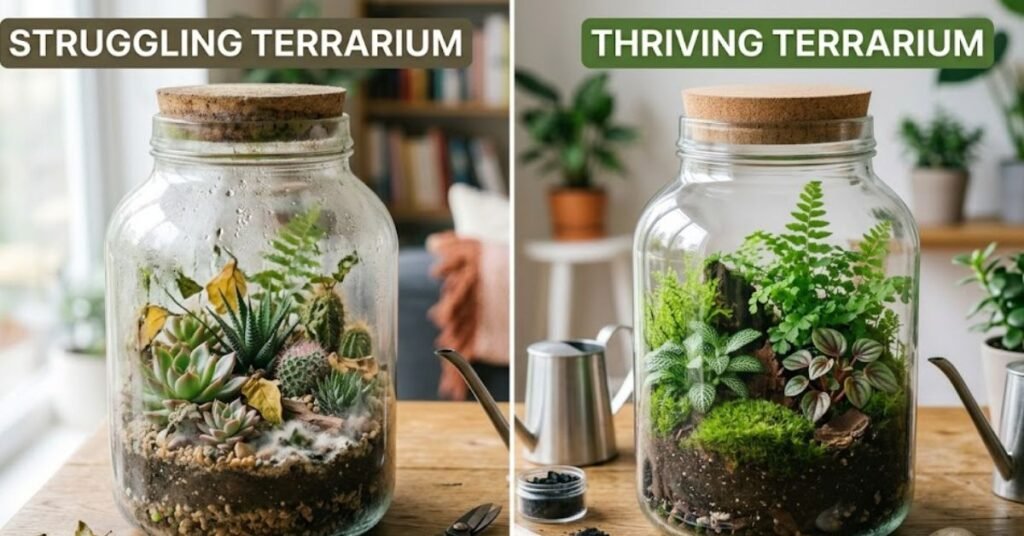
    Troubleshooting Your Apartment Microgreen Garden

    Even when you know exactly how to grow microgreens in small apartments, things can get weird. Here is how I fix common issues:

    • Leaves are turning yellow: Your plants are starving for light. If you are relying on a window, the winter sun might not be strong enough. Move them closer to the glass or grab a cheap LED bulb.
    • Brown, crispy tips: This usually means uneven watering or low humidity. Make sure the edges of your tray aren’t drying out faster than the center.
    • They are falling over and dying at the soil line: This is “damping off,” a fungal disease caused by poor airflow and soggy soil. Ease up on the water and put a small fan nearby to keep air circulating.

    Personal Pro-Tip: If I notice a section of my tray looks a little weak or yellow, I literally rotate the tray 180 degrees. Plants stretch toward the light, and rotating them ensures an even, upright canopy.

    Toxicity Warning: Are Indoor Microgreens Safe for Pets?

    Toxicity Warning Are Indoor Microgreens Safe for Pets
    Toxicity Warning Are Indoor Microgreens Safe for Pets

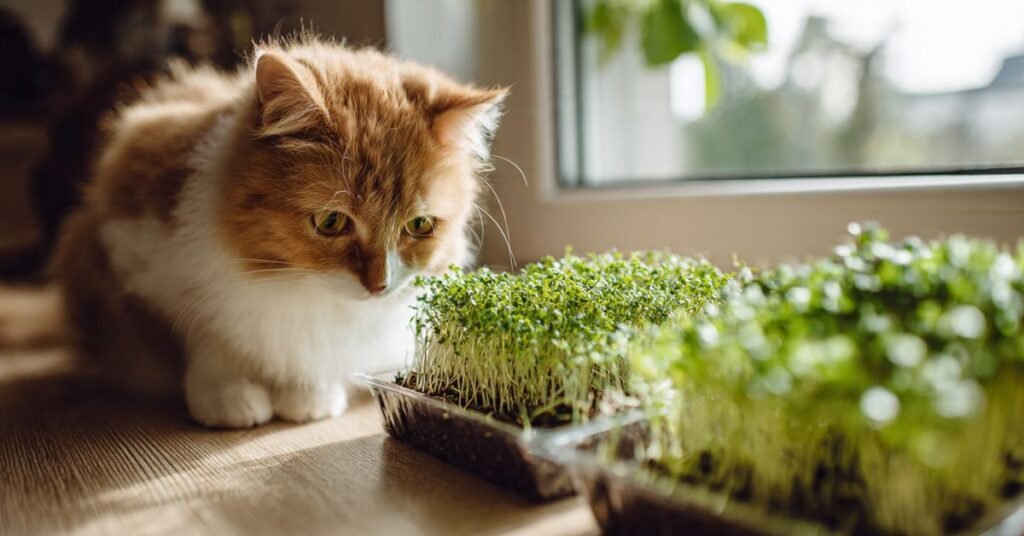
    This is a huge deal for us apartment dwellers with furry roommates. Dogs and cats love to nibble on fresh greens, especially when they are sitting right on the kitchen island.

    The good news? Most common microgreens like broccoli, kale, sunflower, and radish are completely safe and even healthy for cats and dogs.

    The danger comes from the Nightshade family. Never grow tomato, pepper, eggplant, or potato microgreens. The stems and leaves of these plants contain solanine, which is highly toxic to dogs, cats, and humans! We only eat the fruit of these plants, never the foliage.

    Personal Pro-Tip: My cat is obsessed with sunflower shoots. To keep her out of my main harvest, I actually grow a tiny, separate 2-inch pot of oat grass right next to my microgreens. It acts as a perfect decoy!

    FAQs on How to Grow Microgreens in Small Apartments

    I spend a lot of time on Reddit and Quora talking to fellow indoor gardeners. Here are the questions that pop up constantly about how to grow microgreens in small apartments.

    Q1. Is that white fuzzy stuff mold or roots?

    90% of the time, it’s root hairs! If the white fuzz is clinging tightly to the taproot and looks like a tiny caterpillar, it’s just the plant looking for water. If it looks like a spiderweb spreading across the top of the soil, that’s mold.

    Q2. Can I use paper towels instead of potting soil?

    You can, but I don’t recommend it. Paper towels dry out incredibly fast in air-conditioned apartments, and the plants won’t grow as thick or hold as much flavor compared to using a good potting mix.

    Q3. Do I really need expensive grow lights?

    Not at all. While a south-facing window is great, an ordinary LED shop light from the hardware store works perfectly. Just keep it about 2 inches above the plants.

    Q4. How many harvests can I get from one seed?

    Only one. Microgreens are harvested at the cotyledon (first leaf) stage. Once you snip the stem, the plant is done. You’ll need to compost the soil and start fresh.

    Q5. Will my apartment smell like a farm?

    Nope! Healthy microgreens just smell faintly of fresh earth and the vegetable they are (radish microgreens smell surprisingly like radishes!). If it smells foul or sour, you have mold from overwatering.

    The Takeaway: Your Countertop is Your New Garden

    When I first started looking into how to grow microgreens in small apartments, I honestly thought it would be a messy, complicated process that would ruin my kitchen counters. But as you can see, it really just comes down to a few basic supplies and about three minutes of your day. You don’t need a sprawling backyard in the suburbs or perfect spring weather to enjoy fresh, organic greens. You just need a little bit of space and the willingness to try.

    Whether you are looking to upgrade your weekend salads, avoid those crazy premium prices at the grocery store, or just bring a little bit of vibrant, living energy into your indoor space, these tiny plants deliver massive results. Grab a tray, pick out some seeds, and get your hands a little dirty. You’ve got this!

    Personal Pro-Tip: Take a photo of your tray on day one, and then another on day seven. Because you share a living space with your indoor garden and see it constantly, you might not notice the explosive daily growth. Comparing those two pictures is the absolute best motivation to keep planting your next batch!

  • Open vs Closed Terrarium: Which Is Better for Beginners? (A No-Nonsense Guide)

    Open vs Closed Terrarium: Which Is Better for Beginners? (A No-Nonsense Guide)

    I still remember my first “glass grave.” It was a beautiful, vintage candy jar I’d stuffed with delicate ferns and moss, only to watch it turn into a swampy, molded mess within two weeks because I didn’t understand the airflow. Whether you’re a seasoned gardener or someone who usually kills “unkillable” plastic plants, choosing between an open vs closed terrarium which is better for beginners is the first real fork in the road.

    In my years of consulting for indoor gardeners across the US—from the humid Southeast to the bone-dry high deserts—I’ve seen that your success depends less on your “green thumb” and more on picking the system that fits your lifestyle.

    Quick Comparison: Open vs Closed Terrarium At a Glance

    If you’re a “skimmer,” here is the high-level breakdown to help you decide on an open vs closed terrarium which is better for beginners.

    FeatureOpen TerrariumClosed Terrarium
    Ideal PlantsSucculents, Cacti, Air PlantsFerns, Mosses, Nerve Plants
    Humidity LevelLow (Matches your room)High (Self-sustaining cycle)
    Watering FrequencyOnce every 1–2 weeksOnce every few months
    MaintenanceMedium (Needs manual watering)Low (Once balanced)
    Risk FactorLow (Harder to “rot” plants)High (Easy to overwater/mold)
    Best For“Forgetful” waterers“Set it and forget it” lovers

    Defining the Basics: Open vs Closed Terrarium Which Is Better for Beginners?

    Defining the Basics Open vs Closed Terrarium Which Is Better for Beginners
    Defining the Basics Open vs Closed Terrarium Which Is Better for Beginners

    When we talk about an open vs closed terrarium which is better for beginners, we’re really talking about two completely different climates.

    An open terrarium is essentially a glass planter with no lid. Think of it like a tiny, stylish desert. Because air circulates freely, moisture evaporates quickly. This makes it perfect for plants that hate “wet feet.”

    A closed terrarium, on the other hand, is a sealed ecosystem. Moisture evaporates from the leaves, condenses on the glass, and “rains” back down into the soil. It’s a miniature rainforest.

    Personal Pro-Tip: If you live in an area with heavy Air Conditioning (AC) use during US summers, your indoor air is likely very dry. This is actually great for open terrariums but can make balancing a closed one tricky if you keep it too close to a vent!

    Why Your Home’s Environment Matters for the Beginner Debate

    I’ve found that the “best” choice often depends on where you live. If you’re in USDA Hardiness Zone 9 or 10 (like Florida or Texas), the ambient humidity is already high, which helps closed terrariums thrive. However, if you’re up in Zone 4 (think Minnesota) and your furnace is blasting dry heat all winter, an open terrarium will dry out even faster than usual.

    When deciding open vs closed terrarium which is better for beginners, consider your patience level. I always tell my clients: do you want to play “scientist” or “decorator”?

    • The Scientist: Will love the closed terrarium’s water cycle.
    • The Decorator: Will likely prefer the ease of an open succulent bowl.

    Personal Pro-Tip: Never use a “tap” or faucet with softened water for your terrariums. The salts in softened water can build up in the glass and kill sensitive mosses. I always use distilled or rainwater for my builds.

    Picking the Best Plants for an Open vs Closed Terrarium

    Picking the Best Plants for an Open vs Closed Terrarium
    Picking the Best Plants for an Open vs Closed Terrarium

    The biggest mistake I see beginners make is putting a cactus in a closed jar. That is a one-way ticket to a “mushy” cactus. When choosing an open vs closed terrarium which is better for beginners, your plant choice is non-negotiable.

    Top Choices for an Open Glass Setup

    • Echeveria & Jade: Classic American favorites that love the dry air.
    • Zebra Haworthia: Very hardy and handles lower light than most succulents.
    • Cacti: Only if you have a very wide-mouthed open container.

    Best Beginner Plants for a Sealed Ecosystem

    • Fittonia (Nerve Plant): They “faint” when they need water, making them great communicators.
    • Lemon Button Fern: One of the hardiest ferns I’ve ever grown indoors.
    • Sheet Moss: Essential for that “forest floor” look.

    Personal Pro-Tip: When buying potting soil, don’t just grab the cheapest bag. For open terrariums, look for “Cactus and Succulent Mix.” For closed ones, I prefer a mix of peat moss, perlite, and a little horticultural charcoal to keep things fresh.

    Common Pitfalls: Why Most Beginners Fail

    After years of troubleshooting, I’ve noticed a few “American-specific” habits that lead to terrarium failure.

    1. The Greenhouse Effect: We love our big, sunny US windows. But if you put a closed terrarium in direct sunlight, the glass acts like a magnifying glass and literally cooks your plants.
    2. Over-loving (Overwatering): Most beginners treat an open terrarium like a standard houseplant. If you water it every day, you’ll rot the roots.
    3. No Drainage Layer: In a glass container with no hole at the bottom, water has nowhere to go. You must use a layer of gravel or pebbles at the bottom.

    Personal Pro-Tip: If you see “fog” on the glass of your closed terrarium all day long, it’s too wet! Take the lid off for a few hours to let some moisture escape. You want a light mist in the morning, but clear glass by noon.

    Troubleshooting Your Glass Garden

    Troubleshooting Your Glass Garden
    Troubleshooting Your Glass Garden

    Is your project looking a little sad? Don’t panic. Here is how I fix the most common issues when debating open vs closed terrarium which is better for beginners.

    • Yellowing Leaves: Usually a sign of overwatering. In an open terrarium, stop watering for two weeks. In a closed one, leave the lid off for 48 hours.
    • White “Fuzz” (Mold): This happens in closed systems with no airflow. I suggest adding “Springtails” (tiny beneficial bugs) or simply removing the affected leaf and reducing humidity.
    • Brown, Crispy Tips: Your open terrarium is likely too close to a heating vent or needs a drink.

    Toxicity Warning: Is It Safe for Pets?

    This is a huge deal for US pet owners. Many common terrarium plants are toxic if chewed.

    • Safe (Pet-Friendly): Most Mosses, Peperomia, and Haworthia.
    • Toxic (Keep Away): Ivy (Hedera helix), Peace Lilies, and some Ferns can cause stomach upset in cats and dogs.

    Personal Pro-Tip: Always check the specific species on the ASPCA website before you build. I once had a client whose cat knocked over a beautiful open succulent bowl—luckily it was just a mess, not a trip to the vet!

    FAQ: Everything You’re Asking About Open vs Closed Terrariums

    Q1. Which one is actually easier to start with?

    Honestly, an open vs closed terrarium which is better for beginners usually comes down to “open” being the winner. It’s more forgiving if you make a mistake with water.

    Q2. Can I use moss in an open terrarium?

    I wouldn’t recommend it. Moss needs constant humidity. In an open container, it usually turns into a crispy brown carpet within a week unless you mist it daily.

    Q3. Do I ever need to fertilize my terrarium?

    Hardly ever! I actually avoid it. You want your plants to stay small so they don’t outgrow the glass. Maybe a tiny bit of diluted liquid fertilizer once a year in the Spring.

    Q4. How long do closed terrariums actually live?

    If you balance the water correctly, they can live for years! I’ve seen some that haven’t been opened in a decade, though for a beginner, expect to “tinker” with it every few months.

    Q5. Why is my open terrarium smelling like rotten eggs?

    That is root rot. It means water is sitting at the bottom and the soil has gone anaerobic. You’ll need to repot with fresh potting soil and a better drainage layer.

    Q6. Can I put bugs in my terrarium?

    In a closed terrarium, yes! “Springtails” are a beginner’s best friend—they eat mold and keep the ecosystem clean. Avoid putting bugs in open terrariums; they’ll just wander into your living room.

    Q7. Does the size of the glass matter?

    Yes. For beginners, a medium-sized jar (about half a gallon or a quart) is the “sweet spot.” Tiny jars are hard to plant, and huge ones are hard to balance.

    My Final Thoughts on open vs closed terrarium which is better for beginners

    Ultimately, deciding on an open vs closed terrarium which is better for beginners comes down to how much you want to interact with your plants. I’ve found that most folks across the US from rainy Seattle to sunny Phoenix thrive when they match the jar to their own natural energy.

    If you’re a “set it and forget it” person, a closed jar is a tiny miracle of nature. If you like to get your hands in the potting soil every now and then to check on things, go with an open design. Just remember: there’s no such thing as a failed project, only a “learning opportunity” for your next build!

    Personal Pro-Tip: If you’re still torn on an open vs closed terrarium which is better for beginners, I suggest starting with an open one using a Zebra Haworthia. It’s tough as nails, handles the dry AC air in American homes perfectly, and won’t throw a fit if you forget to water it for a week while you’re away for the holidays. It’s the ultimate “low-stakes” entry into the hobby!