If you love spicy food but lack a massive backyard, learning how to grow bird chili plant in pots is a total game-changer. I used to think you needed a huge garden plot for a decent pepper harvest, but these fiery little plants actually prefer container life. Let’s get into how you can turn a tiny patio or sunny windowsill into your own personal spice factory.
Quick Care Guide for Potted Bird Chilis
| Plant Need | Quick Requirement |
| Sunlight | 6 to 8 hours of direct, blazing sun daily |
| Soil Type | Loose, well-draining potting soil (pH 6.0–7.5) |
| Watering | Only when the top inch of soil feels completely dry |
| Temperature | Ideal range: 70°F to 85°F (Protect below 55°F) |
| USDA Zones | Grown as annuals everywhere; perennial in Zones 9–11 |
| Pot Size | Minimum 2 to 3 gallons with great drainage |
Why I Love Learning How to Grow Bird Chili Plant in Pots
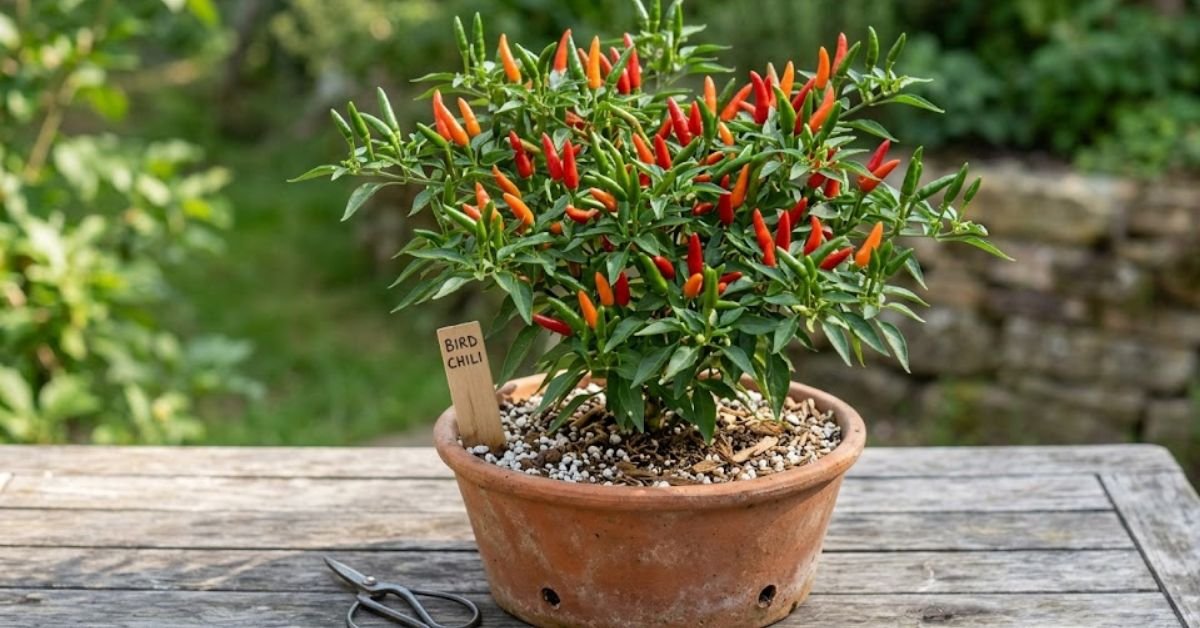
I still remember the first time I harvested a handful of bright red bird’s eye chilis from my own patio. There is something intensely satisfying about walking out with a pair of pruners and gathering spice for your dinner. These little peppers pack a monstrous punch, but the plants themselves are surprisingly polite guests on a small deck or sunny windowsill.
When I first figured out how to grow bird chili plant in pots, I made a ton of mistakes. I treated them like regular houseplants, which was a complete disaster. Containers give you incredible con
trol over the environment, but they also mean you are the plant’s entire life support system. If you live in an apartment or a house with limited yard space, containers are your ticket to hot pepper heaven.
Personal Pro-Tip: Don’t start with a giant 10-gallon pot for a tiny sprout. I always step my plants up gradually. A small seedling belongs in a 4-inch nursery pot before moving to its final home. This stops the excess soil from holding onto stagnant water and drowning the baby roots.
Setting Up the Best Containers and Potting Soil for Bird Chili Plants
You cannot just scoop dirt from your backyard into a container and expect a pepper harvest. Yard dirt compacts like concrete inside a plastic pot. It suffocates the roots.
Instead, buy a high-quality, lightweight potting soil from your local garden center. Look for something mixed with perlite or vermiculite. These little white rocks create tiny air pockets in the soil. Air is just as important to roots as water.
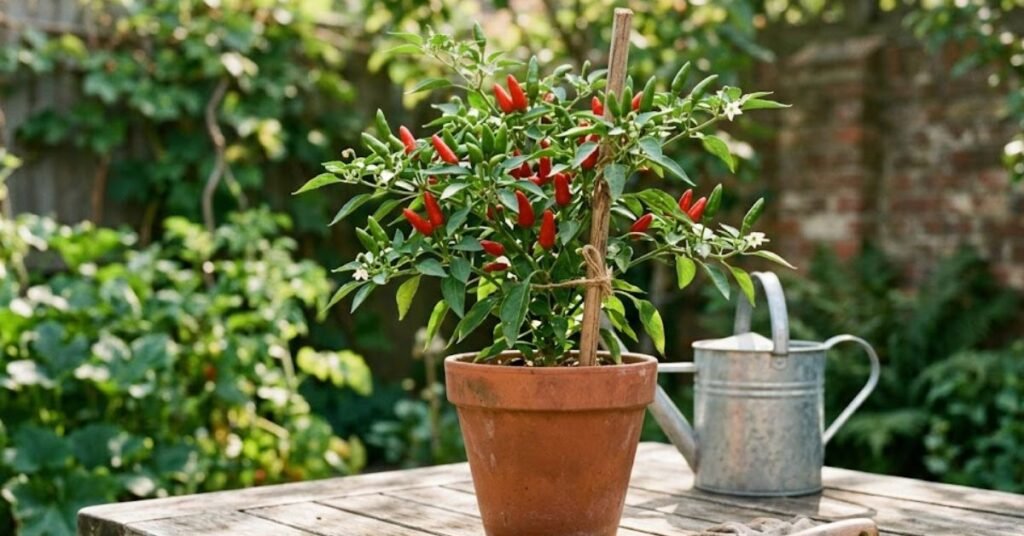
For the container itself, drainage is non-negotiable. If your pot doesn’t have holes at the bottom, don’t use it. I highly prefer terracotta or fabric grow bags because they let the soil breathe from all sides.
Personal Pro-Tip: If you fall in love with a beautiful ceramic pot that lacks drainage holes, don’t despair. I use the “cachepot” method. Keep the chili in a cheap plastic nursery liner with holes, and simply slip that liner inside the gorgeous decorative pot. Pull it out when you water so it never sits in a puddle.
The Ultimate Guide on How to Grow Bird Chili Plant in Pots From Scratch
If you want to master how to grow bird chili plant in pots, timing your planting with early spring is vital. Peppers are slow starters.
I start my seeds indoors about 8 to 10 weeks before our last expected spring frost. They need warmth to wake up. I put my seed trays on top of a refrigerator or use a seedling heat mat to keep the soil around 80°F. Once they pop up and get their second set of leaves, they need intense light.
When daytime temperatures consistently stay above 70°F, I start the “hardening off” process. This just means giving them a few hours of outdoor sun a day so they don’t get sunburned or shocked by the sudden change in environment.
Personal Pro-Tip: When transplanting your seedling into its final pot, bury it slightly deeper than it sat in its nursery plug. Just like tomatoes, peppers can grow extra anchor roots along the buried portion of the stem, giving you a sturdier plant.
Balancing Sun, USDA Zones, and AC Vents for Potted Chilis
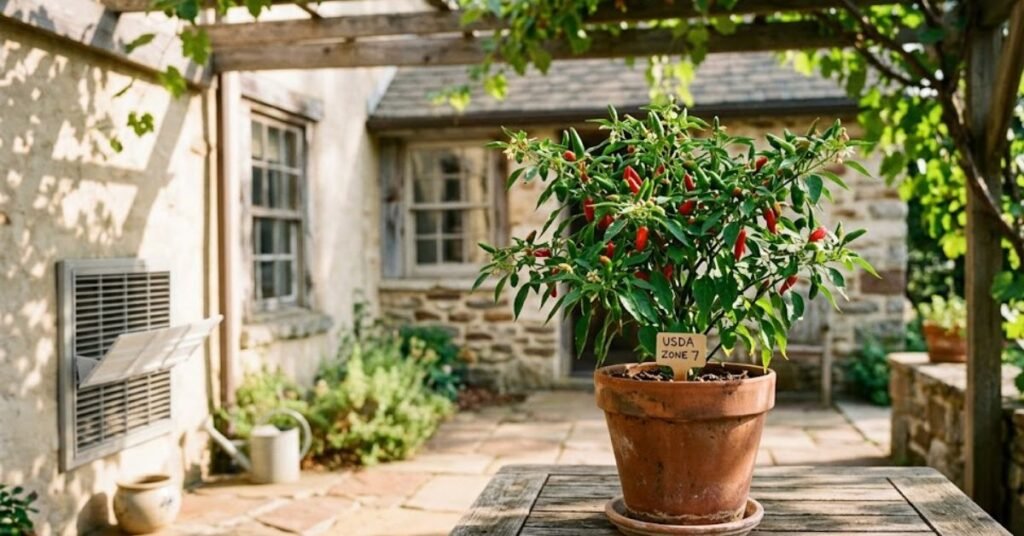
Bird chilis are tropical creatures at heart. If you live in Southern California, Florida, or Texas (USDA Hardiness Zones 9 through 11), you can treat these plants as perennials. They will live for years if protected from the occasional weird cold snap. For the rest of the country, they are grown as summer annuals.
Sunlight is the fuel that creates the heat in your peppers. They need at least 6 hours of direct sun, but 8 to 10 hours is the sweet spot.
However, indoor growing comes with a massive hidden trap: your air conditioning.
Americans love ice-cold AC in July, but your chili plant hates it. Placing your pot directly under or near an AC vent will cause the air to dry out violently. The temperature drop will shock the plant, causing it to drop its flowers. No flowers means zero peppers. Keep indoor pots in a south-facing room well away from any forced-air drafts.
Personal Pro-Tip: If you’re growing indoors during a hot summer, mist the air around the plant occasionally or use a simple pebble tray. The ambient humidity helps the flowers stay viable for self-pollination.
Common Mistakes When Discovering How to Grow Bird Chili Plant in Pots
Let’s look at why people fail. The biggest killer is overwatering.
When you overwater a potted pepper, you fill all the tiny air spaces in the soil with water. This causes root hypoxia. The roots literally suffocate from a lack of oxygen. They stop taking up nutrients, turn mushy, and the plant rots from the bottom up.
Another classic mistake is running to the faucet every single day. Chili plants actually like a tiny bit of drought stress; it makes the fruits hotter!
- Using the wrong fertilizer: Flooding your pot with high-nitrogen fertilizer (like standard lawn food) will give you a massive, lush bush with absolutely zero peppers. Use a balanced vegetable food instead.
- Leaving them out in early Fall: When night temperatures drop below 55°F, bring the pots inside. Cold nights stunt growth instantly.
Personal Pro-Tip: Get used to the weight of your pot. Pick up the pot right after you water it feel how heavy it is. Then pick it up when it’s dry. You will quickly learn to tell if your plant needs water just by lifting it an inch off the ground.
Troubleshooting Your Potted Bird Chili Plant Problems
Even experienced gardeners run into issues. Here is how to read your plant’s body language.
Leaf Turning Yellow
This is almost always a sign of overwatering or nitrogen deficiency. Check the soil. If it feels like a soggy sponge, stop watering immediately and let it dry out completely. If the soil is dry and leaves are still pale yellow, give the plant a half-strength dose of liquid organic fertilizer.
Brown Tips on Leaves
Brown, crispy edges usually point to low humidity or fertilizer burn. If you recently added a lot of granular fertilizer, you might have fried the roots. Flush the pot with clean water from the faucet to wash away excess salts.
Flowers Falling Off Without Setting Fruit
This happens when temperatures are too extreme. If it’s over 95°F during the day or drops below 60°F at night, the plant gets stressed and discards its blossoms. Move the pot into a spot with light afternoon shade during extreme summer heatwaves.
Personal Pro-Tip: If your plant is blooming indoors but not making peppers, give the stem a gentle shake every day. Peppers are self-pollinating, but they need a little vibration (which wind or bees usually provide) to drop the pollen inside the blossom.
Toxicity Warning: Is Your Potted Chili Safe for Pets?
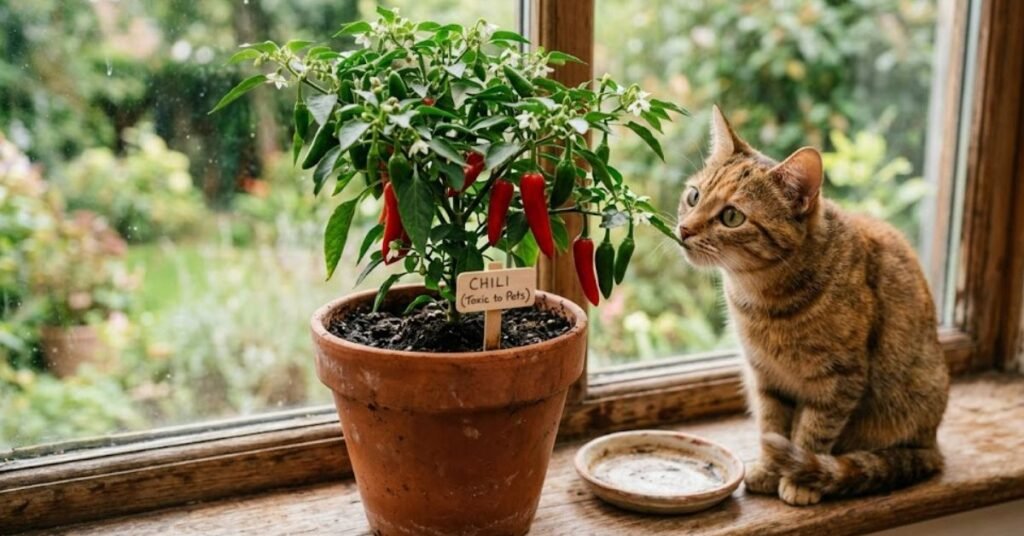
This is incredibly important for pet owners. Bird chili plants are toxic to dogs and cats. The danger comes from capsaicin, the very chemical that makes the peppers spicy. While a nibble won’t necessarily kill them, it causes severe gastrointestinal distress. Your pet will experience intense burning in the mouth, excessive drooling, vomiting, and diarrhea.
The leaves and stems also contain solanine, which is common in the nightshade family and harmful to animals. Keep your pots up high on plant stands or behind barriers if you have curious pets.
Personal Pro-Tip: If your dog happens to eat a fallen bird chili, do not give them water capsaicin is an oil and water will only spread the burn. Instead, check with your vet immediately. I keep my fruiting plants strictly on an outdoor patio table where my dog can’t reach them.
FAQs: Real-World Questions on How to Grow Bird Chili Plant in Pots
Q1: How big of a pot do I actually need for a bird chili plant?
You need a pot that is at least 10 to 12 inches in diameter, which holds roughly 2 to 3 gallons of soil. Anything smaller will restrict the roots, meaning you’ll get a stunted plant with very few peppers.
Q2: Can I grow bird chilis indoors year-round?
Yes, but you will almost certainly need a supplemental LED grow light. Standard window glass filters out a lot of the UV rays peppers need to produce a heavy fruit harvest.
Q3: Why are my bird chilis not spicy?
Potted chilis lose their heat if they are overwatered or overfertilized. To ramp up the heat, cut back on watering right when the peppers start to form. Let the plant wilt just a tiny bit before giving it a drink.
Q4: How long does it take to get peppers from seed?
Expect to wait about 100 to 120 days from sowing the seed to harvesting your first ripe red chili. They take their sweet time, but the harvest window lasts for months.
Q5: Should I pinch off the first flowers?
Yes! I know it hurts to do it, but plucking off the very first set of blossoms tells the plant to put its energy into growing a stronger, bushier frame. A larger frame means triple the peppers later in the season.
Q6: What is the best fertilizer for container chilis?
Look for an organic fertilizer with a ratio like 5-10-10 or 4-18-38 once the plant starts blooming. You want lower nitrogen (the first number) and higher phosphorus and potassium to encourage fruit production.
Q7: How do I know when to harvest bird chilis?
Wait until they change completely from green to a vibrant, shiny red. They can be eaten green, but they reach their full flavor profile and maximum fiery heat when they turn fully red.
Personal Pro-Tip: Always wear gloves when harvesting or pruning these plants. I once rubbed my eyes after handling bruised bird chilis without gloves, and it is an experience I wouldn’t wish on anyone!
Final Thoughts
Growing these fiery little powerhouses in containers is one of the most rewarding weekend projects you can take on. By avoiding heavy soils, dodging the blast of your indoor air conditioning vents, and letting the soil dry out between waterings, you will have a stunning, heavy-yielding plant right on your doorstep. Keep it safe from frost and away from your pets, and you will be enjoying homegrown heat all summer long.

Amin Khalid is a professional horticulturist and the founder of LeafyWisdom. With a deep passion for home gardening and horticultural research, he specializes in providing practical, easy-to-follow care guides for indoor plants. Amin’s goal is to simplify gardening for everyone and help fellow plant lovers build their own thriving green spaces.