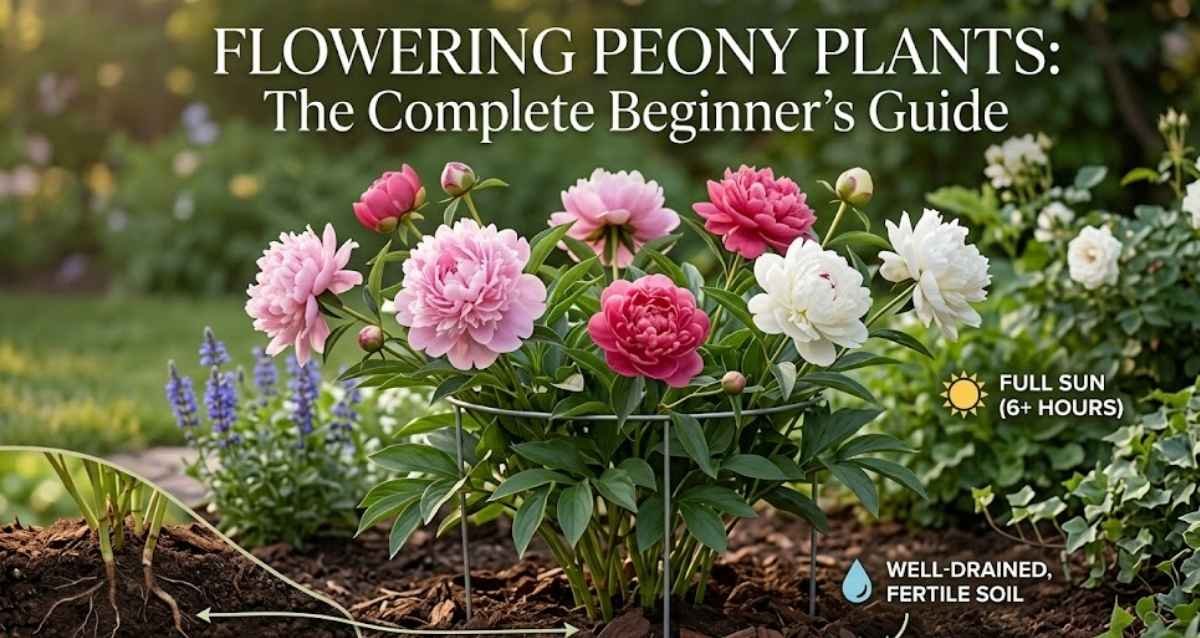
Flowering peony plants are among the most beautiful and long-lasting garden flowers you can grow. Known for their large, fragrant blooms and incredible lifespan, flowering peony plants can thrive for decades with the right care. However, growing flowering peony plants successfully depends on proper planting depth, sunlight, and seasonal care. In this guide, you’ll learn exactly how to plant, grow, and care for flowering peony plants so they produce stunning blooms year after year.
Quick Care Summary Table
| Factor | Requirement |
| Sunlight | 6–8 hours full sun daily |
| Soil pH | 6.0–7.0 (neutral to slightly acidic) |
| Planting Depth | Eyes 1–2 inches below soil surface |
| Best Planting Time | Fall (September–October) |
| Watering | 1 inch per week; water at base only |
| Fertilizer | Low-nitrogen bloom formula; twice in spring |
| Hardiness Zones | Zones 3–8 (most varieties) |
| Mature Size | 1–3 ft tall (herbaceous); up to 7 ft (tree) |
| Bloom Time | Late spring to early summer |
| Lifespan | 50–100+ years |
| Toxicity | Mildly toxic to dogs, cats, horses |
Types of Peony Plants
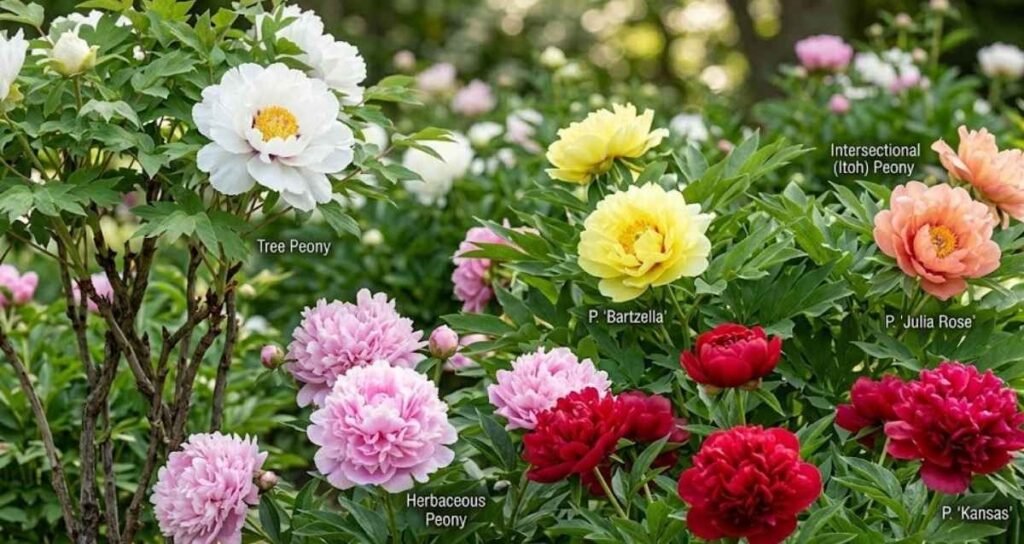
There are three main types. Knowing which you have matters for care.
Herbaceous Peonies The most common type. They die back to the ground every winter and come back each spring. Best for beginners. Bloom around Memorial Day in most regions.
Tree Peonies Woody shrubs that keep their stems year-round. Can grow 4–7 feet tall. Bloom earlier than herbaceous types. Never cut them to the ground.
Itoh (Intersectional) Peonies A hybrid of the two above. Strong stems, huge blooms, up to 6 weeks of color. More expensive but worth every penny.
| Type | Height | Bloom Time | Cut to Ground in Fall? |
| Herbaceous | 1–3 ft | Memorial Day | Yes |
| Tree | 4–7 ft | Mother’s Day | No |
| Itoh | 2–3 ft | Both periods | Cut to 4–6 inches |
How to Plant Peonies (Step-by-Step)
Choosing the Right Spot
- Full sun: At least 6 hours per day. No exceptions. Peonies in shade will not bloom.
- Well-draining soil: Soggy roots cause rot. Test drainage before planting.
- Away from trees: Tree roots compete for water and nutrients.
- Wind protection: Big blooms catch wind easily. Plant near a fence or hedge.
Planting Depth — The #1 Rule
This is the most important step. The pink “eyes” (buds) on the root must sit no deeper than 1–2 inches below the soil surface.
Planting too deep is the #1 reason peonies never bloom. Even 3 inches too deep can keep a plant silent for years.
In cold climates (Zones 3–5): Eyes 1.5–2 inches below surface. In warm climates (Zones 6–8): Eyes no more than 1 inch below surface.
Step-by-Step Planting Instructions
- Dig a hole 12–18 inches deep and wide.
- Mix in 2–4 inches of compost and a handful of bone meal.
- Form a small mound of soil in the center of the hole.
- Drape bare roots over the mound with eyes facing up.
- Backfill so eyes are at the correct depth.
- Water deeply. Add 1–2 inches of mulch (not touching the crown).
Best time to plant: Fall, September–October. Container-grown plants can go in almost any time except during a freeze.
Watering & Fertilizing
Watering: Give peonies about 1 inch of water per week. Always water at the base — never overhead. Wet leaves invite disease. Once established, peonies handle short dry spells well.
Fertilizing: Use a low-nitrogen, bloom-boosting fertilizer (look for ratios like 5-10-10). High-nitrogen fertilizers like lawn food push leafy growth and suppress flowers.
- Feed once in early spring when shoots first emerge.
- Feed again in mid-spring as buds begin to form.
- Never fertilize more than twice a year.
Seasonal Care Guide
Spring
- Remove winter mulch when red shoots appear.
- Install peony ring supports before plants reach 6 inches tall.
- Apply first fertilizer feed.
- Watch for botrytis blight (brown spots on buds or stems).
Summer (After Blooming)
- Deadhead spent flowers back to the first strong leaf.
- Do NOT cut back foliage. Leaves feed the roots all summer. Removing them starves the plant.
- Water during dry spells.
Fall (Most Important)
- Cut herbaceous peonies to 2–3 inches after the first frost.
- Cut Itoh peonies to 4–6 inches — not to the ground.
- Do NOT cut tree peonies back.
- Remove all cut foliage from the garden — do not compost it if there are signs of disease.
- Apply 2–3 inches of mulch over the crown after the ground begins to freeze.
- This is the best time to plant new bare-root peonies.
Winter
- Established peonies need nothing. They’re dormant.
- Snow is fine — it actually insulates the crown.
Pest & Disease Solutions
Peonies are extremely pest-resistant. Deer and rabbits avoid them. But a few issues come up.
Ants on Peony Buds — Should You Worry?
No. Ants feed on the sweet nectar that peony buds produce. This is completely normal. They do not harm the plant. Simply shake them off before cutting blooms for a vase.
Common Disease Guide
| Problem | Signs | Fix |
| Botrytis Blight | Brown stem base, wilting buds | Remove affected parts; improve airflow; apply copper fungicide |
| Powdery Mildew | White powder on leaves | Improve spacing; apply neem oil |
| Leaf Blotch | Purple-brown leaf spots | Remove affected leaves; clean up fall debris |
| Crown Rot | Collapse at soil level; rotting smell | Dig up, remove rot, dust with sulfur, replant in better-draining soil |
Best prevention: Water at the base only, space plants 3 feet apart, and remove all foliage in fall.
Can You Grow Peonies in Containers?
Yes — but it requires more effort than in-ground growing.
- Use a 15–20 gallon pot minimum with excellent drainage holes.
- Use quality potting mix amended with perlite for drainage.
- Water more frequently than in-ground plants.
- In cold climates: Move pots to an unheated garage in winter. Roots in containers freeze more easily than in-ground roots.
- Choose compact Itoh or herbaceous varieties for containers.
Expect slightly smaller blooms than in-ground plants.
Common Beginner Mistakes
1. Planting too deep. The eyes must be within 1–2 inches of the surface. This is the single biggest cause of failed blooms.
2. Expecting blooms in year one. Peonies establish roots first. No flowers in year one is totally normal. Relax and wait.
3. Cutting foliage back after blooming. The leaves power the roots. Cutting them in summer starves next year’s flowers.
4. Planting in shade. Six to eight hours of sun isn’t optional — it’s required.
5. Using high-nitrogen fertilizer. Lawn fertilizer = leaves, not flowers. Switch to a bloom formula.
6. Overwatering. Deep, weekly watering is enough. Peonies hate soggy feet.
7. Dividing too early or too often. Every division resets the bloom clock. Only divide plants older than 10 years that are clearly overcrowded.
Peony Toxicity — What Pet Owners Must Know
Peonies contain paeonol, which is mildly toxic to pets.
| Species | Risk | Symptoms |
| Dogs | Mild | Vomiting, diarrhea, lethargy |
| Cats | Mild | Vomiting, diarrhea |
| Horses | Mild | Digestive upset |
| Humans | Very low | Nausea if large amounts eaten |
If a pet eats peony, contact your vet or the ASPCA Poison Control: (888) 426-4435.
Pro Tips from Experienced Growers
Mix early, mid, and late bloomers. Different varieties bloom 1–3 weeks apart. Planting all three types gives you 6–8 weeks of flowers instead of two.
Protect buds from late frosts. A frost in May can kill open buds. Keep a frost cloth on hand when buds are showing.
Buy named varieties, not bargain bags. A labeled cultivar like ‘Sarah Bernhardt’ or ‘Bowl of Beauty’ performs more predictably than generic mixed bags.
Cut blooms at the marshmallow stage. Buds should feel soft and squishy — not tight and hard, not already open. This gives you the longest vase life.
Add bone meal at planting. Work 1 cup into the planting hole. It’s a slow-release phosphorus source that dramatically supports early root development.
→ [Affiliate: Espoma Bone Meal — ideal for planting time and early spring top-dressing]
Best Companion Plants for Peonies
- Bearded Irises — bloom at the same time; great vertical contrast
- Alliums — purple spheres complement peony softness beautifully
- Salvia or Nepeta — blue tones balance pink and white peonies perfectly
- Roses — classic pairing with similar care needs
- Delphinium — tall spikes create drama behind peony clumps
FAQ,s
Q1: Why is my peony not blooming? Most likely planted too deep (eyes deeper than 2 inches), not enough sun, too young (wait 2–3 years), or divided too recently. Check planting depth first.
Q2: Do I need to deadhead peonies? Yes. Remove spent blooms back to the first strong leaf. This redirects energy to the roots and prevents disease.
Q3: How long do peony plants live? Herbaceous peonies can live 50+ years. Tree peonies can live 100+ years. They truly are a lifetime — and multigenerational — garden investment.
Q4: Why are there ants all over my peony buds? They’re eating the natural sweet nectar the buds produce. It’s harmless. Shake them off before bringing flowers inside. That’s all you need to do.
Q5: When is the best time to plant peonies? Fall — specifically September to October for bare-root divisions. Container-grown peonies can go in almost any time the ground isn’t frozen.
Q6: Can peonies grow in pots? Yes, in 15–20 gallon pots with great drainage. They require more water and winter protection than in-ground plants, but it’s doable.
Q7: Are peonies toxic to dogs? Yes, mildly. They contain paeonol, which can cause vomiting and diarrhea. Keep curious pets away and contact your vet if a large amount is eaten.
Conclusion
Flowering peony plants are one of the best decisions you can make for your garden. They’re long-lived, low-maintenance, deer-resistant, and absolutely breathtaking in bloom.
The key rules to remember:
- Plant shallow — eyes no deeper than 1–2 inches
- Full sun only — no shortcuts
- Plant in fall — best results from bare-root divisions
- Leave summer foliage alone — it feeds next year’s flowers
- Clean up in fall — removes disease, protects the crown
Ready to start? Plant this fall, be patient for 2–3 years, and you’ll have a garden centerpiece that blooms beautifully for the rest of your life.
Have a question about your peonies? Drop it in the comments — we read and respond to every one.

Amin Khalid is a professional horticulturist and the founder of LeafyWisdom. With a deep passion for home gardening and horticultural research, he specializes in providing practical, easy-to-follow care guides for indoor plants. Amin’s goal is to simplify gardening for everyone and help fellow plant lovers build their own thriving green spaces.